
Fine line and sketchy ankle pieces flood feeds, and they often read fragile once the initial scab falls away. The foot and ankle wear more friction, swelling, and sun than people expect, so spacing and needle depth matter as much as the drawing. These 27 sketch-style ankle and foot directions focus on designs and placement choices that still look deliberate after a year of shoes, beach days, and walking.
1. Delicate Anklet Vine on the Lateral Ankle
I've seen this motif hold up when artists allow breathing room between leaves. Ask for slightly broken linework and a mix of stipple shading so the vine reads as texture rather than a continuous thin line. Pain at the outer ankle is low to moderate, session time about 30 to 45 minutes. A common mistake is packing too many tiny leaves close together, which blurs after a year. Expect a light touch-up at year two for crispness. For the session, wear rolled-up jeans so the artist can access the ankle without tugging the fabric.

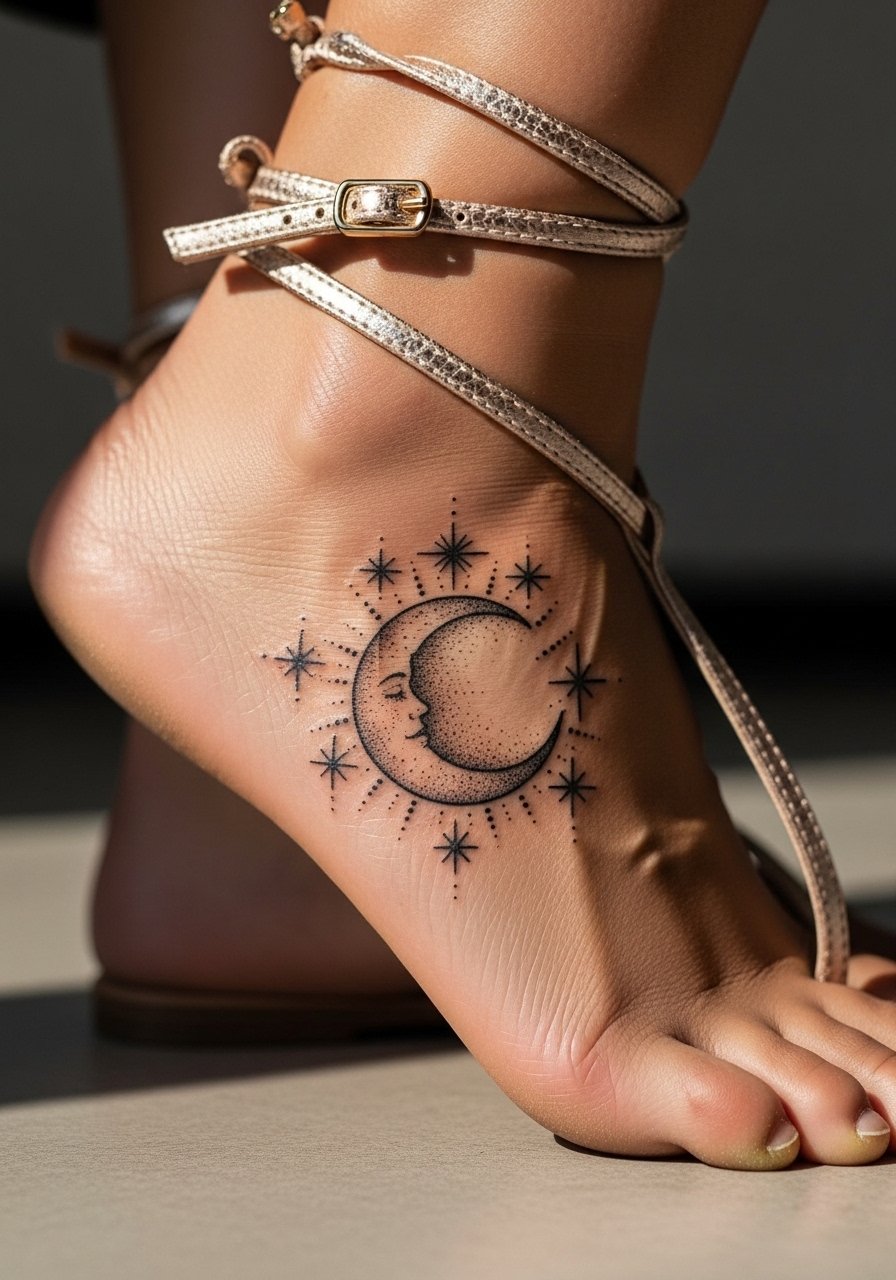
2. Stippled Moon and Stars on the Instep
Fair warning: the instep swells more than the ankle, so small dots can puff slightly as they heal. When I recommend this placement, I tell clients to choose a slightly larger star size than they expect. Session time is moderate, about 45 to 75 minutes depending on dot density. A mistake is requesting ultra-tiny stipple across the whole instep, which tends to soften into smudges. This design pairs well with strappy sandals when showing off, try an ankle-strap sandal to frame the work.
3. Sketch-Style Compass Along the Side of the Foot
When you bring this in, show the artist a reference with clear orientation so the compass aligns with the foot's natural lines. Pain is moderate where the bone runs close to skin. Expect a single-session layout with touch-up at year two if you want the needle-fine direction lines to stay crisp. A common error is centering the compass too close to the toes, which distorts when the foot flexes. For showing it off, an open-toe slide sandal keeps the compass visible without rubbing.

4. Minimalist Top-of-Foot Script with Tiny Sketch Accents
Personal observation: tiny script on the dorsal foot looks charming fresh but fades faster due to showers and socks. Tell your artist to increase letter spacing and use a slightly heavier line weight. Pain is moderate, session time 30 to 60 minutes. The mistake is asking for hairline script at 6 point type. Expect letters to need a touch-up by year two. For the appointment wear low-profile no-show socks or sandals so the area is easy to reach and stays clean in transit.

5. Sketchy Wave Wrapped Around the Ankle Bone
When I see this age well, the wave has staggered line weights and a few open white spaces that let it read on movement. Pain is low to moderate and sessions run 30 to 50 minutes. A common version that ages poorly uses uniform, ultra-thin lines around the entire ankle. That creates a soft band that blurs after heavy walking. For evenings out, pair the wrap with an anklet chain that sits below the ink so both elements read separately.

6. Tiny Botanical Cluster on the Outer Toe
Consultation lead: ask the artist to simplify the leaves and use negative space so the tiny cluster survives toe movement. Toe skin shifts and touch-ups are common, so plan for a follow-up at six months. The session is short, often under 30 minutes, but pain can be sharp at the tip of the toe. A rookie mistake is cramming multiple tiny motifs across adjacent toes. For shoes during the healing window, pick a roomy open-toe sandal that avoids pressure on the tattoo.

Pre-Session Essentials
The lower foot and ankle pieces above share concerns around friction and bandaging, so a few targeted items smooth the session and the first week.
-
Stencil transfer paper kit. Lets you and the artist preview placement on the ankle where wrap and shoe lines land.
-
Topical numbing cream. Applied before the session eases sharp toe and rib bone sensitivity without changing how the linework settles.
-
Thin protective film roll. Useful for foot pieces that rub against shoes during the first few days.
-
Fragrance-free gentle body wash. Cleanses without irritating delicate linework on the instep and top of foot.
-
Aquaphor healing ointment. Thin layer for the initial days keeps the small channels moist, which helps fine sketch lines settle.
7. Single-Line Continuous Anklet in Loose Sketch Style
Mistake lead: the biggest mistake with continuous single-line anklets is making the loop too tight. That forces the artist to put very thin lines close together and they merge with time. Pain is low and sessions are brief. Tell your artist to leave slight gaps and vary the weight so the single line reads as intentional sketching rather than a faint band. For styling, a ankle cuff bracelet worn above the ink keeps attention on the negative space.

8. Abstract Geometric Sketch on the Medial Ankle
Visual impact lead: abstract geometry in sketch style relies on spacing and a few bold anchor points. Pain is moderate where the tibia meets the ankle. Sessions range 45 to 90 minutes depending on detail. A common error is overcomplicating angles at small scale, which creates merging lines. In the debate about fine detail on ankles, one camp says complex geometry fades quickly due to movement, the other says proper spacing and depth preserves it. Ask the artist how they handle tight angles before booking.

9. Dotted Crescent and Compass Points Near the Heel
Consultation lead: because heel skin is tough and moves, ask for a mix of dot work and light line anchors. Pain can be higher here due to the proximity to bone. Sessions often split if you want heavier dot saturation. Many people underestimate how shoes will rub the area; plan footwear accordingly. For the session, wear slide sandals so the artist can reach the heel and you can keep the area clean afterwards.

10. Freehand Sketch Arrow Along the Top Ridge
Personal observation: arrows drawn to follow the foot's natural ridge keep their direction as the skin moves. Pain is moderate where the bone sits close. Sessions are quick but require steady linework. A common mistake is forcing a perfectly straight arrow across a curved surface. That creates tension and irregular healing. For showing off in ankle-baring footwear, a slim racerback sneaker keeps the top of the foot visible without crowding the design.

11. Tiny Sketch Paw Print on the Side of the Ankle
Mistake lead: people often ask for hyper-realistic paw prints at a tiny scale. Those lose definition as the pads blur. Instead, a simplified sketch paw with light stippling keeps the charm longer. Pain is low and session time is short. Expect a possible touch-up at one year. For session comfort, wear slip-on sandals so the artist can work without you handling shoelaces.

12. Sketchy Laurel Wreath Curved Across the Instep
Aging lead: wreaths with lots of tiny leaves often merge into a block of gray on the instep. Ask for generous spacing and a few thicker anchor strokes to preserve silhouette. Pain is moderate and sessions run around 60 minutes. The common mistake is treating the instep like forearm space. The skin there moves differently. For evening wear, an open sandal or strappy mule shows the curve without pressure.

13. Micro-Realism Pebble Cluster Along the Lateral Arch
Visual impact lead: tiny pebble shading works when the artist breaks up saturation with negative space. Pain on the arch is moderate and sessions tend toward shorter bursts. A common mistake is requesting fully packed micro-realism at too small a scale. That looks muddied after months. For the session, wear high-waisted shorts if you need the artist to adjust leg positioning easily while you sit.

14. Sketchy Floral Rosette Nestled by the Ankle Tendon
Pain warning lead: the tendon area can feel sharp under the needle, but small floral rosettes placed slightly off the tendon age better. Session time 45 to 75 minutes. The mistake is centering heavy shading directly over the tendon where movement distorts the ink. For show-off styling, a low-cut boat shoe or sandal draws the eye without covering the bouquet.

15. Hand-Drawn Map Coordinates on the Side of the Foot
Consultation lead: text in foot placements must be spaced wider and use a sturdier weight. Expect to schedule a touch-up if you want hairline numerals tight. Pain is moderate, sessions short for few characters. One common error is tiny Roman numerals that later blur. This design pairs well with minimalist rings and open footwear; try a thin toe ring set when showing it off.

16. Scribbled Heart Behind the Ankle Bone
Mistake lead: behind-ankle hearts done too small fade into soft shapes. Scale up slightly and add a hint of stippling. Pain is moderate and sessions quick. This placement can be touchy for runners because shoes can press on the area. In some careers, visible ankle work is acceptable, while in others it might still cause questions. Consider where footwear and dress codes meet before booking.

17. Sketchy Sailboat at the Base of the Ankle
Visual impact lead: small nautical pieces read best with simplified sails and an implied horizon. Pain is low and sessions are brief. The mistake people make is over-detailing the hull for the available space. For travel and beach seasons, a low-profile espadrille sandal shows off the placement while avoiding heel rub.

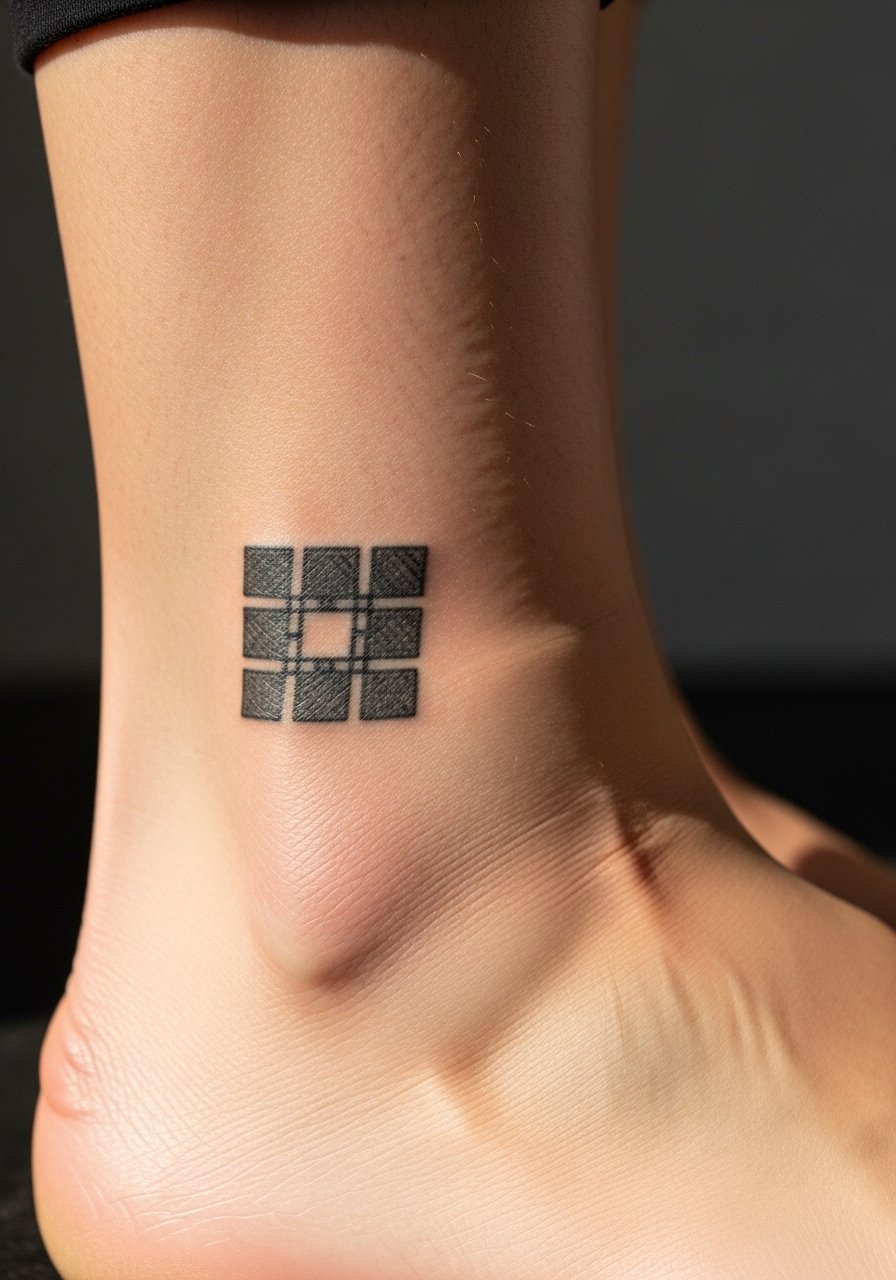
18. Crosshatch Sketch Square Over the Ankle Joint
Aging lead: crosshatch and dense hatch shading on joints tend to soften where skin flexes. Ask the artist to limit hatch density and leave negative frames. Pain is moderate and session time varies with fill. A common error is pushing too much texture into a small square; that becomes gray in months. For the appointment, wear slip-on shoes so the artist can check movement without you retying laces.
19. Quick Sketch Fox Paw Trail Up the Foot Side
Personal observation: motion-aware motifs like paw trails look lively when the spacing follows tendons. Pain is low to moderate. Sessions are quick, but toe-adjacent pieces can need attention in healing. The mistake is packing prints so close they touch. For casual days after the session, choose roomy canvas sneakers that do not press on the trail.

20. Tiny Sketch Anchor Near the Ankle Groove
Consultation lead: anchors read best with a heavy base line and softer top lines. Pain is low and sessions short. The rookie move is asking for too many tiny anchor details. Those blur on the ankle groove over time. For nautical outfits, a low canvas espadrille keeps the symbol visible without covering it.

21. Abstract Scribble Cluster on the Dorsum of the Foot
Mistake lead: abstract scribbles need deliberate whitespace. Random dense scribbles become a gray patch after months. Pain ranges moderate and session time is short. Tell your artist to plan negative space as intentionally as inked strokes. For the session, open footwear like slide sandals keeps the dorsum free from pressure.

22. Linear Mountain Range Along the Outer Ankle
Visual impact lead: small mountain silhouettes do well when the peaks vary in thickness and some lines break. Pain is low to moderate. A common mistake is forcing even thin peaks across a curved ankle. For showing off on hikes or outdoors, wear low hiking trail shoes that reveal the ankle line when laced loosely.

23. Tiny Constellation Cluster Across the Top of the Foot
Consultation lead: constellations need slightly larger stars than they look for, because the foot bathes in water and friction. Pain is moderate and session length is short. A controversy exists about minimal dot work on feet. One camp claims the dots vanish quickly due to movement and washing. The other says with deeper, spaced dots the pattern lasts. Have your artist show healed photos from similar placements before committing. For show-off, a pair of simple strappy sandals highlights the cluster.

24. Scribbled Lightning Bolt Near the Ankle Tendon
Aging lead: high-contrast single strokes like lightning bolts hold well if the artist uses a confident medium weight and leaves space around the bolt. Pain is moderate. Sessions are quick. The common mistake is trying to micro-detail it with micro-shading that fades into blur. For a sharp look under casual footwear, pair with a low-cut leather sandal.

25. Tiny Floral Sprig Behind the Heel Bone
Personal observation: behind-heel placements get bumped by shoes, so choose a compact sprig with open centers. Pain can spike near the heel and session recovery requires avoiding tight footwear. The mistake is expanding the sprig into a larger bouquet that cannot avoid shoe contact. For the healing week, choose roomy open-back sandals that stop rubbing.

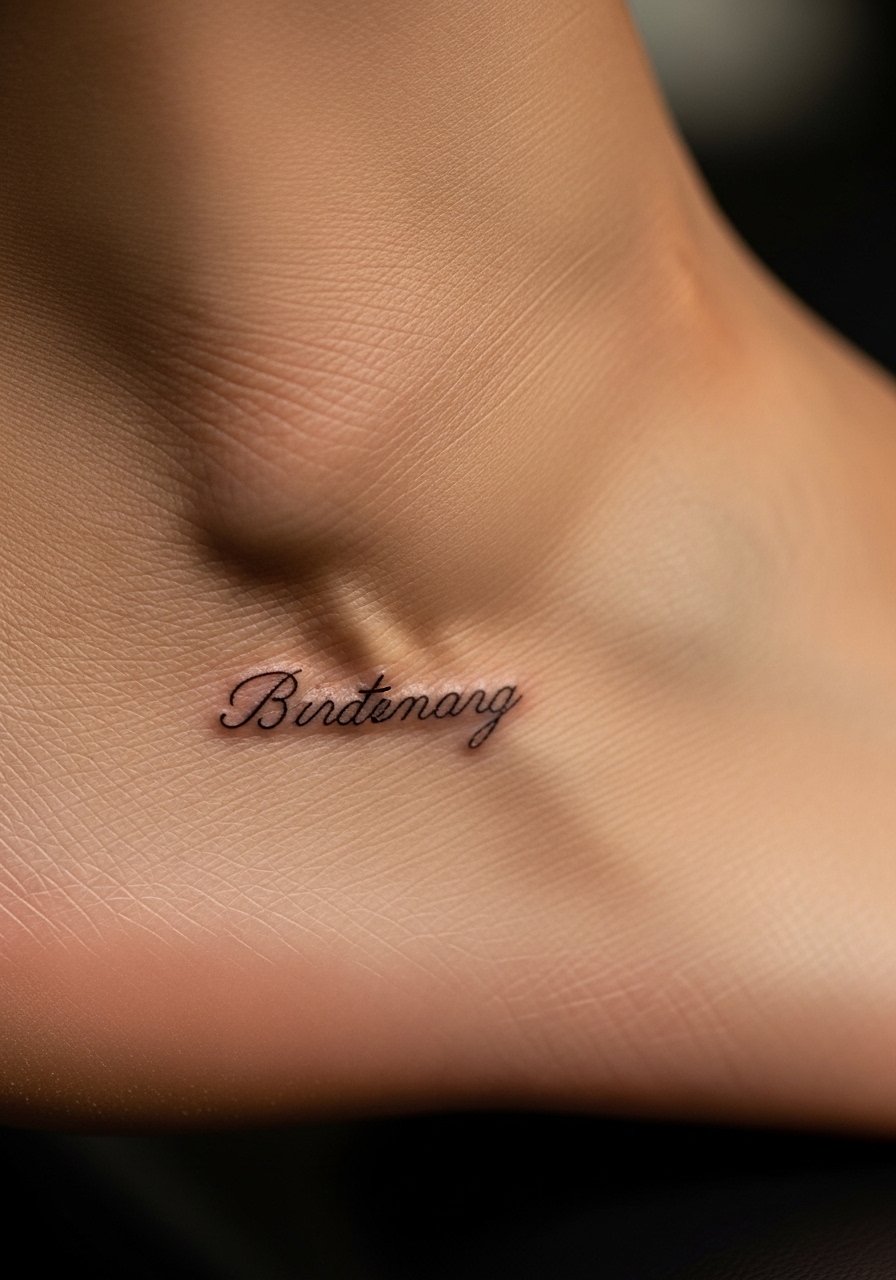
26. Tiny Scripted Word Along the Lateral Foot Edge
Consultation lead: lateral foot text should use stronger kerning and slightly thicker letters than you see on paper. Pain is moderate and session times are short. A common mistake is choosing a delicate cursive that vanishes with daily washing. For showing it off with casual looks, a thin chain anklet sits above the lettering without crowding the script.
27. Quick Sketch Paw Print Path Over the Top and Side
Consultation lead: for paths that cross the top to the side, plan directional spacing so each print keeps separation while the foot moves. Pain is low to moderate, and the session may be split if you want crisp dots. The mistake is stacking prints too close so they merge into a line. For footwear after healing, a pair of open-toe mules shows the trail without pressure.

Frequently Asked Questions
Q: Will fine sketch lines on the foot blur faster than on the forearm?
A: From what I've seen, yes. Foot skin moves more and faces more friction from shoes and socks. Ask your artist to space lines slightly wider and add a few heavier anchor strokes. Plan on a touch-up around year two if you want the same crispness you see fresh.
Q: How should I pick an artist for sketch-style ankle work if I want longevity?
A: Look for healed photos of similar placements, not just fresh shots. Use discovery pathways like local studio directories, tagged shop searches on social platforms, and threads in tattoo communities to find artists who post healed feet work. Ask specifically about how they handle spacing and depth on ankles.
Q: Do toe and instep tattoos need different aftercare than ankle pieces?
A: The basic aftercare is similar, but toes and insteps need more protection from shoes and water. Keep footwear roomy and follow bandaging guidance from your artist. Avoid tight socks for the first two weeks and consider protective film during high-friction activities.
Q: Are there sketch-style designs you should avoid for people who run a lot?
A: Heavy hatch or dense dot work on joints like the top of the foot can soften with recurring motion. For runners, pick designs that emphasize bold anchor strokes and negative space so the silhouette remains clear despite movement.
Q: Can I get a healed preview of how a sketch ankle tattoo will look on my skin tone?
A: Many artists will stencil the design and let you wear it for a day to gauge placement and size. For color and contrast expectations, ask to see healed photos on a range of skin tones. If you want, bring photos of your usual footwear so placement avoids areas of repeated rubbing.
Q: Should I expect more pain for ankle placements compared to the instep?
A: Pain varies, but areas directly over bone tend to be sharper. Ankles sit on a scale from low to moderate depending on exact location. The instep can feel more uncomfortable for some because of swelling. Plan session length accordingly and discuss numbing options during consultation.
Q: What should I wear to the appointment for a foot or ankle tattoo?
A: Wear clothing that gives the artist clear access. For ankles and feet that means rolled-up jeans, shorts, or sandals you can slip on and off easily. A simple open-toe sandal or slides help during both the session and the healing window.
