
Fine line bite mark tattoos look like a moment frozen in skin, and the sketch approach lets the mark feel impulsive rather than staged. The trick is balancing that raw, bitten-in look with linework that will age cleanly. Below are 21 sketch-style bite mark ideas that play with negative space, dot work, and tiny accents so the motif reads strong at six months and still legible at five years.
1. Tiny Bite Mark with Stipple Shadow on Inner Forearm
I’ve seen this micro bite mark hold up better than you'd expect on forearms when the shading uses stipple rather than solid fill. Ask for single-needle linework and light dot shading so the negative space of the "teeth" keeps its shape as the skin ages. Fair warning, forearms get sun and abrasion, so expect a touch-up around year three if you wear short sleeves often. For the session wear a loose short-sleeve button-down you can roll or pull aside easily so the artist has clean access. Common mistake is asking for heavy black shading that fills in the bite gaps, which blurs faster than dotted texture.
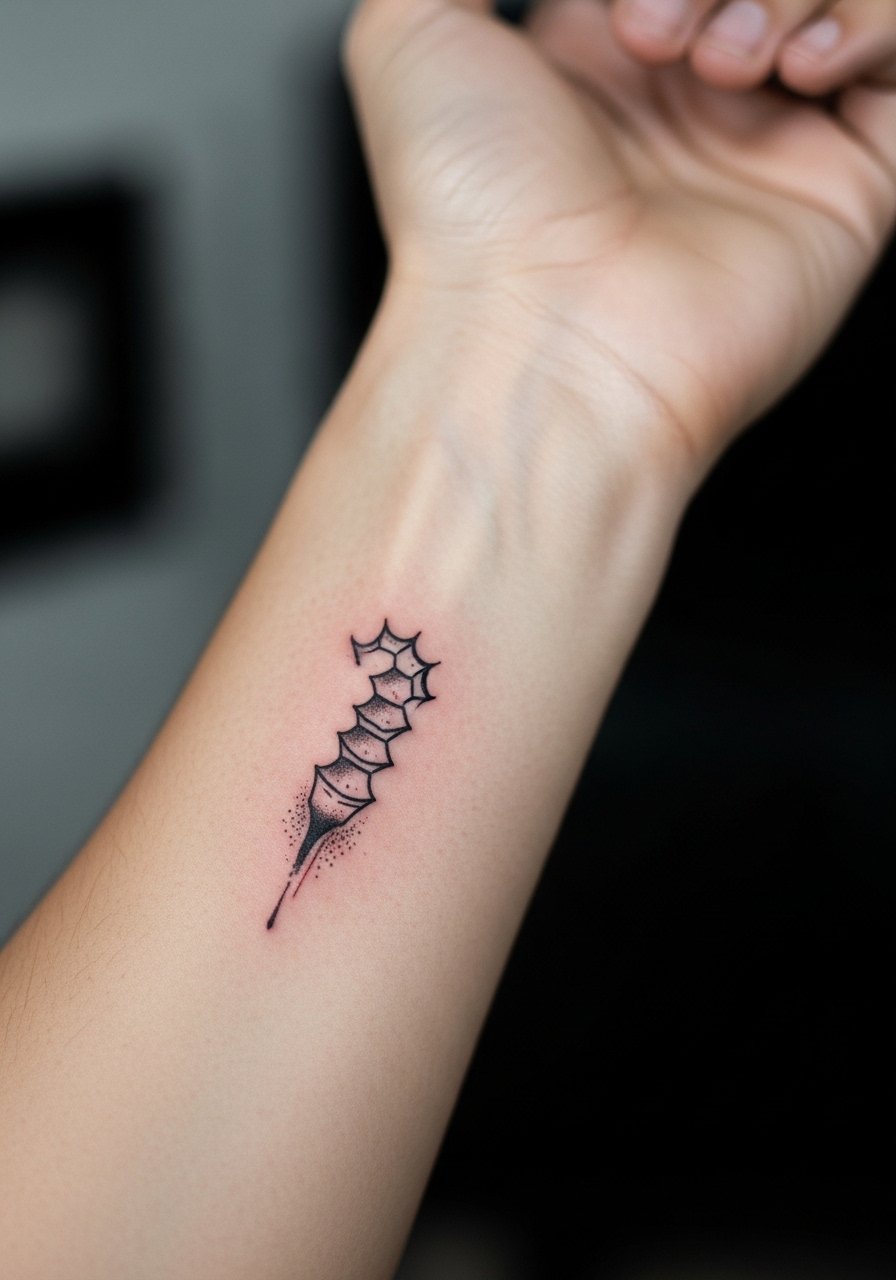
2. Constellation Bite Mark Above the Wrist

There is a quiet visual payoff when you pair a small bite mark with a few dot-work stars trailing toward the hand. During consultation, specify spacing between the stars and the bite so the design breathes. Pain is mild at the outer wrist, but fingers and inner wrist are sharper. Expect a ninety-minute session for this scale and a possible touch-up at year two for the dots. Pair it with a thin chain bracelet to frame the area without crowded detail. Avoid asking for tiny script inside the bite gaps unless you want legibility issues down the line.
3. Torn Paper Bite Mark on the Shoulder Blade

The torn paper effect makes the bite look like a ripped page instead of a literal mark, and that keeps the piece playful without being kitschy. For this placement, tell your artist you want light whip shading along the torn edges and slightly thicker outline only on the outer tear so the break reads over time. The shoulder blade is moderate on pain and forgiving on blowout, but clothing friction from straps can irritate the first week. For showing this off, pair with an open-back dress that reveals the blade and keeps attention on the negative space. A common mistake is requesting heavy black inside the tear which ages into a flat mass instead of preserving the sketch texture.
4. Anatomy Heart with Bite Mark Overlay on the Ribcage

Fair warning, the ribcage is high on the pain scale, and the fine line world splits on this placement. One camp says ribs stretch and blur fine line within two years. The other camp argues that proper needle depth and spacing keep it readable for longer. Ask your artist where they land and request slightly larger line spacing than you expect. This piece reads like a private statement and suits someone who wants an intimate focal point. Expect a two to three hour session and a likely touch-up at year two. The mistake I see most is going too tiny on the heart detail, which smudges into an indistinct shape over time.
5. Watercolor Splash Bite Mark on the Calf

Watercolor accents can give a bite mark an impulsive, painterly edge while keeping the bite as the composition anchor. For longevity, ask for the watercolor as broken washes rather than solid blocks so any fade looks intentional. Calf sessions are mid-range pain and often require the sitter to shift positions if the leg cramps. Plan for a two-hour slot when combining sketch linework with color wash. For nights out, the design pairs well with midi skirts that let the calf peek through. Avoid asking for saturated color right up against single-needle lines, because contrast can harden and age unevenly.
6. Negative Space Bite with Script Edge on the Collarbone

This collarbone placement uses the skin as a canvas to let the bite read because the negative space eats the teeth shapes. When you sit down for this, bring script references for the small edge text and ask that lettering sits outside the bite outline rather than inside. Collarbone sessions can be sharp but quick at this scale, often under an hour. The common mistake is crowding the bite with decorative script that competes with the negative shapes. Pair it with a thin chain pendant necklace for a layered look that draws the eye to the area without covering it.
Studio Day Picks
The collarbone, calf, and ribcage pieces above require different prep and first-week protection, so these small studio day items smooth the session and the initial healing.
-
Stencil transfer paper kit. Lets you preview exact placement and line weight on skin, which is especially helpful for collarbone and forearm designs.
-
Topical numbing cream. Applied per the directions reduces the sting for ribcage or sternum sessions without masking how the artist needs to work.
-
Thin protective film roll. Keeps ankle and wrist bite marks clean during the first week when friction from shoes and bracelets is high.
-
Fragrance-free gentle body wash. Cleanses healing skin gently so the fine line gaps in negative-space bites do not get irritated.
-
Aquaphor healing ointment. Thin layers in the first days help prevent cracking on areas like the calf and forearm and reduce scab hardness for smoother healing.
7. Micro-Realism Bite Mark on the Side of the Neck

This is a bold placement that reads like an accidental moment, and it suits someone who likes visible statements. When you consult, ask for slightly heavier anchor lines at the outer bite and softer interior stippling to avoid blowout on the thin neck skin. Pain is higher here and professionals often recommend shorter sessions rather than marathon sittings. Because neck tattoos are visible, think about professional contexts before committing. For showing off, a crew neck or wide-neck top you can shift during events keeps focus on the mark. The usual mistake is expecting ultra-fine single-needle work to remain crisp without planned touch-ups.
8. Barcode Bite Mark on the Upper Arm

Mixing a barcode motif with a bite mark gives a modern graphic contrast that plays well on the outer arm. It's a mid-pain spot and a forgiving canvas for slightly heavier linework. Ask the artist to keep barcode bars spaced to avoid merging as the skin shifts. At six months the barcode will look crisp, but by year four some bars may need refreshing if you suntan often. For session comfort, wear a loose short-sleeve tee that can be rolled up without displacing the stencil. Avoid asking for tiny barcode numerals inside the bite, because micro-numbers rarely survive without blurring.
9. Torn Skin Scar-Style Bite on the Inner Thigh

Inner thigh pieces feel private and intimate, and the scar-style bite reads like a story rather than a novelty. The inner thigh is sensitive but not extreme on pain, and sessions can be long if you want layered shading. For the consultation, request whip shading that follows the muscle contours so the scar appears natural across movement. Because of the location, wear shorts you can move easily in during the session. A common mistake is crowding the bite with too much texture that becomes muddy with time. Also note some artists treat thigh work as specialized so look through portfolios via local shop directories or convention guest lists to find someone who does detailed healed scar texture well.
10. Barcode Coordinates Bite on the Outer Wrist

Adding a line of coordinates or Roman numerals along the bite edge turns the motif into a personal marker. Wrist skin is thin and sees a lot of movement, so request moderate line weight for the numerals rather than ultra-fine script. Sessions for this scale run under an hour but expect a touch-up at year two if you wash hands often. For showing it off, stack with a minimalist watch or slim bracelet, but avoid pieces that rub directly over the fresh work. The frequent mistake is asking for very tight script inside the bite area, which loses legibility quickly.
11. Collage Bite Marks Around the Shoulder Cap

A scattered set of small bites can read like a graphic constellation across the shoulder and look intentional rather than literal. When you ask for this, tell the artist the spacing you want between marks so they do not merge with sun exposure over time. Shoulders are forgiving and tolerate varying line weights, which helps preserve detail; sessions can be modular where you add more bites across multiple visits. For styling, a sleeveless linen top in neutral tones keeps the shoulder silhouette clean and shows how the bites sit with natural movement. The common mistake is clustering too many tiny marks in one spot, which turns into a smudge with heavy sun exposure.
12. Anatomical Jawline Bite Mark Near the Ear

This placement reads cinematic because it follows a natural contour, and the sketch approach softens the drama. Ask for slightly thicker anchor lines at the jaw curve with internal sketch strokes that mimic tooth indentations. The area is sensitive but heals predictably with careful aftercare. Consider how the piece looks with hair styles, because bangs or long hair partially covering it changes the visual from bold to suggestive. A typical mistake is requesting heavy shading near the ear which can look too dense against the softer jawline skin.
13. Watercolor Moon Bite on the Calf Wrap
A wrap piece on the calf gives the bite a narrative motion as you walk. For this, ask for broken watercolor washes that do not sit directly against single-needle lines, so any fade looks deliberate. Calf skin tolerates sessions well and is lower on the touch-up scale compared with hands. Expect a two-hour slot if you want wrap continuity and a color anchor. For evening wear, pair with a midi dress and low boot that lets the calf peek out. The mistake is overdosing on saturated color that outpaces the delicate sketch lines.
14. Tiny Bite Over the Knuckle

Knuckle and hand tattoos carry high visibility and a faster fade path thanks to frequent washing and rough use. Keep the bite tiny and ask for simplified linework with slightly deeper placement to limit blowout. Sessions are quick but the expected touch-up rate is significant; plan accordingly. Hand tattoos can affect job prospects in conservative fields so consider that trade-off. For subtle styling, a thin adjustable ring on the adjacent finger draws attention without sitting over the ink. The common mistake is requesting dense shading on the hand, which goes flat and patchy.
15. Scripted Bite Mark at the Sternum

Sternum work is intimate and the skin there moves with breath, which affects line settling. Artists are split on fine line here, one camp saying the area blurs within a couple of years, the other saying proper depth and spacing keep detail legible. Ask for slightly bolder script and for the lettering to stay outside the bite outline. Sessions can be intense but usually brief at this scale. For session day wear, bring a zip-up or sports bra you can remove easily so the artist has clear access. A typical mistake is packing the area with thin micro-lettering that loses crispness as the chest expands and contracts.
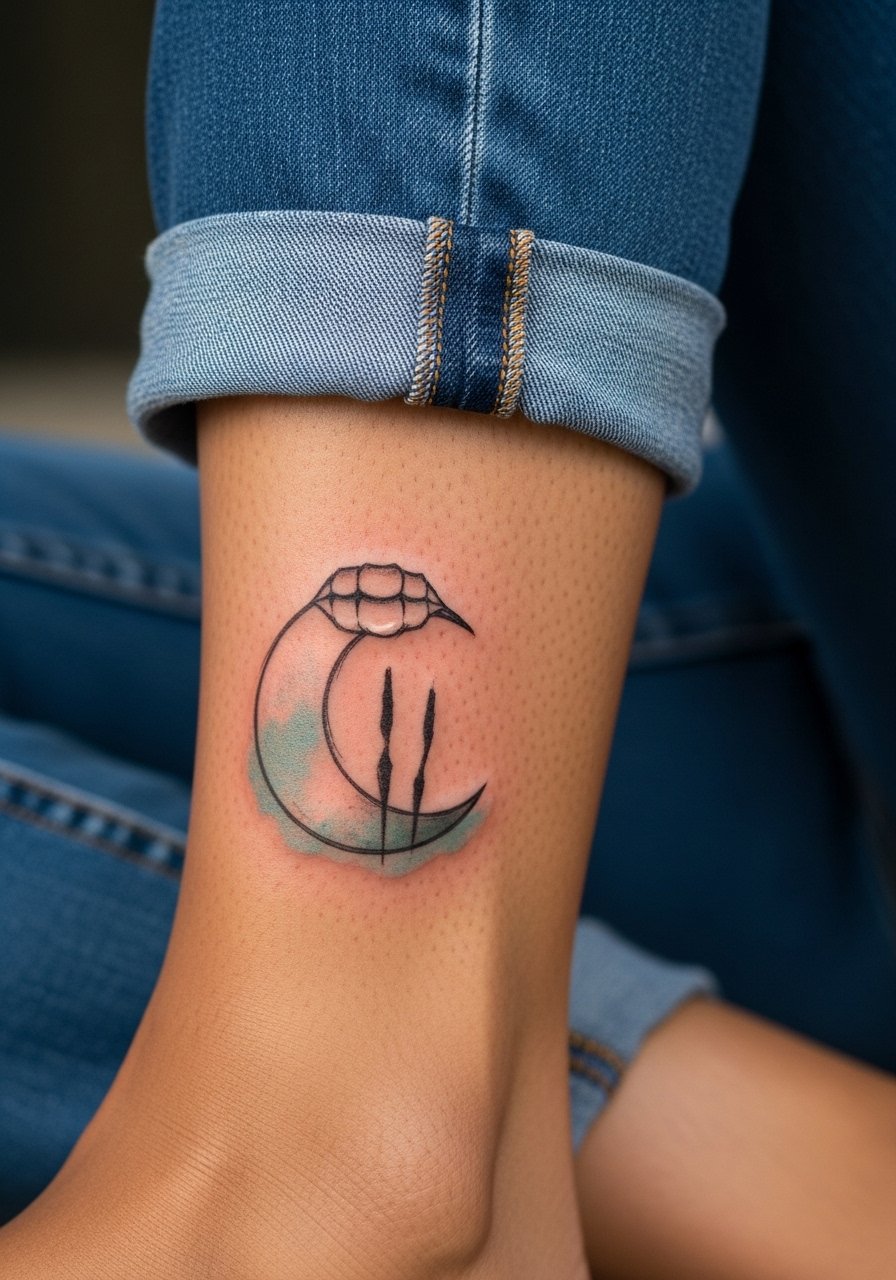
16. Minimalist Bite with Dot Work Halo on the Ankle

Ankle placements are small and often photographed, so keep the halo spacing generous to avoid merging. The ankle is bony and sharp, so expect a sharper sting but quick sessions. I recommend dot halos for soft aging because they fade predictably into the skin. For footwear choices that show the design, try simple sandals or low-profile sneakers that do not rub the area during the initial healing. A common mistake is requesting dense shading on the ankle that rubs against socks and shoes causing scabbing.
17. Portrait Bite Mark Over an Eye-Style Sketch on Upper Arm

An illustrated eye paired with a bite mark reads surreal and works well on the upper arm where you have room for expressive strokes. Mention during the consult that you want the eye to be illustrative and the bite to be sketchy so both elements maintain their identities as the piece ages. Upper arms are forgiving and tolerate varied line weights which helps hold the portrait detail. For casual looks, a short-sleeve tee that rolls up neatly keeps the artwork visible without strain. The common mistake is over-detailing the iris in single-needle work that later softens into an indistinct spot.
18. Fragmented Bite Mark with Geometric Lines on the Thigh

Thigh pieces let you play with scale, and fragmenting the bite into geometric slashes gives a modern edge. Tell your artist you want firm line spacing between the geometric elements so the intersections do not merge into blur over time. Thigh skin is forgiving on blowout and color retention, and sessions can be longer if you want a larger composition. For session day comfort, wear loose shorts that allow the artist to access the upper thigh easily. A typical mistake is making all the lines the same density, which reads flat instead of layered.
19. Tiny Bite Behind the Ear with Hairline Framing

Behind-the-ear placements are subtle and feel like secrets, and sketch bites here should be very small and airy. For safety and discretion, frame the piece just below the hairline on the neck rather than on the ear itself. Pain is low but access can be awkward so expect a short session. Ask your artist how they handle low-visibility touch-ups because this spot can be tricky to rework. For styling, hair-up looks reveal the mark, while loose hair hides it. The common mistake is making the bite too large for the tight behind-ear space.
20. Stitched Scar Bite Mark Along the Lower Back

Lower back pieces let you use horizontal motion so the stitched bite can follow the curve of the spine. Ask for staggered stitch sizes and light stippling so the scar reads textured without looking heavy in person. Sessions are moderate in pain and often scheduled in one long sitting for continuity. For showing it off, low-rise waistlines or cropped backs work well with the horizontal placement. The mistake to avoid is uniform stitches that make the scar look graphic instead of simulated.
21. Layered Sleeve Accent with Repeating Bite Motifs
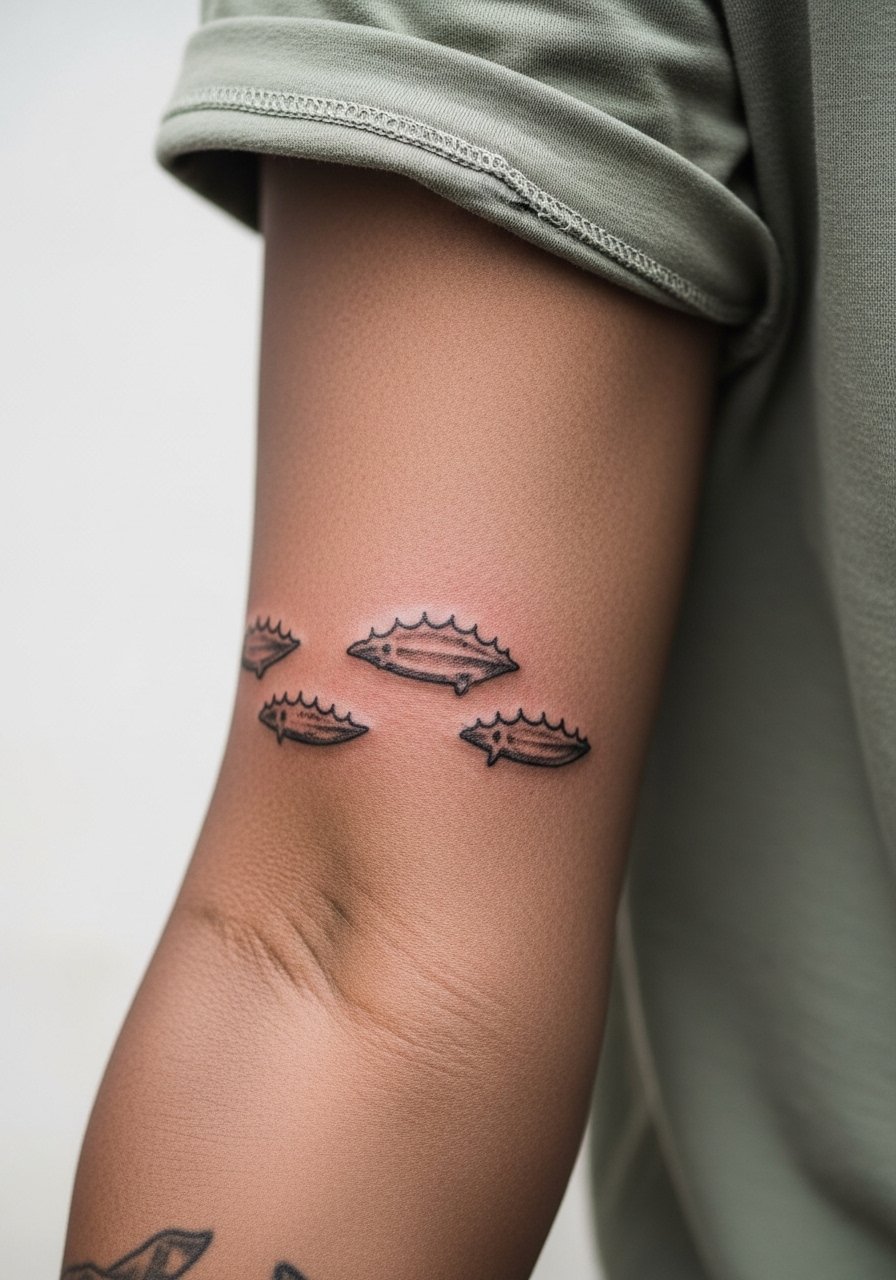
A sleeve that uses repeated bite motifs as negative-space accents can tie multiple visual themes together without dominating the arm. When planning, map out where each bite sits relative to larger elements so the negative space does not get filled in over time. Expect multiple sessions depending on how many accents you want. For session day comfort and access, a loose button-down pulled aside is practical and keeps fabric from rubbing the fresh work. The typical mistake is adding too many tiny bites in the high-friction zone near the wrist where they fade fastest.
Frequently Asked Questions
Q: How long will a sketch style bite mark stay crisp on thin areas like the wrist or neck?
A: It depends on placement, sun exposure, and how fine the linework is. In my experience, wrists and necks need touch-ups sooner than upper arms. Using slightly bolder anchor lines and planning for a touch-up at year two to three keeps the design readable.
Q: If I want a ribcage or sternum bite, what should I ask an artist during consultation?
A: Ask where they stand on fine line in that location. Say you want slightly larger spacing and controlled depth rather than ultra-fine needles. Ask to see healed photos of similar placements so you can judge how their work ages.
Q: Which clothing choices help show off collarbone or shoulder bite marks without irritating healing skin?
A: Choose tops that can be shifted rather than removed. A wide-neck shirt or a tank with thin straps keeps access clear and avoids rubbing the area while it settles.
Q: Do watercolor accents make bite marks harder to maintain?
A: Watercolor washes fade more predictably than solid blocks if they are applied as broken strokes. The risk is when saturated color sits right up against single-needle lines. Ask the artist to leave a little breathing room between color and fine line.
Q: Are hand and knuckle bite marks a bad idea for longevity?
A: Hands get heavy wear and washing, which accelerates fading and touch-ups. They are not a bad idea if you accept a higher maintenance schedule and plan for touch-ups at year one or two.
Q: How do I find an artist who understands sketch texture and healed scar effects?
A: Look through local shop directories, portfolio sites, and convention guest lists, and search hashtags that match the technique you want. Ask to see healed photos of similar textures rather than just fresh work.
