
Fine line sketch sleeves read delicate on a phone screen, but the reality in the chair is different. Needle depth, spacing, and how the design flows around muscle and joint determine whether a sleeve looks crisp at year three or needs frequent touch-ups. These 17 sketch-style sleeve ideas show what works in the long run and what to ask your artist in that consultation before the stencil goes on.
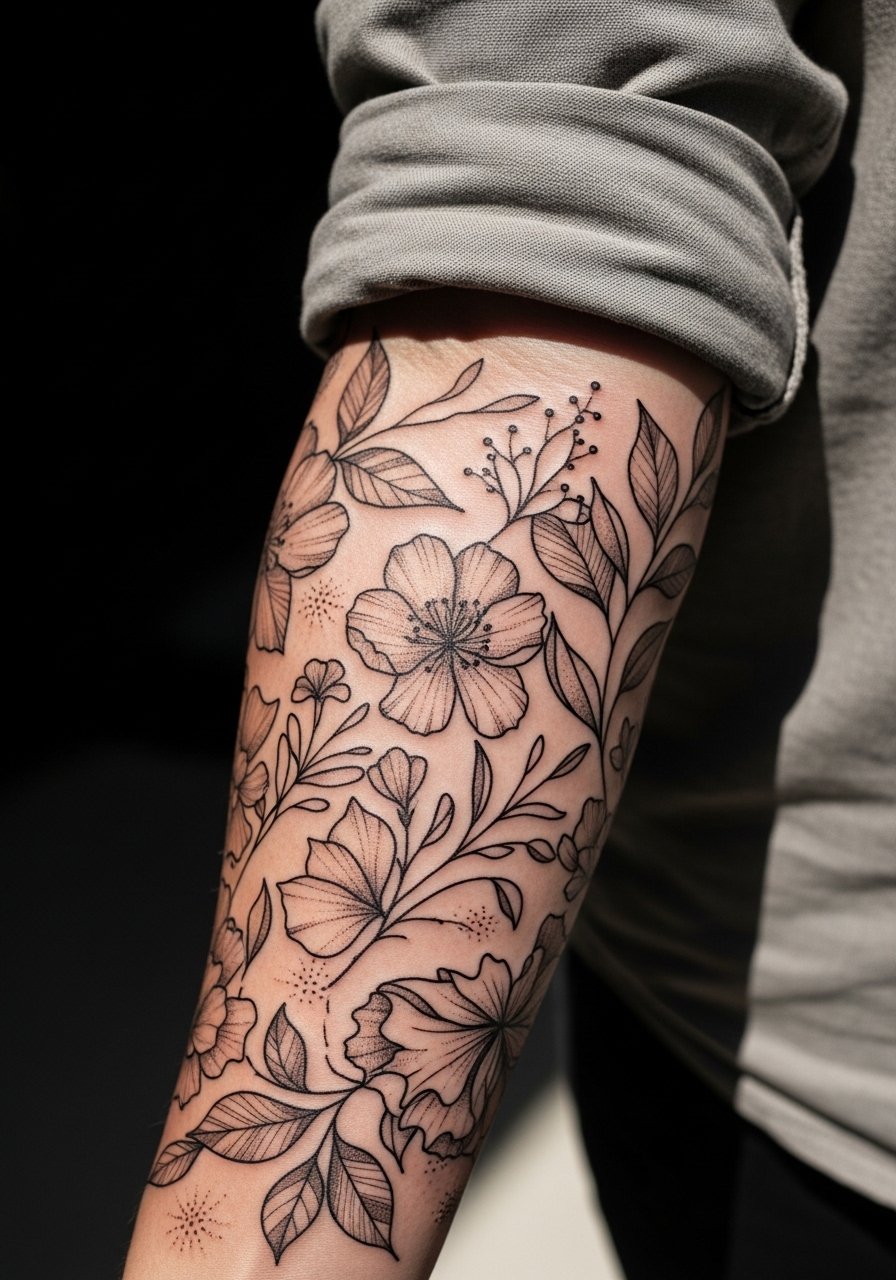
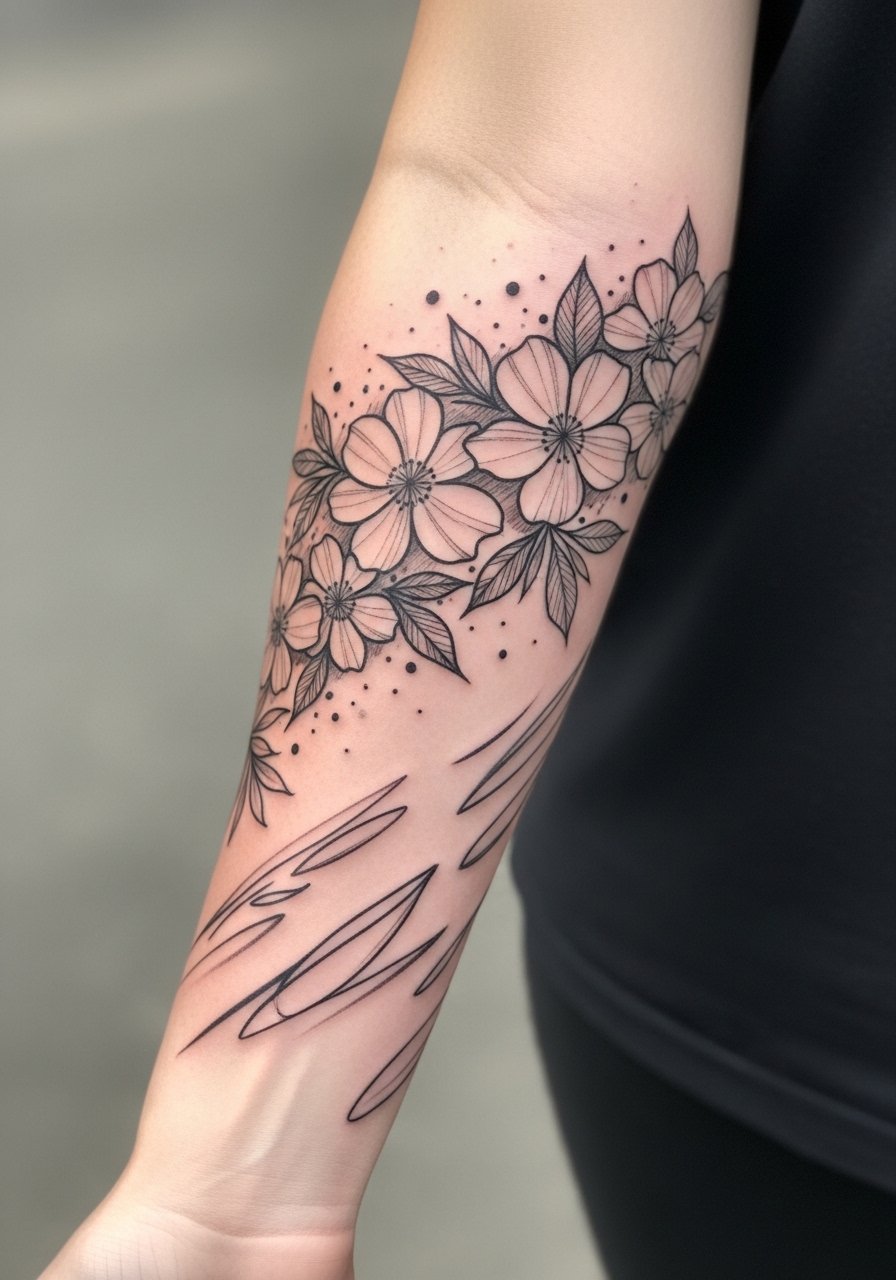
1. Wild Botanical Forearm Sleeve with Loose Sketch Lines
I've seen this on three women who garden and the lines still read nicely after two years when spaced correctly. Ask your artist for open negative space between stems so stipple shading has room to settle. The mistake is packing too many tiny leaves into a narrow forearm band. Expect a medium pain level and a two to three hour session per chunk for the forearm wrap. For showing it off, roll sleeves or wear a loose button-down shirt in neutral tones so the sketch lines stay the focal point. Blowout risk is low here if linework is a touch bolder than micro single-needle work.
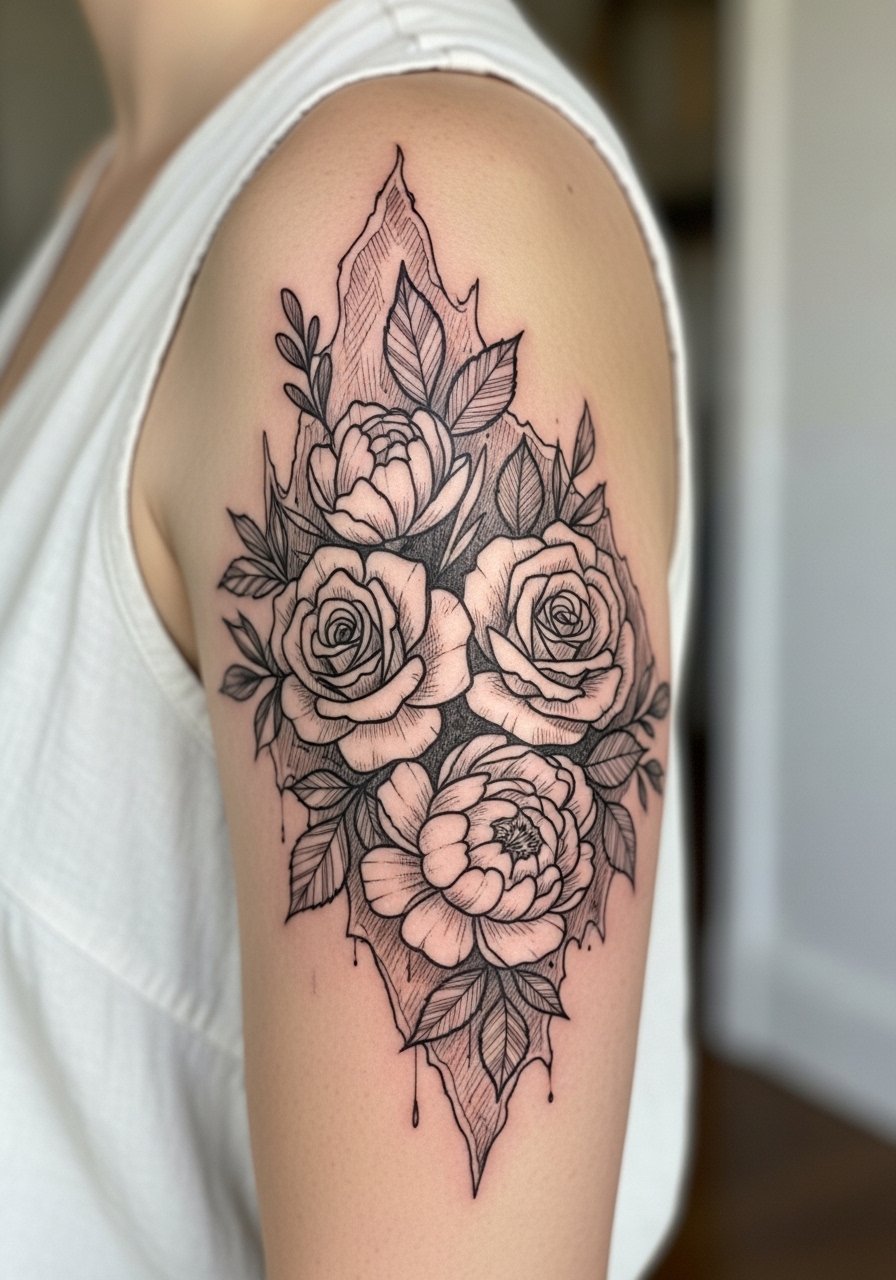
2. Ragged Edge Floral Half Sleeve Over the Outer Bicep
When you sit down with your artist for this, bring bouquet photos and mark where muscles peak. The outer bicep gives room for sketchy petals that look dynamic when the arm moves. The common error is making petals too small near the elbow where motion blurs detail by year two. Sessions feel like moderate buzz for the bicep with two to three hours typical per sitting. Pair this with sleeveless summer tops to let the outer arm breathe in warm months. Touch-up at year three is common if you want the fine crosshatching to stay crisp.
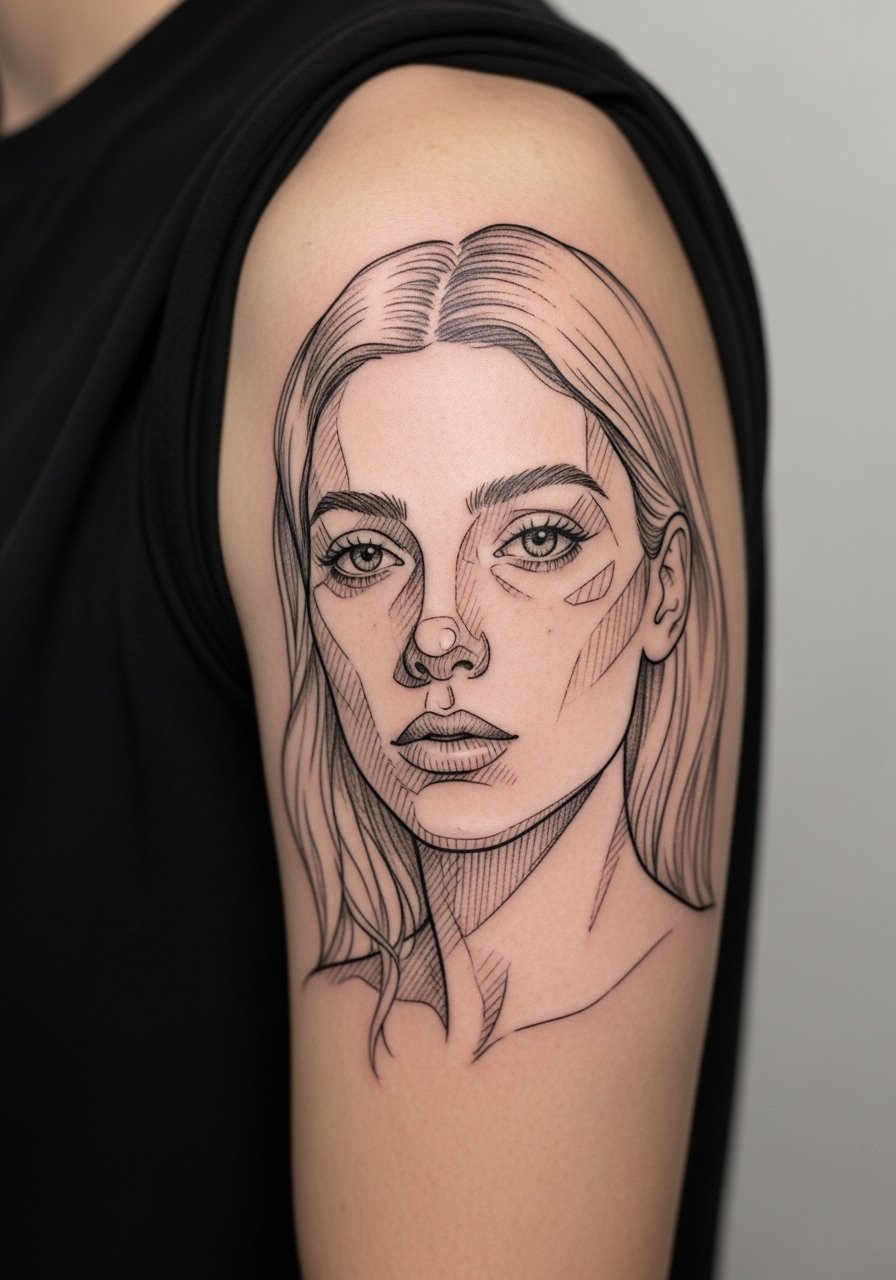
3. Sketch Portraits Mixed with Linework on a Upper-Arm to Elbow Sleeve
Personal observation lead. I notice portrait sketch sleeves that pair loose contour lines with thicker anchor strokes age better than single-weight portrait lines. Tell your artist to alternate thin sketch strokes with fuller linework around cheekbones and hair to retain definition as skin shifts. This placement is less prone to blowout than forearm bands but needs careful spacing near the inner arm. Sessions are detail-heavy and can be longer, so plan for multiple sittings. For career-sensitive settings, remember a short-sleeve shirt can conceal the upper arm if needed.
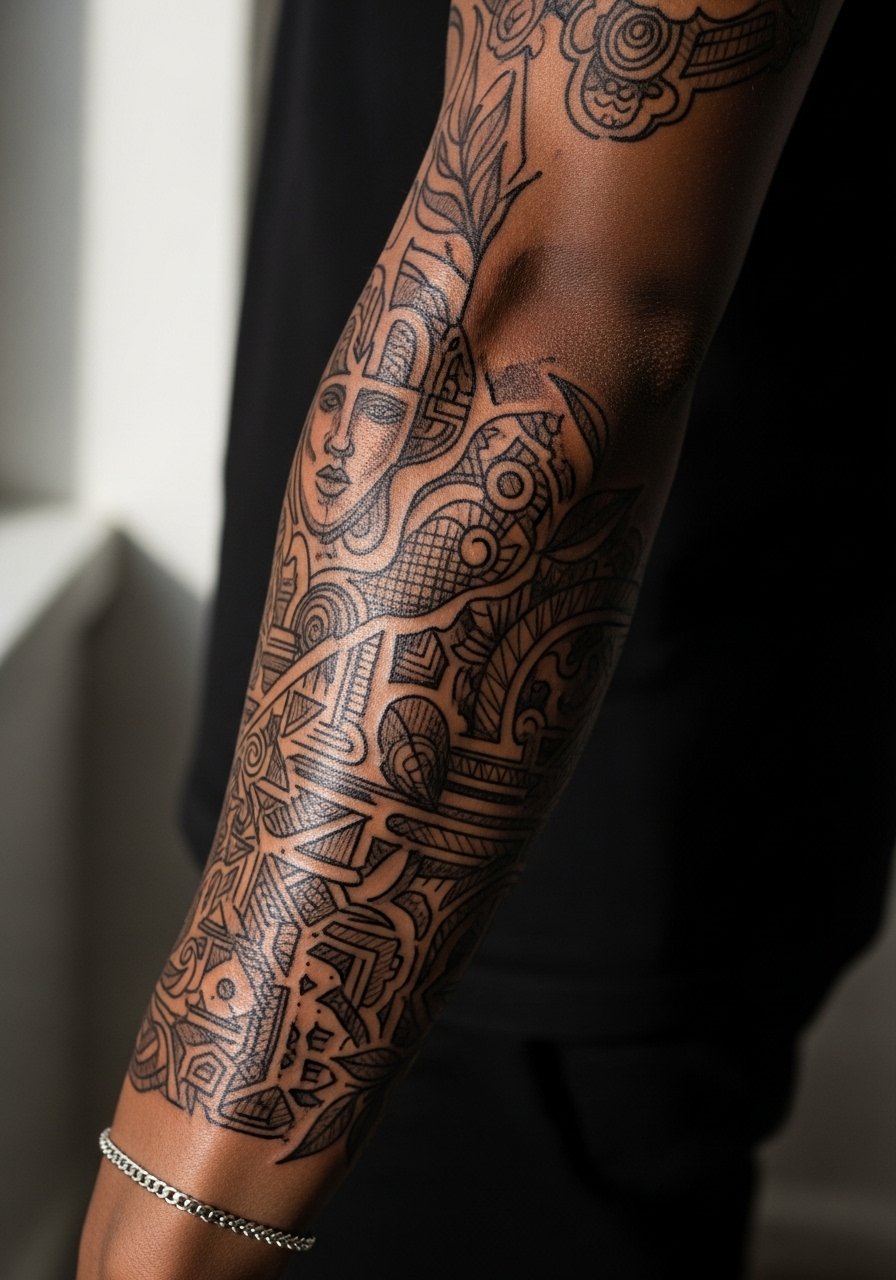
4. Whip-Shaded Scribble Sleeve That Wraps the Full Arm
Visual impact lead. There is a bold look when whip shading and intentional scribble lines wrap the whole arm, giving a motion effect that reads from across a room. The trade-off is that dense scribble in tight areas can soften over time, so plan for more negative space and varying line weight. This is a longer session and feels like a steady vibration across the arm. For showing it off, cuffed sleeves and a thin chain bracelet keep attention on the flow without crowding the wrist. Expect a touch-up window around two to four years depending on exposure.
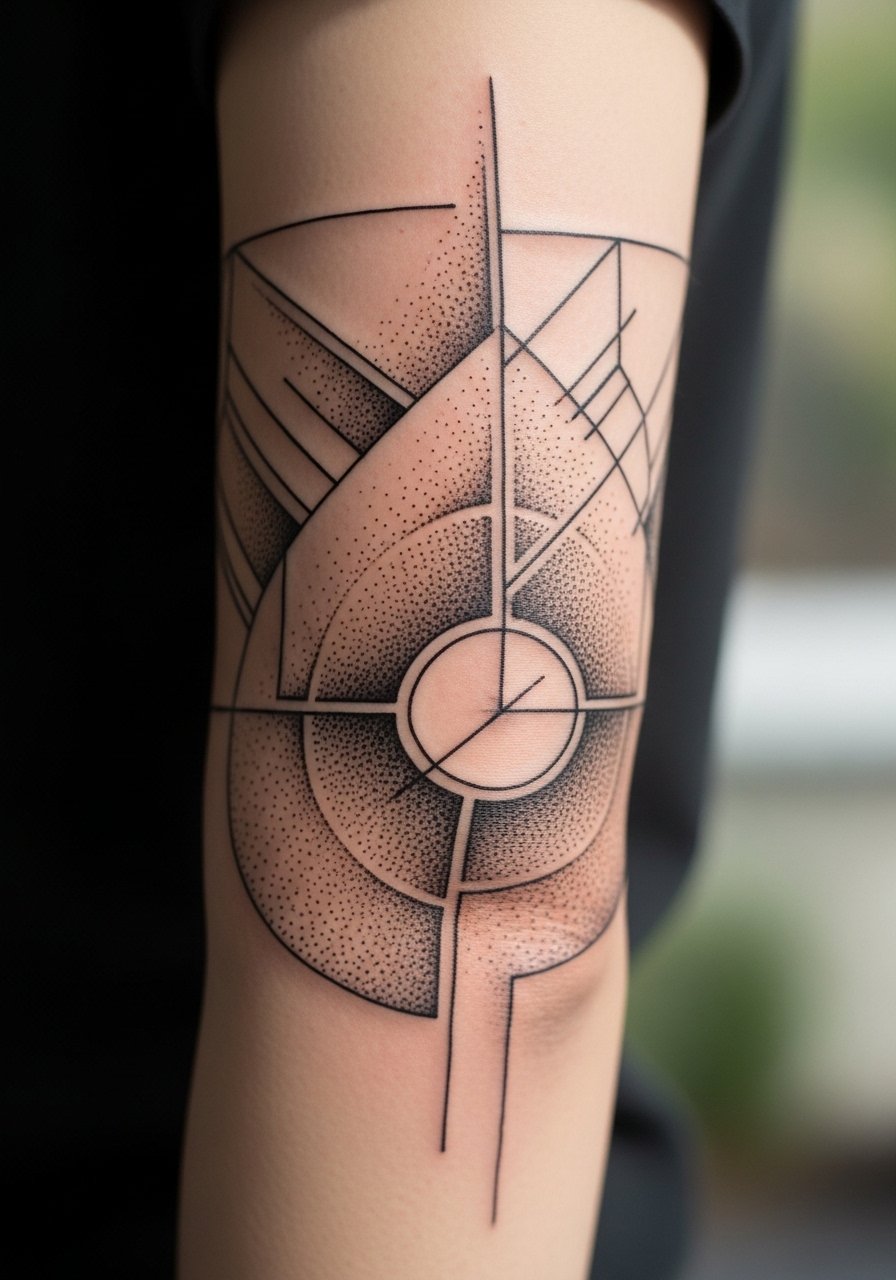
5. Geometric Sketch Sleeve with Negative Space and Dot Work
Mistake lead. The biggest mistake with geometric sketch sleeves is compressing complex patterns into too small a band. The pattern needs breathing room or dot work fills will merge over time. Ask for larger module sizes and stipple shading that graduates out to skin. This placement maps well to the outer and inner arm for contrast. Sessions are methodical and require focus, so expect multiple shorter sittings. For session comfort, wear a loose button-down shirt you can pull aside easily. This version tends to hold detail if spaced intentionally.
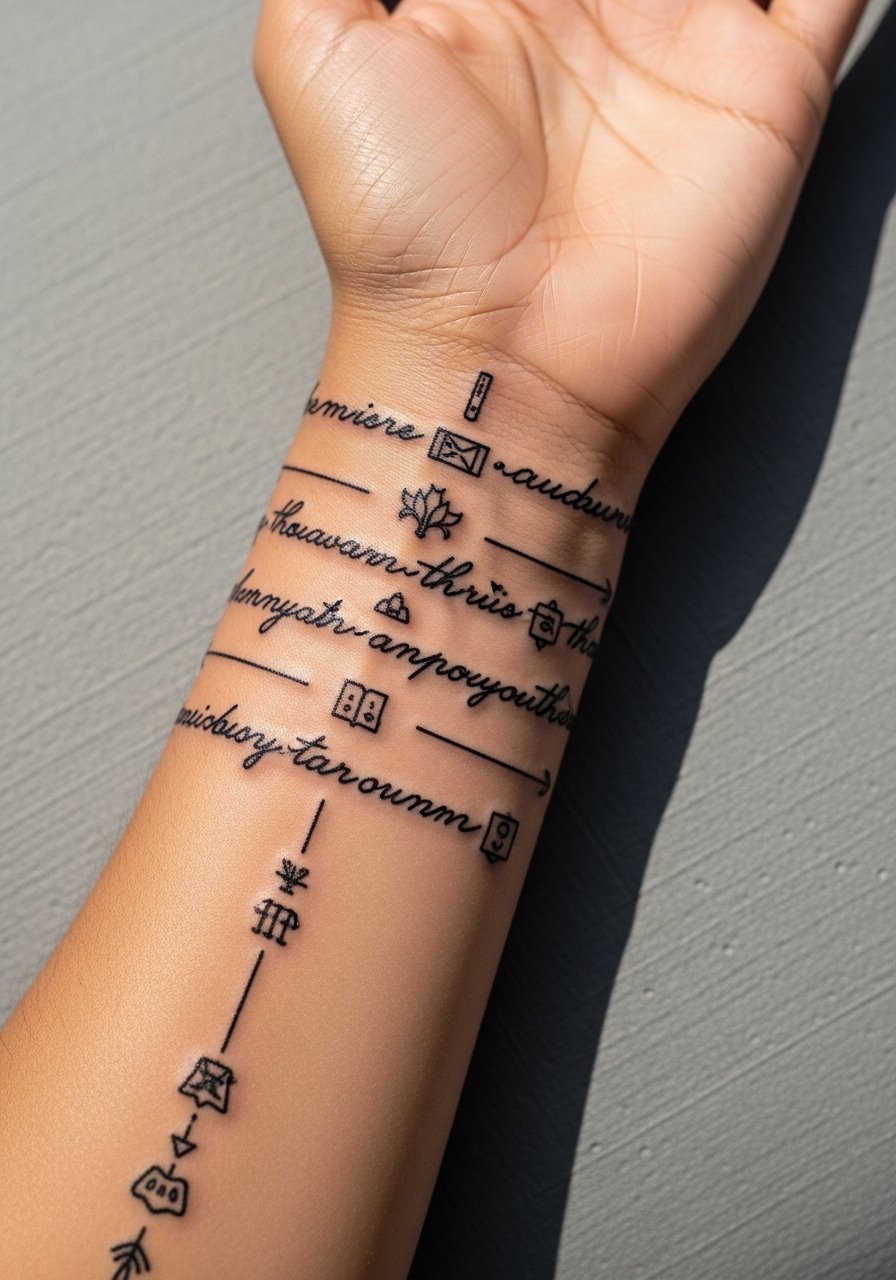
6. Sketchy Script and Small Icons as a Cuff Sleeve
Consultation lead. When you request script that snakes into small icons for a wrist-to-forearm cuff, be explicit about letter height and spacing so letters do not blur with the icons after a year. Fine script here reads delicate initially then softens, so plan touch-up if you want crisp script long term. Pain around the wrist is higher, so topical numbing for the wrist band can help. Pair the cuff with a minimalist watch strap to frame the script without covering it. Expect short sessions over two appointments for clean layout.
Studio Day Picks
The wrist and forearm pieces above heal differently from denser upper-arm work, so a few small items smooth the session and the first week.
-
Stencil transfer paper kit. Lets you preview how sketch lines sit on curved forearms before commitment, which is vital for the cuff and geometric ideas above.
-
Topical numbing cream. Applied per instructions about 40 to 60 minutes before eases the higher sensitivity at the wrist and inner arm without changing linework when used correctly.
-
Thin protective film roll. Keeps fine script and wrist bands clean through the first week of hand washing and daily friction.
-
Fragrance-free gentle body wash. Gentle cleansing around forearm and sleeve areas prevents irritation of delicate linework during daily showers.
-
Aquaphor healing ointment. A thin layer during the initial healing window locks in moisture for fine line work without clogging the needle channels.
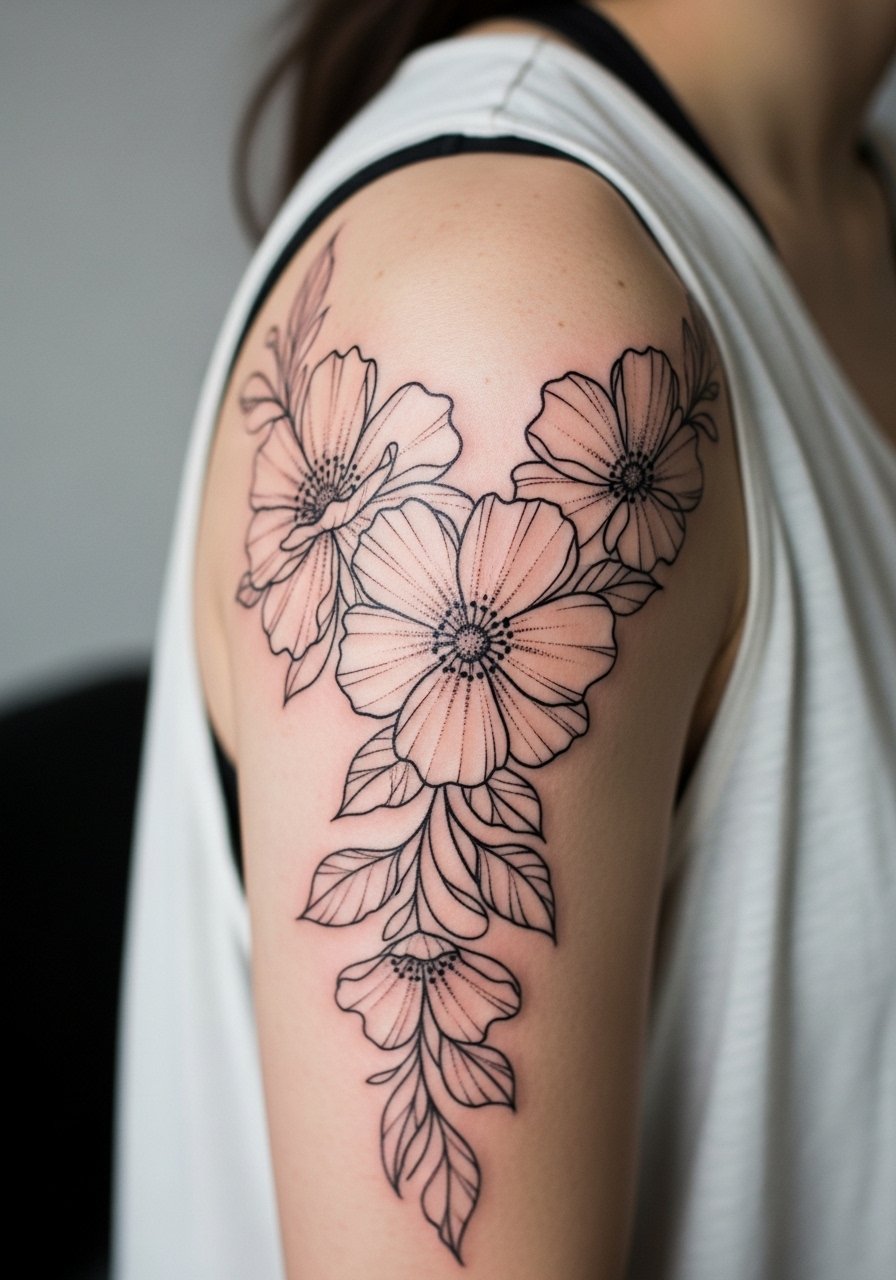
7. Freehand Floral Sleeve That Starts at the Shoulder
Aging and healing lead. Most freehand florals look great fresh but the dense center shading can turn muddy by year three if petals are overlapped without space. I advise larger petal outlines and stipple centers so the motion and texture persist. Shoulder-to-bicep soft tissue ages differently than forearms, so the design can afford more looseness. Sessions usually split by quadrant. For sessions, wear a loose tank top so the shoulder is accessible without tugging. This approach keeps the freehand sketch feeling while making ageing predictable.
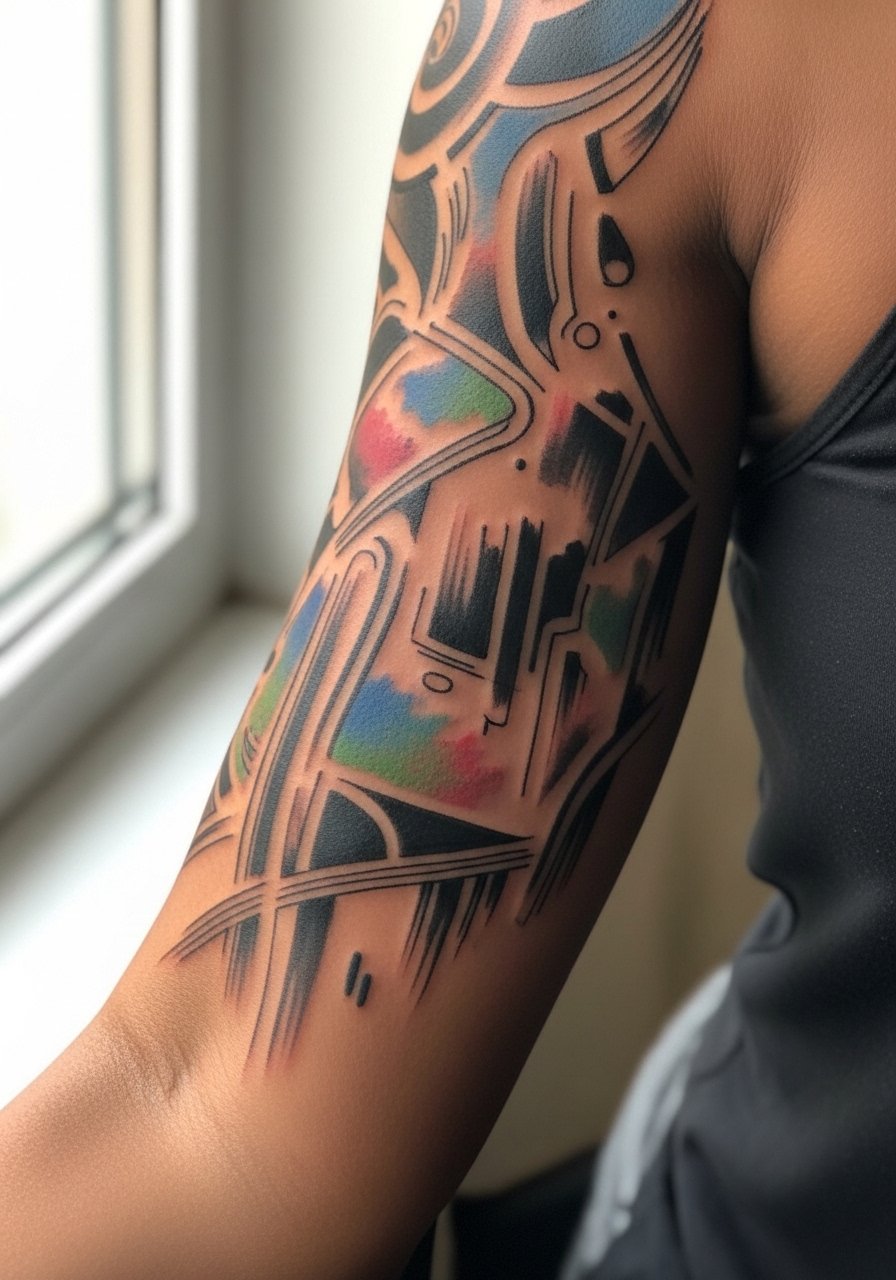
8. Abstract Brushstroke Sleeve with Sparse Color Accents
Personal observation lead. Abstract brushstroke sleeves that keep color accents sparse tend to age more gracefully than fully saturated painterly sleeves. Ask for diluted color patches and let the linework remain dominant so the color softens without overtaking the sketch. This sleeve feels more like a painting being built in layers. Sessions include colorwork that can be longer due to saturation and healing. For showing it off, a short-sleeve linen shirt rolled at the cuff complements the brushy strokes. Expect a touch-up around year three for the color spots if you want them vivid.
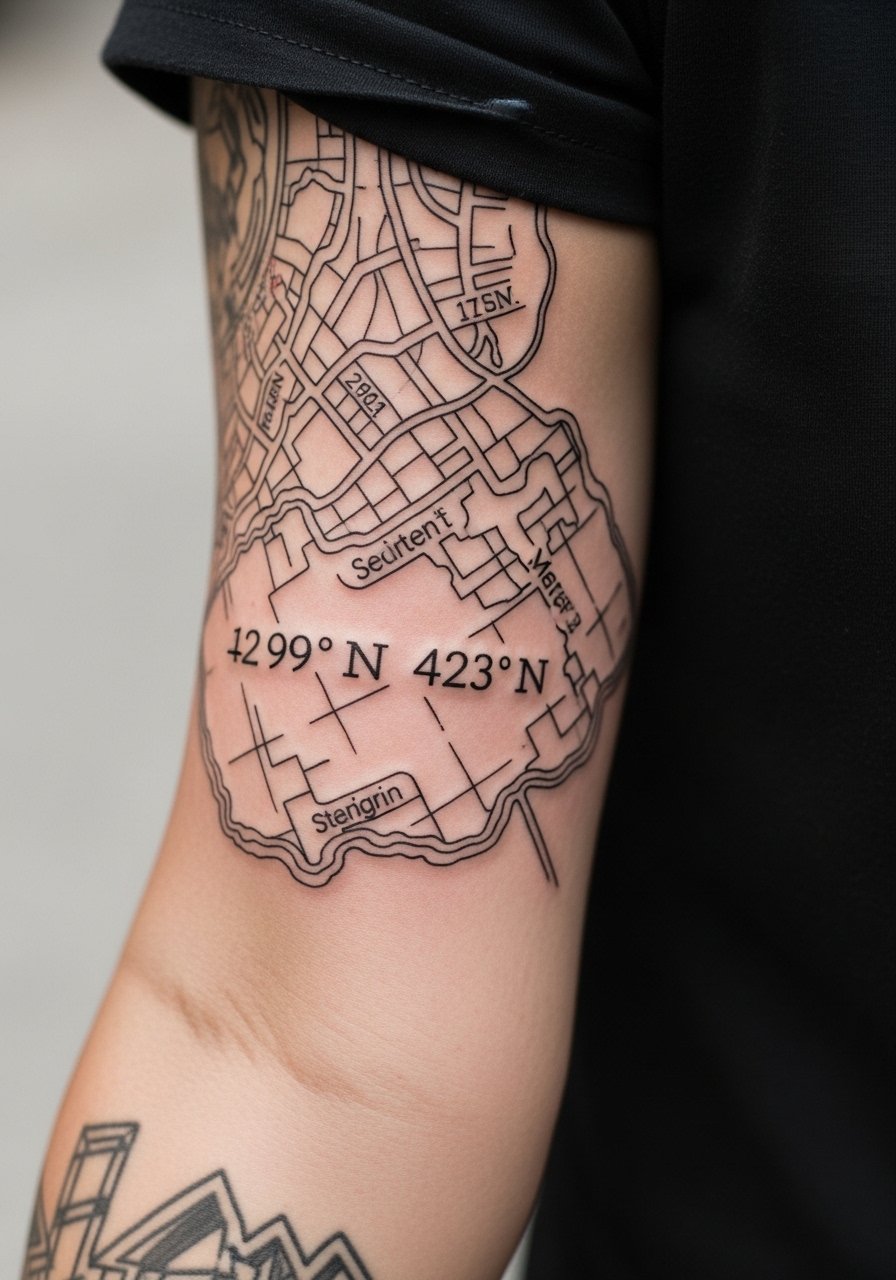
9. Sketch Map and Coordinates Sleeve That Wraps the Inner Arm
Mistake lead. The inner arm can be tempting for a continuous map sleeve, yet tight script or tiny coordinates there blur faster than on flatter parts. If you want text or numbers, increase font size and space the elements so movement does not smudge detail. Inner-arm sessions feel more tender and require arm-raising positions that can be uncomfortable for long sittings. A compact session plan with breaks helps. This placement is discreet when the arm is down and looks intentional with a short-sleeve top. For career concerns, the inner arm hides easily under most sleeves.
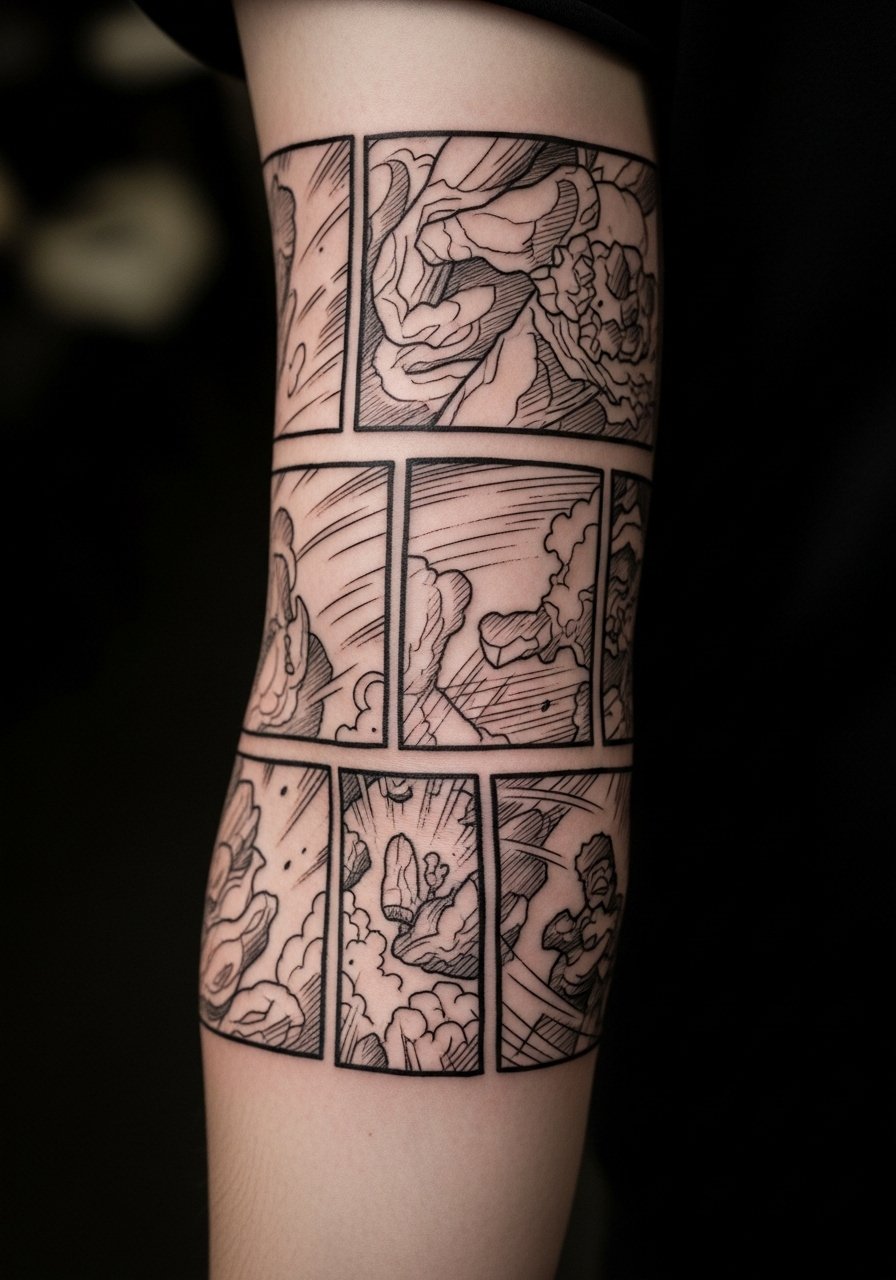
10. Comic-Panel Sleeve with Sketch Borders and Motion Lines
Consultation lead. Bring the exact panel layout you want and mark which panels should be the focal points. The most successful comic-style sleeves leave breathing room between panels so motion lines do not merge over time. Expect multiple sessions because the artist will need to build contrast between sketch borders and interior linework. For showing it off casually, cuffed shirts and a minimalist leather cuff bracelet harmonize with the panel rhythm. Touch-ups may be needed on thin motion lines after two to three years.
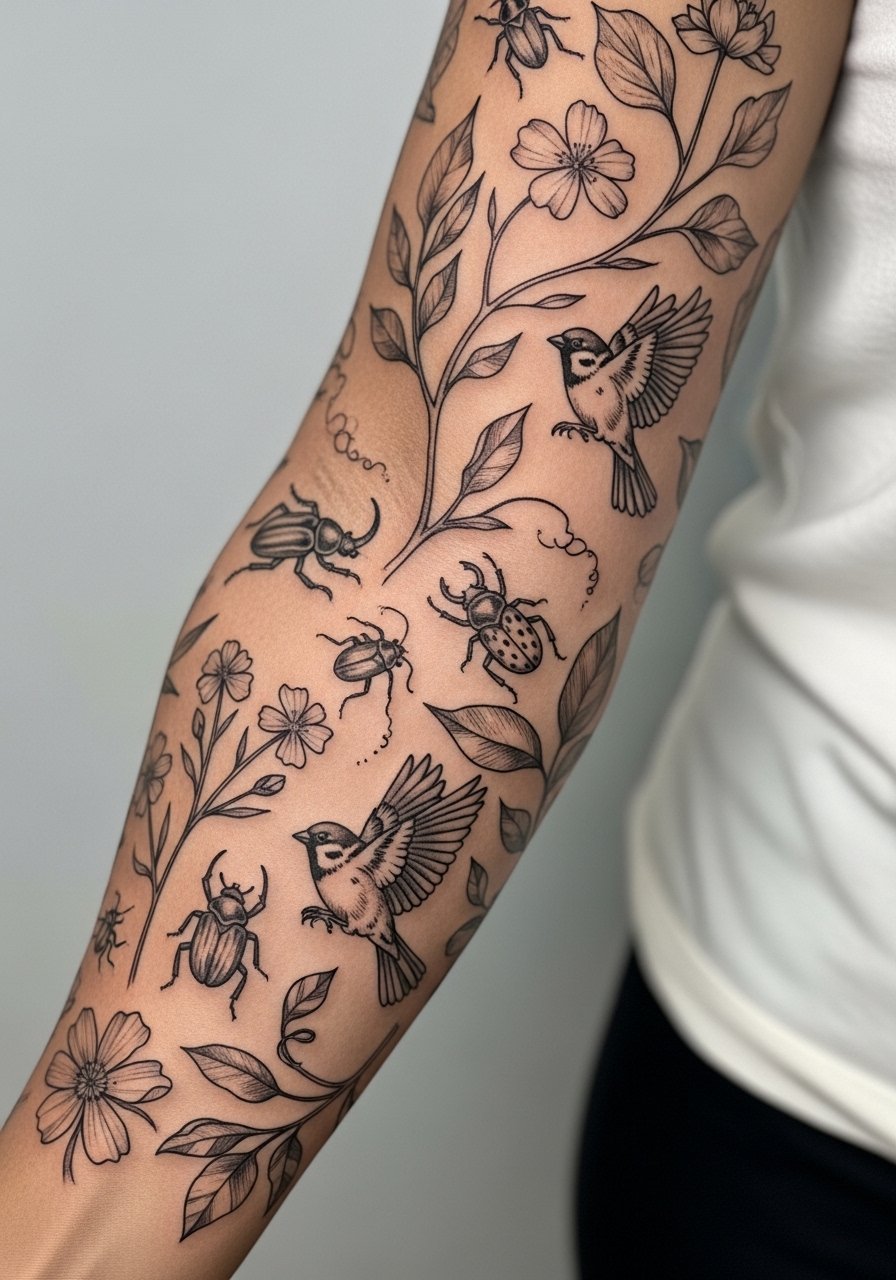
11. Botanical Sleeve with Negative Space and Tiny Wildlife
Visual impact lead. Tiny wildlife such as insects and birds placed among open botanical sketching brings life to a sleeve without densifying the whole arm. The aging trick is spacing the critters so their fine legs or antennae are not the only detail in motion-prone zones. Sessions are fun but require careful mapping. For the session wear, a button-down shirt you can pull aside gives the artist access to shoulder and upper arm areas. Wildlife details may need micro touch-ups at year three to keep crisp micro features intact.
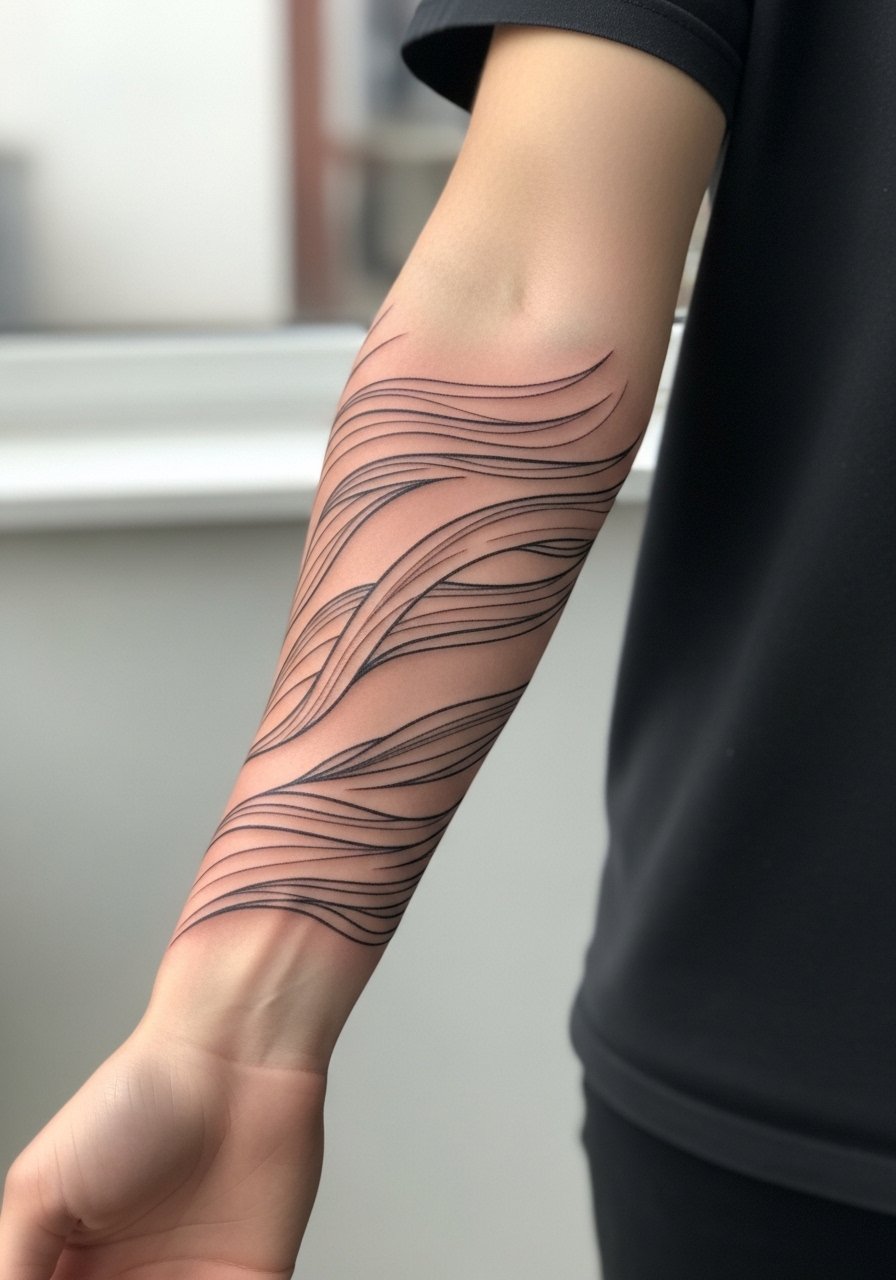
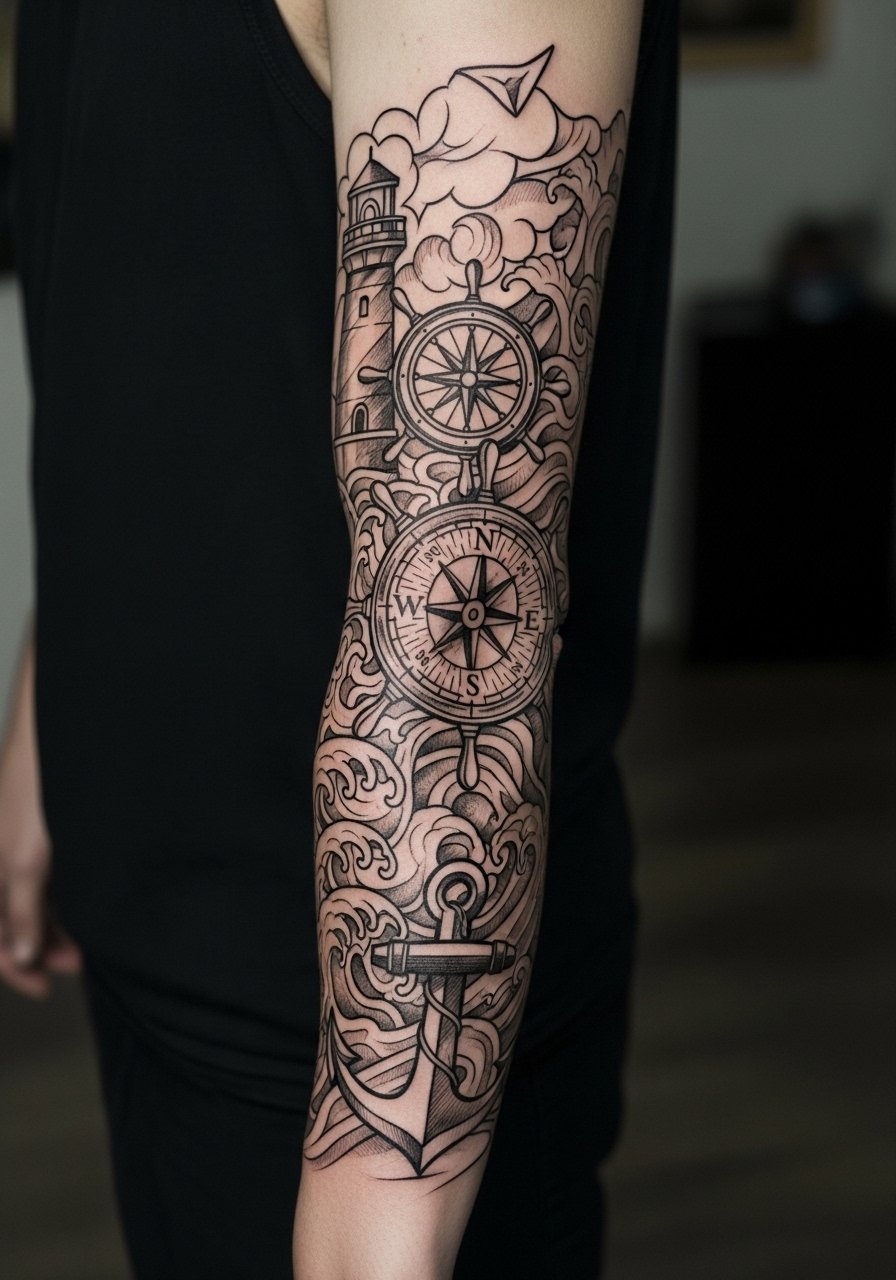
12. Linework Wave Sleeve Flowing Around the Forearm
Mistake lead. The biggest error with flowing linework sleeves is forcing symmetric waves around asymmetrical muscles. Instead, let the lines follow natural contours so motion lines keep their rhythm as the arm bends. Forearm placement means frequent washing and sunlight exposure, so plan on sunscreen and occasional touch-ups. Sessions are steady and can be done in two longer sittings. For an evening look, roll your sleeves and pair with a thin chain pendant necklace that reads clean with the sleeve lines. Healed linework here looks fluid and architectural when spaced.
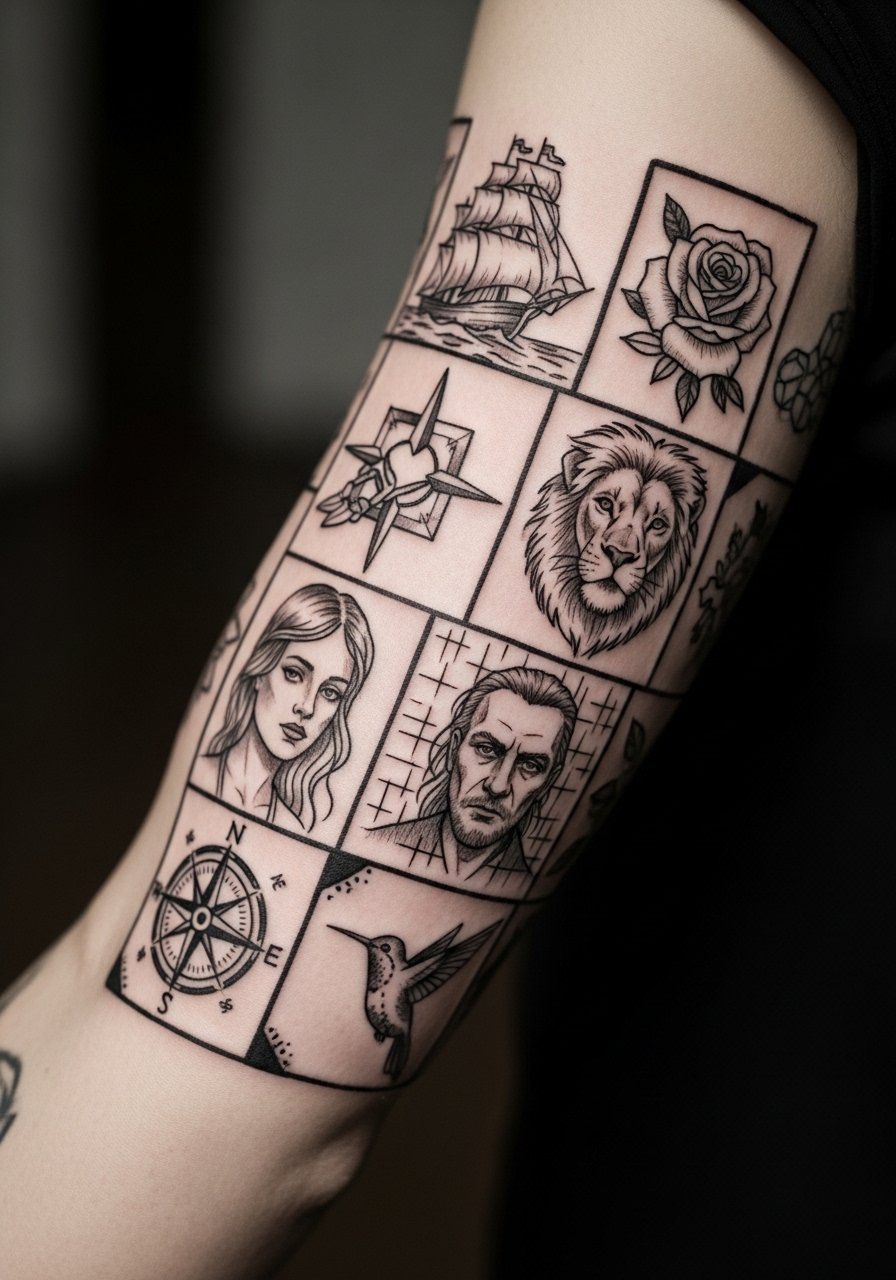
13. Patchwork Sleeve of Sketch Flash and Tiny Portraits
Personal observation lead. Patchwork sleeves made of small sketch flashes and tiny portraits read eclectic and let you add over years. The trick is to leave buffer skin between patches so each piece ages independently. Sessions are modular and beginner-friendly for breaking into installments. The inner elbow zone is motion-prone so avoid dense details there. This design gives flexibility if you plan to expand or cover later. A short-sleeve shirt keeps the patches visible in summer and professional when needed in cooler months.
14. Single Continuous Line Sleeve That Suggests Figures
Controversy lead. Single continuous line sleeves split artists into two camps. One camp argues the method's minimal breaks let it read clean for longer. The other camp warns the single stroke can lose definition quickly when placed over joints. The truth is artist technique and spacing decide the outcome. If you want a continuous line figure wrap, ask the artist about planned line weight changes for high-motion areas. For sessions, wear a loose drawstring linen pant if the piece extends near the elbow crease so you are comfortable. Touch-ups are common where the line crosses high-movement zones.

15. Floral-to-Abstract Transition Sleeve with Fading Lines
Aging lead. Most floral-to-abstract transitions look best when the floral elements are slightly bolder and the abstract edges feather out. If the opposite happens and the abstract holds more saturation than the florals, the balance shifts and the botanicals disappear. Sessions should start with the floral anchor points, then build outward into the abstract strokes. For session comfort choose a top that gives clean access to the upper arm. Expect a touch-up at year three if you want the floral outlines restored after the abstract softens.
16. Black Ink Sketch Sleeve Emphasizing Bold Anchor Lines
Mistake lead. People often ask for all thin sketch lines for a sleeve that sees daily sun. Thin-only approaches tend to fade into fragility. I recommend bold anchor lines for structure with sketchy infill so the silhouette holds as the detail softens. Sessions are efficient because anchors give the artist clear stop points. For showing the silhouette, wear a rolled-up linen shirt that frames the arm while keeping the focus on anchor shapes. Expect less frequent touch-ups when anchor lines are used.
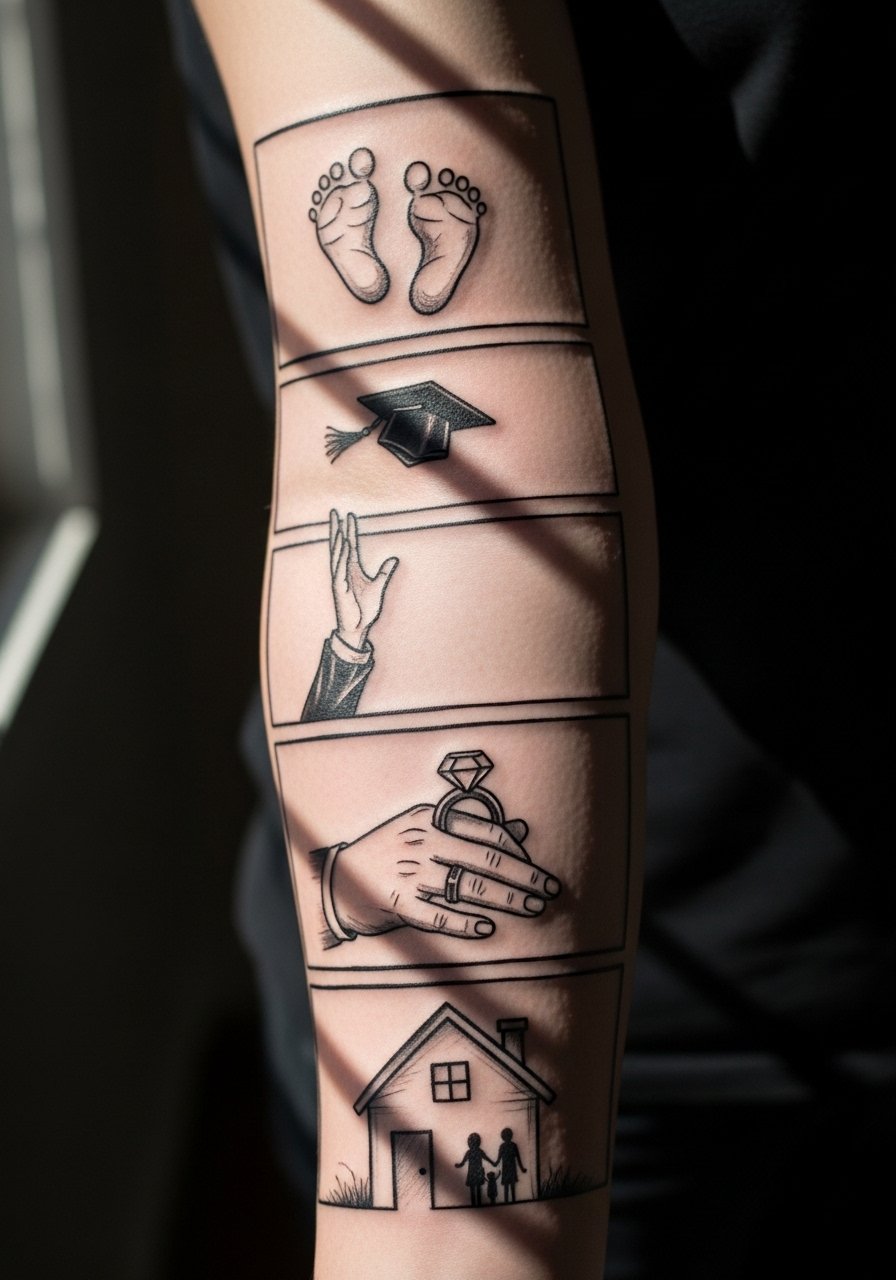
17. Storyline Sleeve That Maps Life Events in Sketch Panels
Consultation lead. Mapping life events into a cohesive sleeve requires time in consultation to decide pacing, focal size, and transitions. Small scenes need larger panels or they blur over time. The advantage of a storyline layout is that you can add chapters in the future without reworking existing pieces. Sessions are best scheduled as milestones rather than marathon days. For the session wear choose comfortable, easy-to-adjust clothing so the artist can access upper and lower arm zones without interruption. Plan to revisit focal panels at year three for minor touch-ups if details are important to you.
Frequently Asked Questions
Q: Will fine sketch lines in a full sleeve blur into a single mass over time?
A: It depends on placement, spacing, and how bold the anchor lines are. Sketch lines on high-motion zones like the inner elbow or wrist are more likely to soften. Ask your artist to mix in slightly heavier anchor strokes and leave negative space between clusters to preserve readability.
Q: How should I dress to make a shoulder-to-sleeve session easier for long sittings?
A: Wear a loose tank top or a button-down you can pull aside so the artist can reach the shoulder and upper arm without you getting cold. Comfort and easy access cut session time wasted on clothing adjustments.
Q: Are touch-ups typically required for sketch sleeves, and on what timeline?
A: Expect touch-ups on the most delicate areas every two to four years if you want the initial crispness back. Bold anchor lines and good sun protection stretch that timeline. How often also depends on your skin type and daily friction on the sleeve.
Q: Do sketch sleeves limit future cover-ups or expansions?
A: They do not if planned well. Leaving negative space and using a mix of line weight makes future additions or cover-ups easier. Talk through expansion ideas in your consultation so the artist can set anchor points that work long term.
Q: Is there debate about fine line work on areas like the inner arm and wrist?
A: Yes. One camp says fine line blurs too quickly on those spots due to movement and thin skin. The other camp says properly spaced lines with deliberate depth can hold up. Ask potential artists where they stand and look for healed photos of similar placements in portfolios.
