
Fine line trends look delicate on a phone screen, but the sketch style that holds up is usually the one that reads like a quick, confident hand sketch on paper. The trick is spacing, controlled wobble in linework, and knowing which placements let hairline strokes survive sun and friction. Read these twenty one pilots–inspired sketch designs with practical notes on what to ask, what to expect in the chair, and how they age so you book with fewer surprises.
1. Minimal Skeleton Key on Inner Forearm
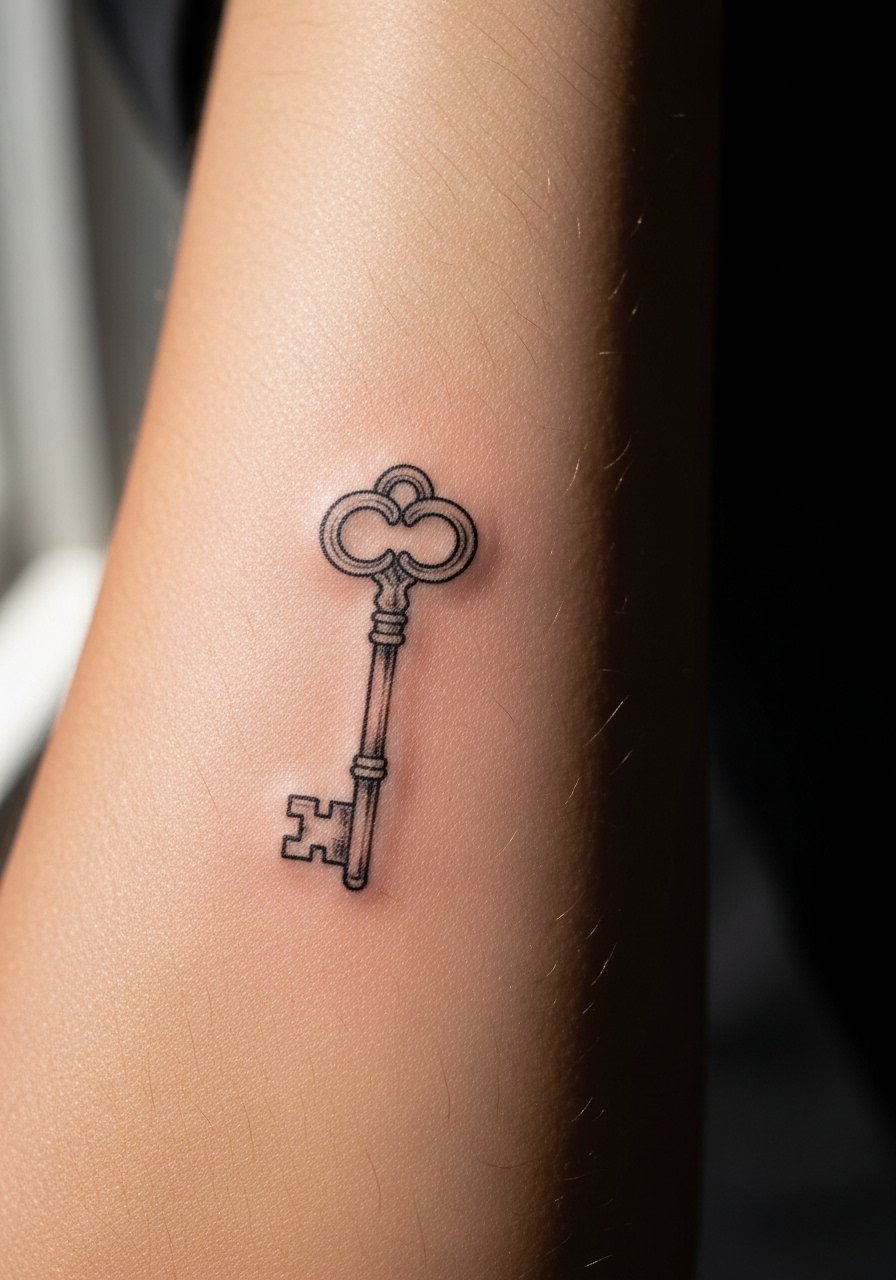
I recommend this when you want something symbolic that still reads like a hurried sketch. Tell your artist you want loose linework with slightly uneven strokes and light stipple shading in the handle so the piece keeps its sketch energy as it heals. Fair warning, the inner forearm is lower-pain but it sees sun and sleeves, so ask for slightly bolder lineweight than you might want fresh. Common mistakes are going too tiny with thin lines, which merge by year two. Session feels like steady needle time, roughly 45 to 75 minutes depending on size. For showing it off, roll sleeves up and wear a loose button-down shirt that frames the forearm without covering the art.
2. Torn Paper Lyric Snippet Along the Collarbone

This placement gives the sketch script room to breathe while staying intimate. Ask for a handwritten-style script with irregular baseline and a faint shadow line to mimic pencil. The collarbone sits between easy and sensitive on typical pain charts. Common aging issues are overly thin script that fades into a gray smudge. Tell your artist to set letters slightly apart and avoid very dense shading crossing the letters. Session time varies from 30 to 60 minutes. Pair the piece with an open-back midi dress for evenings to let the script peek out without feeling like a bold statement.
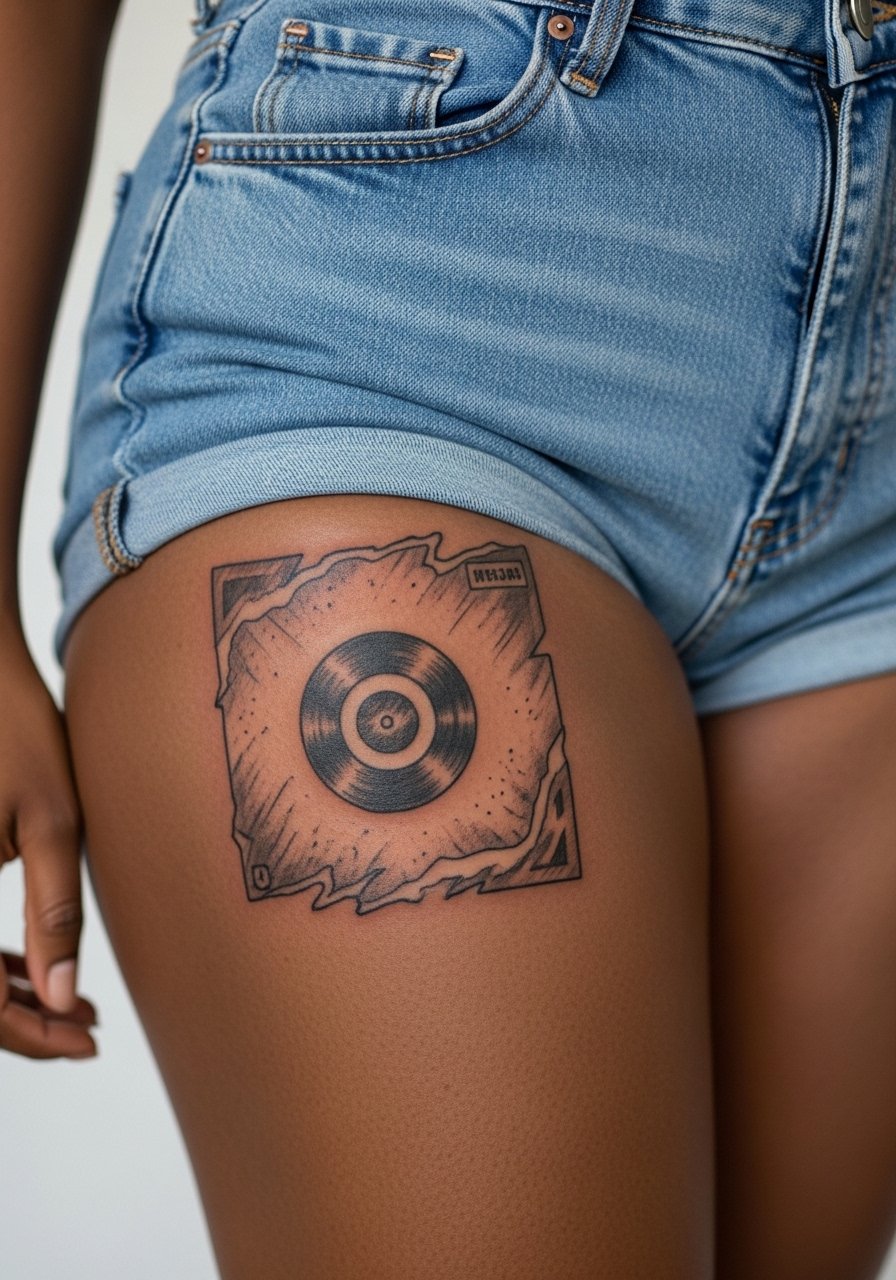
3. Cracked Vinyl Record on Upper Arm

This design reads like a quick sketch of a beloved record and works well for a rounded area. The outer upper arm has low blowout risk and ages predictably. In consultation, bring a clear photo of the record label so the artist can choose which details to keep and which to simplify into sketch marks. A single-session piece of this size often runs 60 to 90 minutes. People sometimes ask for micro-detail that looks great fresh but fogs into the background by year three. For casual show-off, throw on a sleeveless tee to highlight the circular composition.
4. Sketchy Skeleton Hand on the Ribcage
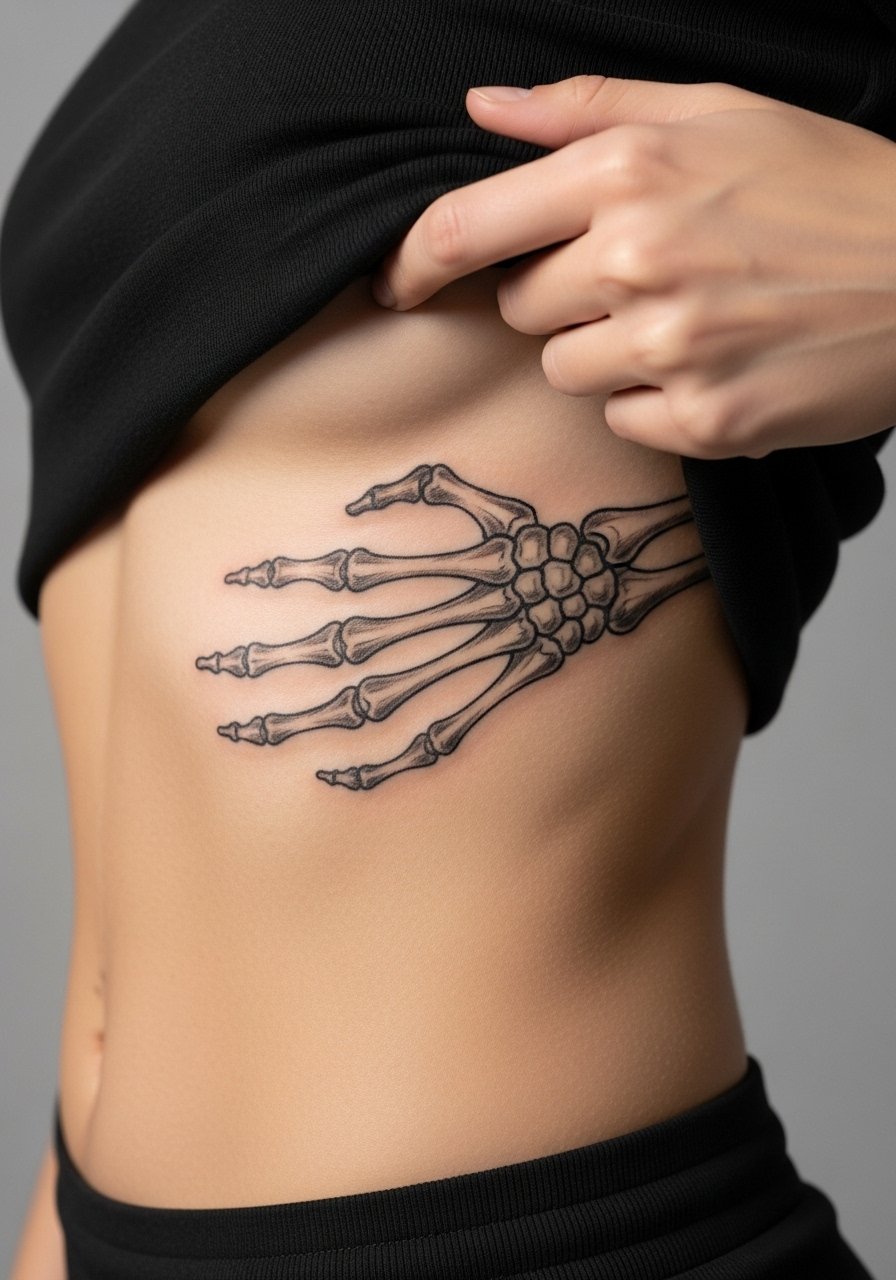
Ribcage work comes with a debate about fine line longevity. One camp argues the skin there shifts and blurs tight lines within two years. The other camp says a slightly deeper, confident stroke and spacing keeps sketch lines readable. Name both camps when you ask about long-term touch-ups. Expect higher pain and a longer session, often split into two shorter sittings if you want to limit discomfort. A common mistake is requesting ultra-small detail across curved rib anatomy, which loses definition. Wear a zip-up hoodie you can lift for work and then pull back down for comfort during healing.
5. Scratched Micro-Logo Behind the Ear
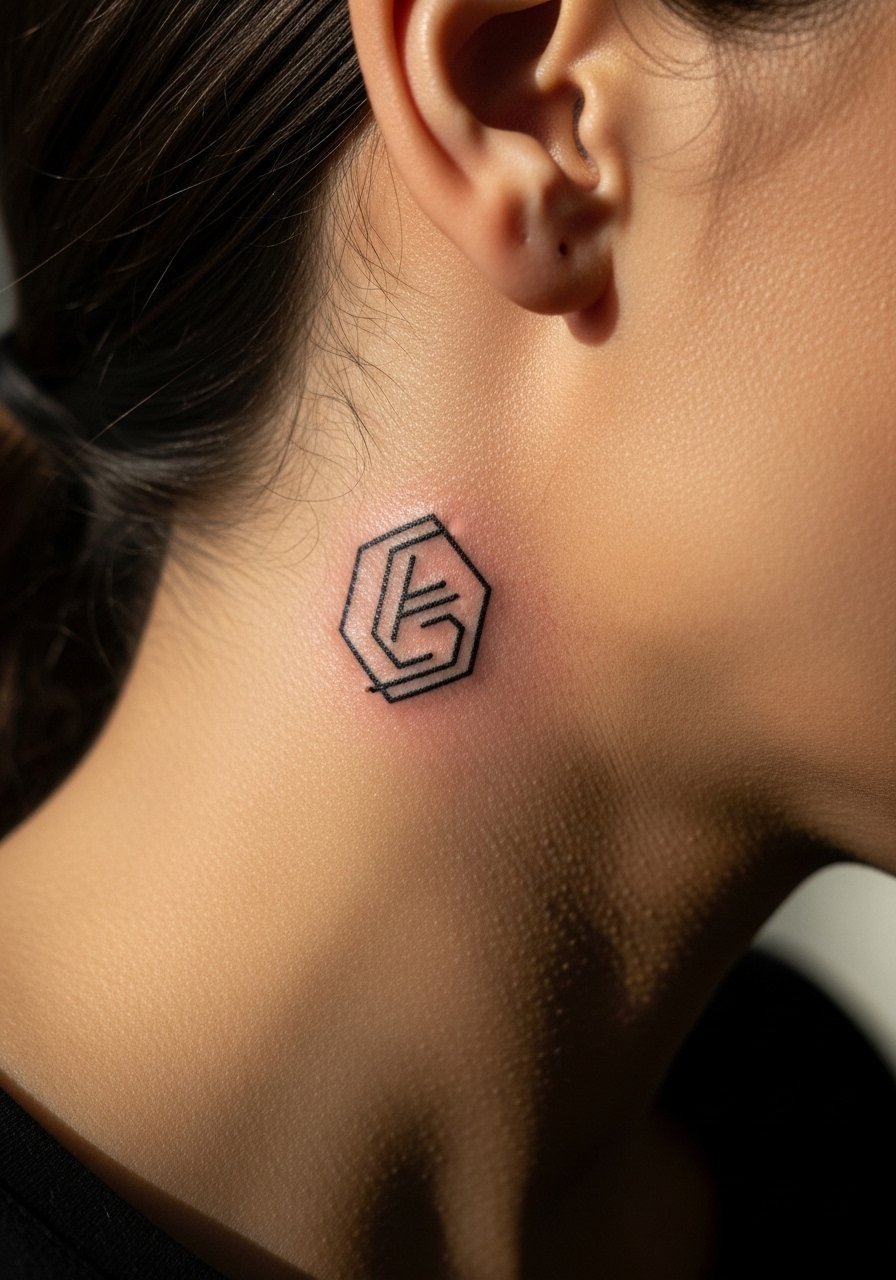
Behind-the-ear sketch marks are discreet and feel like a private nod. They require a close consultation because the canvas is small. Ask your artist to show the stencil placement and check scale before needles start. Tiny linework heals fast but is vulnerable to blur if too dense. Session time is short, usually under 30 minutes, but booking a walk-in might be tricky. Consider career implications before committing since some workplaces still have strict rules. For the appointment, tuck hair behind the ear and wear a wide-neck shirt so the artist has clear access without full hair removal.
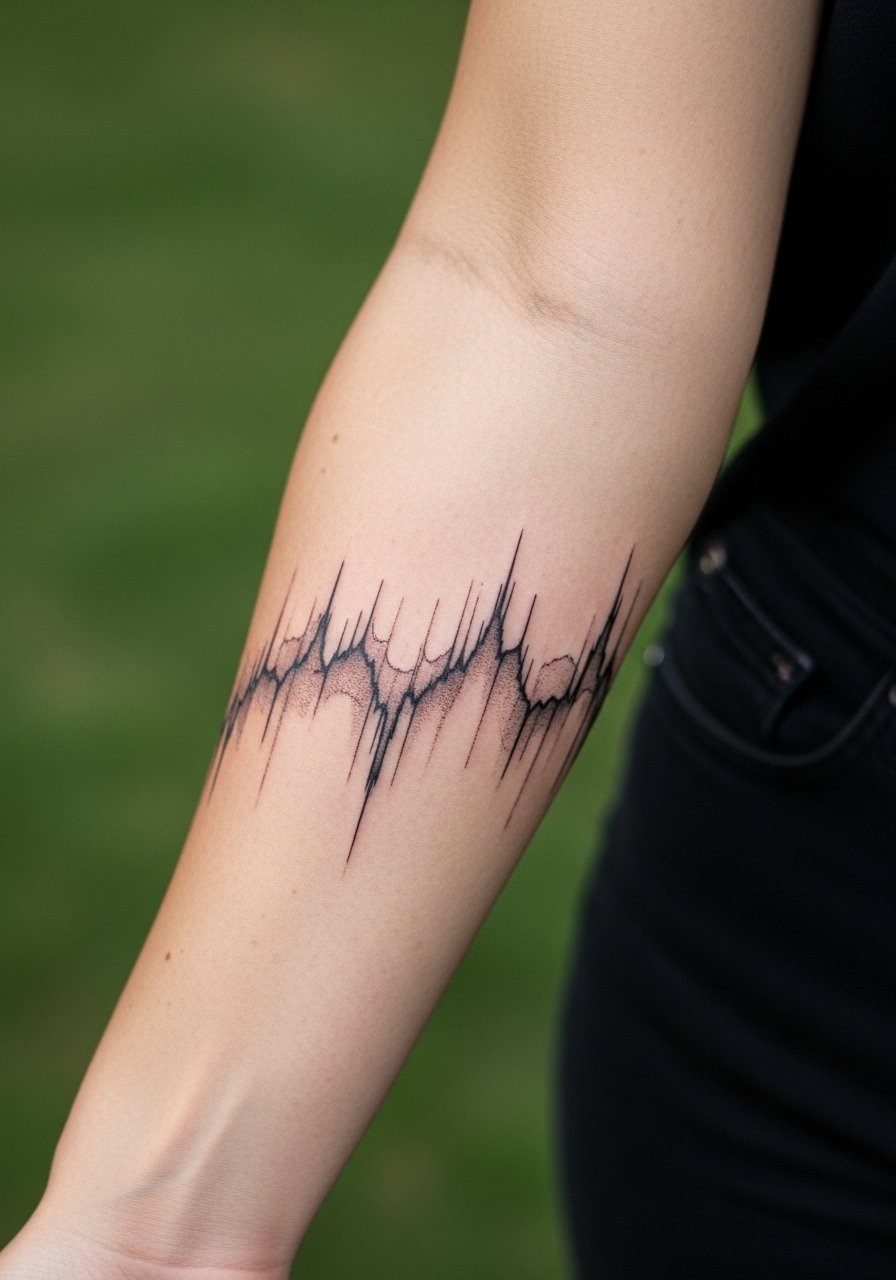
6. Fragmented Drumstick Wrist Band

A thin sketch wrap around the wrist reads like an offhand doodle turned permanent. Wrist skin takes a beating from washing and bracelets, so ask for slightly heavier linework and spacing between strokes to avoid merging. Expect a 30 to 60 minute session and touch-ups around year two for very fine work. People often rush to place intricate details around the wrist which then fade fast. For showing it off and protecting it during wear, pair with a thin chain bracelet that frames the band without rubbing directly on fresh lines.
Studio Day Picks
The forearm, wrist, and behind-ear pieces above need different prep than chest or ribcage work, and a few targeted items smooth the session and the first week.
-
Stencil transfer paper kit. Lets you preview exact placement for micro logos and script along the collarbone before the needle hits skin.
-
Topical numbing cream. Useful 30 to 45 minutes before a ribcage or sternum session when sensitivity spikes.
-
Thin protective film roll. Helps wrist and finger pieces survive early washing and friction from daily tasks.
-
Fragrance-free gentle body wash. Cleans without irritating fine line areas like the inner forearm.
-
Aquaphor healing ointment. Thin layers in the first few days lock in moisture for sketch lines without clogging fine needle channels.
7. Hand-Drawn Logo on the Calf
The calf gives room for vertical sketch marks and holds saturation well. It is lower on pain than ribs or sternum and ages with minimal blur if you avoid tiny crosshatching. In the consult, say you want the sketch to look quick and slightly rough rather than photo-real. That cue guides the artist to use whip shading and stipple rather than dense blocks. Session time depends on size, typically 45 to 90 minutes. People underestimate aftercare for lower leg pieces because rubbing from pants matters. For showing it off, wear culotte shorts that let the calf sit visible without chafing.
8. Pencil-Sketched Blurry Face Silhouette on Upper Back
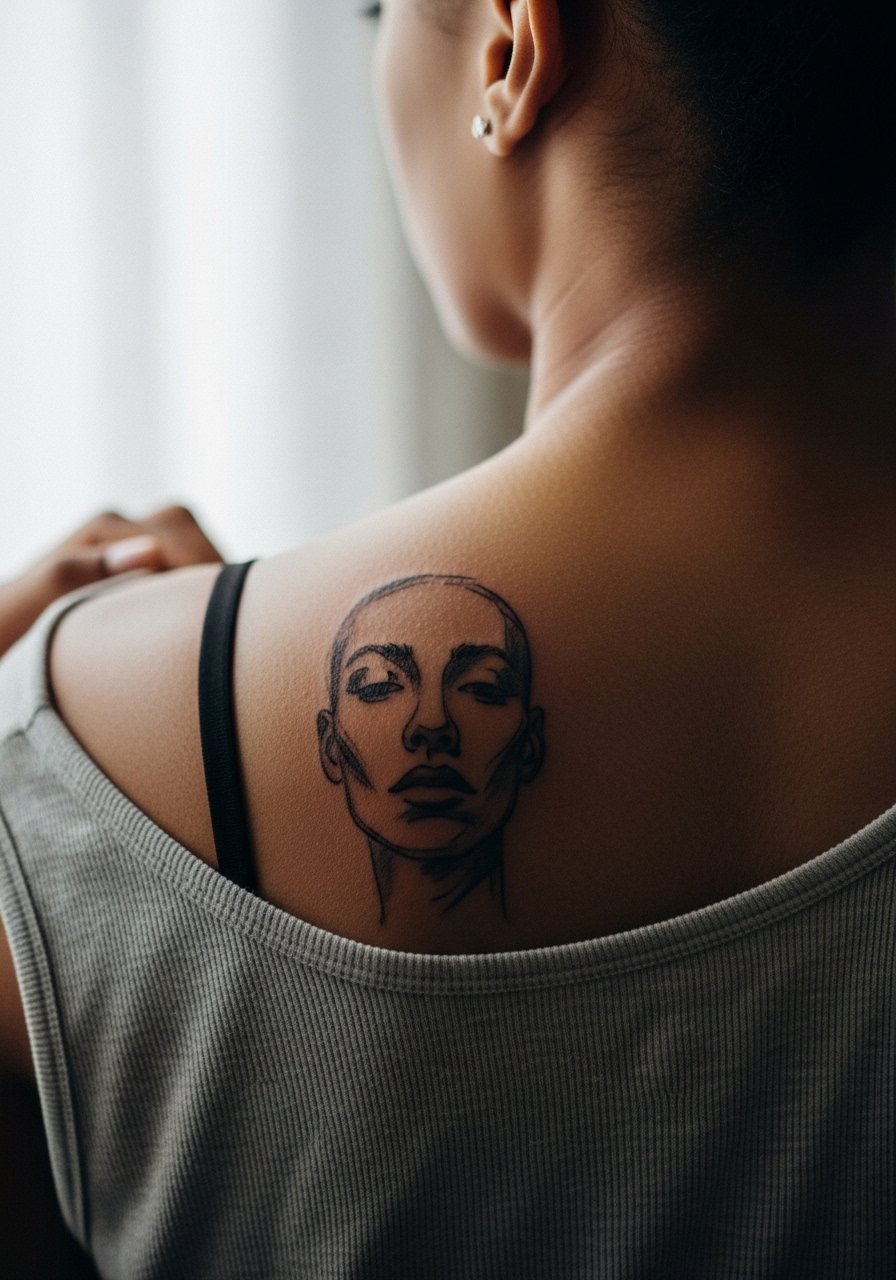
Upper back pieces read like a canvas and suit looser sketchy compositions. Tell your artist you want a gestural, pencil-like outline with faint broken strokes and gentle stipple for depth. The upper back is forgiving and low-risk for blowout, but lines can lose contrast if placed too close to the shoulder blades where stretching happens. Sessions might take 90 minutes or more depending on scale. A common mistake is cramming in tiny facial features that blur over time. For after the healed stage, open-back shirts or a racerback tank frame the silhouette without hiding it.
9. Scribbled Lightning Bolt on the Ankle
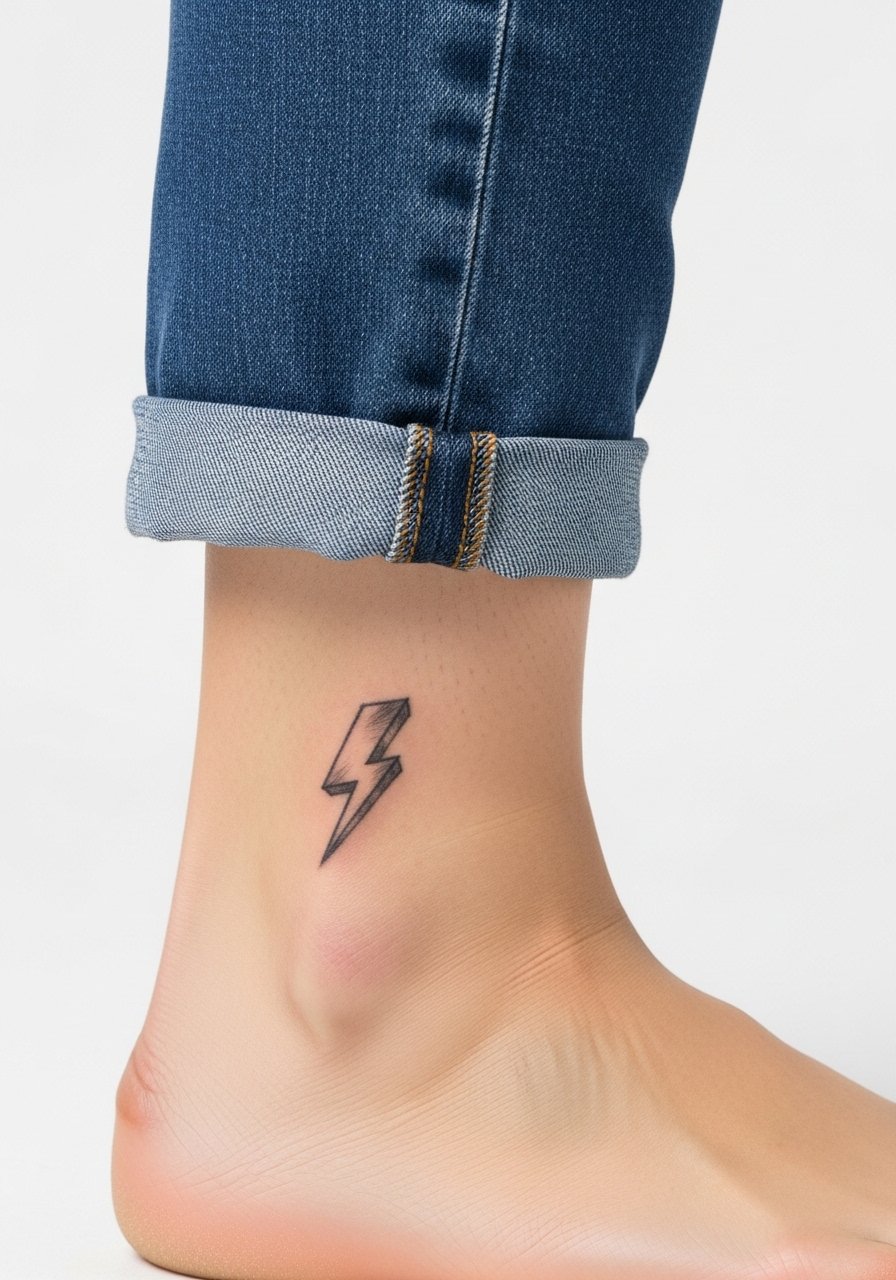
Ankle tattoos face constant friction from socks and shoes, which accelerates fading for hairline strokes. Ask for a slightly bolder outline and limit tiny internal detail so the bolt still reads after several washes. The session is short, typically under 30 minutes, but expect denser touch-ups in year two. A mistake is placing ultra-fine dash marks on the side of the ankle that end up blurring into a single line. Show it off with rolled pants and a pair of sandals that keep the tattoo visible without constant rubbing.
10. Quick-Sketch Microphone on the Side of the Neck
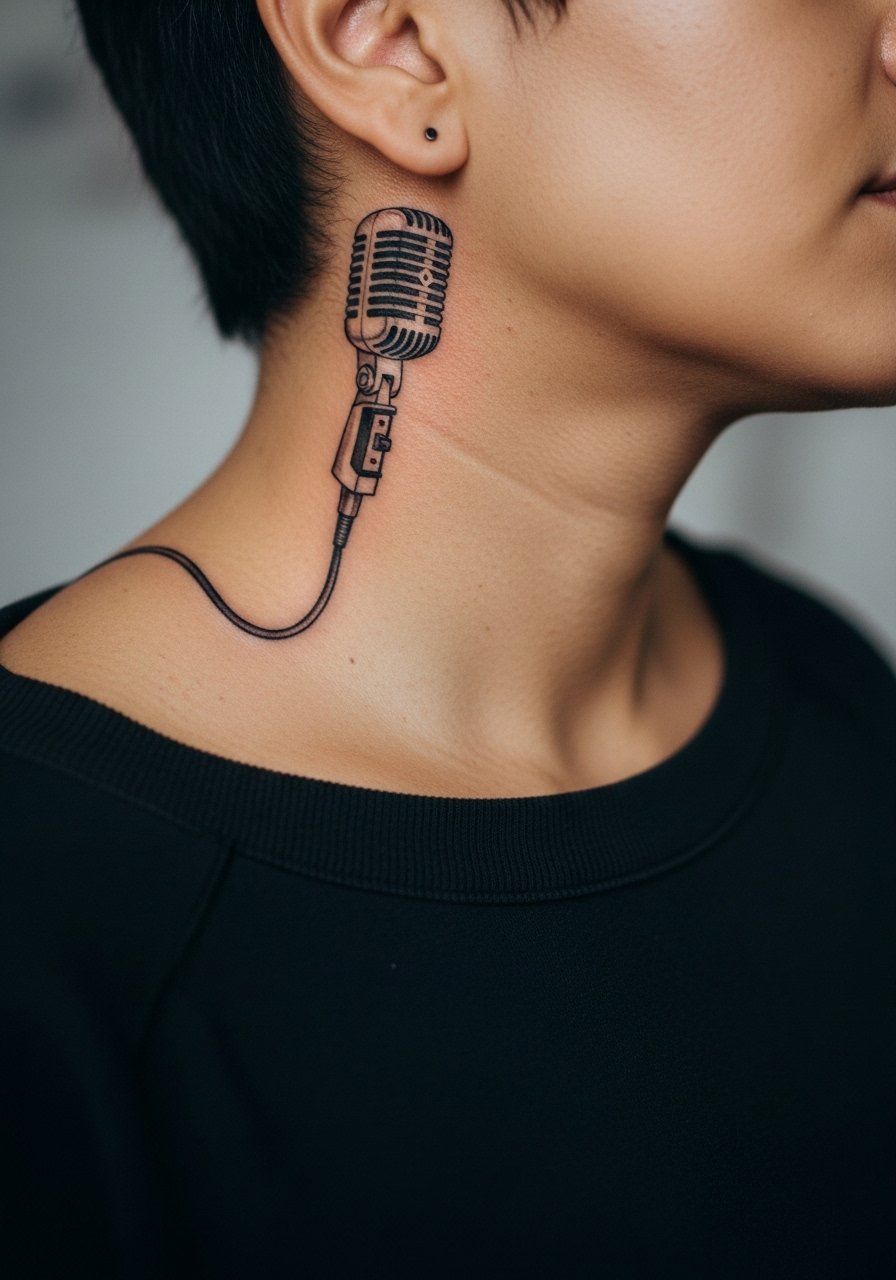
Neck pieces are visible and demand a candid conversation about career impact. In terms of technique, ask for loose linework that avoids heavy black fill across the thin neck skin. The side neck can blur if too much saturation is used. There is a debate in the community about whether sketchy neck work can stay subtle long-term. Some people accept early touch-ups. Expect a 45 to 75 minute session and a need for sunscreen once healed. For days you want to show the piece, a collared shirt worn open frames it while keeping options for coverage.
11. Torn-Edge Album Cover on the Thigh
The thigh is forgiving for sketch-style complexity and handles shading without much blowout. It is a great canvas if you want a larger sketch that still feels spontaneous. Ask your artist to simplify background textures into quick hatch marks so the focal lines stay clear. Sessions can be longer, often over 90 minutes, and sometimes split into two if you want breaks. A common mistake is asking for extreme micro-detail that the skin will soften into a muddied mass within a few years. For showing it, high-waisted shorts or a biker short pair well so the design sits just under your clothing line.
12. Raw Pencil-Style Portrait on the Sternum
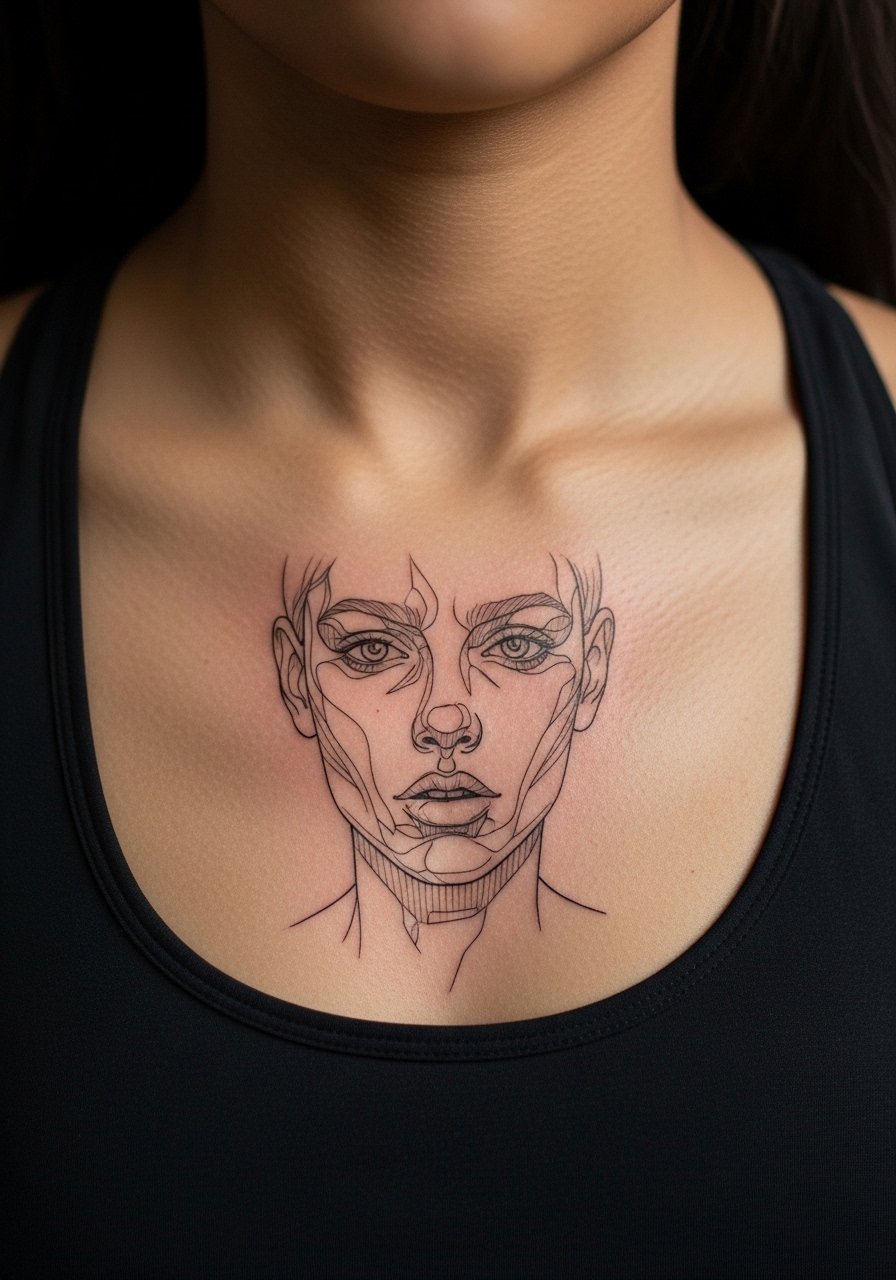
Sternum work is a sensitive session and demands an artist experienced with thin-skin placements. There is a real split in approaches. One camp avoids high-density fine lines near the sternum because the area heals unpredictably. The other camp will accept denser marks with the expectation of an early touch-up. Ask where your artist stands and whether they recommend spacing or certain shading techniques for longevity. Expect higher pain and a session of 60 to 120 minutes depending on size. For the appointment, wear a fitted sports bra so the artist can work and you can dress easily afterward.
13. Rough Sketch Eyeglasses Over the Chest Clavicle
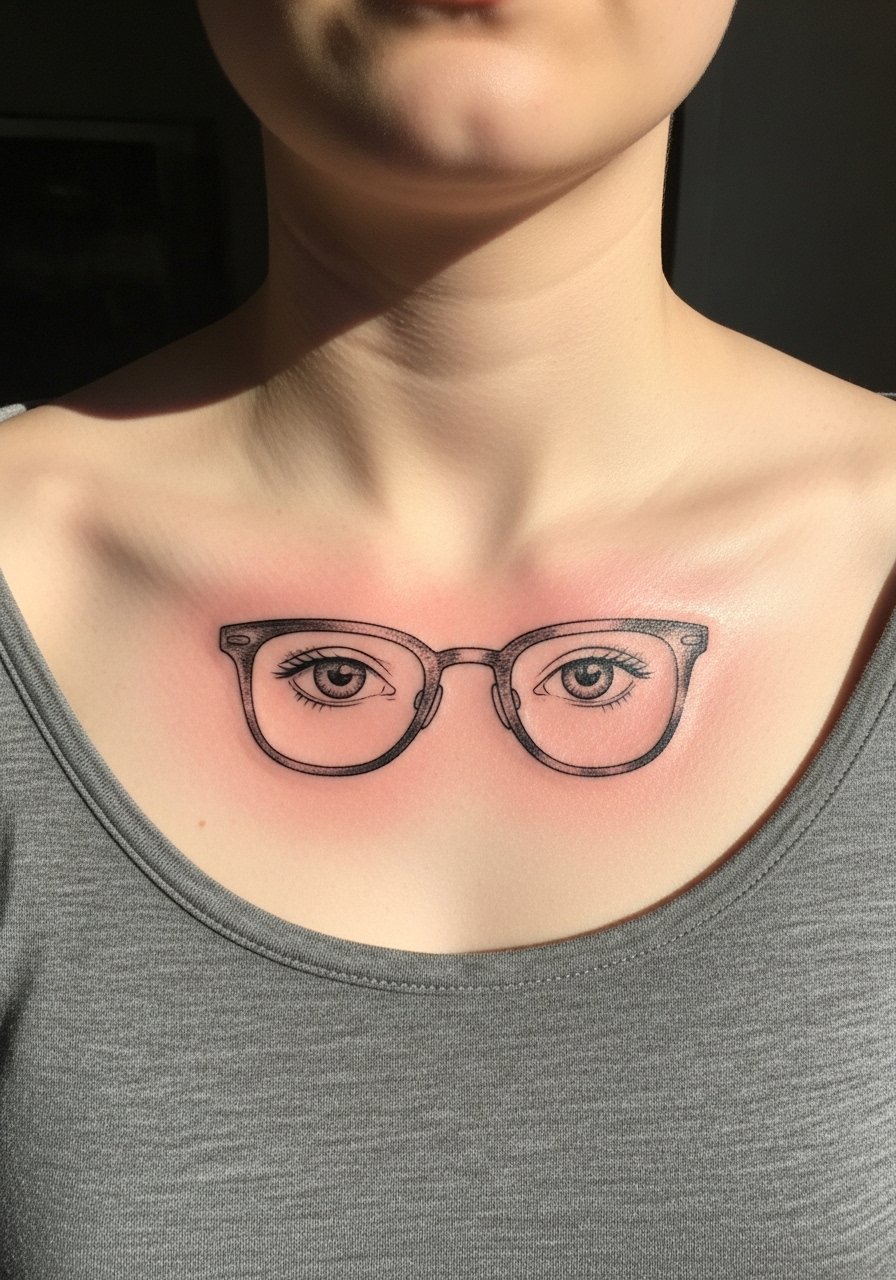
Placed near the clavicle, small sketch objects read as delicate statements. Request a slightly thicker outer contour with interior hatch marks to preserve detail over time. The upper chest is exposed to sun which dulls contrast, so plan for sun protection once healed. Sessions are usually quick, under an hour. A common mistake is asking for ultra-fine interior lines that vanish after a year. For styling, thin chain necklaces sit above without competing, and a thin chain pendant necklace keeps the focus on the sketch.
14. Frayed Micro-Compass on the Inner Bicep
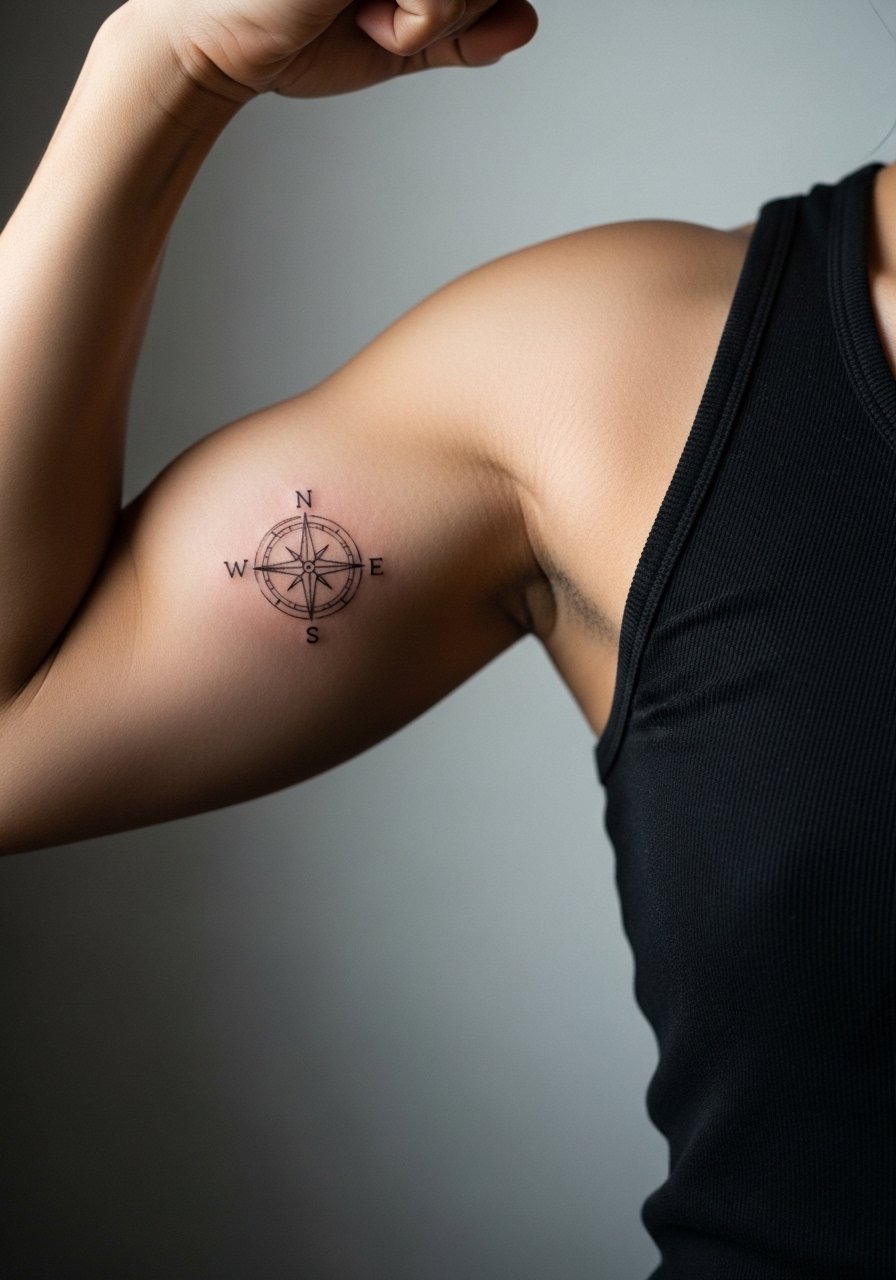
Inner bicep placements are hidden in everyday movement and can stay crisp if linework is spaced. The area is moderately sensitive and can be awkward to work on. During consultation ask for a compass with simplified cardinal marks and gentle stipple rather than dense black. The mistake people make is cramming compass roses with tiny text, which blurs into an unreadable mark. Sessions run 45 to 90 minutes depending on size. For the appointment, a loose tank top allows the arm to be positioned without fabric pulling.
15. Scribbled Band Logo Across the Shoulder Blade

Shoulder blade canvas suits horizontal sketch layouts and holds line contrast well. Ask your artist to keep the main strokes broad with light secondary hatch so the logo remains legible at a distance. The area is low pain compared with ribs, and sessions often finish in under 90 minutes. People sometimes want excessive micro-detail that looks good fresh but fades into a blur. For wear, open-back or racerback tops show the logo without rubbing against seams, try a racerback tank for summer events.
16. Lightly Etched Script Down the Spine
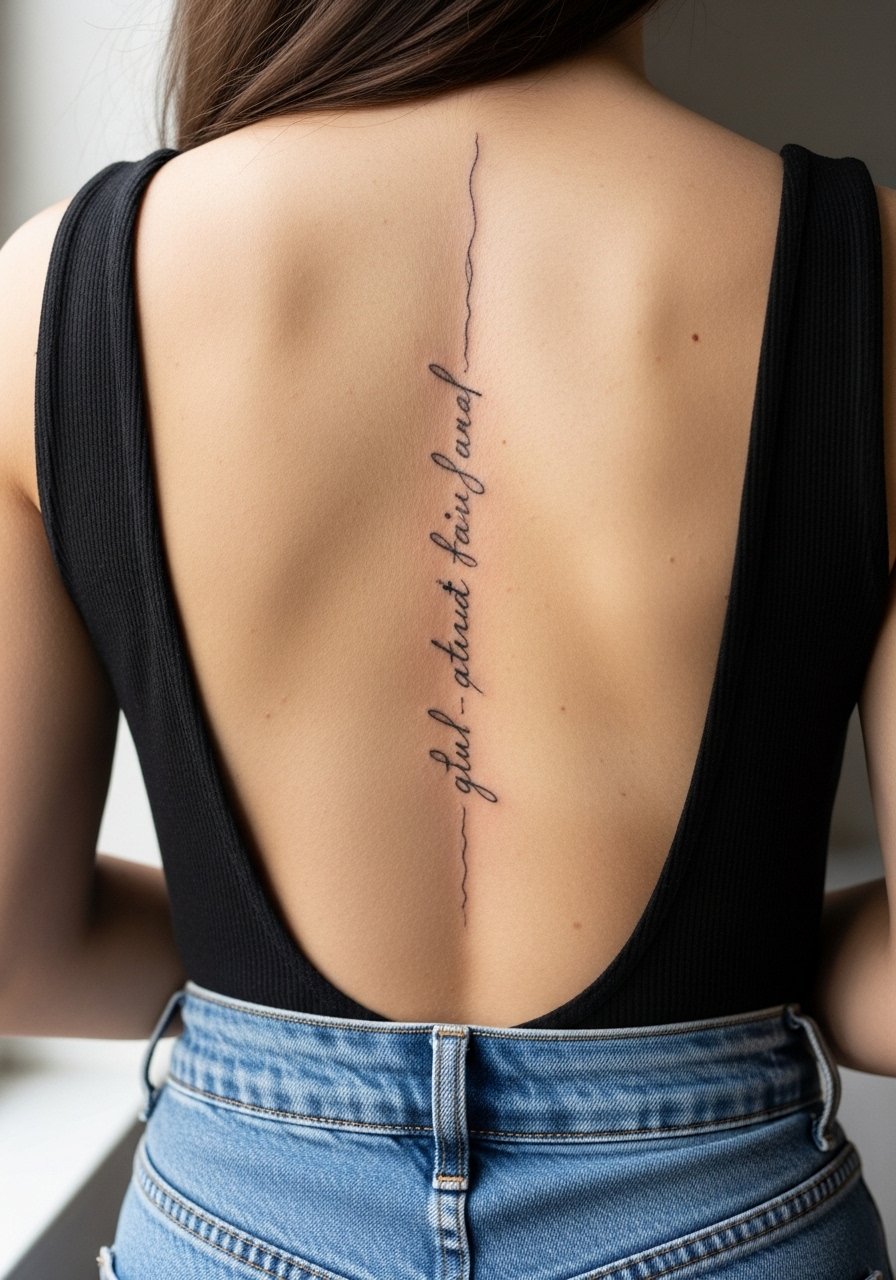
Spine scripts look striking but require careful spacing so letters do not compress with movement. Ask for a slightly open baseline and irregular stroke width so each word keeps its identity as the skin moves. Sessions can be longer and sometimes split to reduce discomfort. The common mistake is requesting very tight lettering which smudges over time. For nights out, open-back dresses highlight spine work, and a thin strappy dress keeps the line visible without pressure.
17. Jagged Skyline on the Forearm Wrap
A forearm wrap provides narrative flow and is forgiving for sketch lines when you space elements. Tell your artist you want a handheld pencil effect with intermittent broken strokes to mimic quick sketching. The forearm tolerates this well, but avoid tiny crosshatching near the wrist where blending can occur. Sessions run 60 to 120 minutes depending on wrap complexity. People sometimes ask for too many buildings in a tight band which blurs. For showing it off, roll sleeves and wear a loose button-down shirt so the skyline reads clearly against fabric.
18. Chalky Constellation on the Finger
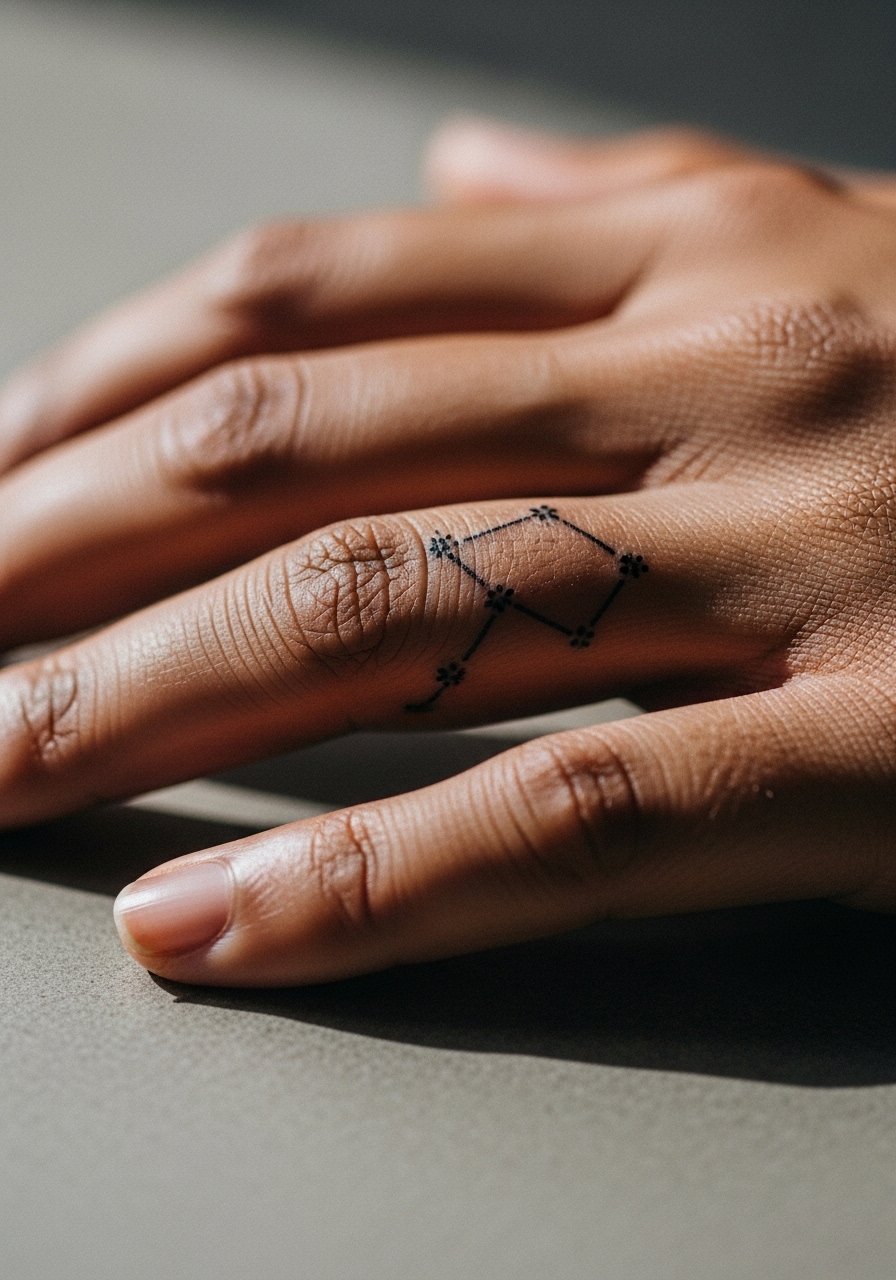
Finger work is trendy but carries a high risk of early fading and distortion because of constant use. If you want the chalky sketch look, request fewer dots and slightly thicker connector lines to withstand washing and typing. Expect touch-ups sooner than other small placements, often within one to two years. Sessions are short, under 30 minutes, but plan for maintenance. A common mistake is asking for dense dot clusters on the fingertip that disappear. For subtle show-off, a pair of thin stacking rings complements the constellation without rubbing on fresh ink.
19. Coffee-Stained Cassette Tape Over the Hip
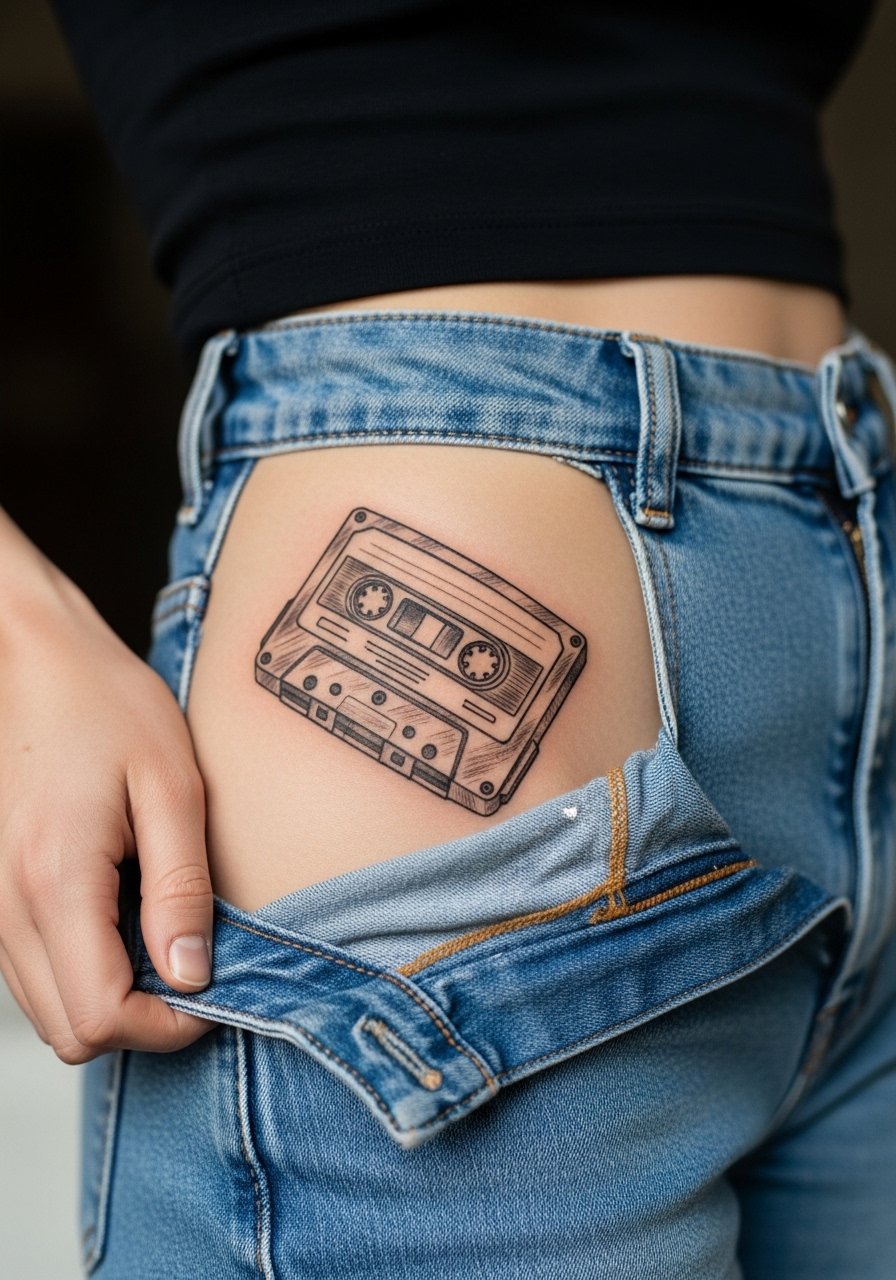
Hip pieces let you carry larger sketch motifs that remain private or shown selectively. The skin here handles motion well but can be affected by waistbands, so placement just outside seams matters. Ask your artist to avoid heavy black fill where clothing rubs. Sessions for a medium hip piece run 60 to 90 minutes. People often place the design too low under tight waistbands which leads to irritation while healing. For showing, pair with mid-rise jeans and a tucked tee or high-waisted shorts to keep the art visible and safe.
20. Loosened Sketch Eagle on the Shoulder Cap
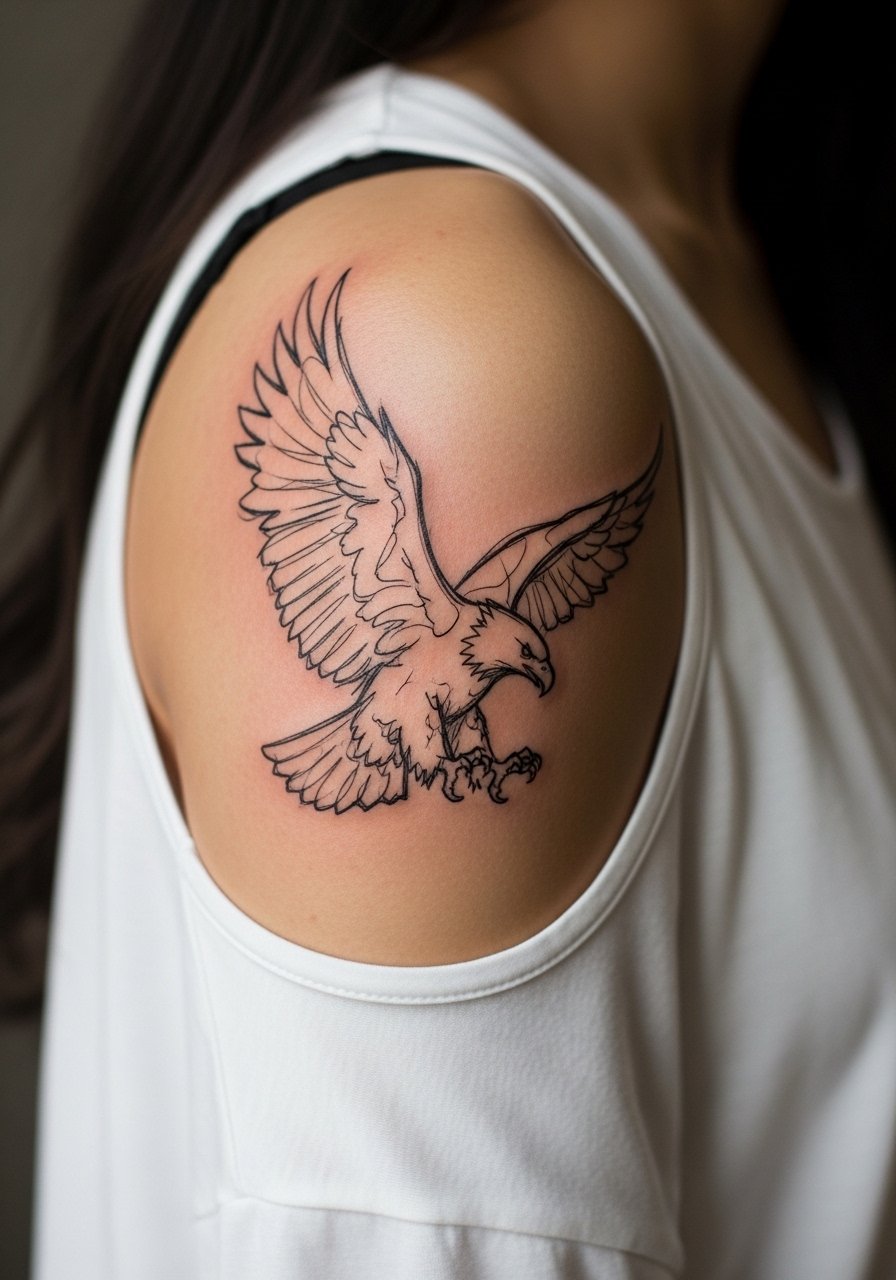
The shoulder cap is forgiving and great for freehand sketch energy with motion in the feathers. Ask for bold anchor strokes on primary feathers and lighter scribble marks elsewhere, which helps the design maintain contrast. The area is low-to-moderate pain and holds well over time. A mistake is requesting super-dense linework near the joint which can fade unevenly with movement. For casual outfits, a loose tank top frames the piece while avoiding strap friction.
21. Quick-Handed Band Symbol on the Knuckle
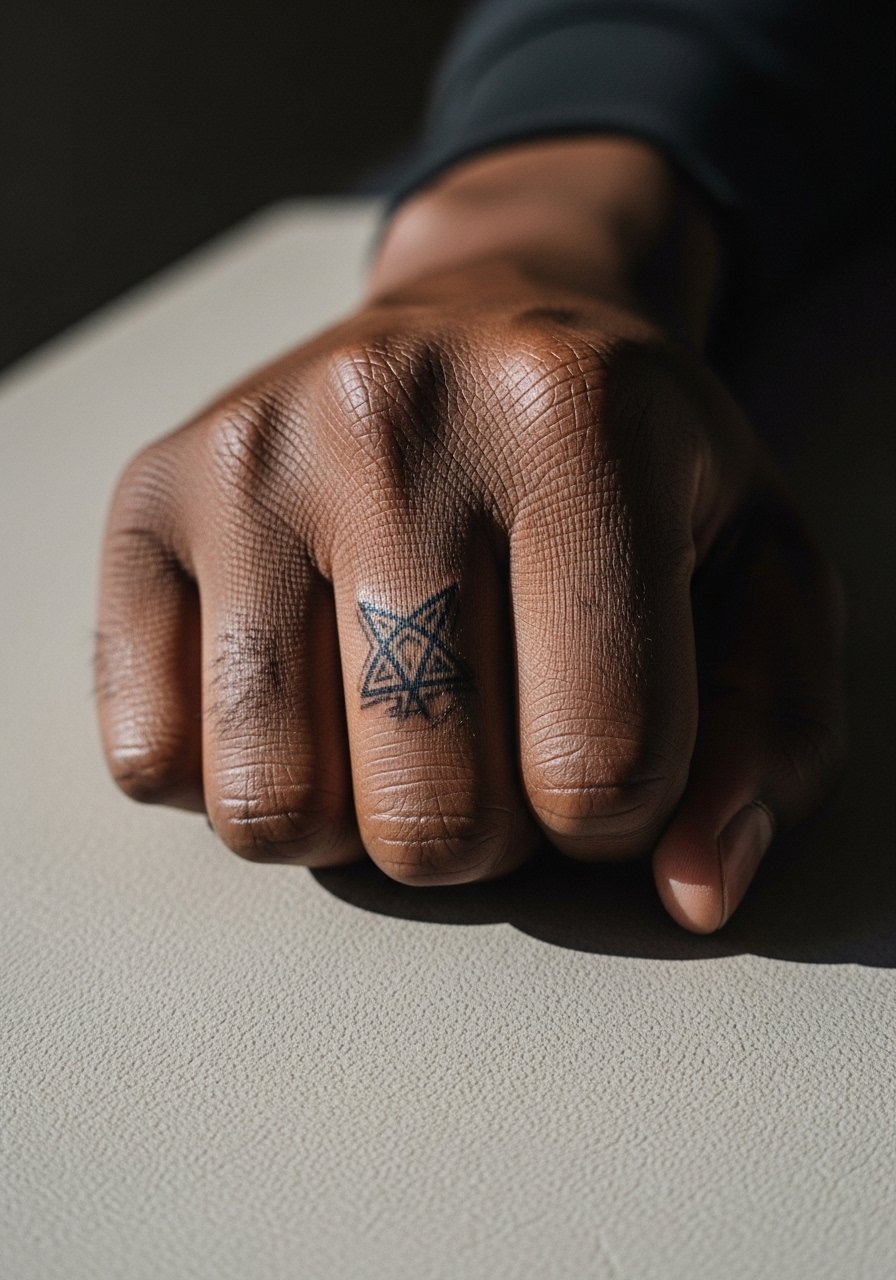
Knuckle pieces are bold in a tiny package and age fast because of constant movement and contact. Ask for thicker minimal marks rather than intricate detail so the symbol remains legible. Most artists will warn you about faster fading and likely recommend small, regular touch-ups. Sessions are short but expect a different healing rhythm than forearm work. A common mistake is requesting script across knuckles which blurs quickly. For wrist and hand balance, pair the knuckle symbol with a simple ring or bracelet, but avoid anything that rubs the fresh area during the first week.
Frequently Asked Questions
Q: Will sketch-style fine lines on the ribcage blur faster than on the forearm?
A: It depends on placement and spacing. Ribs move with breathing and the skin stretches more, so super-fine lines often need touch-ups sooner than forearm work. Ask your artist whether they recommend slightly bolder lineweight or increased spacing to preserve the sketch look.
Q: How should I describe the "sketch" effect to an artist so it does not look like shaky linework?
A: Bring clear references that show confident, intentional broken strokes and stipple shading. Tell the artist you want controlled wobble and light hatch marks rather than random jitter. Most artists will adjust needle depth and spacing to translate that aesthetic properly.
Q: Are wrist and finger sketch tattoos worth the maintenance?
A: They can be if you accept likely touch-ups within two years. The trade-off is visibility and personality against a higher maintenance schedule. If you want lower upkeep, ask to thicken exterior strokes slightly.
Q: Can I hide a sternum sketch piece for work if needed?
A: Yes. Sternum placements are easy to cover with a fitted top and often stay private under normal clothing. For the session, plan to wear a sports bra so the artist has access and you can dress quickly afterward.
Q: What should I wear to a ribcage or sternum session for comfort and access?
A: A zip-up hoodie or a fitted sports bra makes access simple and keeps you comfortable after the session. If you prefer looser options, a button-down you can lift just at the area without full exposure works too.
