
Fine line butterflies are everywhere on saved boards, and the trend looks gorgeous on a feed. The tricky part is that a style that photographs razor-sharp fresh can soften fast if placement and line weight are off. I leaned into real healed examples and forum gripes to pull together tiny designs that actually age well, plus what to tell an artist at the stencil stage.
1. Minimalist single-line butterfly on the inner wrist
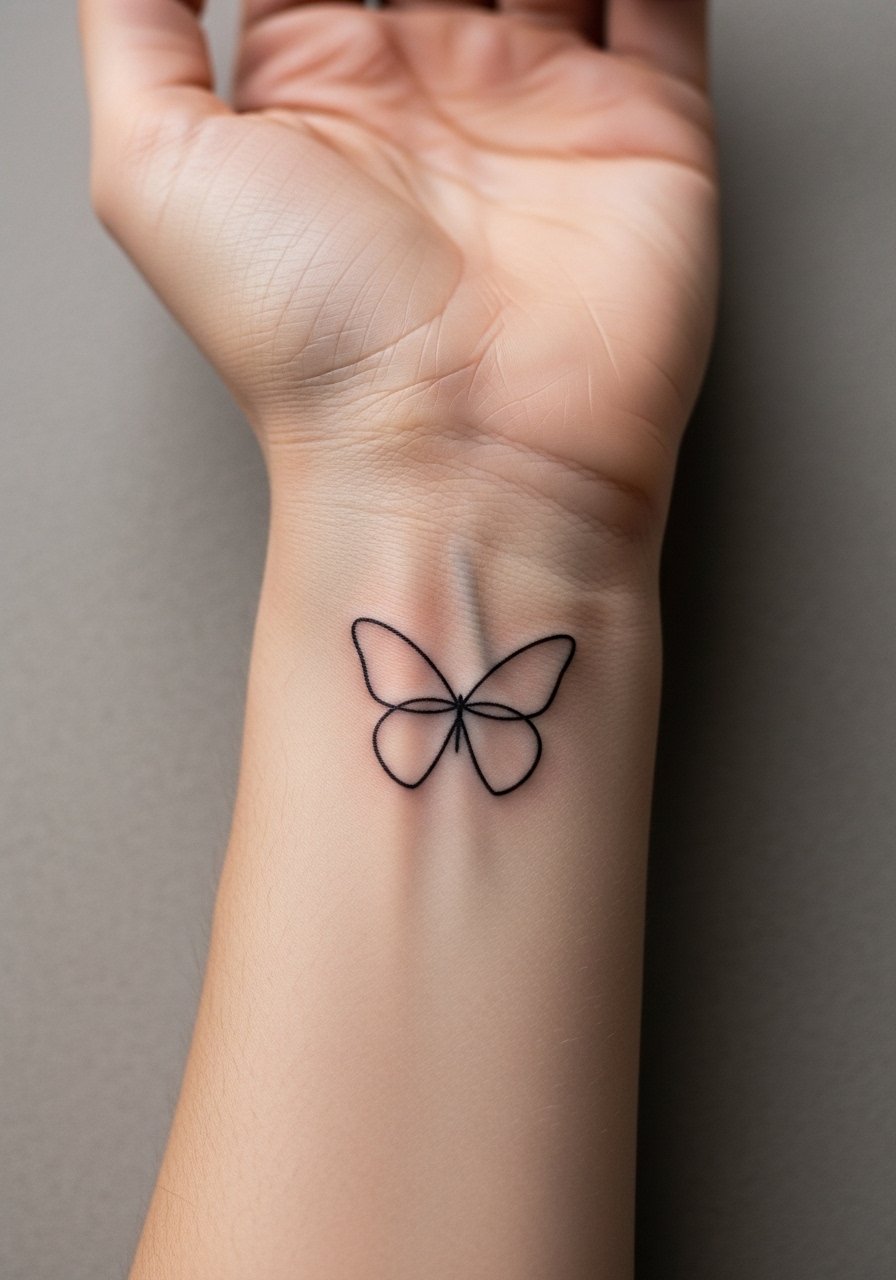
I recommend this for first-timers who want a small symbol that reads in close. Fair warning, the inner wrist rubs against sleeves and soaps, so pick a slightly bolder outline than the tiniest single-needle option if you want less blur over two years. Tell your artist you want single-line flow with 1.5 to 2 mm primary strokes and a touch-up included at booking. Session feel is brief and sharp near the bone. For showing it off, try a linen blouse rolled cuff that frames the wrist without covering it.
2. Precision fine line butterfly with wing veins behind the ear
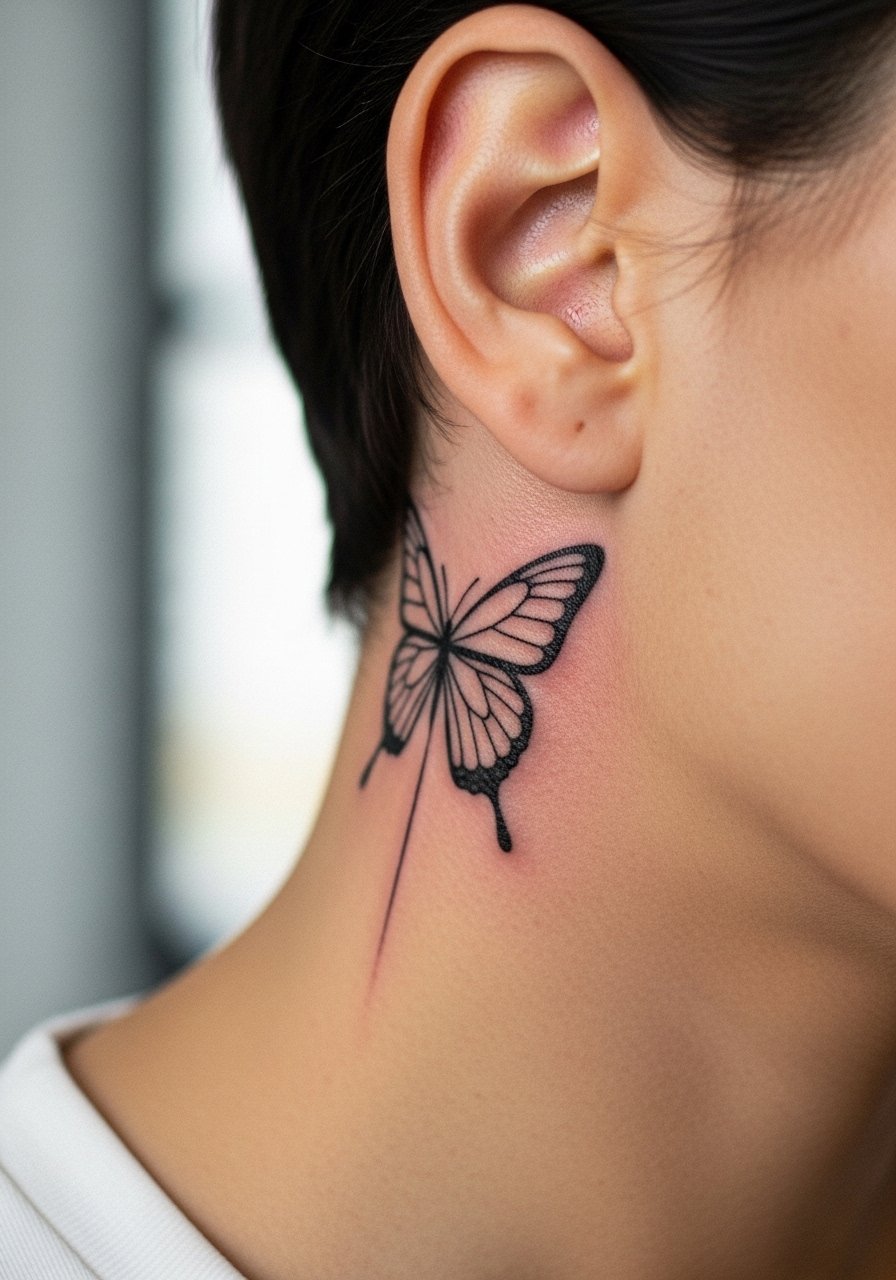
Behind-the-ear micros need single-needle patience. Artists split on numbing for this zone, so ask the artist how they handle pain management before booking. The session is quick but requires steady handwork to keep veins crisp. Over time the lines can fade faster if the needle depth is inconsistent, so request healed portfolio photos of the artist's behind-the-ear work. For the reveal, side-swept hair or a silk scarf works. Pack a silk hair scarf for styling after the session.
3. Micro-realism Monarch on the collarbone
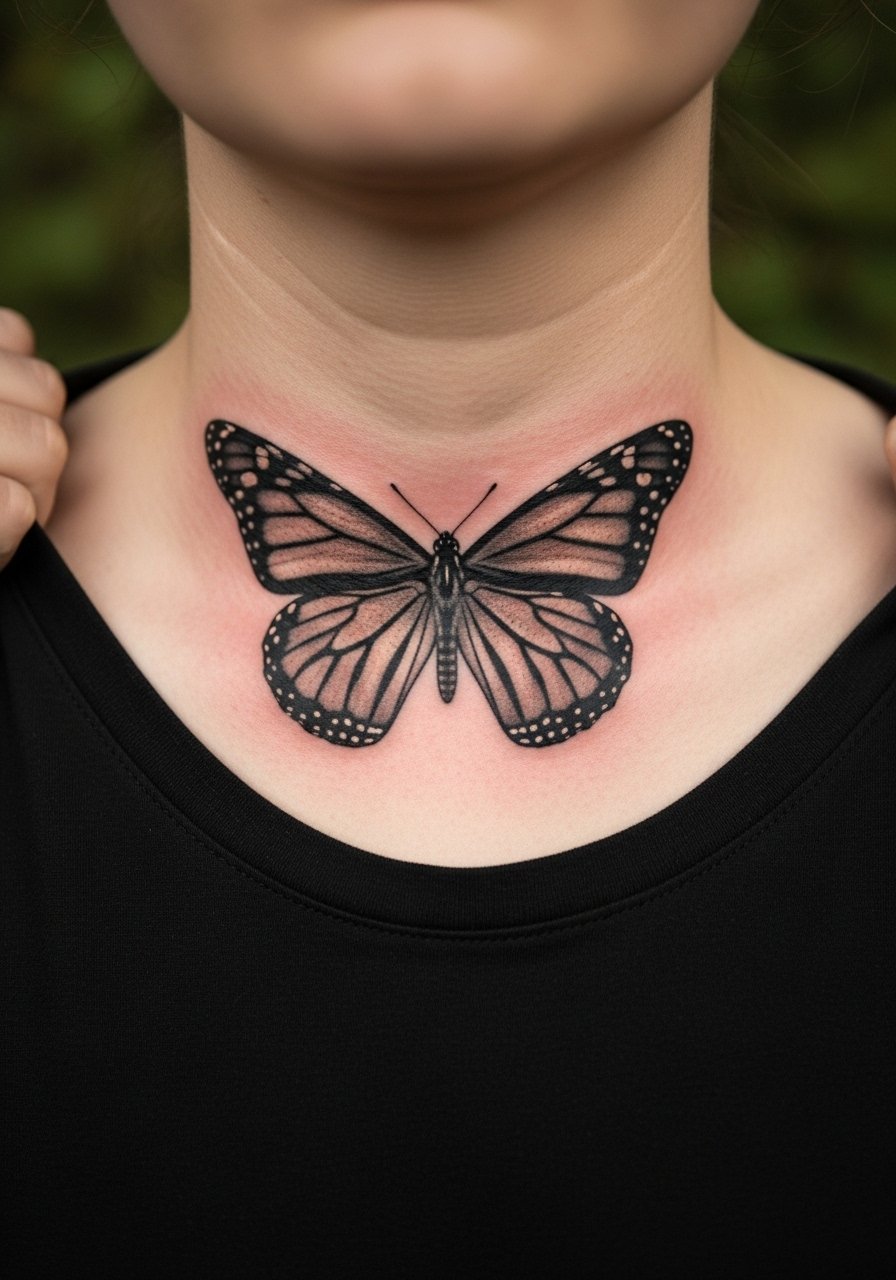
A micro-realism species piece demands subtle shading and confident stipple work. Expect a longer session than an outline, but still under two hours for 2 to 3 cm. The collarbone is low-pain compared with ribs, but it is visible and reacts to sun, so plan on sun protection once healed. Ask for reference shots showing healed tone on similar skin. For outfits, an off shoulder sweater or strapless top highlights the artwork and keeps straps from irritating the area during healing.
4. Symmetrical sternum butterfly pair across the midline
Sternum pairs read like a private composition that reveals with certain clothes. Pain is higher here for many people, and sessions often come in two parts to let the skin settle. Artists split on technique for this canvas. One camp says the thin skin and movement blur fine line quickly. The other camp says careful spacing and depth keep symmetry intact. Ask your artist which camp they favor and to show healed sternum examples. For session wear, choose a sports bra wireless or front-open shirt so the artist has clear access.
5. Tiny floating butterfly silhouette on the ankle
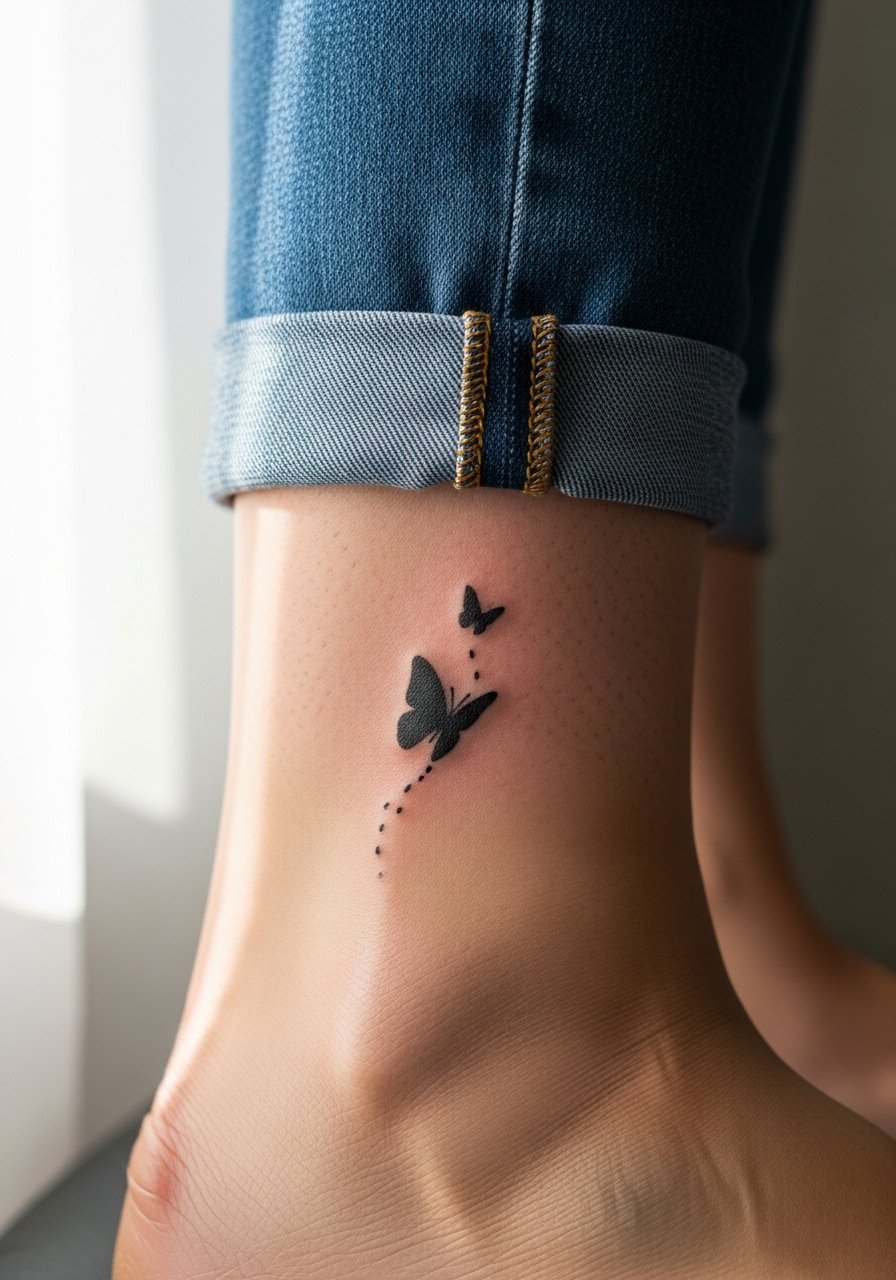
Ankle pieces look charming but face constant movement and shoe friction. For this silhouette, ask for a slightly thicker outline and deeper initial saturation to fight early fade. The session is quick and sharp, and healing can be tricky if socks or straps rub. For showing it off in summer, strappy heeled sandals pair cleanly and keep the tattoo visible. Consider booking touch-ups proactively in the first 12 to 18 months.
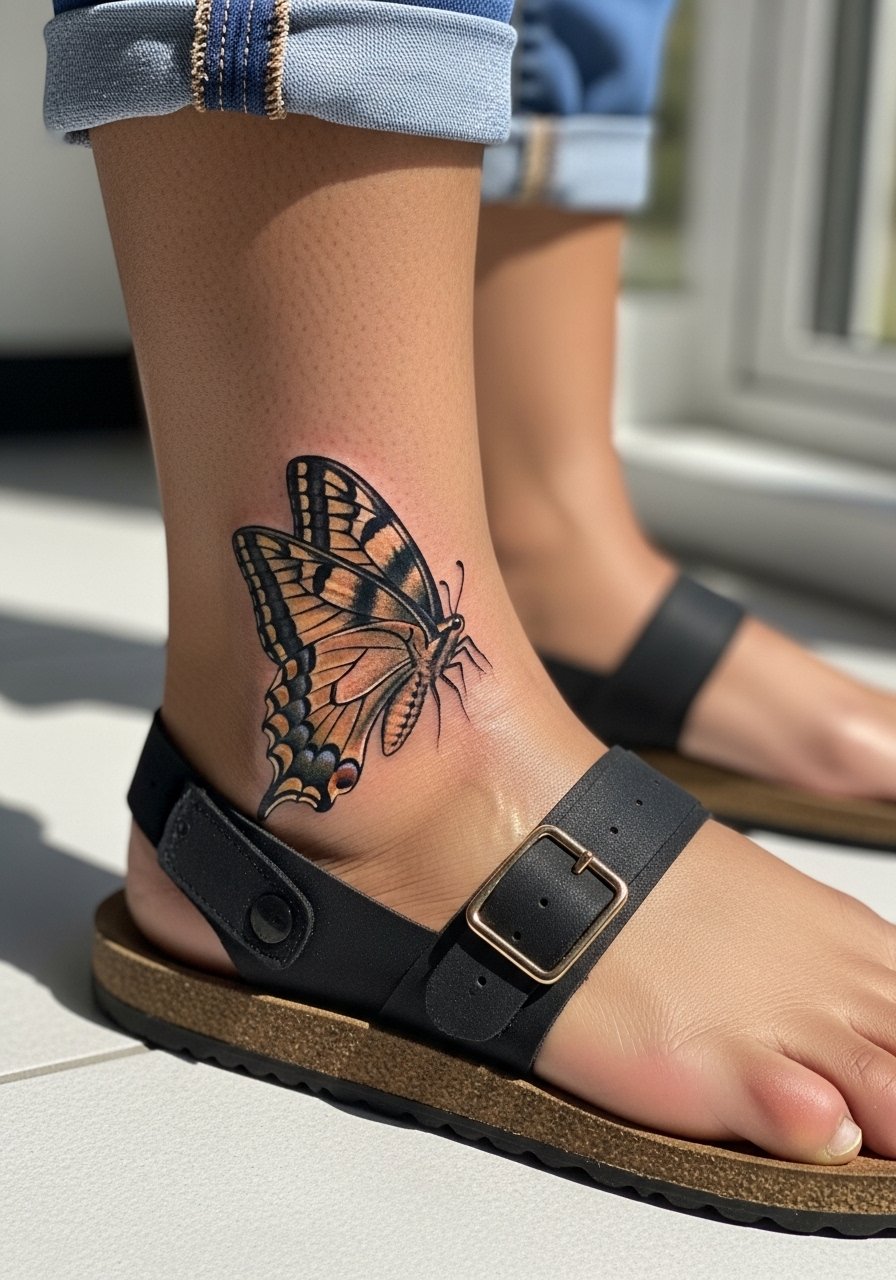
6. Single-needle swallowtail on the outer ankle

The swallowtail texture benefits from precise single-needle veins but the ankle demands respect for movement. If you want species accuracy, tell your artist you prioritize wing texture over extreme tiny filigree. Expect a one-session job under two hours but plan for a touch-up if the edge work softens. During the appointment wear loose jogger pants you can pull up without pressure.
Pre-Session Essentials
The wrist and ankle pieces above heal under different stresses than collarbone or sternum work, so a few targeted items smooth the experience and the first week.
-
Indie single-needle aftercare balm. Thinner balm textures work well on micro single-needle pieces to avoid trapping moisture on tiny channels.
-
UK breathable tattoo film. A lightweight film can protect small ankle and finger tattoos from edge lifting while still allowing airflow.
-
Australian tea tree tattoo spray. Diluted sprays are picked by some clients for gentle antibacterial action on tiny spots that see a lot of contact.
-
Hustle Butter Deluxe. Used by some people as an alternative to heavier ointments during the first week, especially on fine line work where clogging is a concern.
-
Aquaphor healing ointment. A thin layer in the initial days can help on small pieces that would otherwise scab heavily, particularly on sites prone to friction.
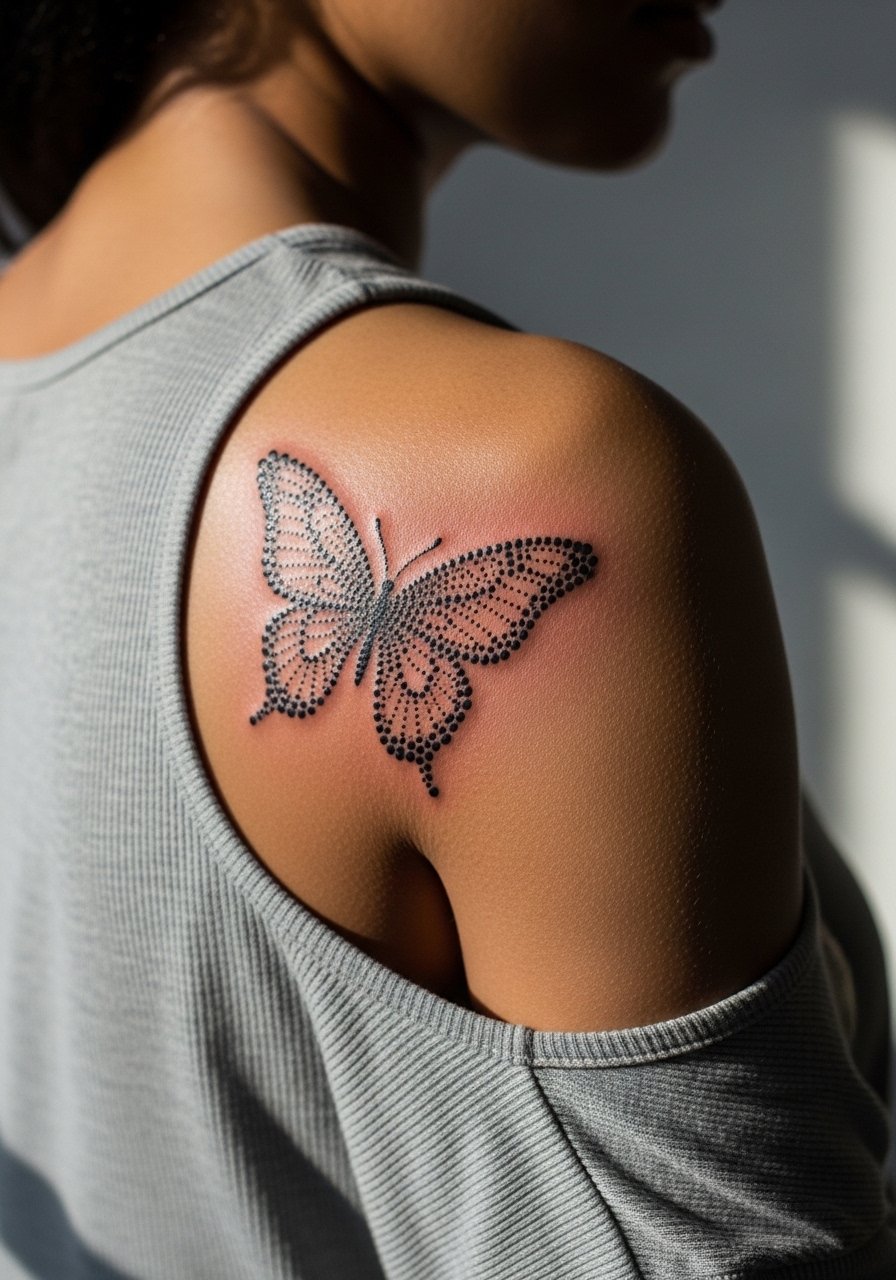
7. Negative space butterfly wings on the shoulder blade
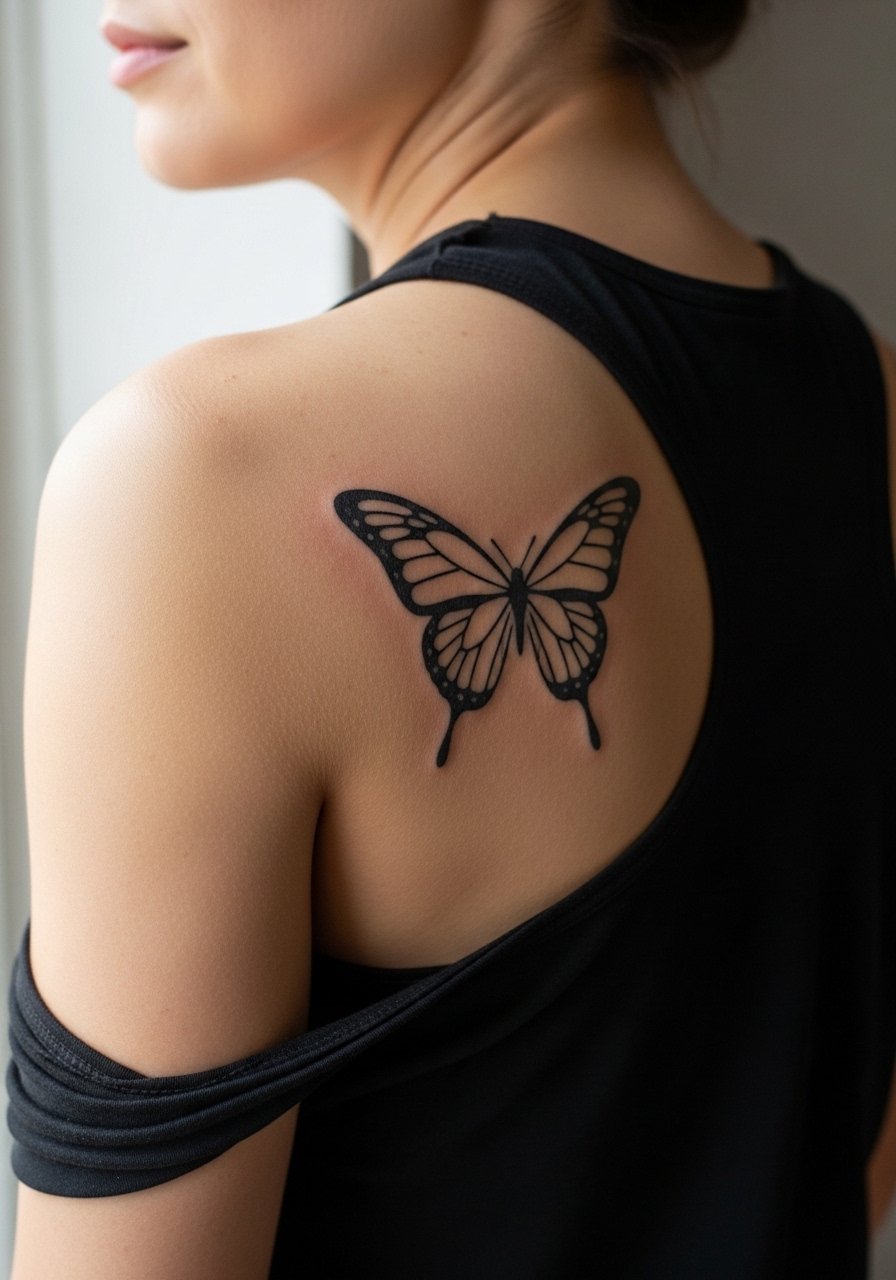
Negative space uses the uninked skin as part of the design, which helps the wings read even if fine lines soften. The shoulder blade is low-friction and usually keeps crisp edges for longer than wrists. For the session wear a racerback tank black you can pull aside so the artist has full access without bra straps in the way. Ask your artist to map negative space explicitly on the stencil so you can approve the gaps before any needle touches skin.
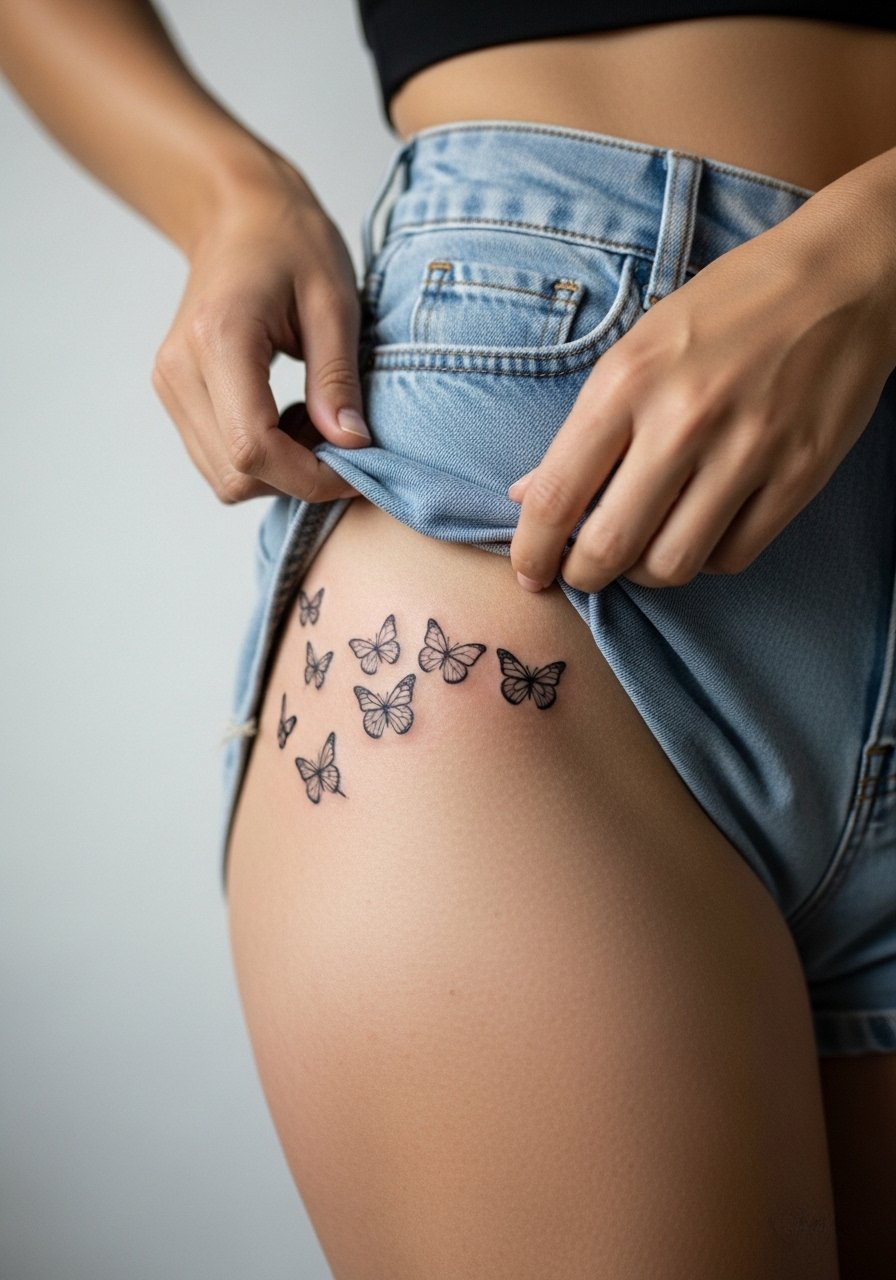
8. Coquette-style butterfly cluster on the hip

Hip clusters let you play with scale and layering, but weight changes can affect placement over time. If you expect body changes, position the cluster where fabric lines sit rather than on movable soft tissue. The artist will likely suggest multiple small stencils to balance the group. For showing off, pair the piece with high-waisted denim or a cropped top that reveals the cluster without tugging the skin during healing.
9. Micro butterfly on finger joints that moves with gestures
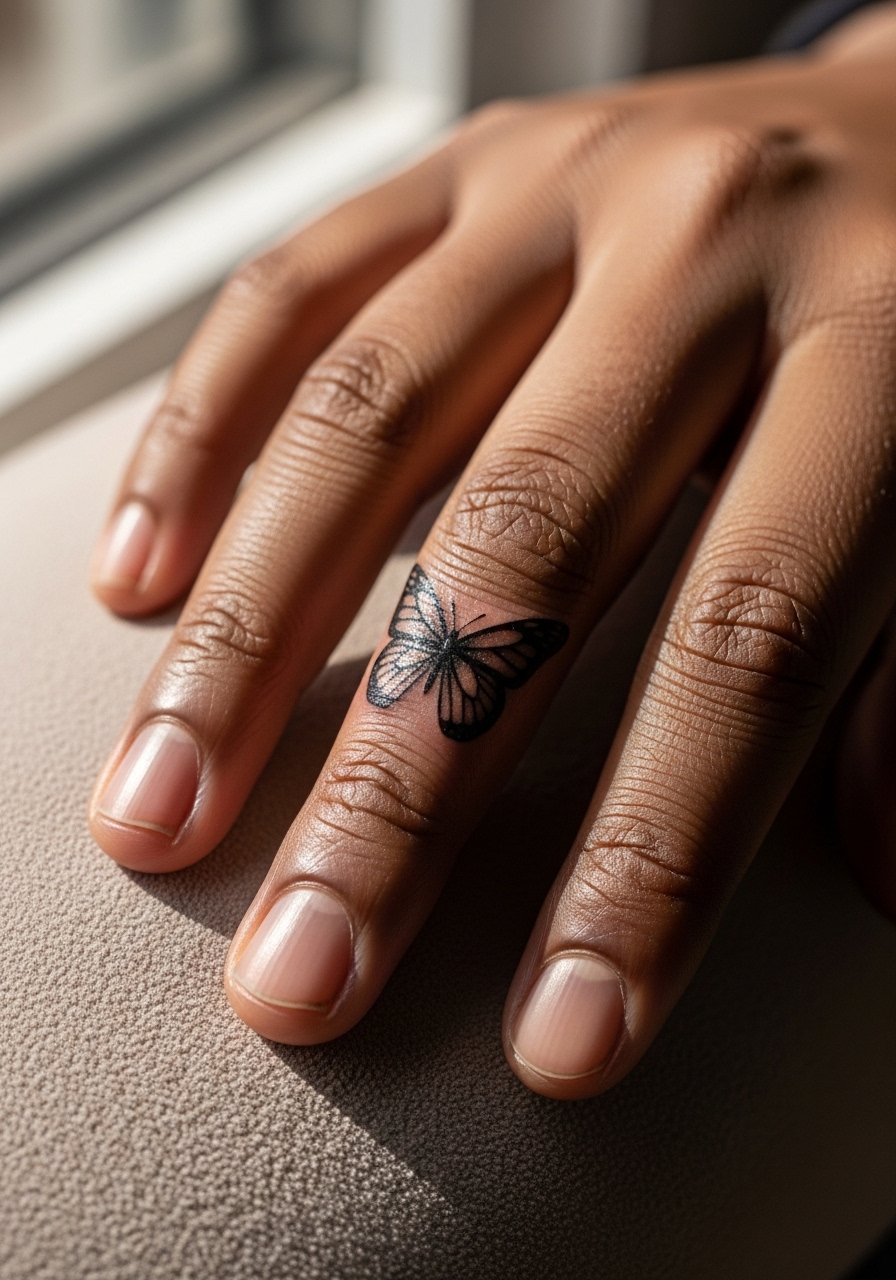
Finger joint work reads intimate but is high-risk for early fading and blowout because of thin skin and constant use. The common mistake is asking for overly fine veins; instead ask for slightly bolder primary strokes with crisp negative spacing to preserve the silhouette as it ages. Expect yearly touch-ups, and go in knowing healed photos matter more than fresh ones when vetting artists. For the session, remove rings and show up with hands clean. A neutral manicure helps when showing it off, try a nude nail polish set.
10. Butterfly effect chain of linked wings along the inner forearm
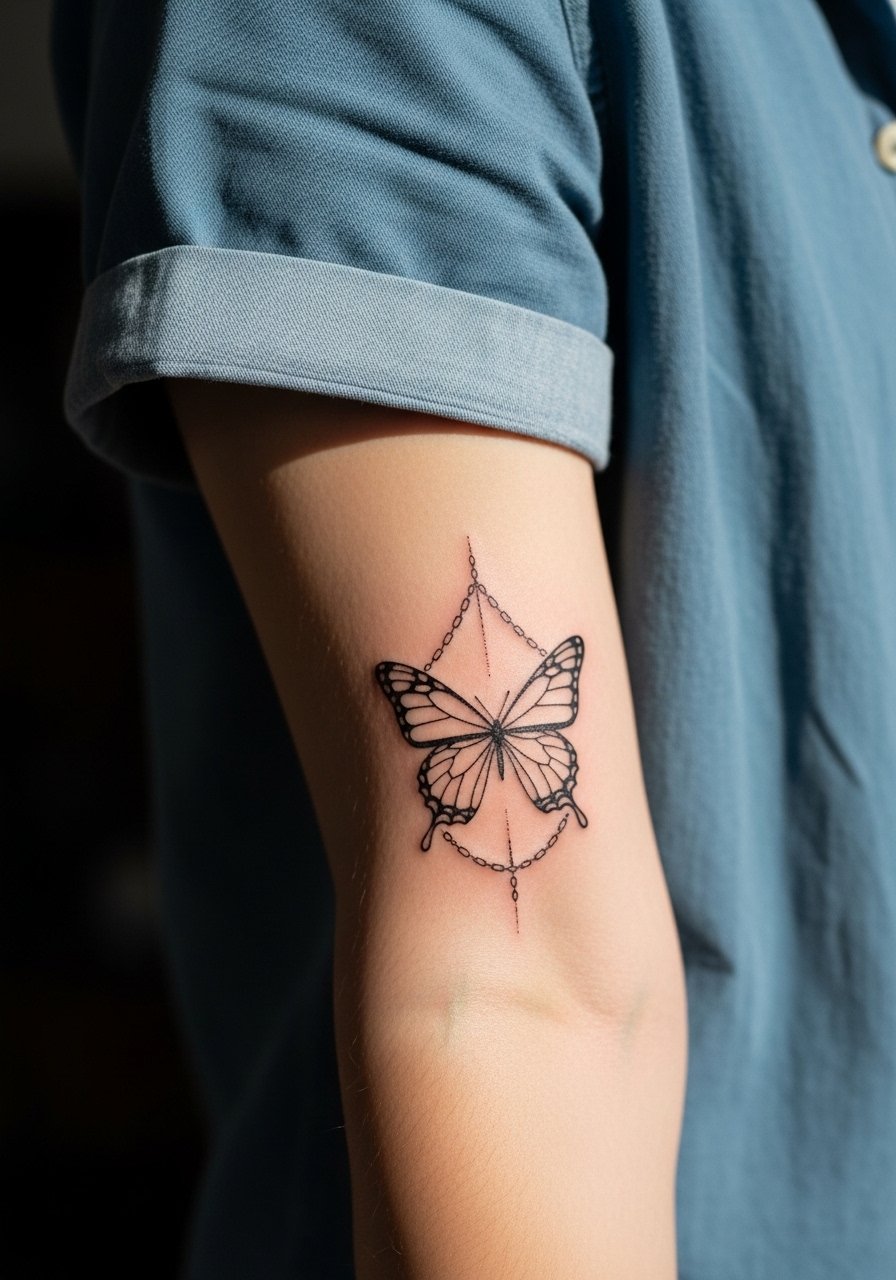
Chains of small linked wings create narrative flow and wear well on forearms because the skin is stable. Tell your artist you want consistent spacing of about 1.5 to 2 cm between elements so each wing breathes. The session time is moderate and pain is low. For showing this piece, rolled sleeves and a linen chambray shirt frame the chain while keeping the skin comfortable during healing.
11. Subtle outline butterfly with a dotted trail on the back of the neck
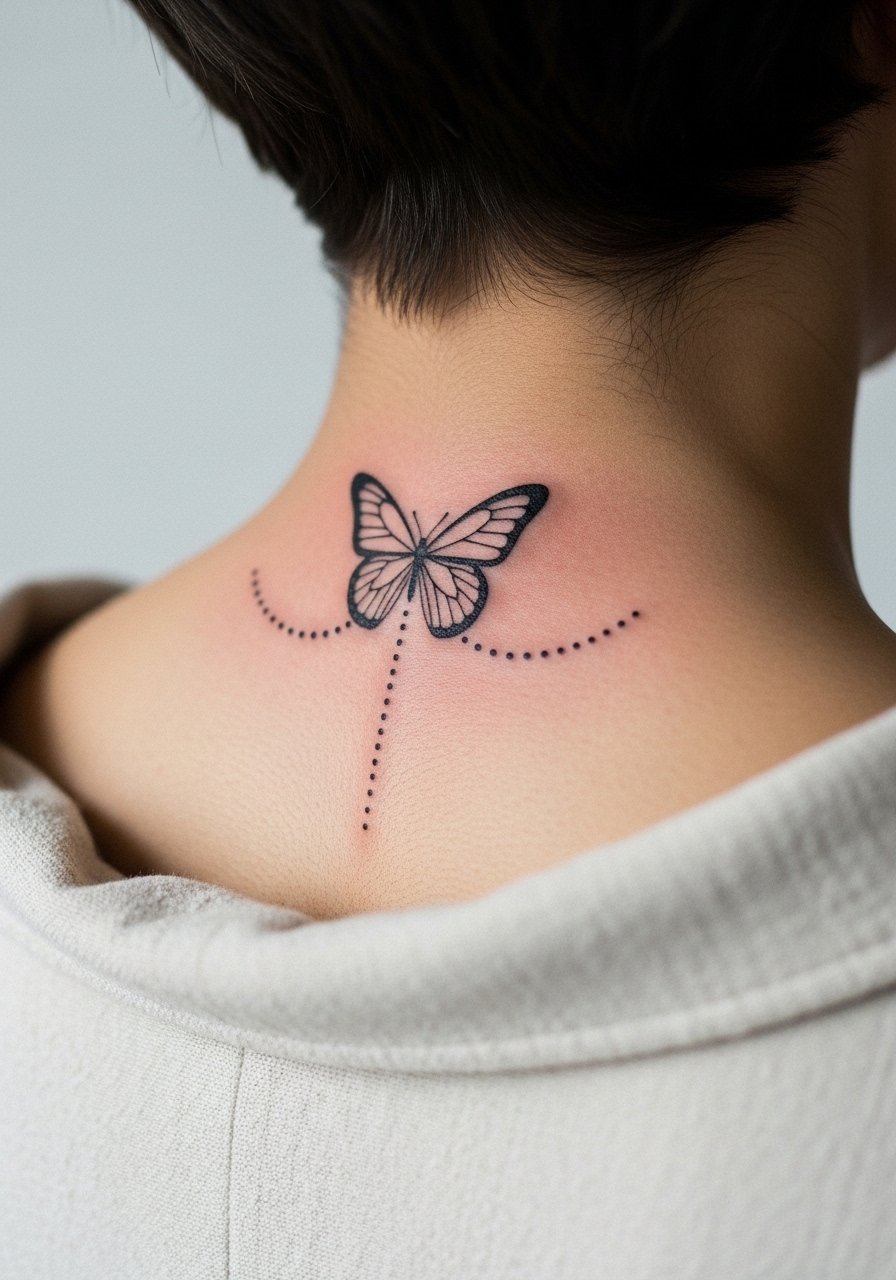
The back of the neck is a sweet spot for a flight path motif that reads when hair is up. Dot trails add movement and hide minor softening that happens with thin lines. Plan for a quick session and tell your artist you want the dots spaced to mimic natural flight rather than a rigid curve. For show-off styling try a wide-neck shirt so the trail peeks above the collar.
12. Organic textured wing micro-butterfly on the inner thigh
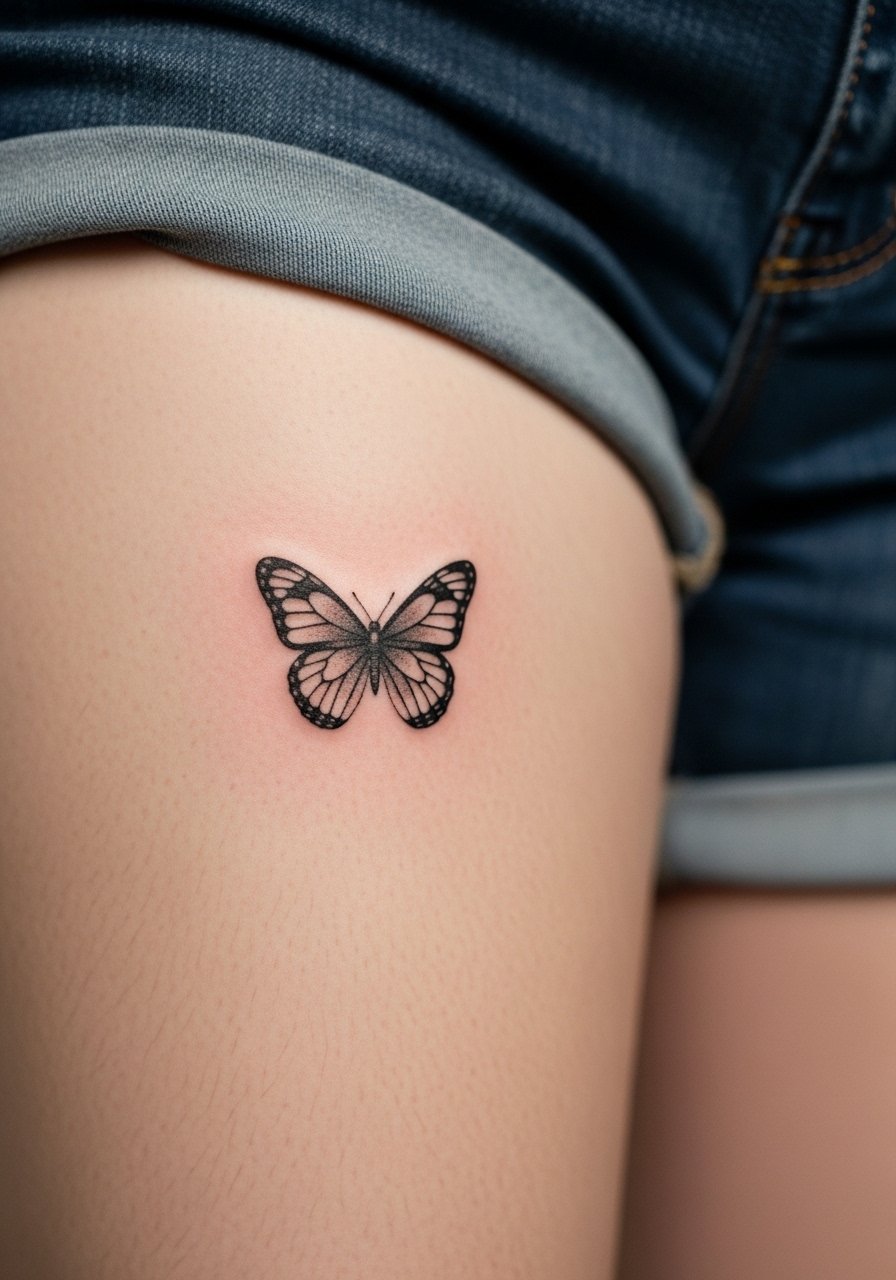
Inner thigh textures allow micro-realism to breathe because the area stays relatively hidden and safe during healing. The session can be uncomfortable because the skin is sensitive, but most clients tolerate it in a single sitting. If you plan to wear tight bottoms, delay until the skin fully heals. For session comfort, bring shorts you can shift easily and keep pressure off the area.
13. Monochrome Monarch on the shoulder blade for species lovers
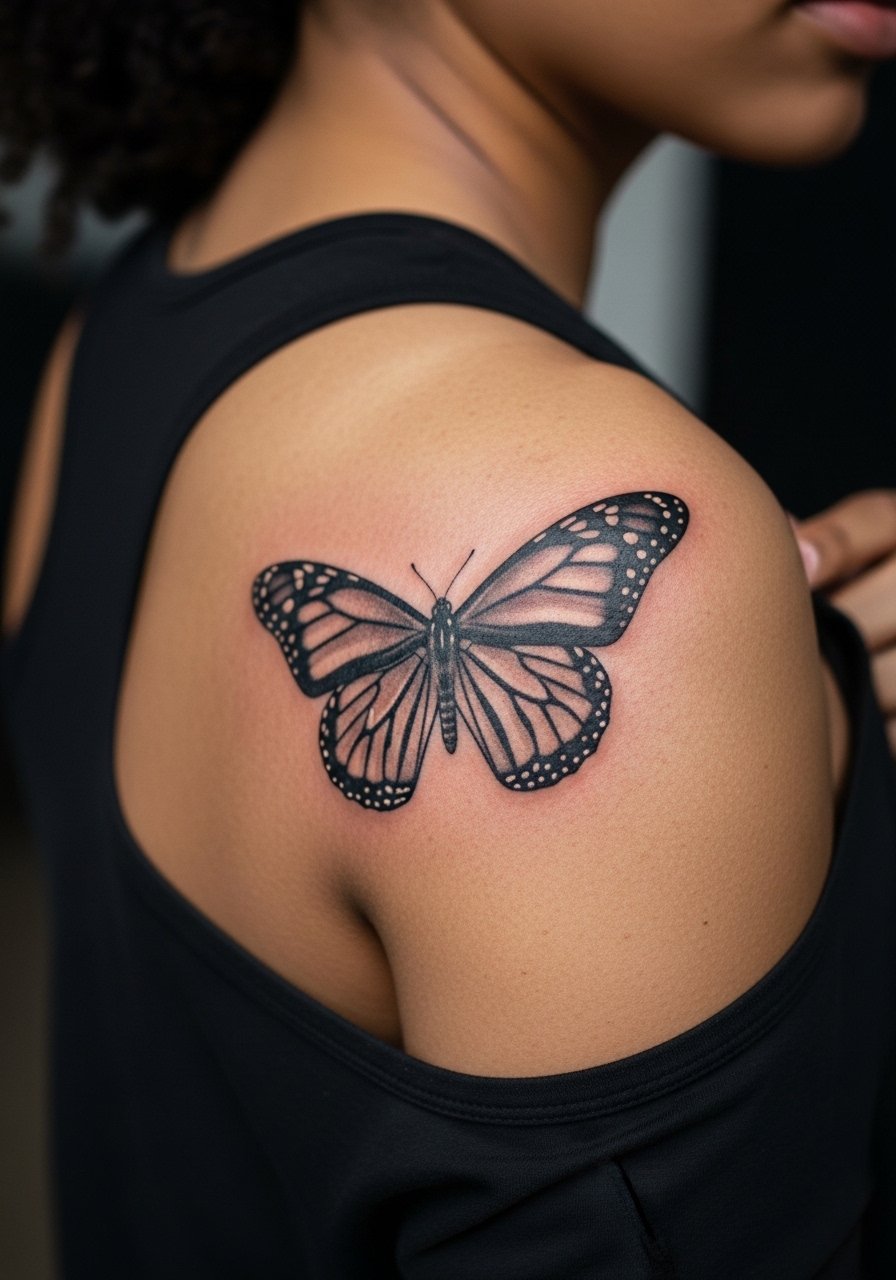
Species-specific Monarch pieces translate well to shoulder blades because the canvas is broad and low-friction. Ask for clear wing venation in the stencil stage, and request healed shots from your artist to confirm texture longevity. The session is a balance of fine shading and crisp edges. For evenings out, a backless halter top frames the wings without covering the negative space.
14. Minimalist dot-work butterfly near the clavicle
Dot work around the clavicle catches light nicely and tends to age predictably when spaced properly. Movement from the shoulder can blur overly dense dots, so ask for airy stippling and wider dot spacing for a 2 to 3 cm piece. The session feels like light tapping rather than deep shading. For styling, a delicate necklace chain sits below the design without crowding it.
15. Delicate line cluster over the hip bone
Clusters over the hip look romantic but can shift with weight fluctuation. If that is a concern, place elements where the fabric line naturally sits. Request that the artist map the cluster against clothing to ensure it sits where you want long-term. Sessions may be split if shading is involved. For a summer reveal, pair with high-waisted denim to keep the artwork visible without irritation during healing.
16. Tiny floating silhouette just below the ear lobe
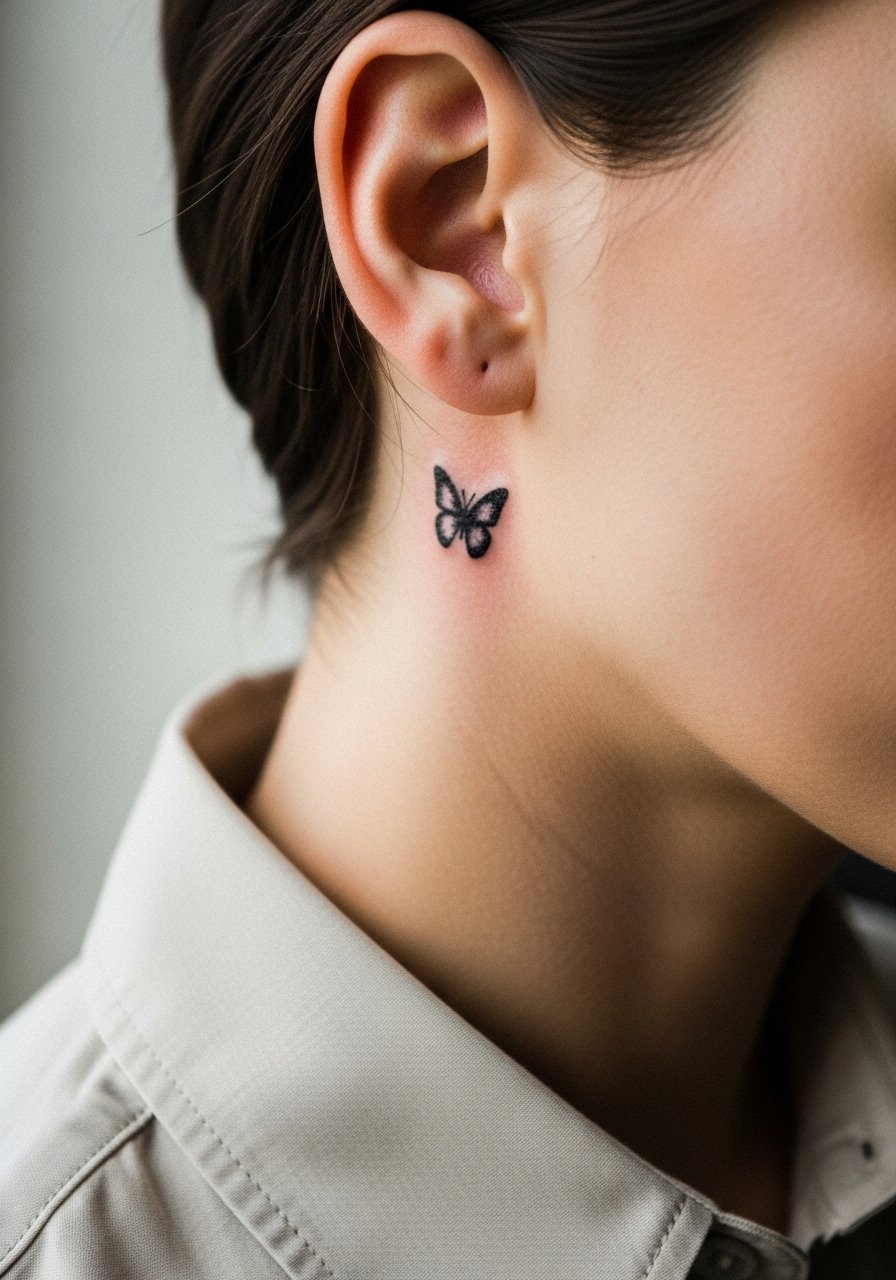
Small silhouettes near the ear have the advantage of subtlety for those who want a quick peek when hair is up. The area heals fast, but fine lines here can disappear into skin texture on some tones. If you have medium to dark skin, request slightly thicker primary strokes to improve contrast in photos. For show-off styling, stud earrings and an open collar shirt keep attention close to the spot.
17. Line-and-dot swallowtail on the calf

Calf placements handle more texture without distortion and often hold detail longer than ankles. The line-and-dot combo keeps the silhouette readable from a distance. Sessions are comfortable and the area is easy to protect from friction with soft clothing. For footwear choices, cropped pants or strappy sandals pair well when you want the tattoo seen.
18. Micro-realism swallowtail as a travel souvenir on the ankle
Travel-inspired swallowtails usually aim for species accuracy at a small scale. If you got this work while traveling, confirm the artist's healed photos before booking a touch-up back home. The ankle is forgiving for shape but fussy for long-term tone because of constant washing and shoe friction. During the session wear loose jogger pants you can roll up easily.
19. Symmetrical micro pair along the upper ribs

Rib placements give intimate symmetry but are sensitive and pose a real aging risk for ultra-fine lines. Here the controversy is clear. One camp says ribs stretch and blur fine lines within two years. The other camp says with proper needle depth and spacing, fine line survives. Ask which approach your artist uses and request healed examples of rib symmetry. Wear a cropped athletic top to the appointment for privacy and access.
20. Single-needle winglet tucked behind the ankle bone
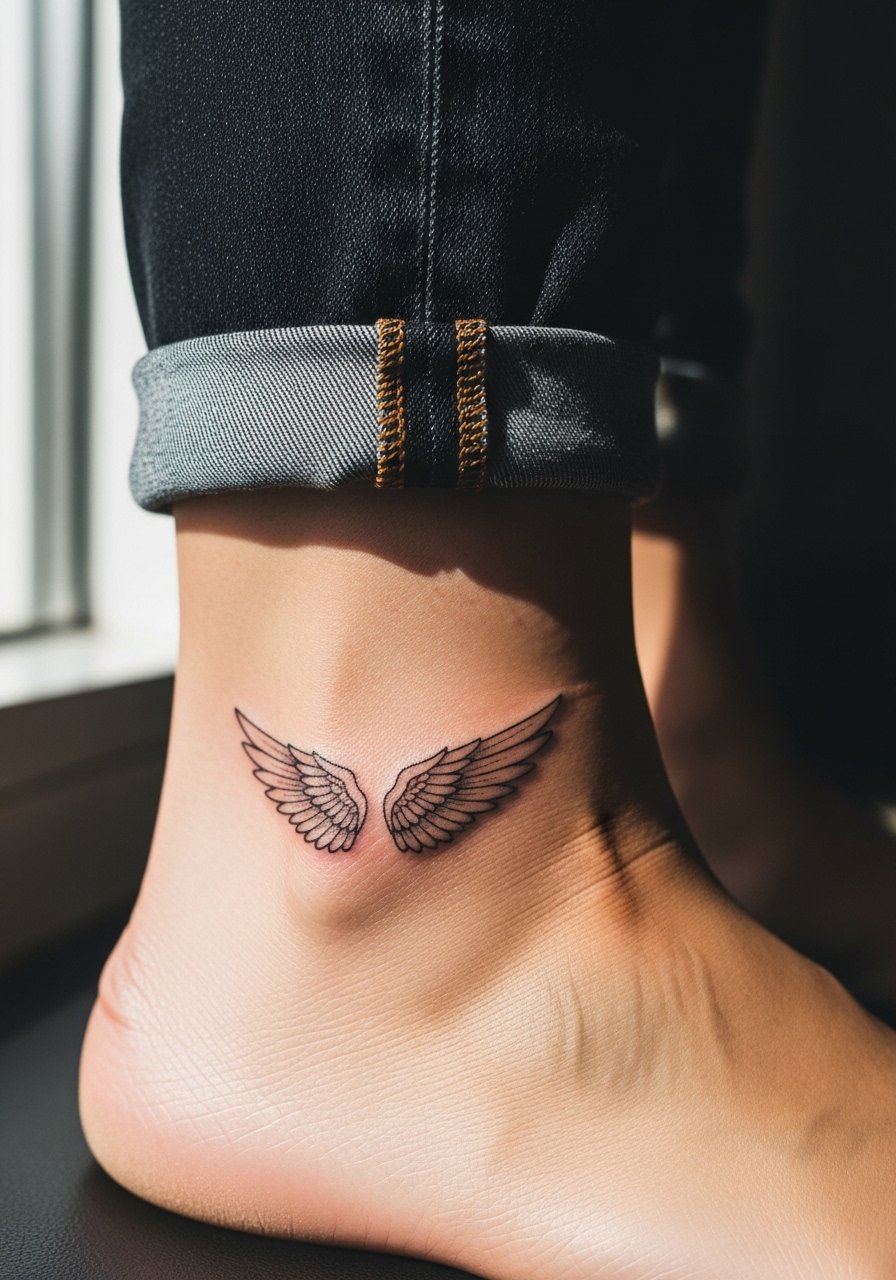
This tucked placement is discreet and often ages a bit better than the outer ankle because shoes rub less on that exact spot. Single-needle work still needs depth so the ink settles, so request a slightly firmer initial pass rather than whisper-thin hairlines. For recovery, slip into easy shoes and consider a loose pant like cropped ankle pants you can pull up without pressure.
21. Dot cluster forming a butterfly at the back of the shoulder
Dot cluster work there reads as texture from a distance and often outlives fine single-needle lines on the same plane. The biggest mistake is packing dots too tightly. Ask for airy stippling and wider spacing to keep the image from merging over time. For the session, wear a loose tank top you can shift for access without tugging.
22. Minimal silhouette floating near the clavicle center

Center-clavicle silhouettes sit nicely with necklaces and are visible without being overwhelming. A common error is placing the design too low where it will be obscured by clothing. During consultation ask the artist to mock the placement with a sticker and check it in different outfits. For quick pairing try a thin chain pendant necklace that sits just below the ink.
23. Butterfly trail that wraps the wrist and peeks under a bracelet

Wrap trails are playful but need careful spacing so elements do not merge at points of constant motion. Ask for slightly heavier anchor lines where the bracelet will overlap so the main motif remains visible as accessories shift. During the session remove all wrist jewelry. To style after healing try a thin gold chain bracelet on the opposite wrist for asymmetry without crowding the tattoo.
24. Micro-realism pocket Monarch on the shoulder cap
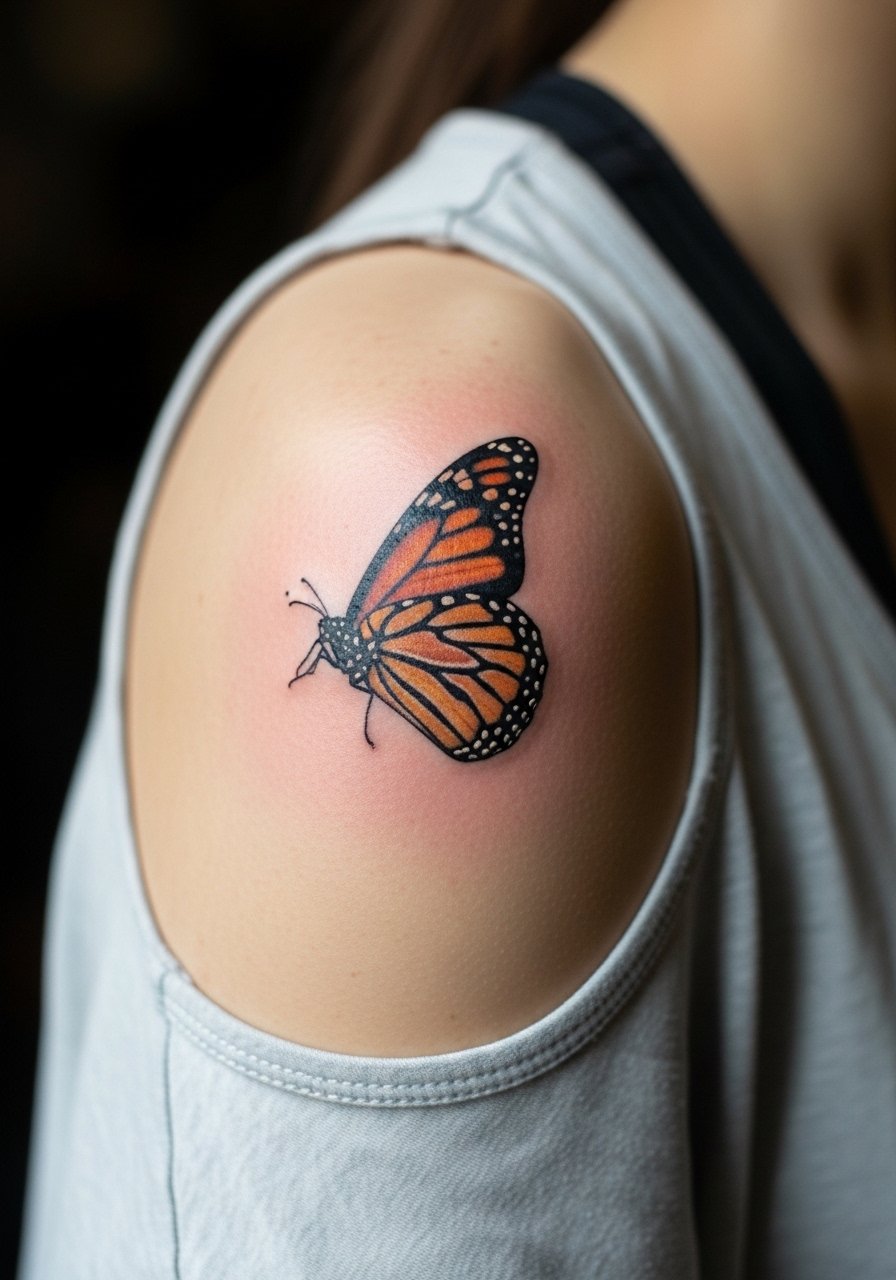
The shoulder cap offers a curved plane that flatters micro-realism because the skin does not compress as much as joints. Ask the artist for species-accurate shading but avoid tiny veins that will soften. Sessions are comfortable and healing is straightforward if clothing is loose. For show-off moments, a tank top keeps the area visible and breathes well during the first week.
25. Tiny negative-space butterfly over the lower back
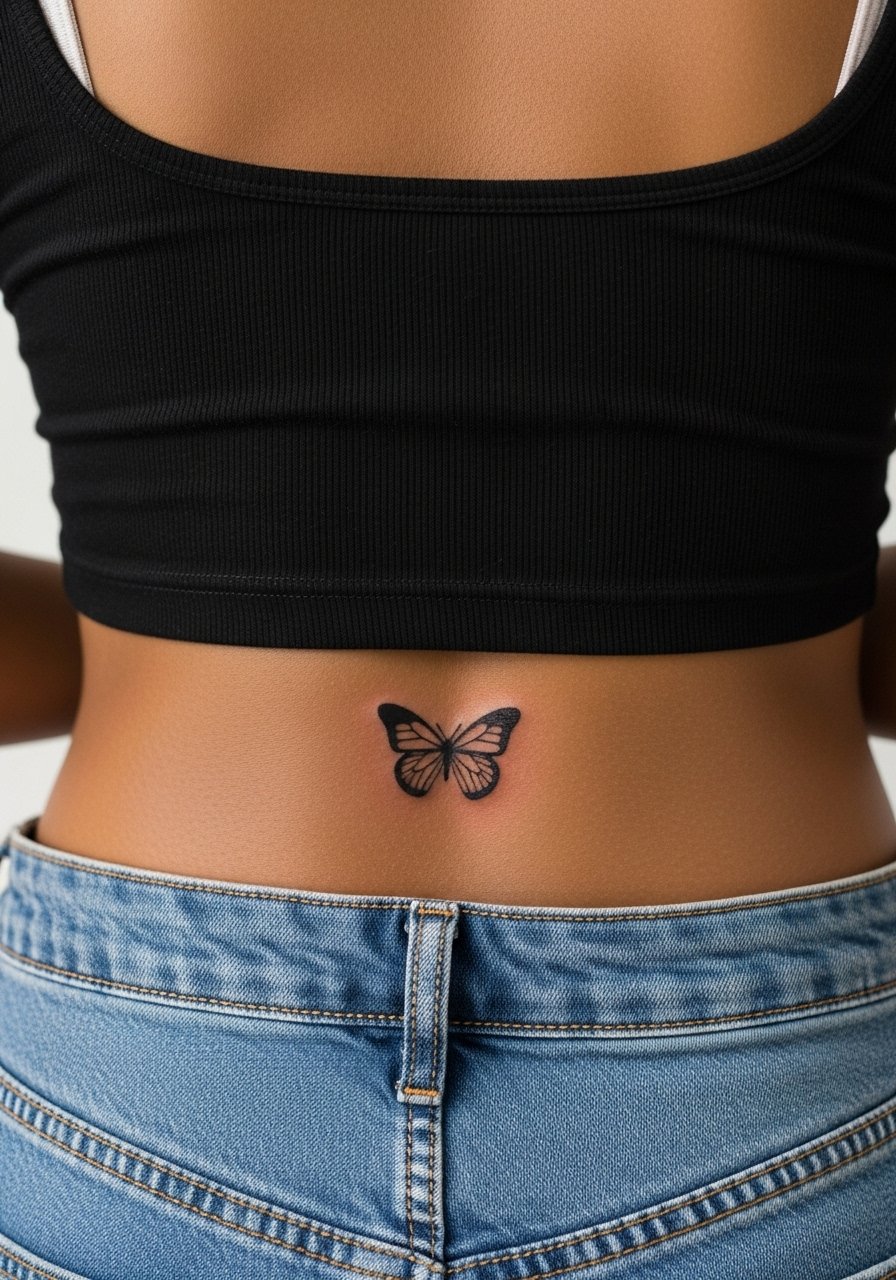
Lower back negative space reads strong when framed by waistlines. The main mistake is placing the piece where waistbands will rub during healing. Ask the artist to map the placement against the clothes you wear most often. Bring a pair of high-waisted jeans as a reference during consultation to find the ideal spot.
26. Tiny chain of butterflies that follows the collarbone curve

A collarbone chain benefits from flow and equal spacing to follow the bone line without appearing choppy. The session is short but placement requires precise stencil alignment. If you want photos to show the piece as you expect, ask the artist to take a quick picture of the stencil before inking. For styling, a delicate necklace chain or an open-neck top complements the curve.
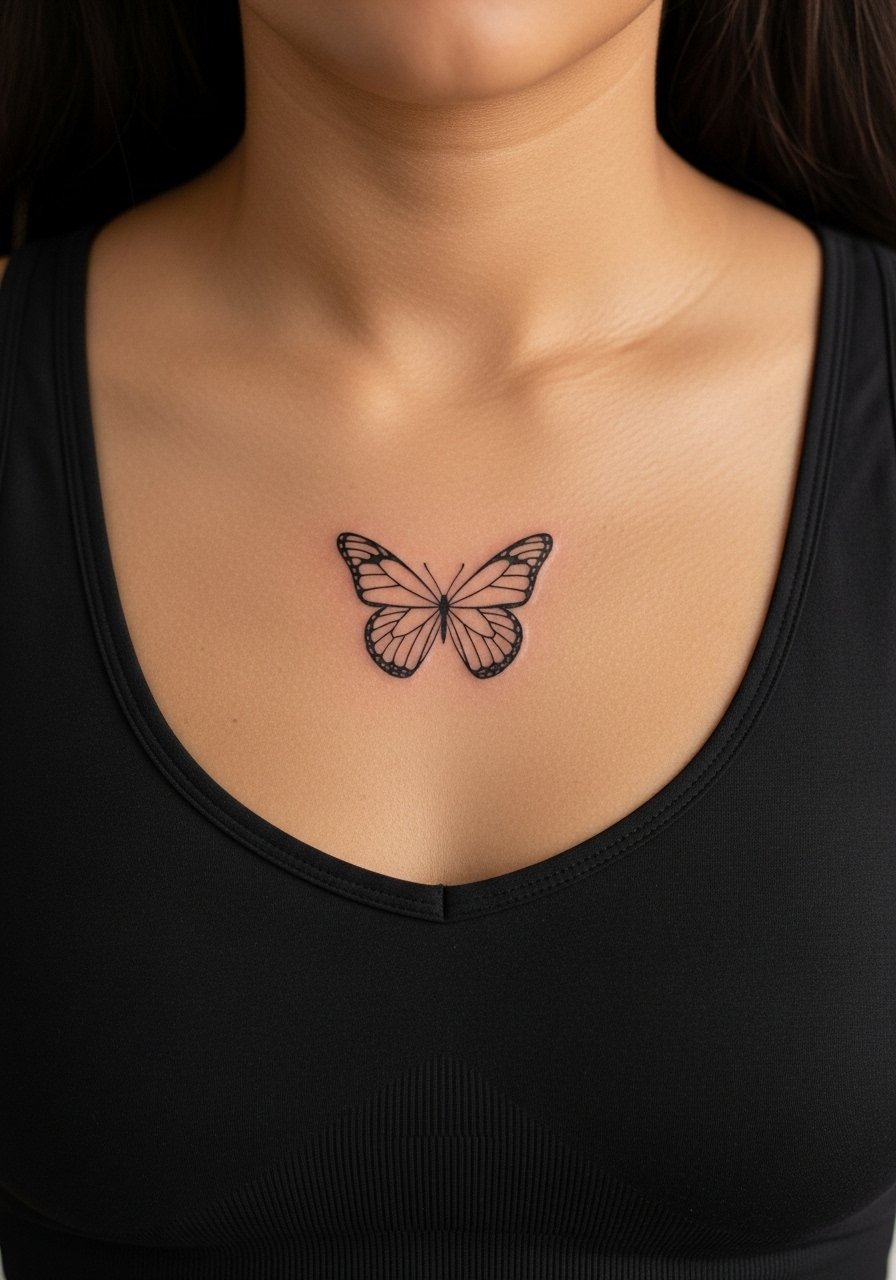
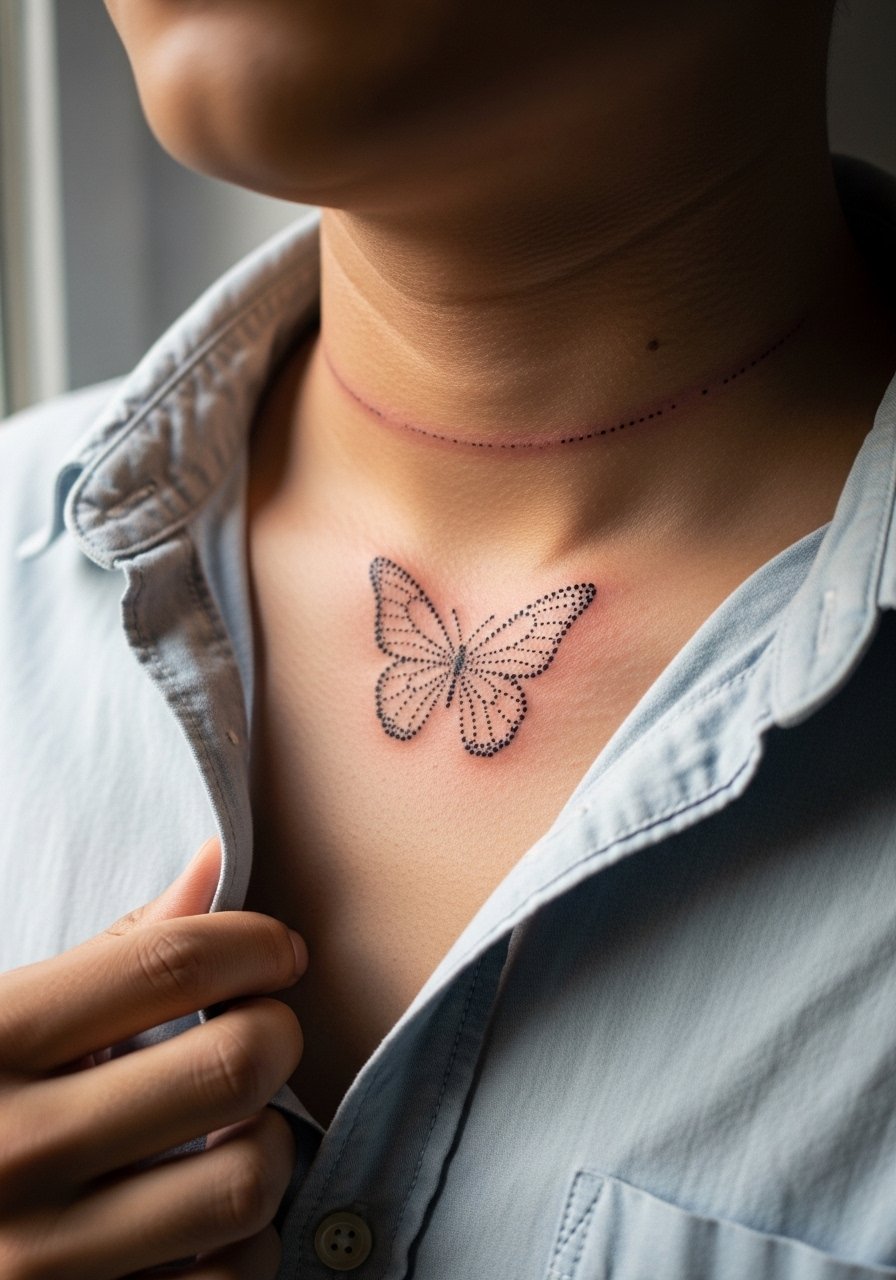
27. Micro butterfly cluster that lands on the upper chest near the sternum
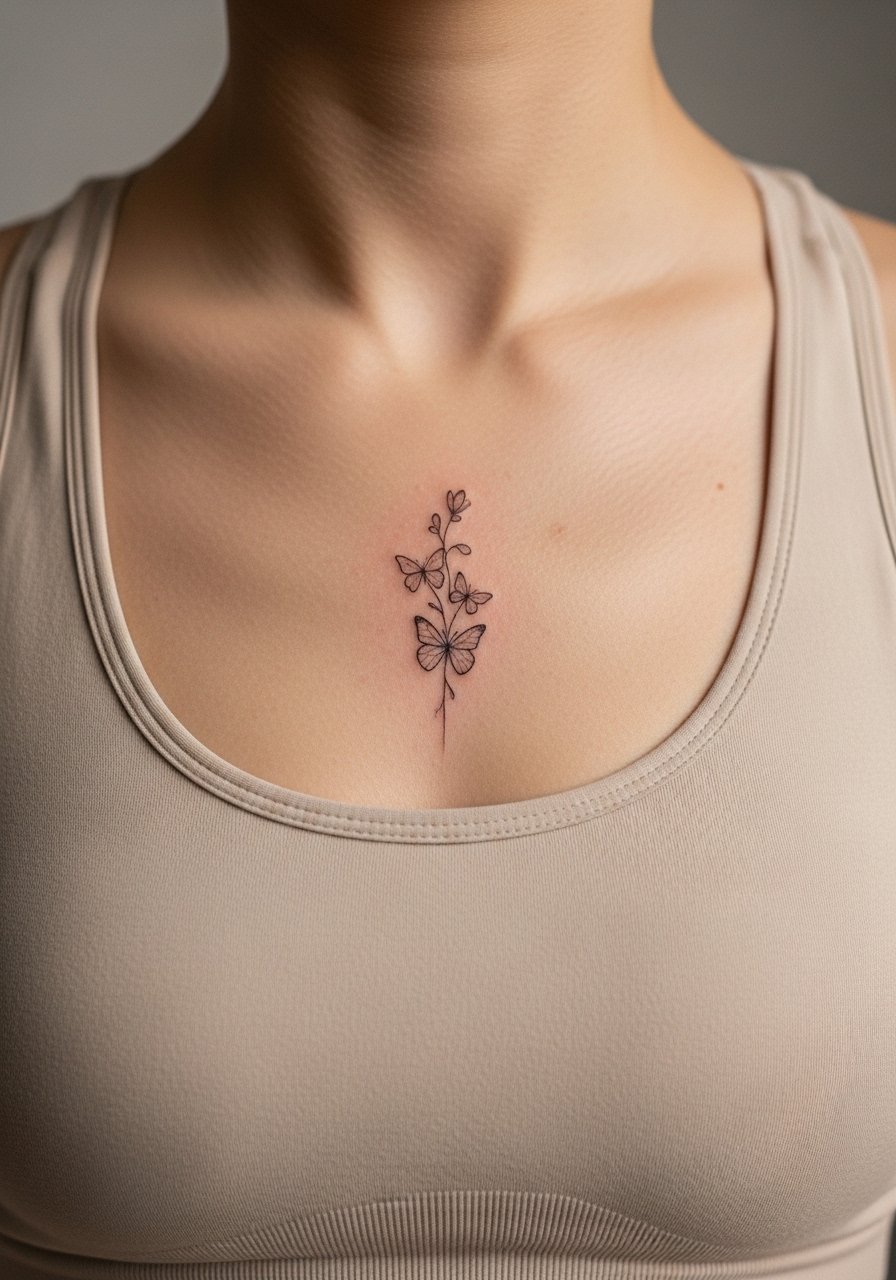
Upper chest clusters look striking but are affected by breath and torso movement. For symmetrical balance, ask the artist to align pieces with the midline and show you several options in the stencil stage. Sessions may require multiple short passes rather than one long sitting to keep the client comfortable. For revealing the piece on warm days, try a low v neck tee that frames the cluster without rubbing the area during recovery.
Frequently Asked Questions
Q: Will fine line butterflies on the wrist blur faster than on the forearm?
A: From what I've seen, wrists blur sooner because of constant washing and sleeve friction. Forearms offer a more stable canvas. If you want wrist placement, ask for slightly heavier primary strokes and plan on a touch-up around year one or two.
Q: Is Saniderm better than dry healing for tiny single-needle pieces?
A: Artists and clients split into two camps here. One group says protective film like Saniderm locks small work pristine during the worst of healing. The other group worries film traps moisture and encourages scabbing on delicate lines. Ask your artist which method they prefer and why, and follow their protocol for the best outcome.
Q: How visible are micro butterflies on medium to dark skin tones in photos?
A: Thin single-needle lines can disappear in photos on richer tones. If you want better contrast, request slightly thicker line weight or a mix of dot shading to create texture. Healed photos from your chosen artist on similar skin tones are the clearest predictor.
Q: What should I wear to a sternum or upper chest session to make the appointment easier?
A: A fitted sports bra or front-open shirt is practical because it gives access without exposure. For a sternum session, bring a front open button shirt you can remove quickly while keeping coverage.
Q: How often do ankle and finger butterfly tattoos need touch-ups?
A: Expect ankle and finger micros to need touch-ups more often than shoulder or back pieces, commonly within one to three years depending on activity and sun exposure. Booking a planned touch-up ahead of time can save you from chasing small losses in pigment later.
Q: Where is the best place to find artists who specialize in fine-line butterfly work if I want healed photos?
A: Use style-specific discovery paths like the hashtag #FineLineTattoo on social platforms, search "butterfly" plus your city on apps that list guest spots, and check threads on tattoo forums that request healed photos. Prioritize portfolios with healed examples rather than only fresh work.
