
Fine line is everywhere on saved boards right now, and the gap between what looks great on screen and what lasts on skin has never been wider. Small Japanese-style pieces can age beautifully if you pick the right combination of placement, line weight, and spacing. Below are 17 compact designs that translate Irezumi ideas into wearable, long-lived ink, with what to ask for at the consult and how to show them off afterward.
1. Minimalist Koi Fish Outline on the Wrist
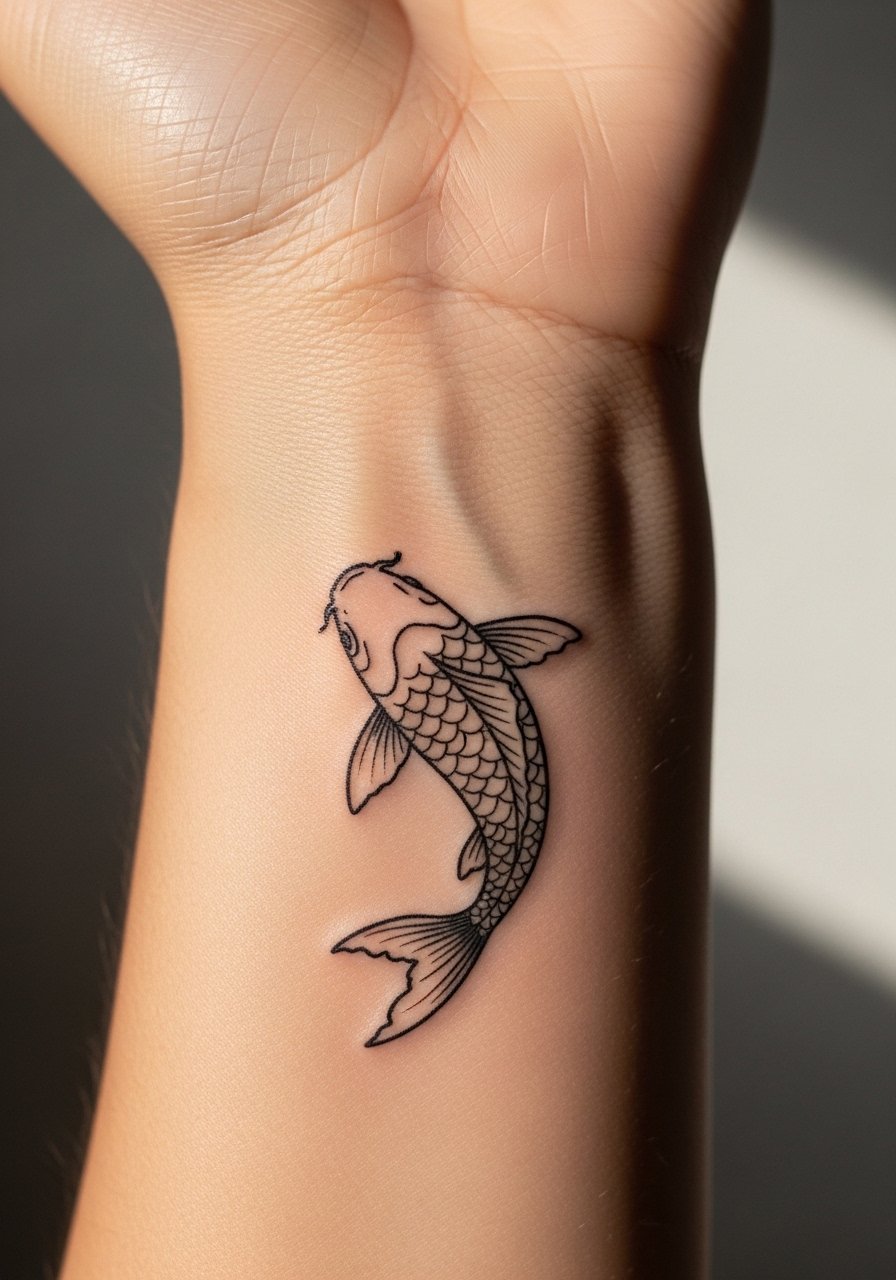
I've seen minimalist koi hold up best when artists use slightly thicker outline weight than they would for a finger piece. Tell your artist you want a bold outline with internal negative-space scales so the form reads after a few years. Pain on the wrist is moderate because of bones and movement, and a single 20 to 40 minute session usually does it. Common mistakes include making the fins too detailed, which blurs into a smudge over time. For showing off, stack the koi with a thin silver chain bracelet on the opposite wrist, and wear a sleeveless tank to keep the area accessible during the session.
2. Fine Line Cherry Blossom Branch on the Inner Forearm
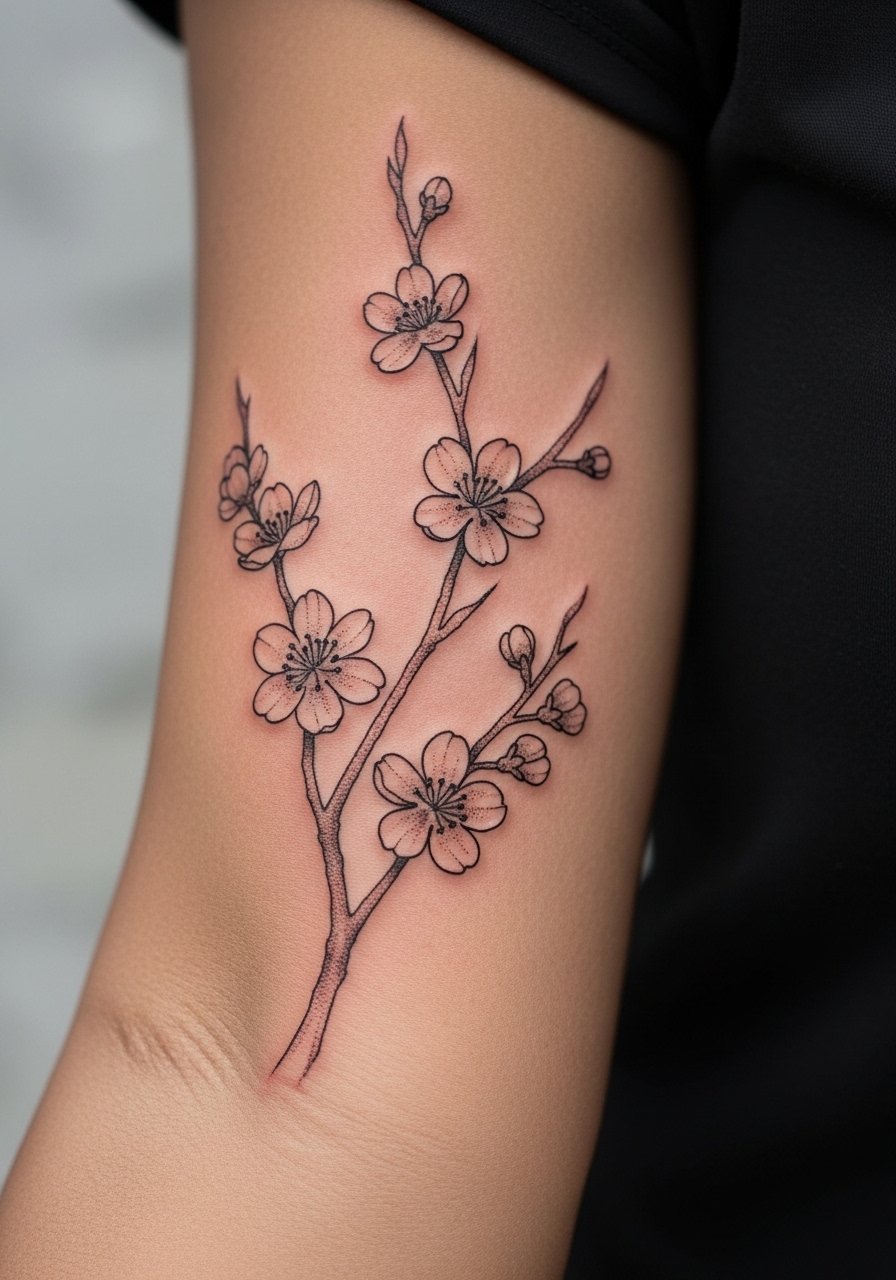
Fair warning, the inner forearm is forgiving but it still needs spacing. Ask for open negative space between blooms and delicate stipple shading rather than heavy gray fills. Expect a one- to two-session piece that feels mild on the pain scale. A common aging issue is overpacking small petals, which creates pooling and loss of petal edges by year three. For visibility and framing, pair this motif with a rolled-sleeve cotton button-up when you want it on display, and wear a loose long-sleeve for the session so you can roll it up easily.
3. Simplified Dragon Tail Curve at the Collarbone
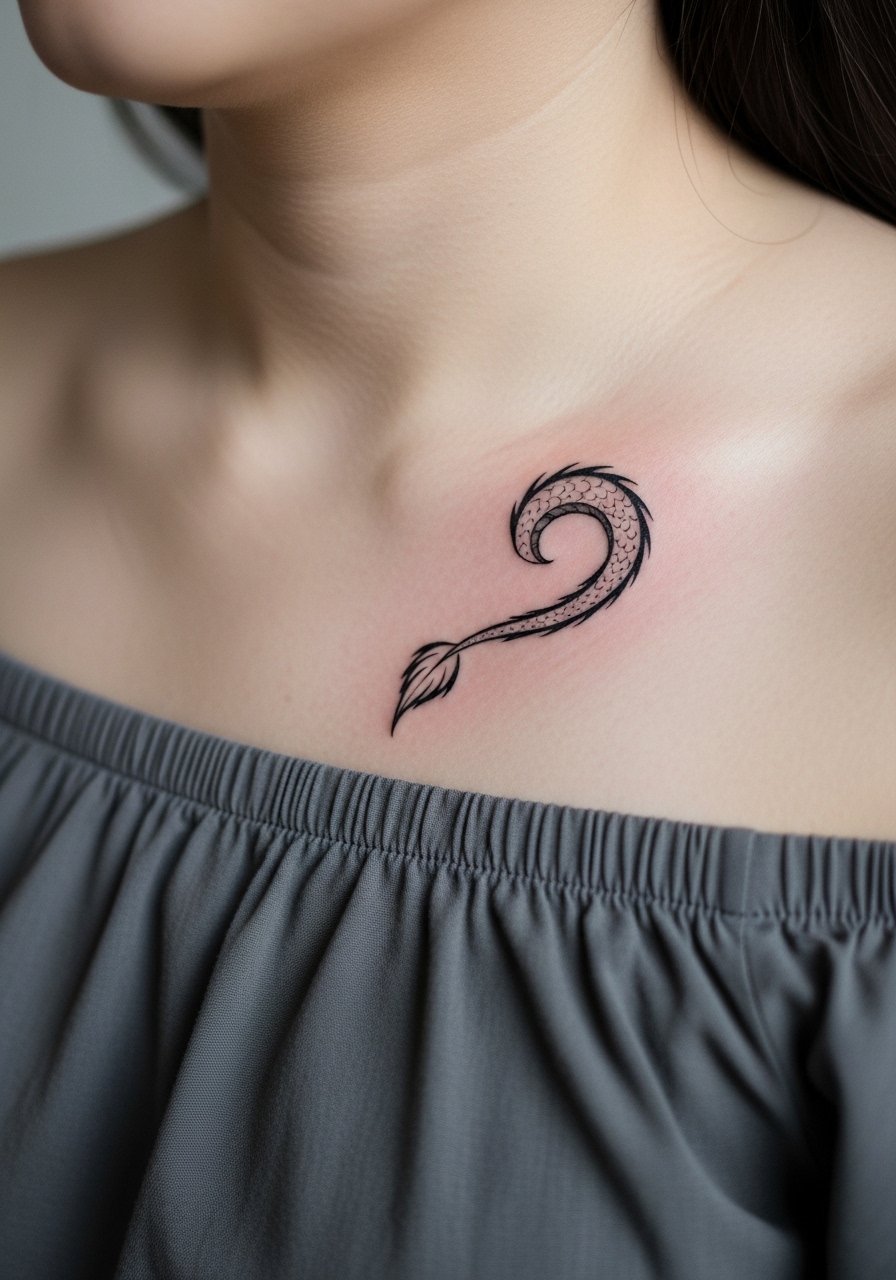
The collarbone reads dramatic even at three inches, but it also moves a lot with breathing. Ask for a flowing curve that follows the clavicle and avoid tiny internal scales. Pain here is above average because the bone is shallow. The piece usually fits in a single session if you keep the linework tight and the shading sparse. A frequent mistake is cramming too much detail into the length, which looks great fresh and mushy later. To show this off, slip into an off shoulder blouse so the curve sits against bare collarbone fabric without covering.
4. Single Lotus Petal Micro Behind the Ear
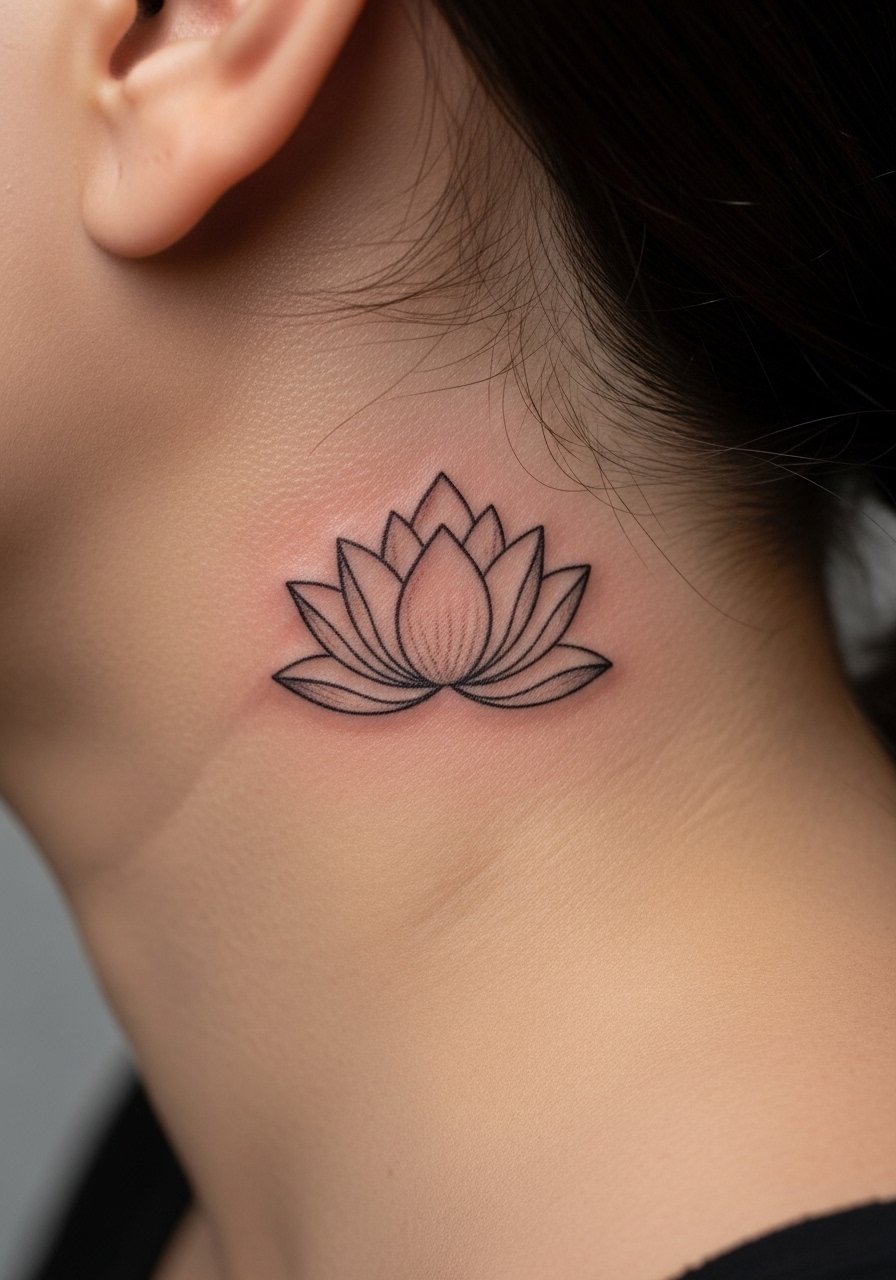
Behind-the-ear micro work is discreet and low session time, usually under 20 minutes, but it requires precision. Tell your artist you want a single petal with a consistent line weight and no fill. Common mistakes are lines that are too close together, which blur into one shape after healing. Hand the artist a reference that shows exact line thickness. For the session, keep hair up and wear a shirt with an easy neckline. This placement traces to Buddhist imagery in many Irezumi pieces, so consider a small variation rather than a direct replication to respect the origin.
5. Outline Samurai Helmet (Kabuto) on the Upper Arm
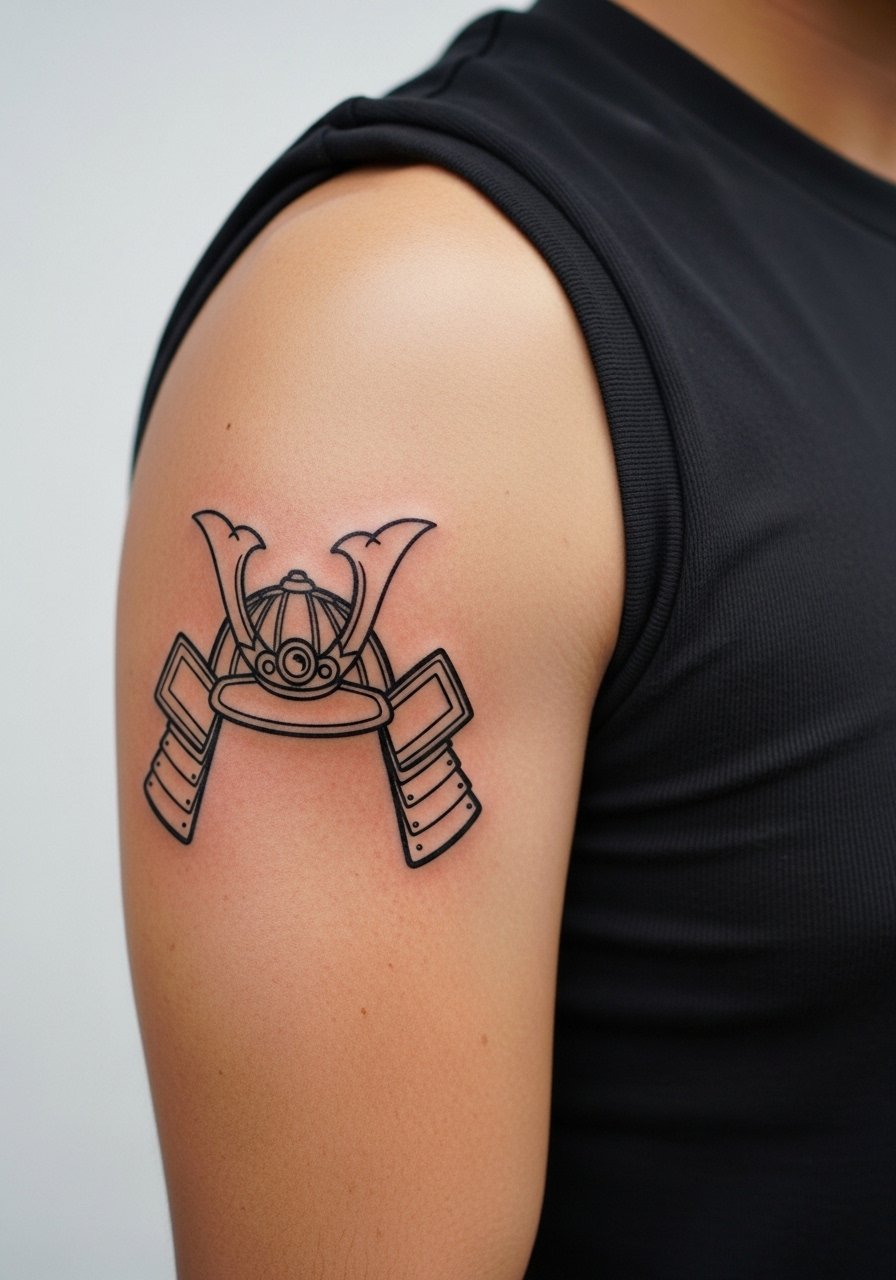
Upper arm pieces handle bolder outline and solid black better than thin-work areas. This kabuto works best at around 2.5 inches with clean silhouette lines rather than interior clutter. Pain is low to moderate and most of this fits into one session. A mistake I see is over-texturing the helmet in micro detail, which ages poorly. When getting inked, wear a sleeveless fitted tee so the artist has full shoulder access. This piece pairs well with structured neutrals like an asymmetric shoulder bag when you want it visible.
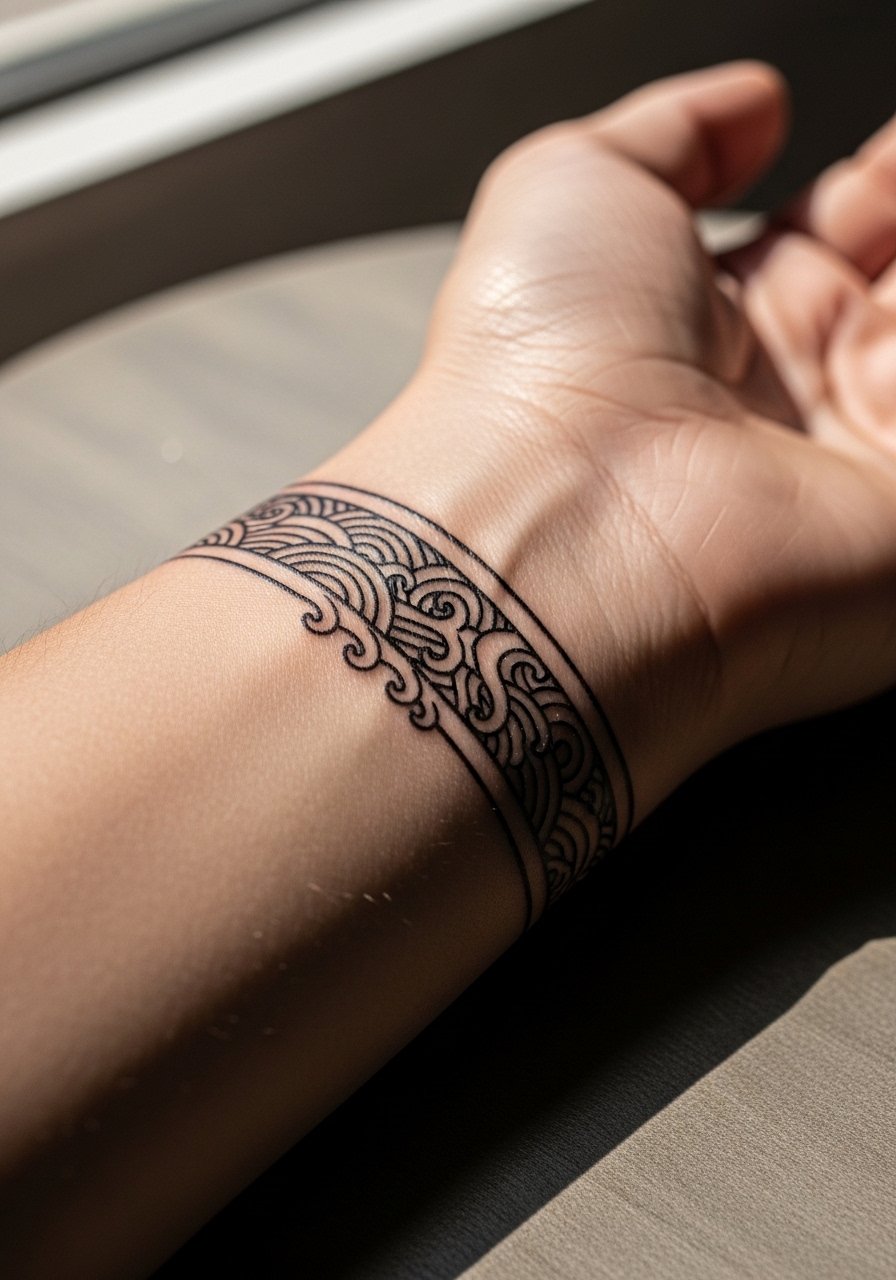
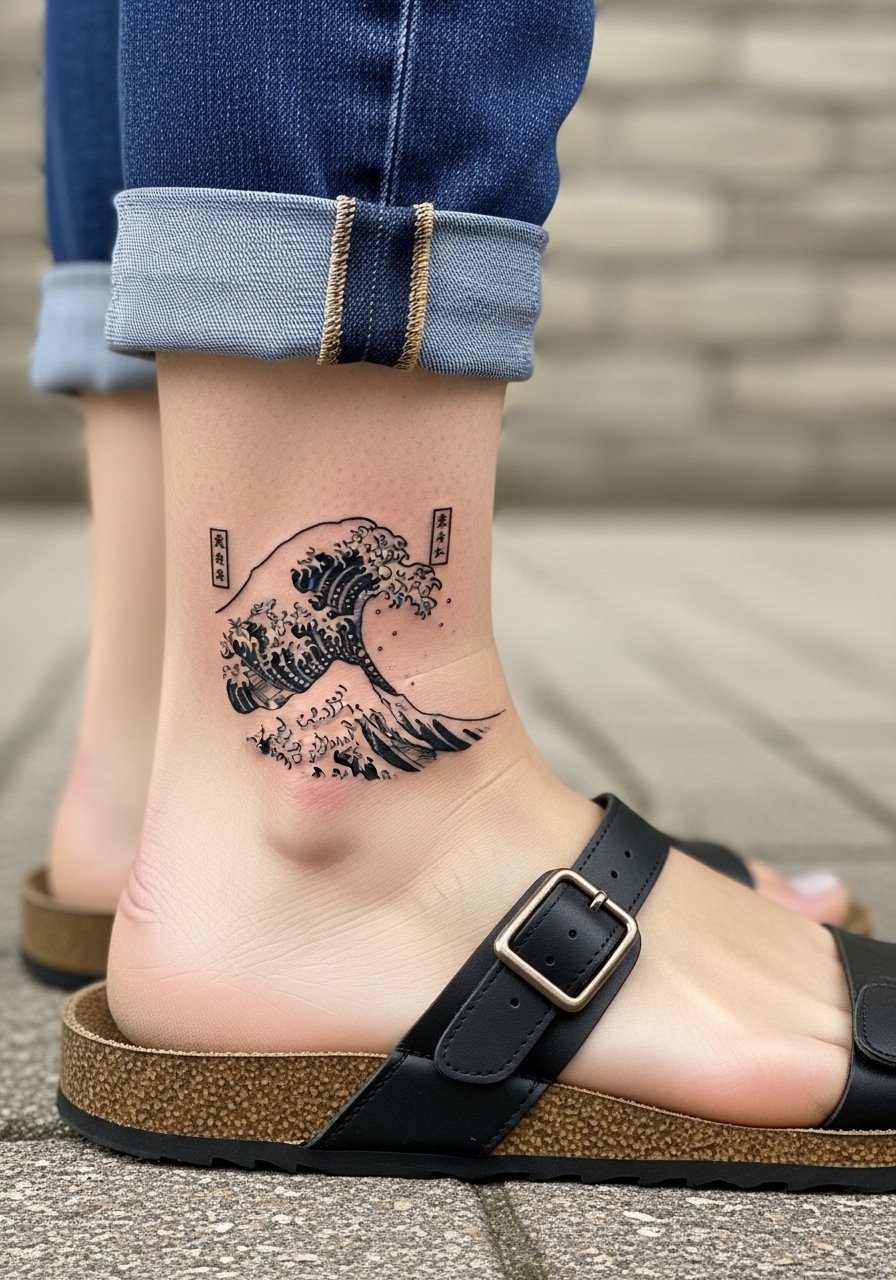
6. Fine Line Wave (Seigaiha Pattern) at the Ankle

Ankle work sits in a friction zone, so line spacing matters more than tiny detail. Ask for slightly more space between wave arcs and a firm but not hairline outline. Pain can spike when the needle crosses bone, and the session is often short. The usual error is making the arcs too tight for a 2-inch canvas, which softens into blur after constant rubbing from socks and shoes. For show-off season, wear strappy flat sandals and cropped pants to keep the design visible.
Studio Day Picks
The wrist, inner forearm, and ankle pieces above live in different wear-and-tear zones, so a few studio essentials make the session and the first week easier.
-
Stencil transfer paper kit. Lets you preview exact placement and line weight on skin before the needle starts, which is crucial for small koi and wrist work.
-
Topical numbing cream. Applied as directed before the session it can reduce collarbone and ankle discomfort without altering linework when used correctly.
-
Thin protective film roll. Ideal for keeping ankle and wrist pieces clean during the first few days of walking and washing.
-
Fragrance free gentle body wash. A mild wash helps cleanse fine line forearm pieces without stripping moisture that delicate lines rely on.
-
Aquaphor healing ointment. Thin layers for the very first day keep micro channels moist and reduce scabbing that can pull on fine line detail.
7. Minimal Oni Mask Silhouette on the Shoulder
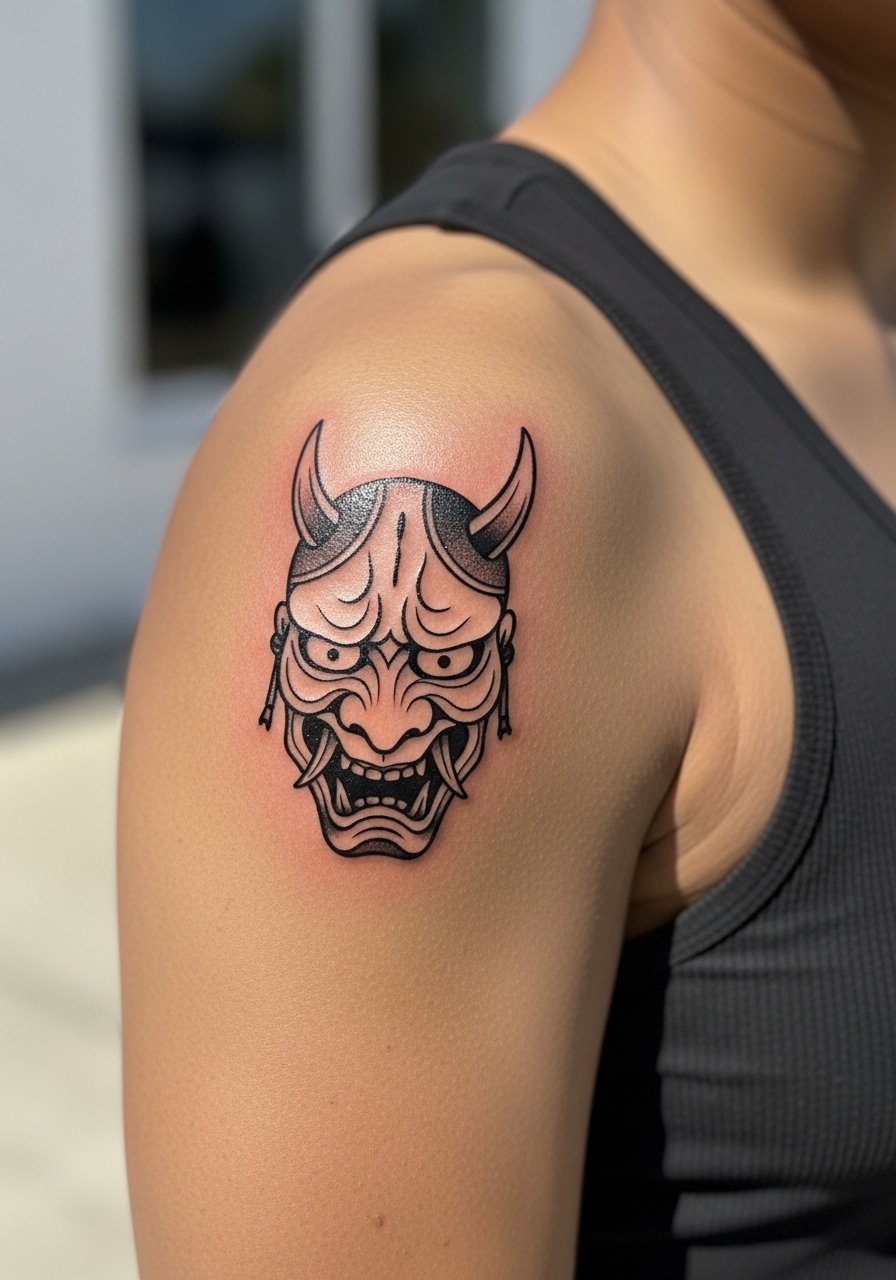
Shoulder pieces tolerate solid black fills beautifully because of thicker skin and muscle. Ask for a silhouette kabuki-leaning shape with clean negative space around the eyes. Pain is moderate and a single session usually covers it. A common mistake is attempting tiny facial details at small scale, which lose definition. Wear a tank top or button-down you can pull aside on session day so the artist has clear access. For everyday wear, fitted sleeveless tees match bold outlines without competing.
8. Koi to Dragon Transition Outline on the Outer Forearm
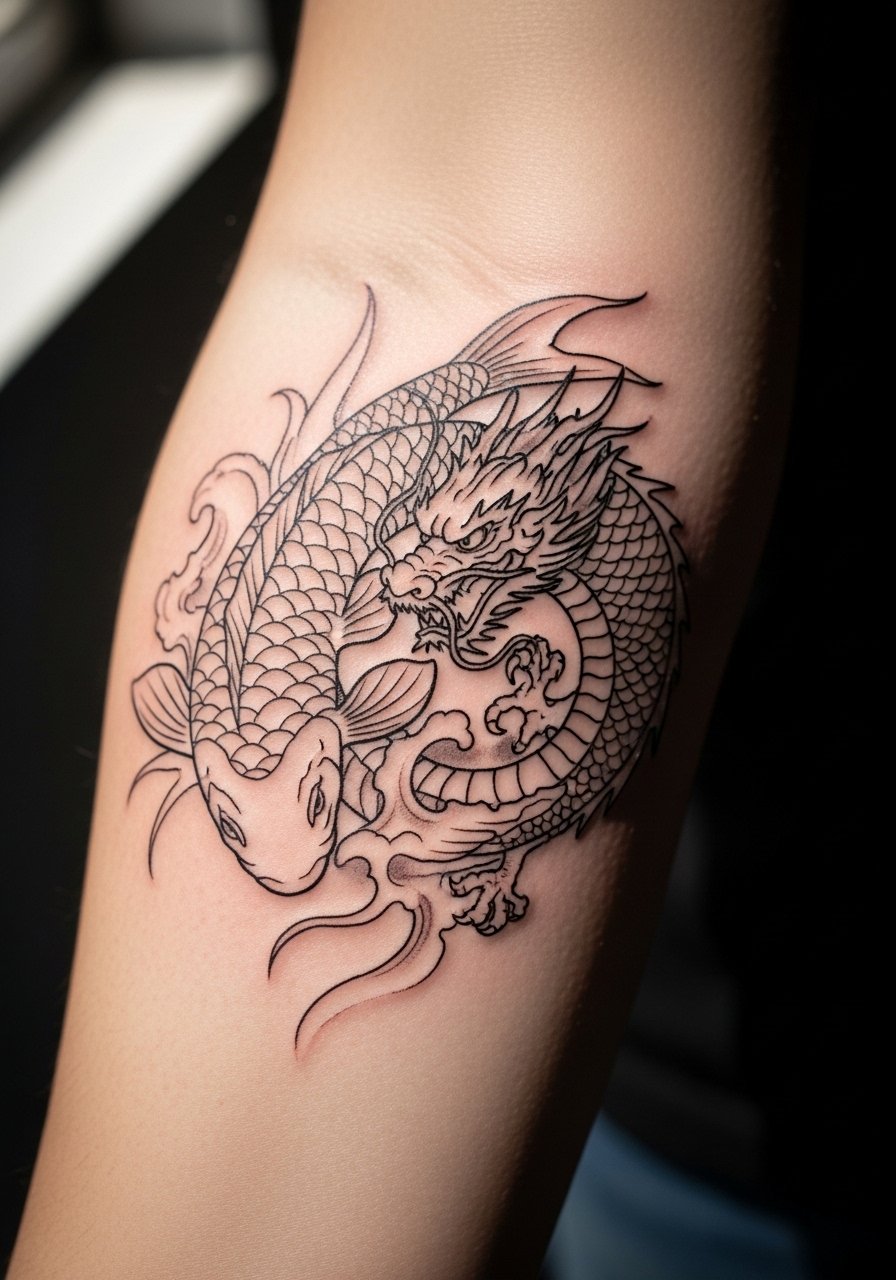
Narrative pieces like a koi-to-dragon work well on the outer forearm where the flow can follow muscle lines. Tell your artist you want the transition implied with negative space and a few directional scales rather than a crowded scene. Expect two sessions if you want shading. A frequent mistake is over-detailing the dragon head at this scale, which reads messy after fading. Pair this with a half zip pullover or rolled denim cuffs for a framed look that highlights the narrative flow.
9. Phoenix Wing Fragment on the Ribcage
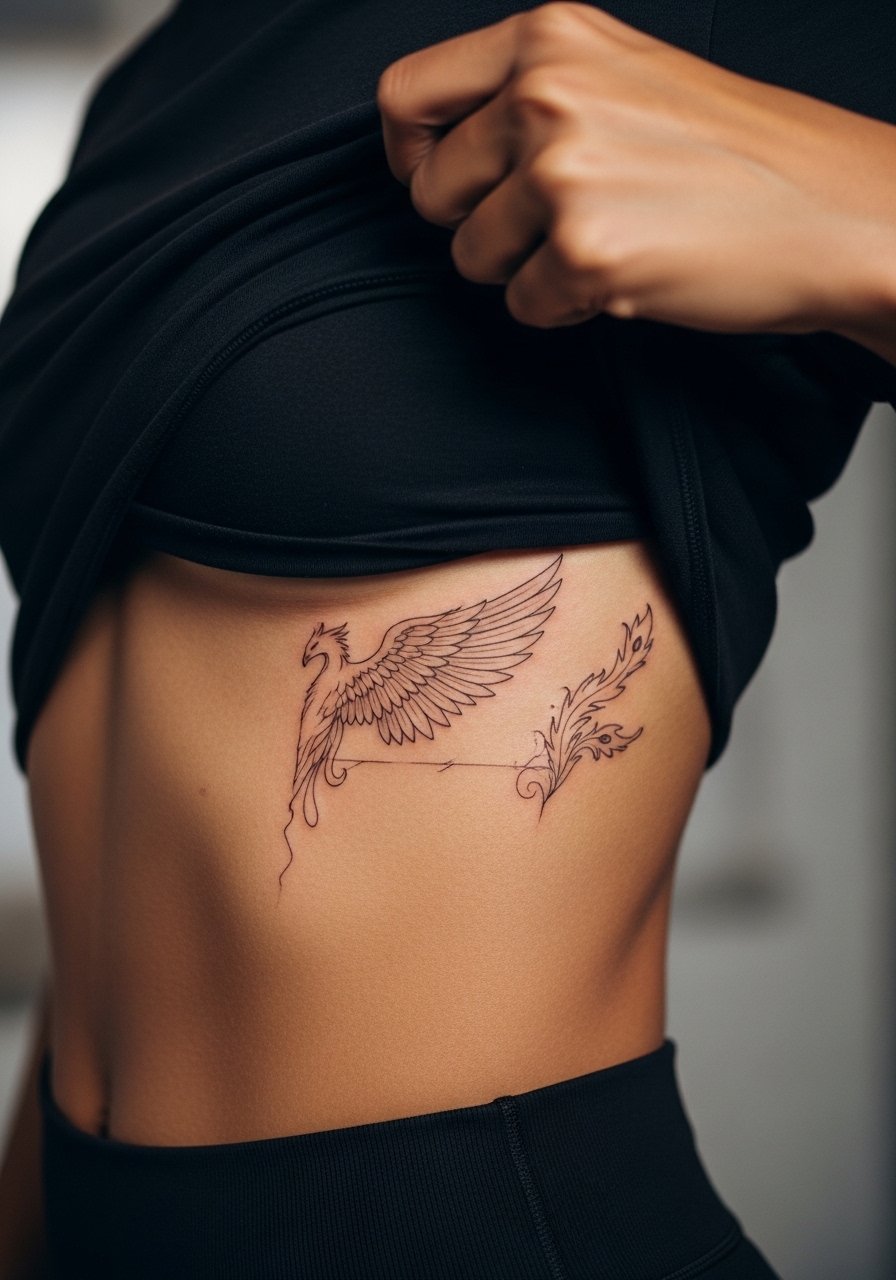
Fair warning, ribcage work is high on the pain scale and it moves with breathing, which affects line consistency. Artists split on fine line here. One group says the skin stretch blurs delicate lines within two years. The other group argues that with proper needle depth and spacing, fine line settles well on ribs. The honest approach is to ask your artist which camp they fall into and request spacing that favors longevity. Expect one focused session with possible touch-up later. For the appointment wear a cropped top you can adjust easily.
10. Bamboo Stalk Single Node on the Wrist
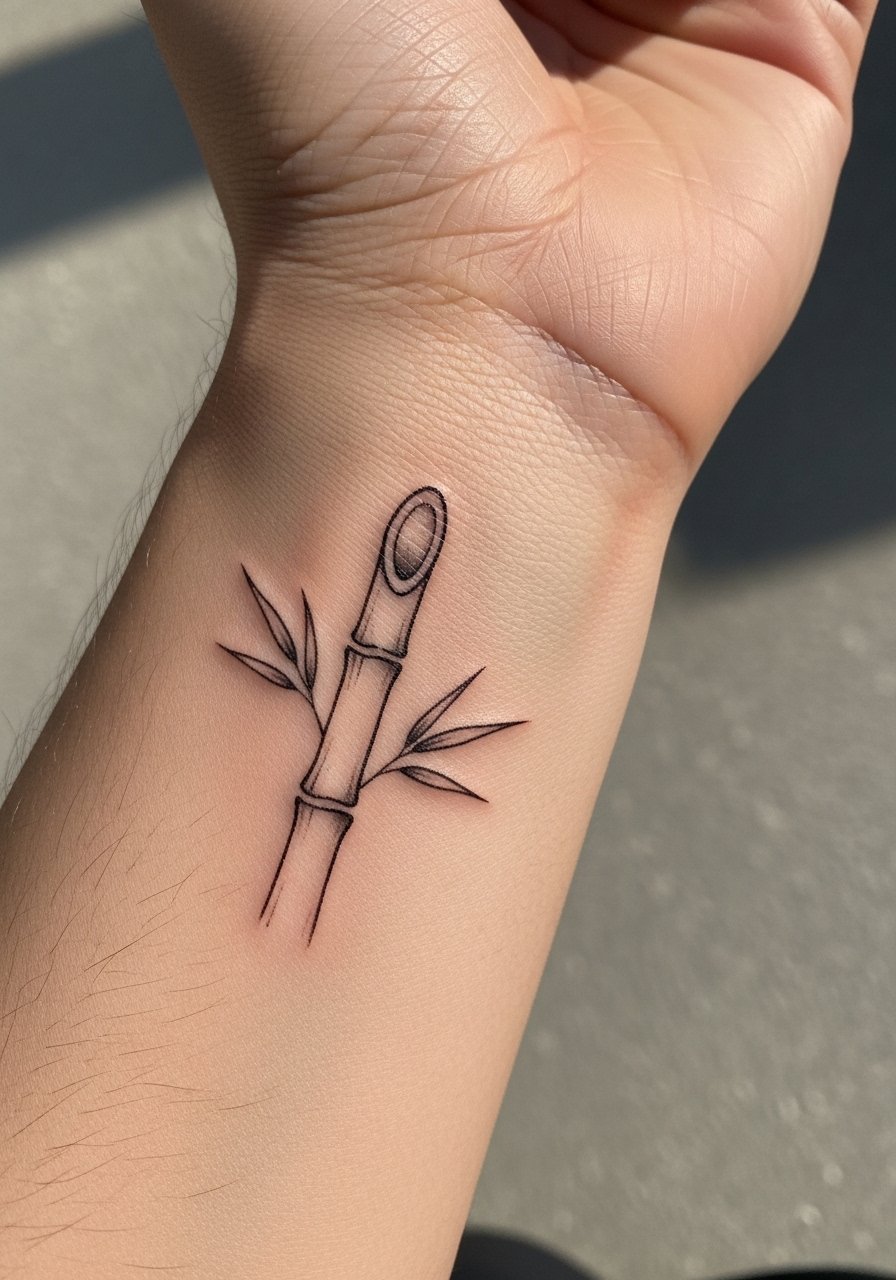
Bamboo nodes need clean vertical lines and small gaps to read as separate segments after a year. Tell the artist you want slightly heavier linework than typical micro tattoos. Pain is similar to other wrist work and session time is short. Common errors include making the nodes too close, which causes merging. For showing it off, a linen cuff bracelet keeps attention gentle and supports the minimalist aesthetic.
11. Lantern (Andon) Outline on the Inner Bicep

Inner bicep skin is softer and stretches with motion, so line depth matters. Ask for a clean outline with minimal interior shading and avoid tiny decorative filigree. Pain ranges from moderate to high when the arm is raised, and most lanterns finish in a single session. A common mistake is packing interior crosshatching, which can soften quickly. Wear a loose tank top for the appointment so the artist can position the arm without restriction. This placement ages well if you allow breathing room around the motif.
12. Crane in Flight Silhouette on the Collarbone
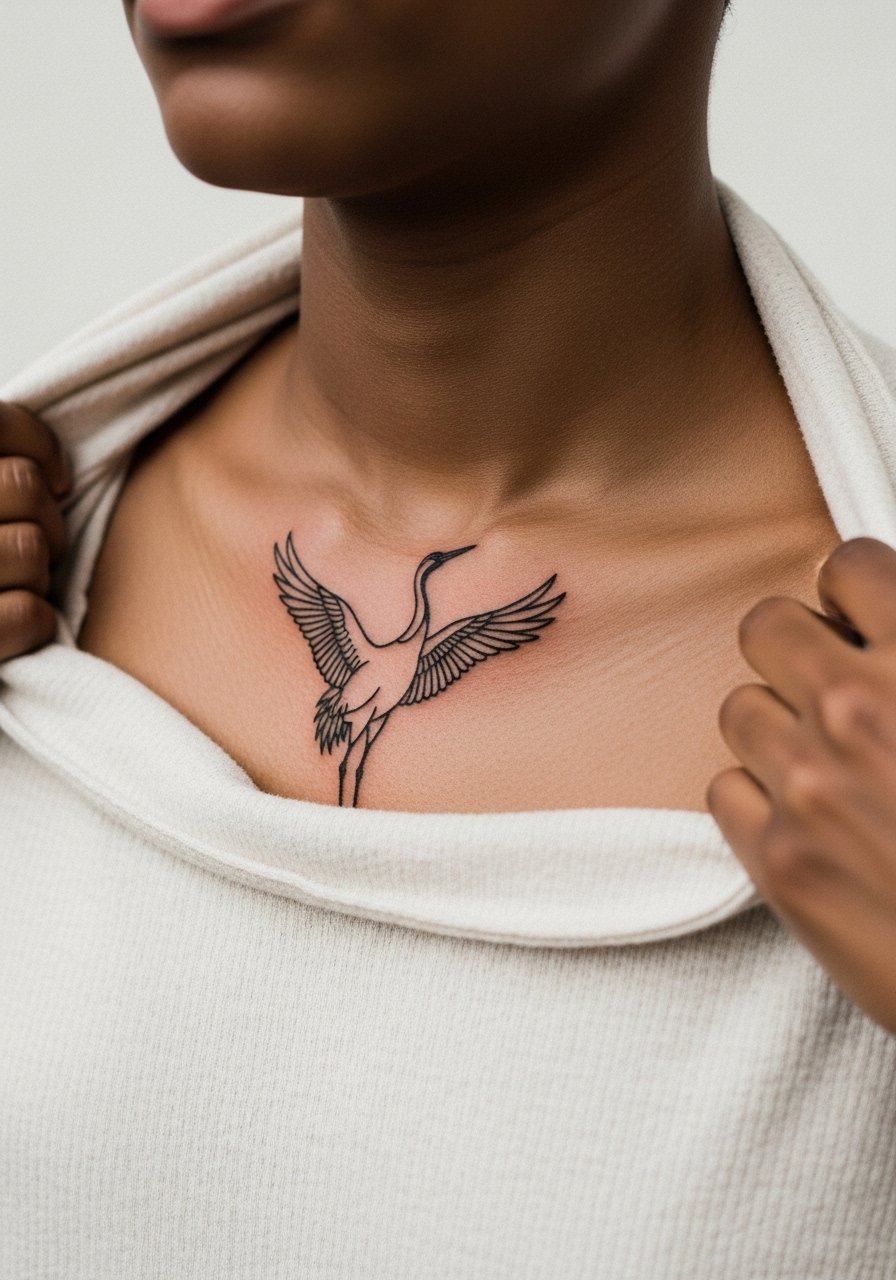
Collarbone cranes need negative space wings to keep motion and elegance over time. Request bold outer contours and light internal gaps. Pain is noticeable over bone and the session usually fits into a single visit. Designers sometimes overdraw feather detail, which blurs into grey patches later. Show it with a thin chain pendant necklace that sits above the silhouette without crowding the composition. Also mention to your artist you prefer minimal fill so touch-ups are simpler down the line.
13. Fan with Wave Motif on the Thigh
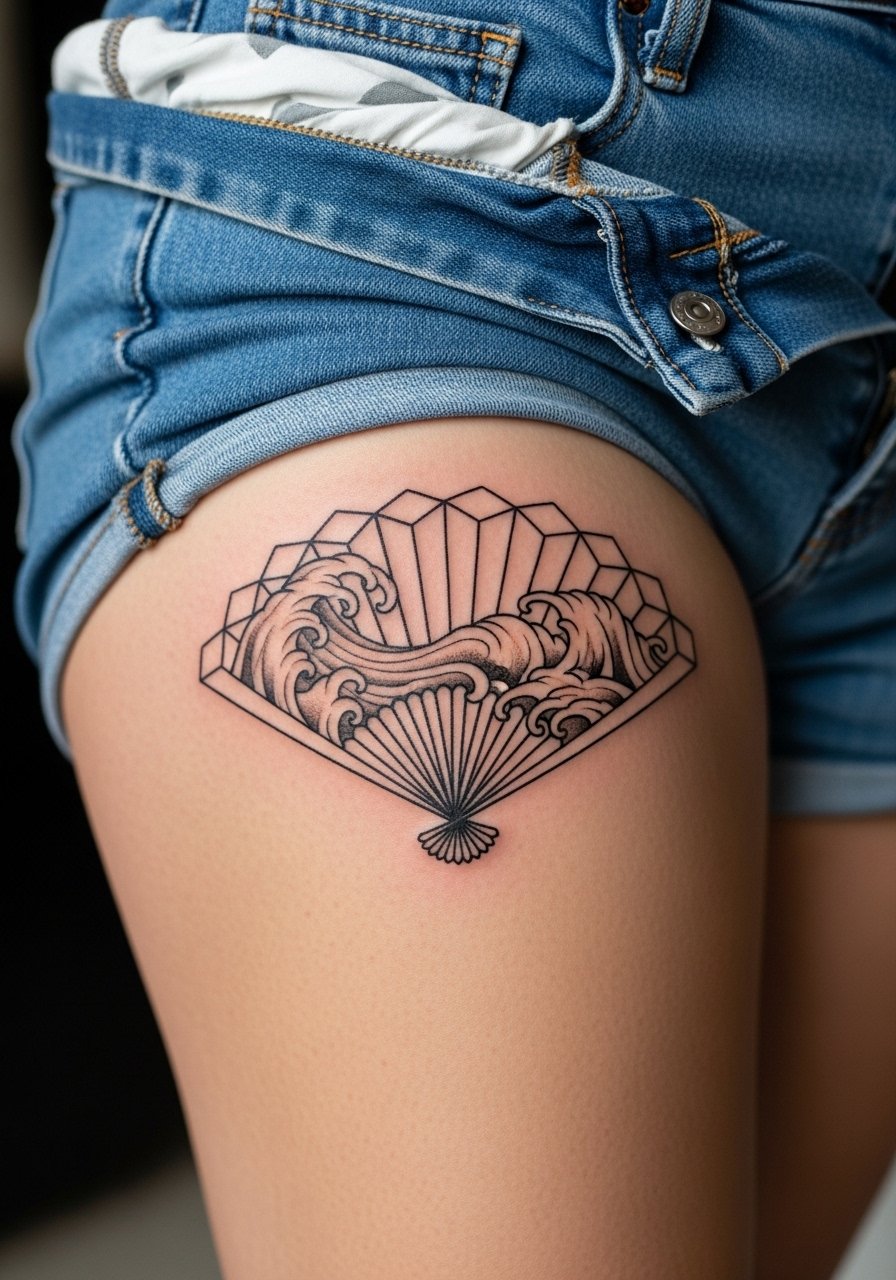
Thigh pieces let you keep generous scale even when the design is called "small." Ask for a three-inch fan with simplified waves and open negative space. Pain is low to moderate and most of this fits into one session. A common mistake is tight radial patterns that compress with movement, so insist on spacing that breathes. Pair the fan with high waist denim shorts for summer visibility. Session wear should include loose shorts so the artist can access the area comfortably.
14. Tiny Hannya Outline on the Upper Arm
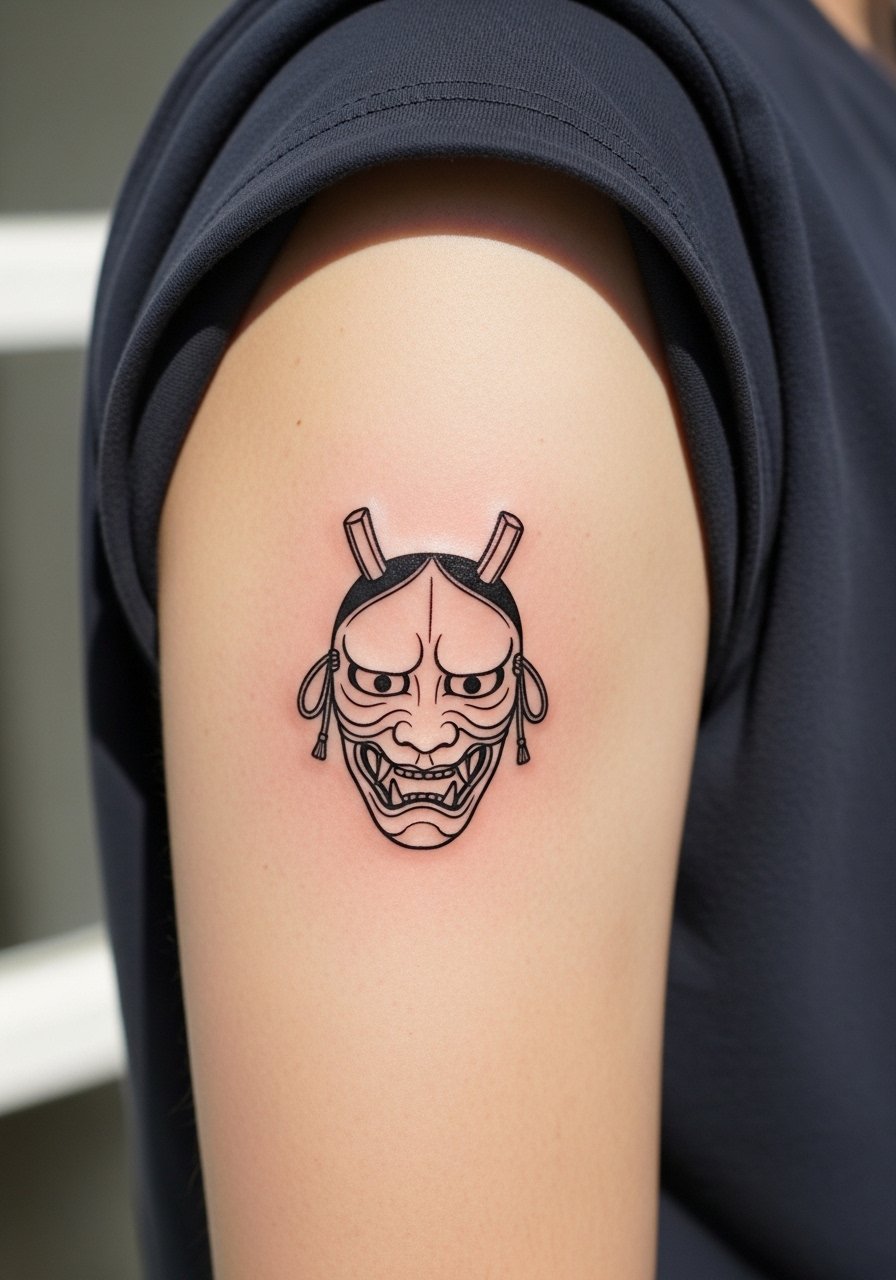
Hannya imagery is charged, so consider a simplified silhouette rather than a full traditional face at small scale. Ask your artist for a clear expression line and avoid tiny teeth or eye detail. Upper arm tolerance is good and the session time is short. A mistake is packing too many facial features into a small area, which loses nuance when healed. This design ties back to Noh theater iconography, so a respectful approach is to adapt rather than replicate.
15. Mini Seigaiha Band Around the Wrist
A continuous wave band looks crisp when arcs are scaled to wrist circumference. Tell the artist you want slightly wider arc spacing so the band survives abrasion and washing. Pain is similar to other wrist work and the piece takes one short appointment. Overly tight repeats are the typical mistake that blurs by year two. Style it with a minimalist metal bracelet stack that does not sit over the tattoo and cause friction.
16. Miniature Sake Cup with Steam on the Rib Edge
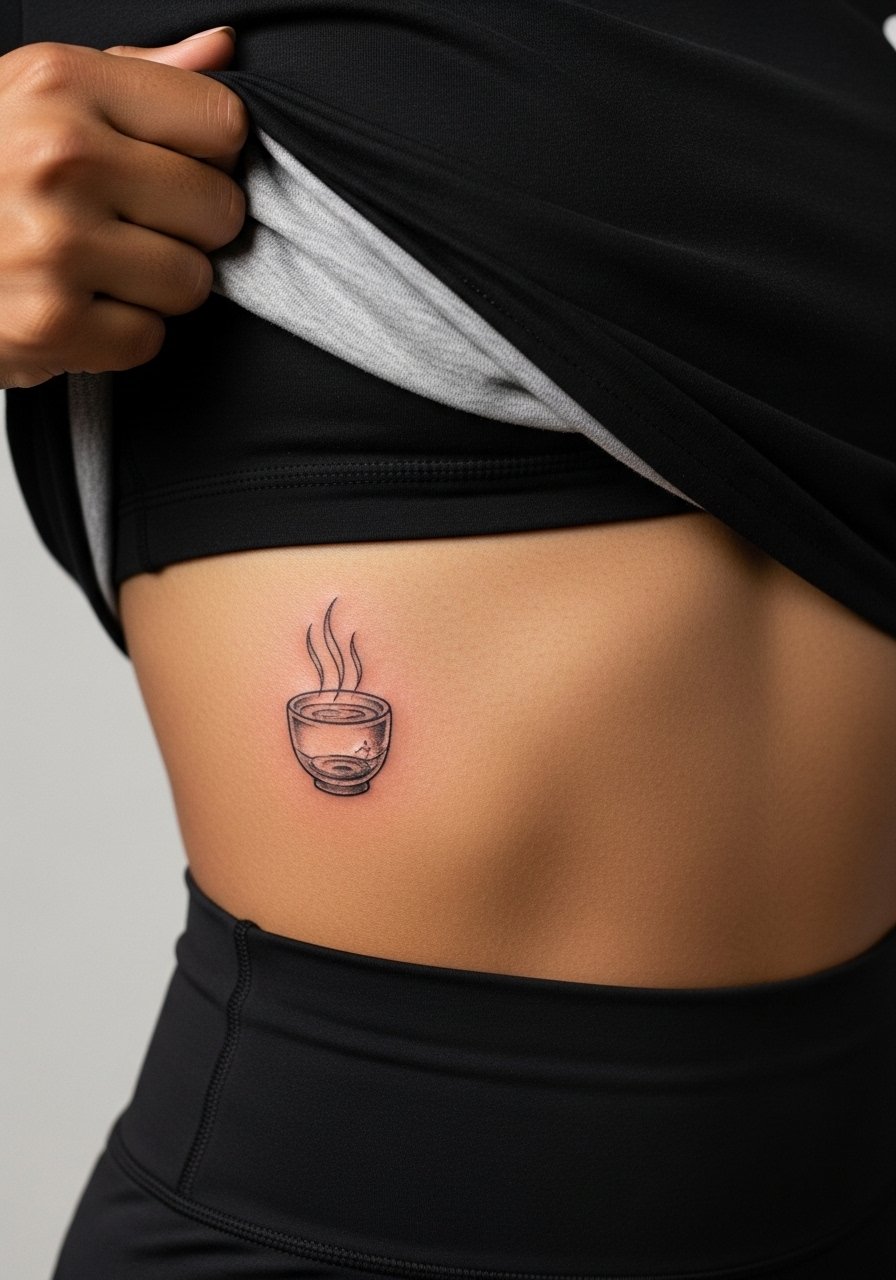
Small rib edge icons are intimate and read like little personal notes. Pain is high and the linework needs space to avoid blowout. One camp of artists says micro rib work will lose crispness quickly. The other says with proper depth and slightly thicker lines it can remain legible for years. Ask the artist which approach they prefer and book a touch-up slot. For the session choose a fitted sports bra you can adjust so the artist can reach the side without exposing other areas.
17. Tiny Wave Crest with Seigaiha Accent on the Ankle
Ankle is a repeat friction area, so small crests need breathing room and slightly bolder linework. Tell your artist you want the crest to be the focal point with the Seigaiha as a light accent. Pain spikes near bone and a short session is the norm. A common error is tiny inner patterning that fades into a blob. For summer wear, keep it visible with black leather ankle strap sandal looks and choose footwear that does not rub the fresh work.
Frequently Asked Questions
Q: How long should I expect touch-ups for fine line cherry blossoms on the forearm?
A: Fine line on the inner forearm tends to need a touch-up around year two to three if you want crisp petal edges. It depends on your sun exposure and how tightly packed the petals are. Ask your artist about a planned light touch-up during your consult so you can budget time.
Q: Will a minimalist koi on the wrist suffer from blowout faster than a thicker blackwork piece?
A: Yes, micro outlines on the wrist can show early blowout if lines are too hairline. A slightly stronger outline and strategic negative space reduce that risk and delay the need for a touch-up. Discuss expected line weight with your artist rather than defaulting to the thinnest option.
Q: Are there cultural concerns with getting Hannya or samurai helmet designs small and stylized?
A: These images link to Japanese theater and history, so many people choose small adaptations or stylized versions rather than exact replicas. If cultural origin matters to you, say so in the consult and ask for respectful references rather than copy-paste imagery.
Q: What should I wear to a ribcage phoenix session to stay comfortable and give the artist access?
A: A fitted sports bra or a cropped top you can lift slightly works best. That lets the artist work without exposing other areas and keeps you comfortable during the longer session. Bring a layer to stay warm during breaks.
Q: How can I style a collarbone dragon tail for evening wear without hiding it?
A: Off-shoulder tops and wide-neck shirts frame collarbone work nicely. A thin gold chain necklace layered can sit lower so the dragon tail remains the visual anchor.
