
Fine line Japanese motifs on the hand are everywhere on feeds, but the pieces that still look deliberate after years are rarely the same ones that popped up first. The trick is pairing appropriate scale, boldness, and placement with hand movement and everyday friction. Below are 21 Japanese-style hand ideas, each one with practical notes on aging, session feel, and what to tell your artist to keep the work readable longer.
1. Mini Koi on the Back of the Hand
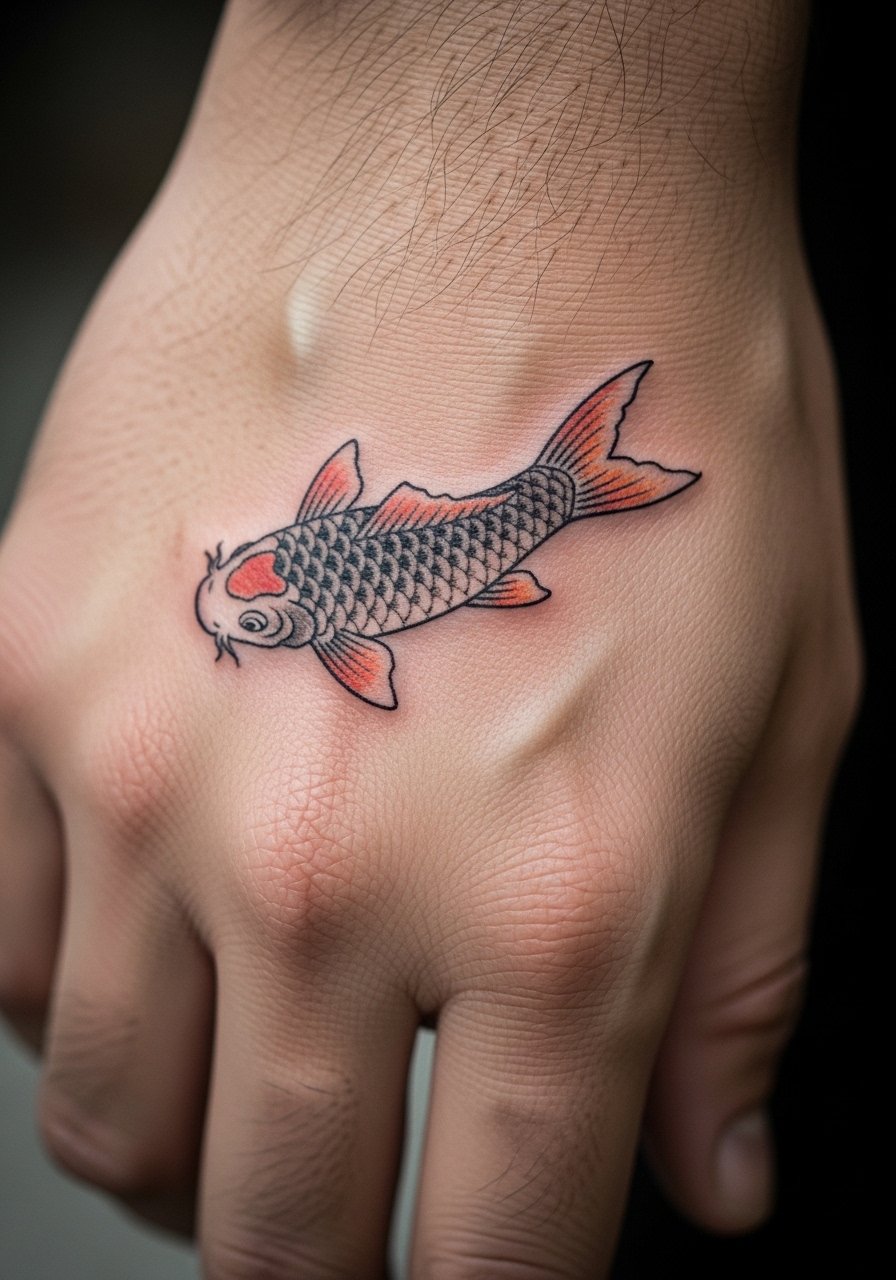
I've seen small koi on backs of hands that look lively for one season and ghosted into patchy blurs by year three. For a hand koi that holds, ask your artist for slightly bolder outline weight than you might on the forearm and for saturated color fields rather than lots of tiny gradients. Expect a sharp sting during the session, but it is short. Common mistake is packing too much tiny detail into the scales. Plan touch-up at year one to fix early wear from hand washing. This placement shows best when paired with a delicate chain bracelet that frames the back of the hand without rubbing the ink.
2. Hannya Mask Finger Stack
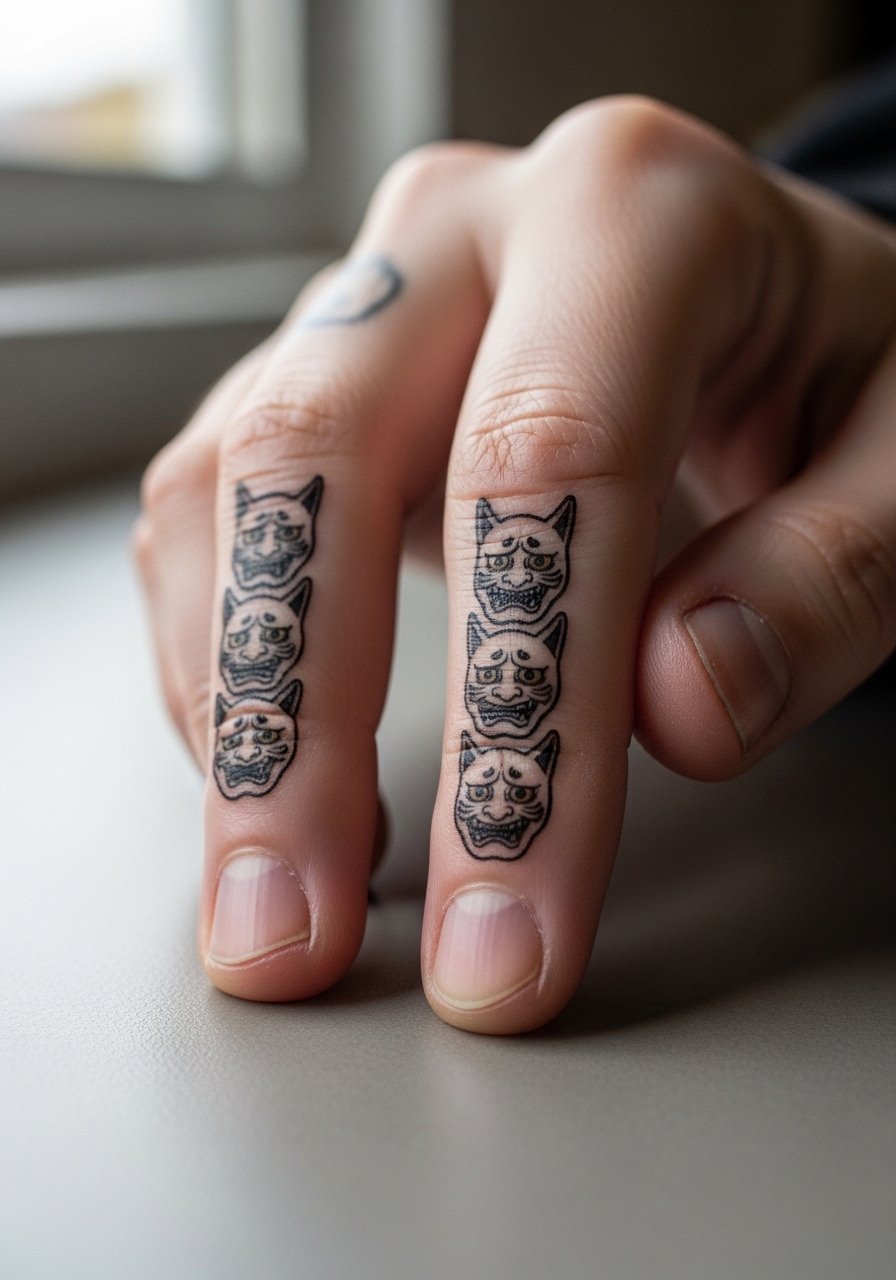
Fair warning: finger pads and sides are high friction and heal differently than flat hand skin. A Hannya mask rendered across adjacent fingers can read well if the masks are simplified into heavy black contours and negative space, rather than tiny facial detail. During consultation, request fewer fine interior lines and stronger silhouette. The session feels sharp in short bursts, and swelling is common for 24 to 48 hours. Blowout risk increases if lines are too close to joints. Expect touch-up at year one to preserve crispness. Pair the design with thin band rings that sit above the knuckle so the rings do not sit on fresh ink.
3. Wave and Cloud Cuff Around the Wrist
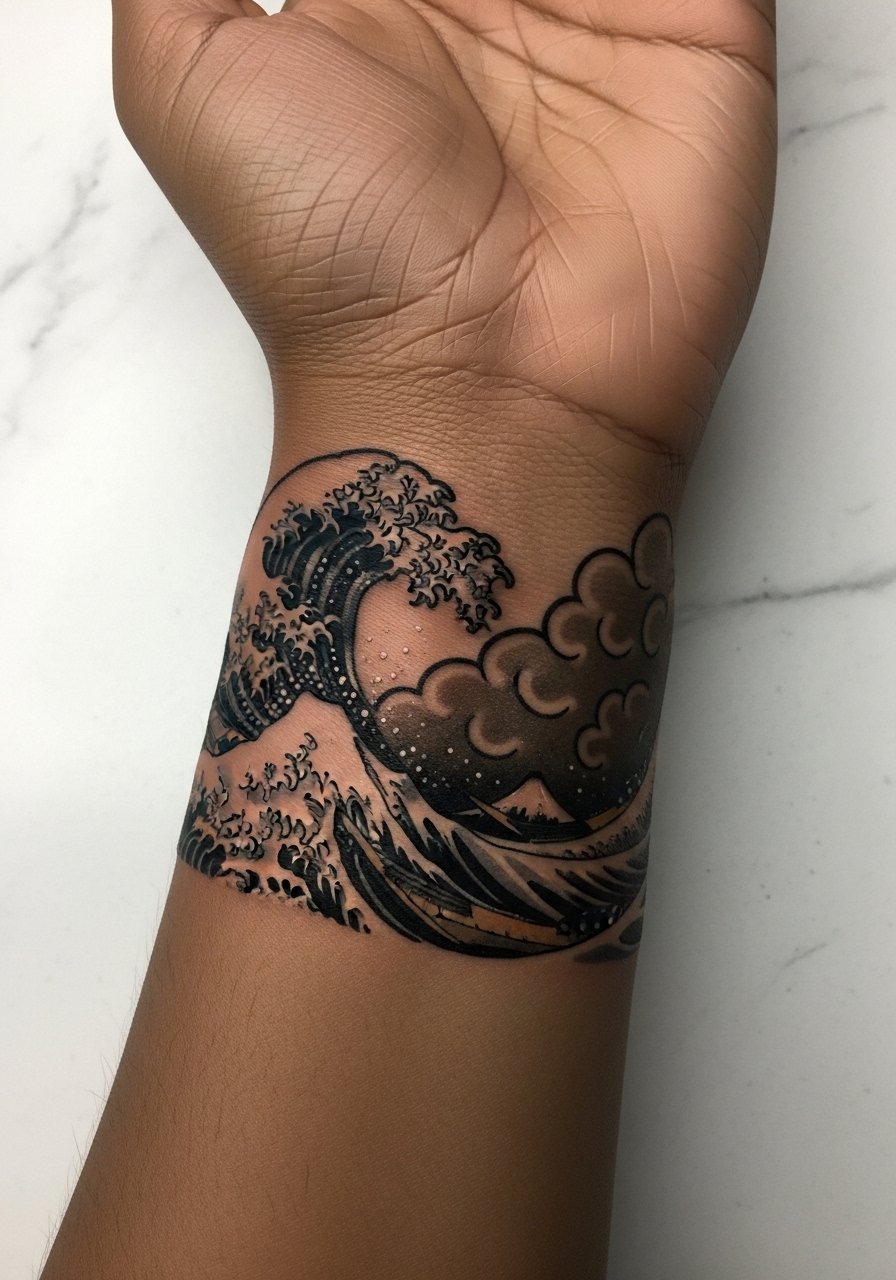
Most cuff-style pieces age nicely when scaled to the wrist's movement zones. The big mistake is going too thin with linework across the entire cuff. Ask for stronger linework on the outer edge and lighter interior detail. At six months the contrast should still read, and at two years expect the interior stipple to soften. For the session wear a loose button-down shirt you can roll or pull aside so the artist has clean access to the wrist. If the cuff hits the underside of the wrist, mention to the artist that area endures more rubbing from watches and bags.
4. Small Daruma on the Thumb Web
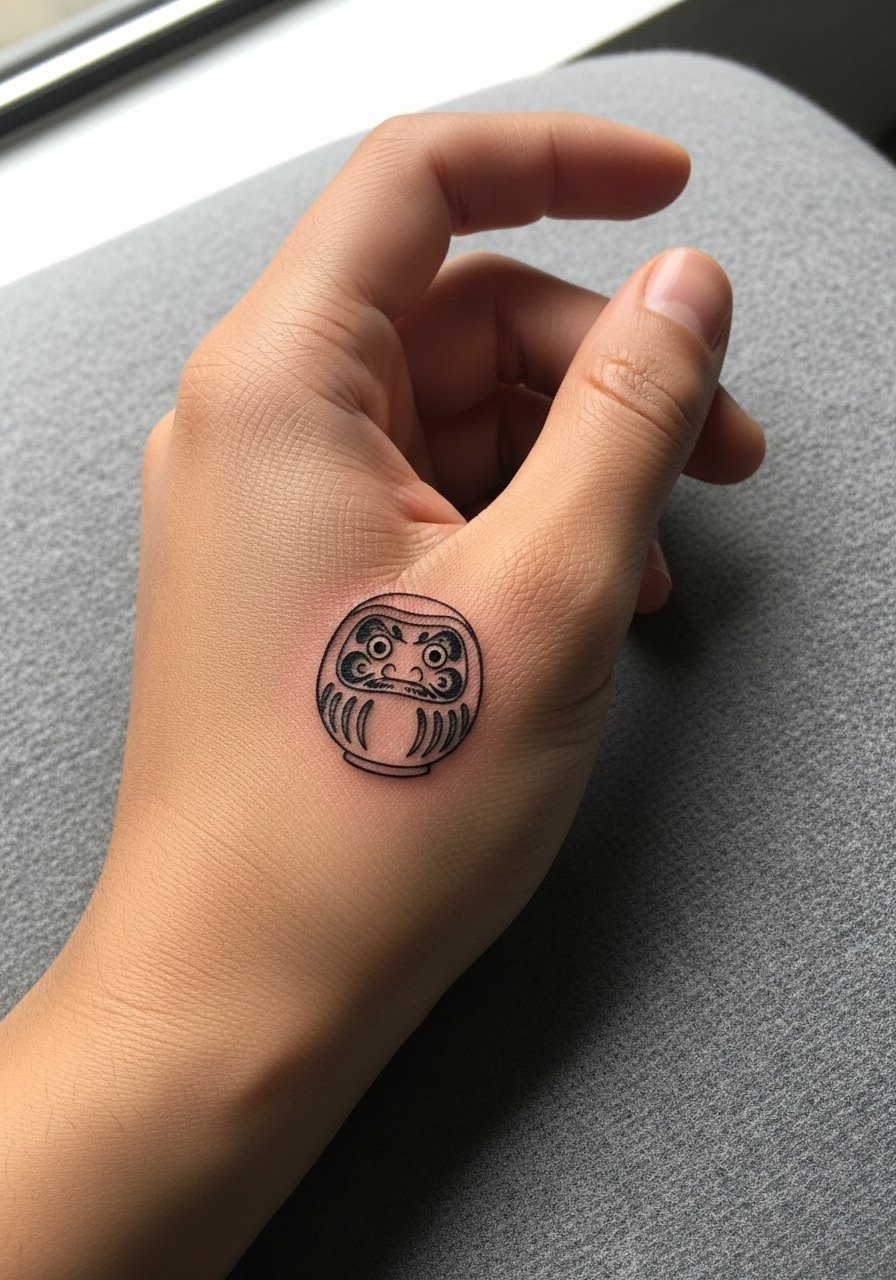
There are two camps on tiny thumb-web work. One group says this micro area simply wears away fast from constant motion and needs heavy bolder work to survive. The other group says with strong outlines and a shallow but consistent depth, small motifs can settle well. Name the debate during consultation and ask your artist which approach they favor. The tactile session feels quick but intense. A common mistake is using ultra-fine linework that disappears under the first month of hand use. For showing it off, a minimalist leather cuff bracelet can frame the thumb web without pressing on the tattoo.
5. Crane in Flight Across the Knuckles
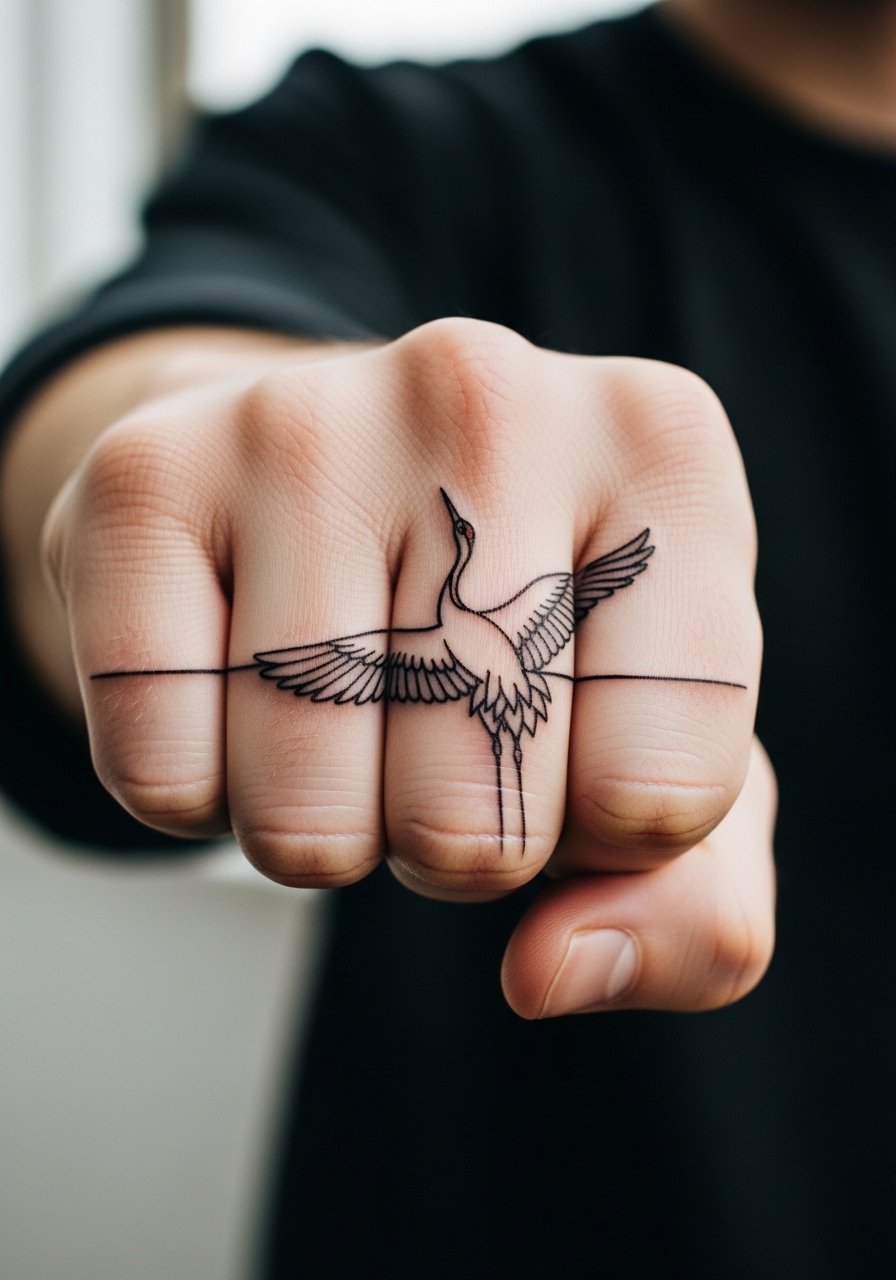
The knuckle zone moves constantly, so visual impact and longevity depend on scale and contrast. I recommend a simplified crane silhouette with thicker linework across the knuckles and thinner neck lines that stop short of the joint. During the consult, show images of knuckle pieces that held up and point out which lines you want bold. Pain is sharp during the session but usually brief. One common error is adding shaded gradients over knuckles, which softens into undefined gray. Expect a touch-up within the first year. Keep bands and rings looser for three weeks after the session.
6. Sakura Branch on the Side of the Hand
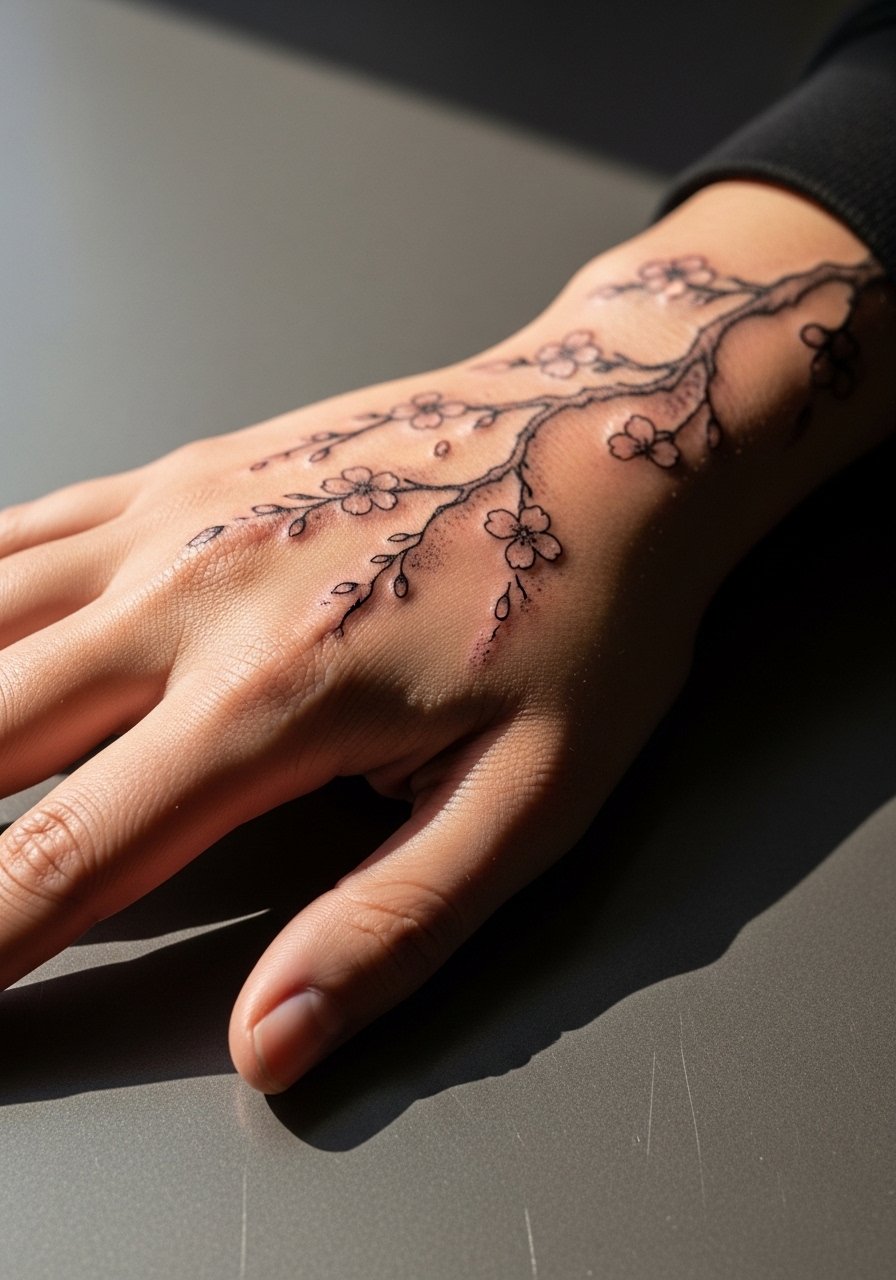
This spot reads elegant when the branch has breathing room and when blossoms are treated as negative-space highlights. Most people ask for tight clusters that age into a mush; avoid that. Tell the artist to space blossoms and to use stipple shading instead of heavy gradients. Session feel is moderate, and swelling can accentuate the branch shape for a day. For the appointment, wear a loose long-sleeve you can pull up so the artist has easy access without tugging on fabric. If career considerations matter, remember visible hand tattoos still carry different workplace responses.
Studio Day Picks
Those back-of-hand and wrist designs above need different prep than small finger pieces, so these items smooth out the session and the first week.
-
Stencil transfer paper kit. Lets you preview line placement on the hand and wrist so you can check how the design moves with your fingers and wrist motion.
-
Topical numbing cream. Apply per directions before short, sensitive hand sessions to take the edge off without altering how the artist works.
-
Thin protective film roll. Helps protect small hand areas from constant washing and friction during the first days without trapping too much moisture.
-
Fragrance-free gentle body wash. Cleanses healing hand tattoos without irritating the linework that tiny Japanese motifs depend on.
-
Aquaphor healing ointment. A thin layer for the first few days can keep the skin supple while lines begin to settle, especially on areas like the thumb web and knuckles.
7. Wave Linework Flowing Over the Thumb
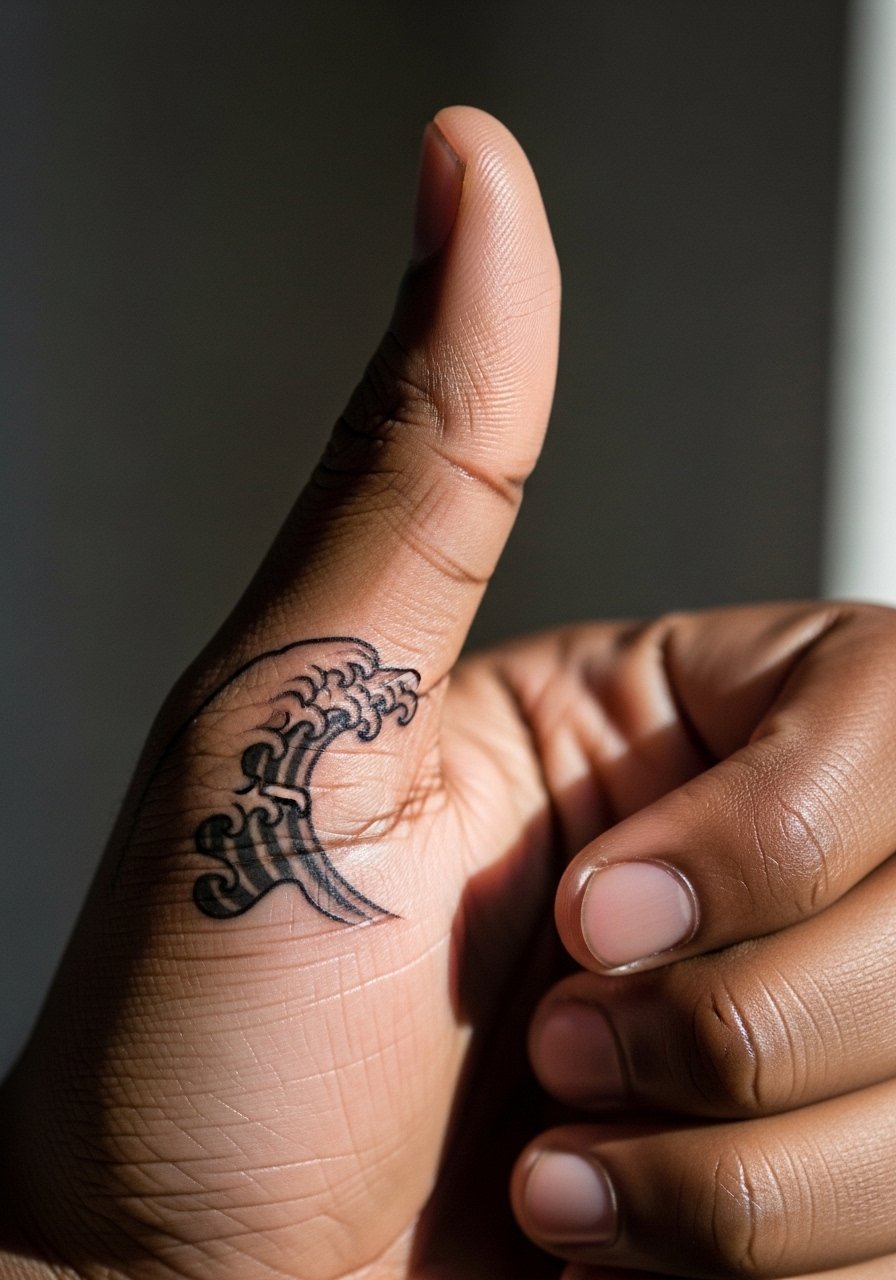
Visual impact lead: there is something about a continuous wave stroke that reads strong on the thumb even after years if scale is right. For longevity, ask for a single confident stroke that curves with the thumb's natural motion instead of many small competing curves. The session is sharp but short. The biggest mistake is packing the curl with interior dot work that fades into gray. Expect a touch-up around year two depending on use. For shows where you want to reveal this, a fitted watch with a thinner strap keeps attention on your thumb design without covering fresh ink.
8. Daruma Palm Accent
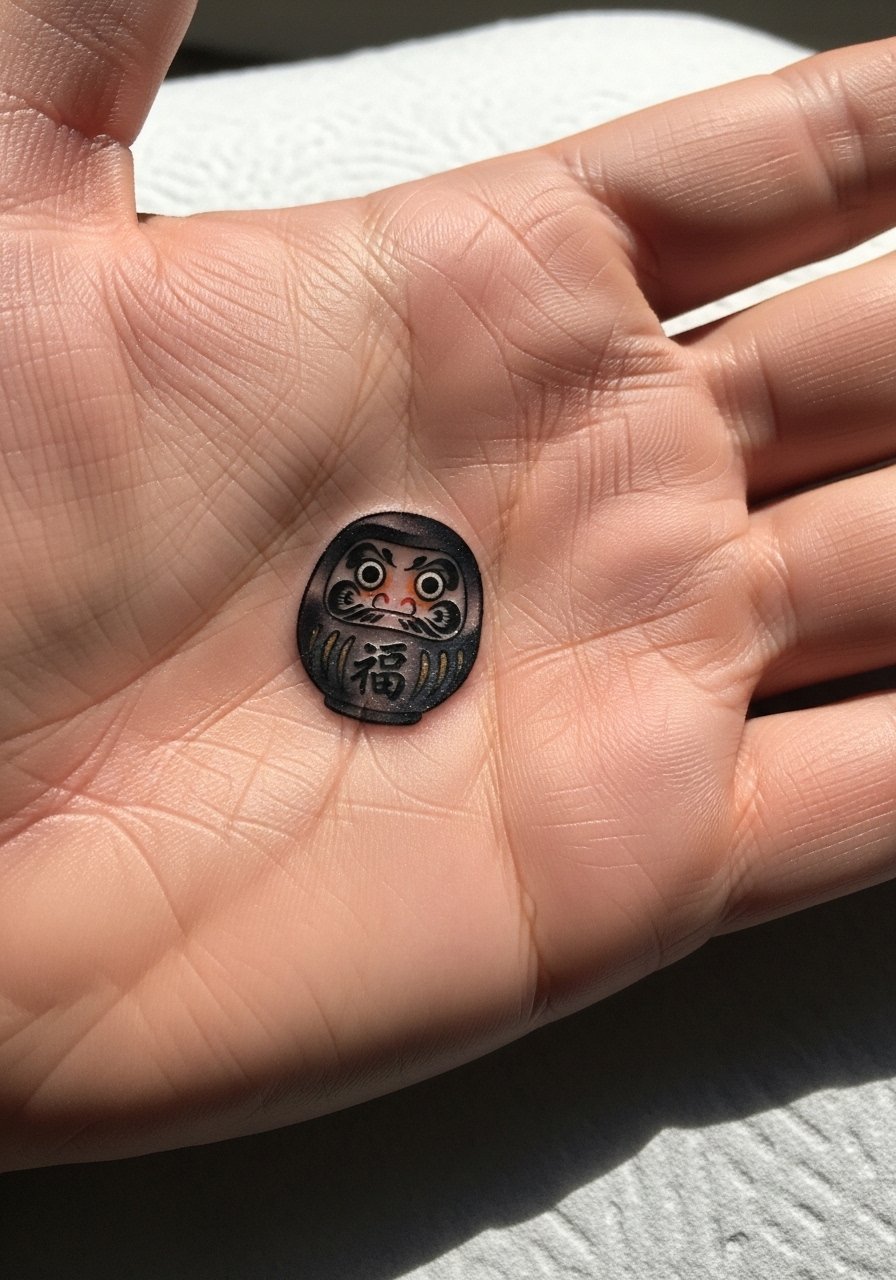
Personal observation: palm tattoos generally fade faster because the skin regenerates, and Japanese motifs on the palm need to be bold and uncomplicated. Tell your artist you want a high-contrast Daruma with minimal interior lines. The session feels tender and the healed look can soften quickly. A realistic expectation is multiple small touch-ups over the first two years. This placement is best if you want a personal symbol that you do not plan to show constantly, because palm wear makes public presentation inconsistent.
9. Komainu Stamp on the Back of the Hand
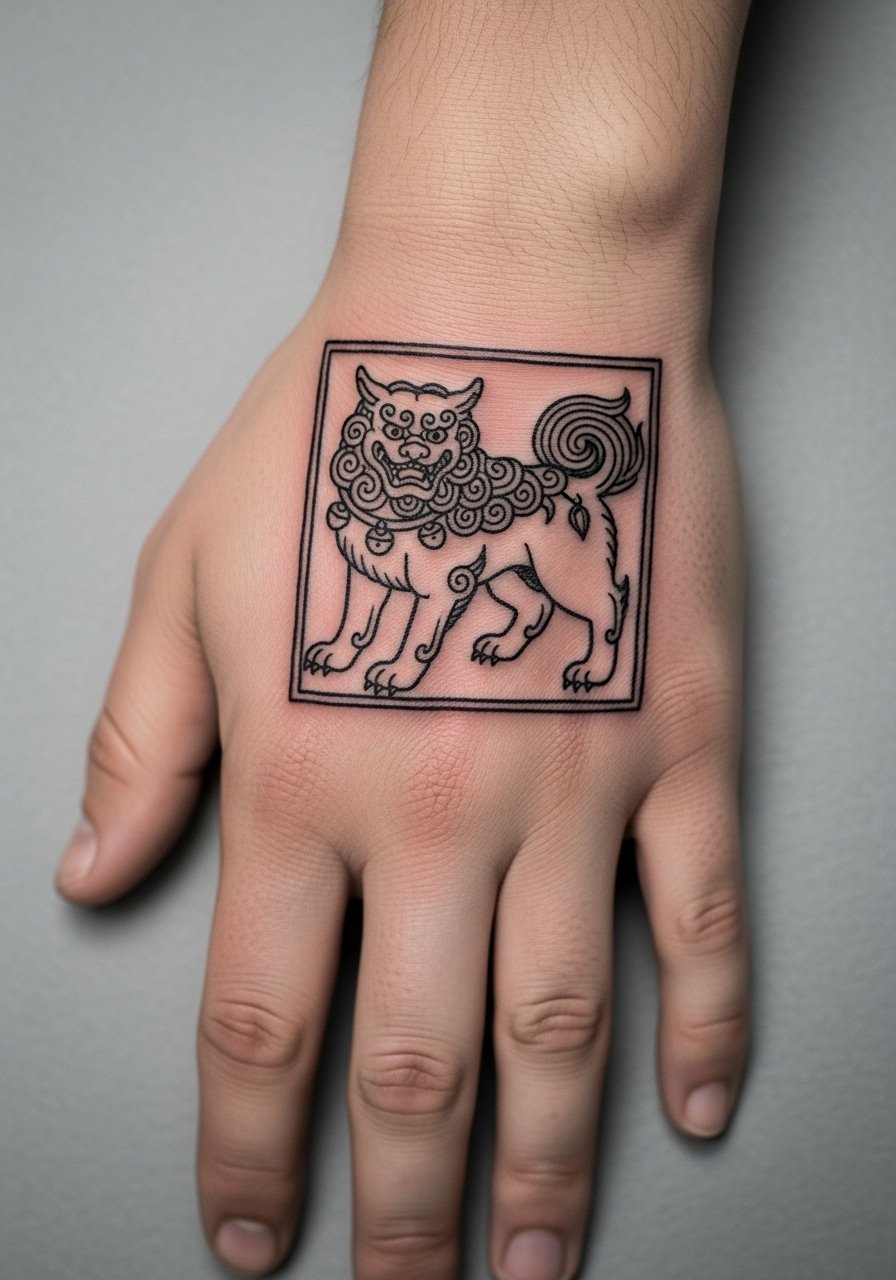
Consultation lead: when you sit down for a komainu motif, bring references that show scale and silhouette rather than elaborate fur texture. Ask the artist to treat the piece like a stamp, with clear negative space around the figure. The session feels steady and can be longer if you add dot shading. Blowout risk is higher on the edges near the knuckles, so maintain spacing from bone prominences. For showing off the stamp, a simple thin ring stack on adjacent fingers draws focus to the composition without pressing onto the tattoo.
10. Tora (Tiger) Mini Portrait on the Finger Side
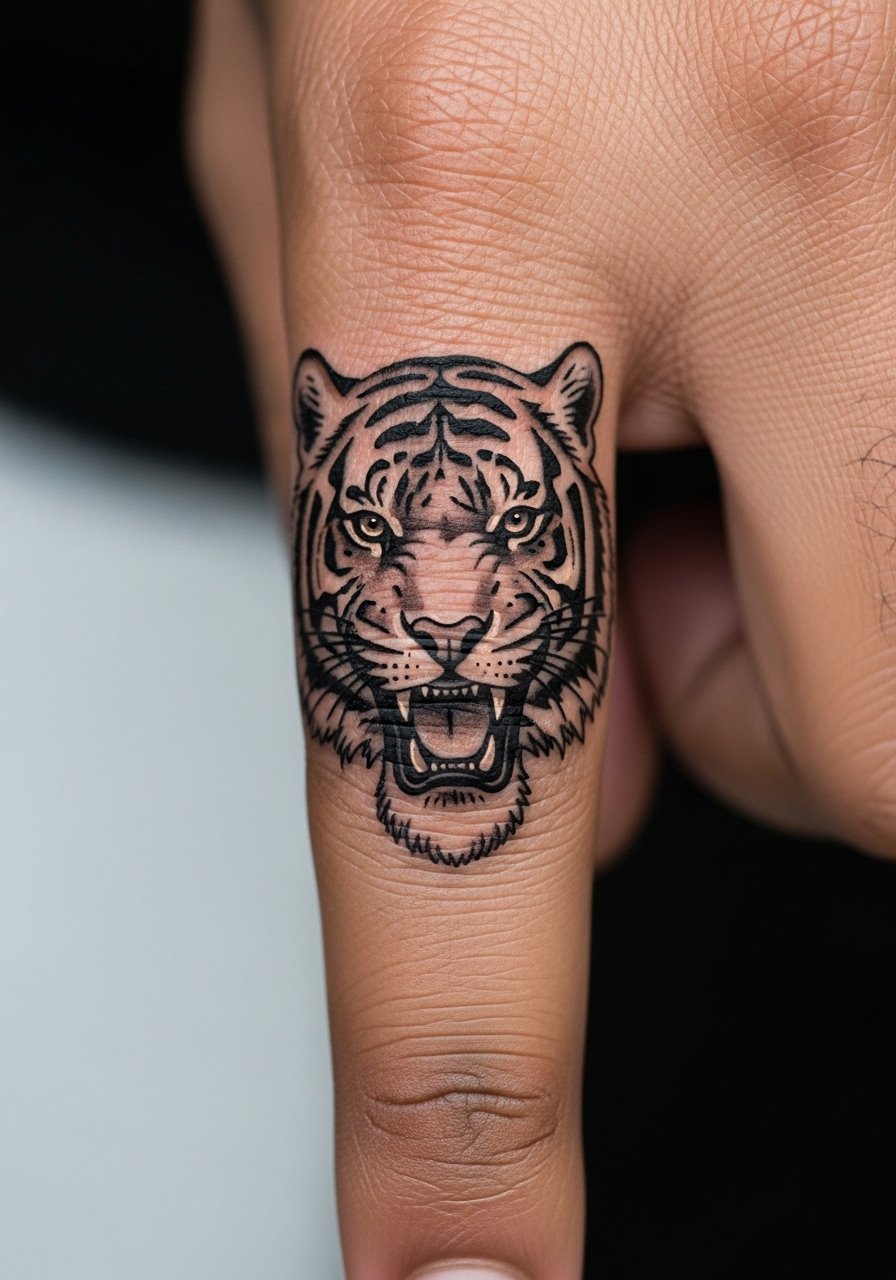
Mistake lead: the biggest error for finger-side portraits is over-detailing the face. Tigers need bold planes on fingers to remain readable. During consultation, say you prefer a stylized face with solid black areas and selective highlights rather than full micro-realism. The session will sting sharply and swelling is likely for 24 hours. Expect the darkest blacks to soften at two years and plan a touch-up then. Keep rings and tight gloves away from this finger for three weeks post-session.
11. Koi Scale Pattern Wrapper on the Thumb Base
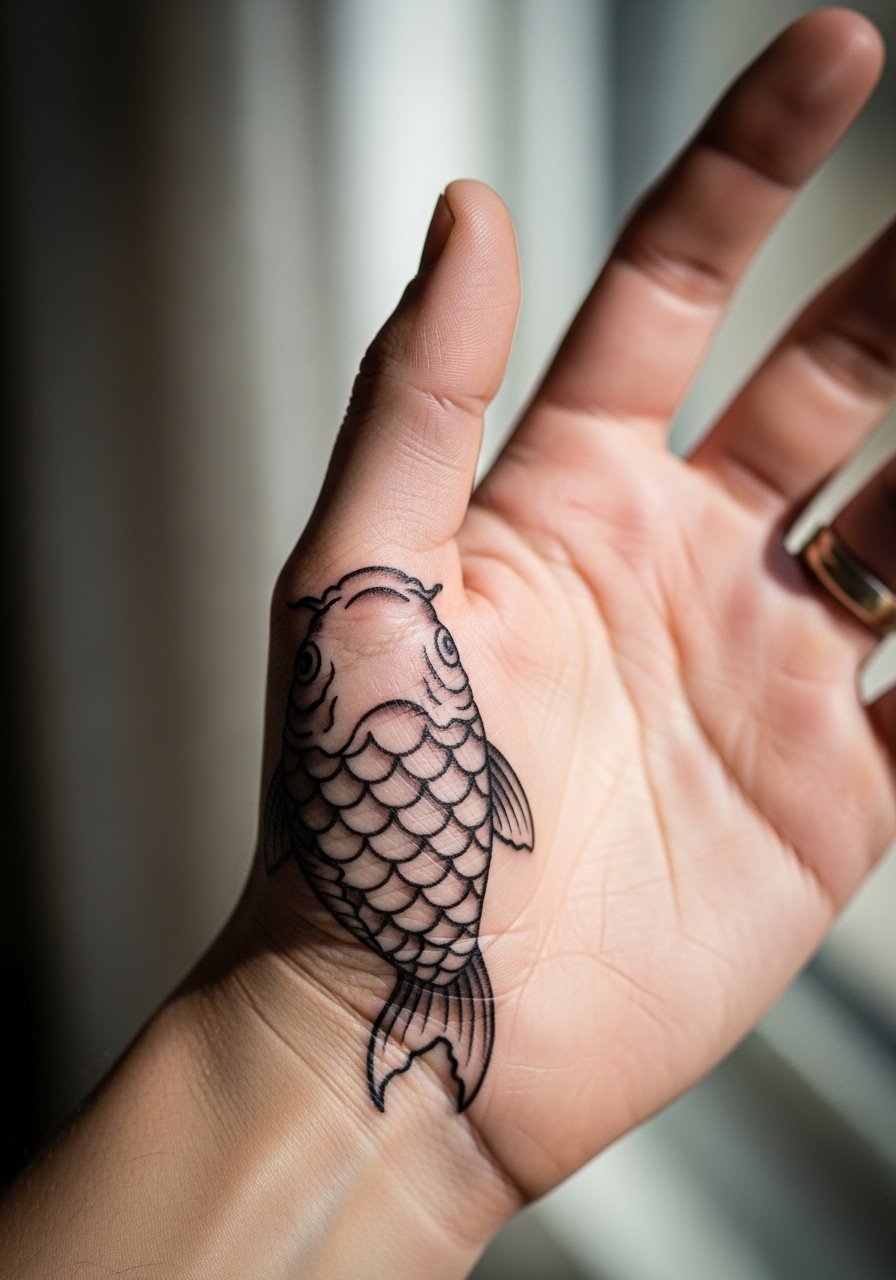
Aging/healing lead: patterned cuffs behave like bracelets visually and they survive longer when scales have clear spacing. Tell your artist to leave micro negative gaps between scales rather than filling every scale with tiny shading. The session is moderate in length and can be fiddly because of the thumb curve. A mistake I see often is making the pattern too dense so individual scales blur by year two. For the appointment, wear a loose drawstring pant or shorts that you can move comfortably to stay relaxed during small, focused sessions.
12. Enso Circle Accent on the Side Finger
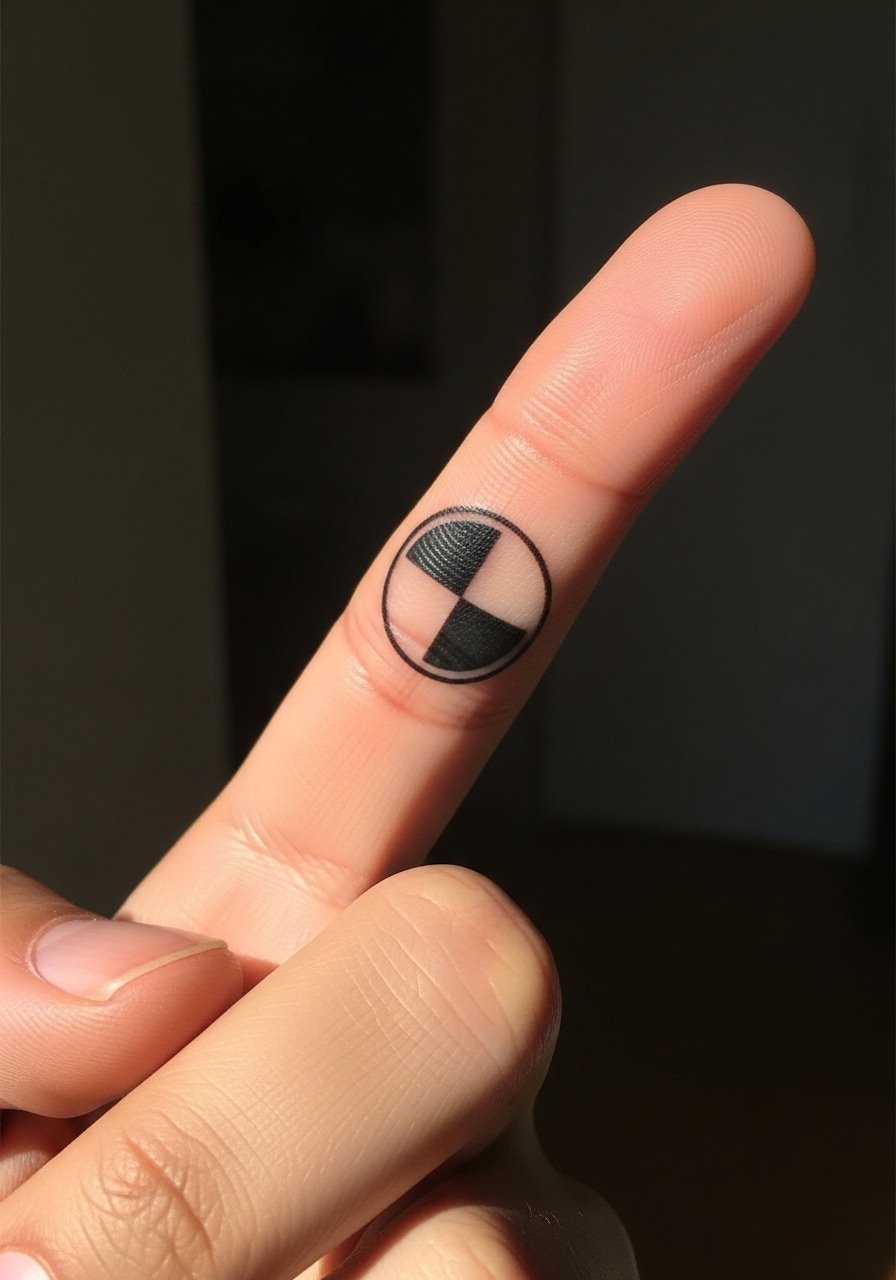
Visual simplicity often outlives ornate detail on fingers. The Enso slice should be bold and brief, not an attempted full brushstroke that runs into joints. During the consult mention you want the circle to read as a bold mark rather than a textured stroke. The session is quick but precise. Expect a touch-up earlier than forearm work because of constant hand washing. For careers that frown on visible hand art, consider placing the Enso slice on the outer finger where it is less prominent when your hands are at rest.
13. Geisha Silhouette Across the Back of the Hand
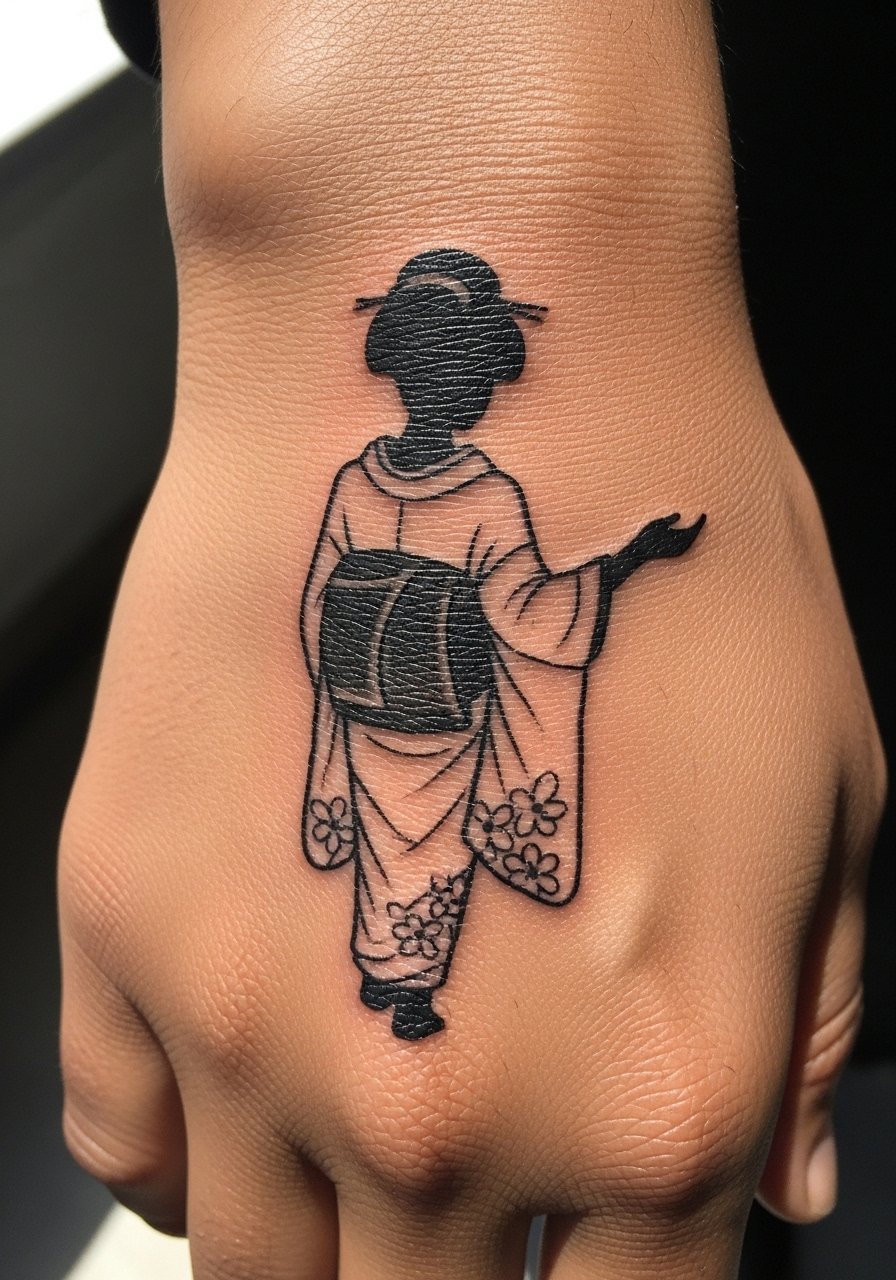
Controversy lead: designs borrowing directly from Japanese cultural figures split people into two camps. One camp says these motifs should be reserved for those with a cultural connection. The other camp argues respectful homage through informed design is acceptable. Avoid cultural shorthand by asking your artist to adapt the silhouette into a personal composition rather than copying sacred iconography. The session can be longer for silhouette pieces if you add patterned kimono fills. For showing it off, a short-sleeve linen shirt keeps the back of the hand visible without competing with sleeve cuffs. If you are uncertain, research cultural meanings and discovery pathways like museum collections and community forums for context.
14. Spiral Wave on the Side of the Little Finger
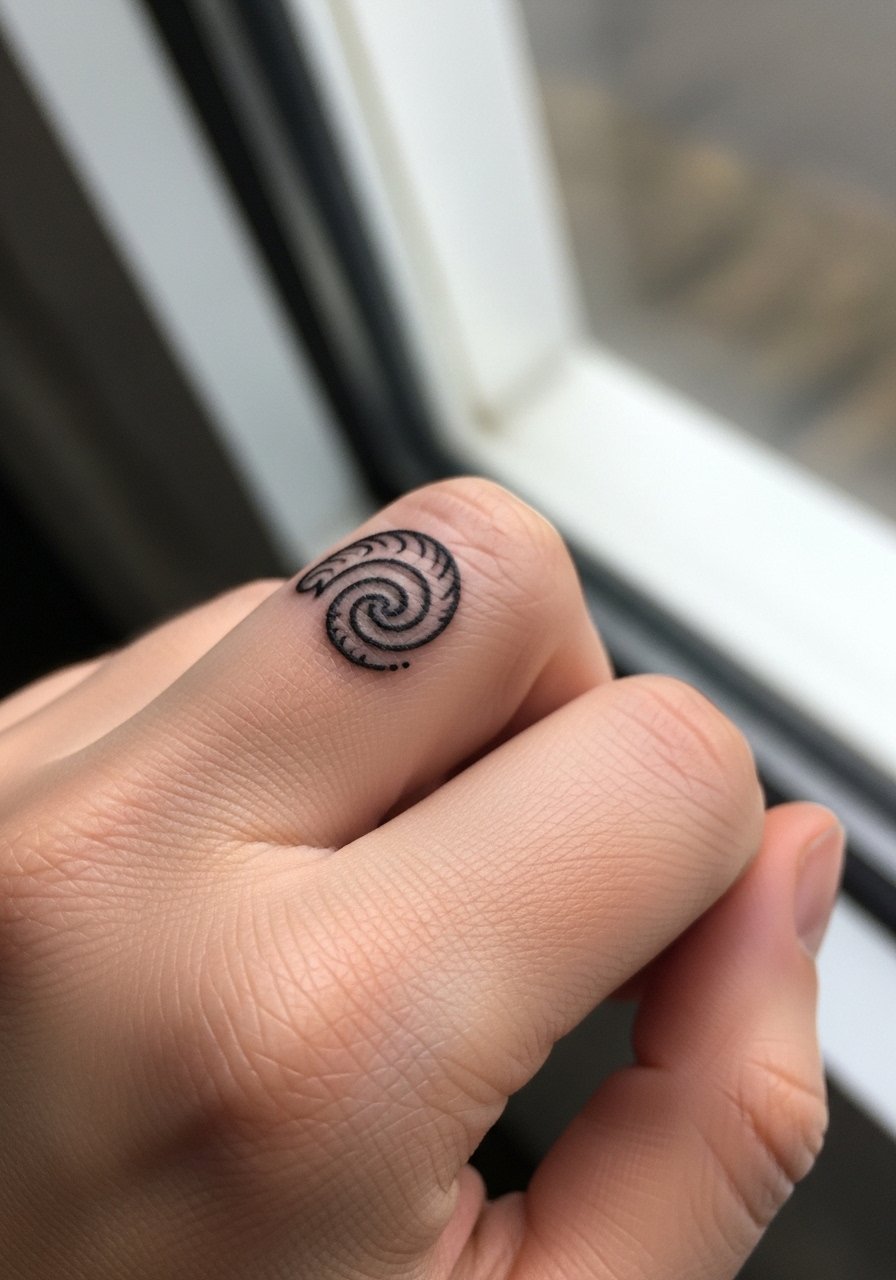
Mistake lead: too often people request a complex wave on the little finger and then expect it to remain readable. Keep the spiral bold and isolated from joint folds. Session pain is brief. Tell your artist to avoid tiny curls that sit over creases. Expect faster softening than on the back of the hand. For daily wear avoid tight rings on that finger for three weeks.
15. Lotus Outline Near the Wrist Crease
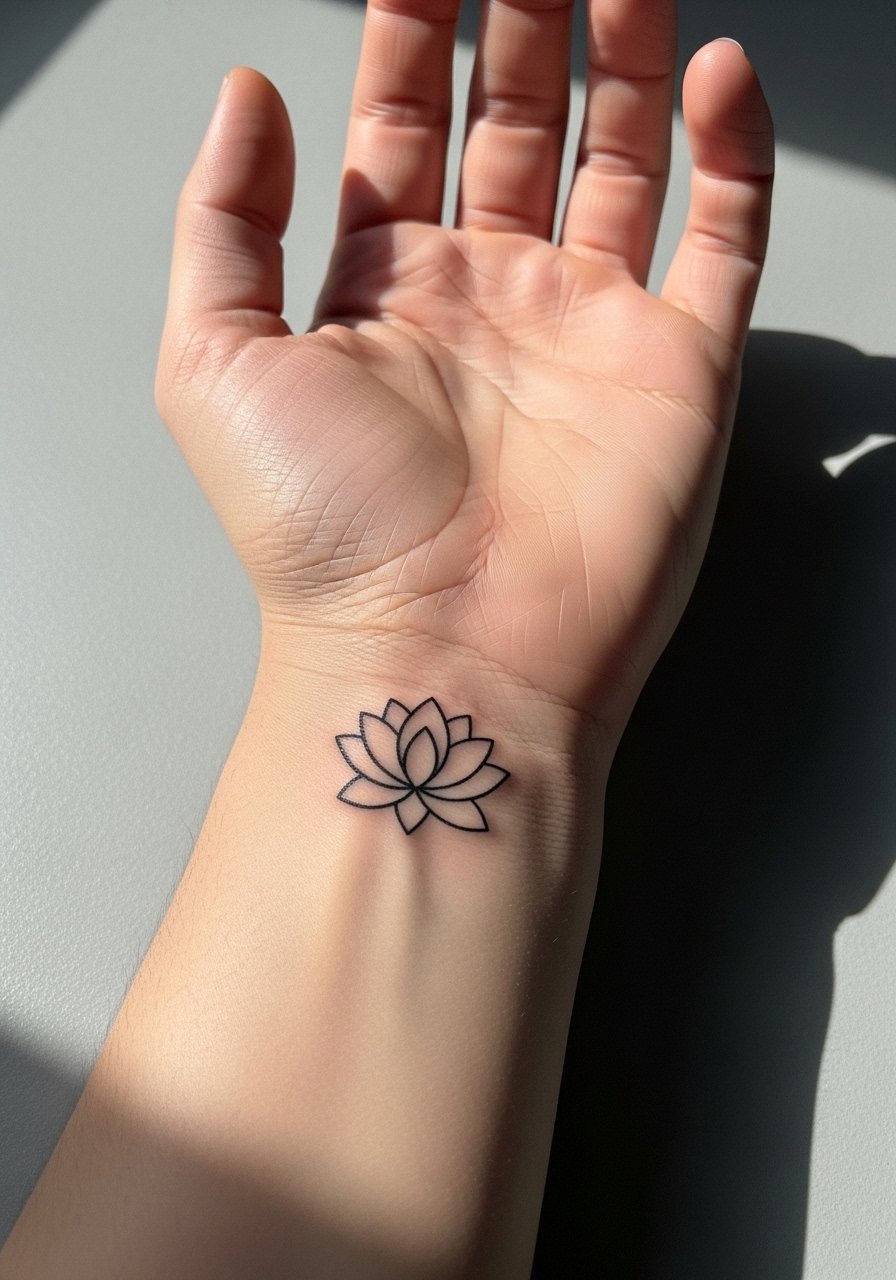
Consultation lead: place the lotus slightly above the wrist crease so it avoids constant folding. Ask the artist to anchor the petals with a small amount of negative space between each petal. The session is low to moderate in pain and short in duration. The most common mistake is placing the lotus directly on the crease, which smudges lines faster. For post-session comfort and to make the motif visible with short sleeves, pair the piece with a minimalist gold watch that sits just above the tattoo.
16. Wave Dot-Work Accent on the Thumb Pad
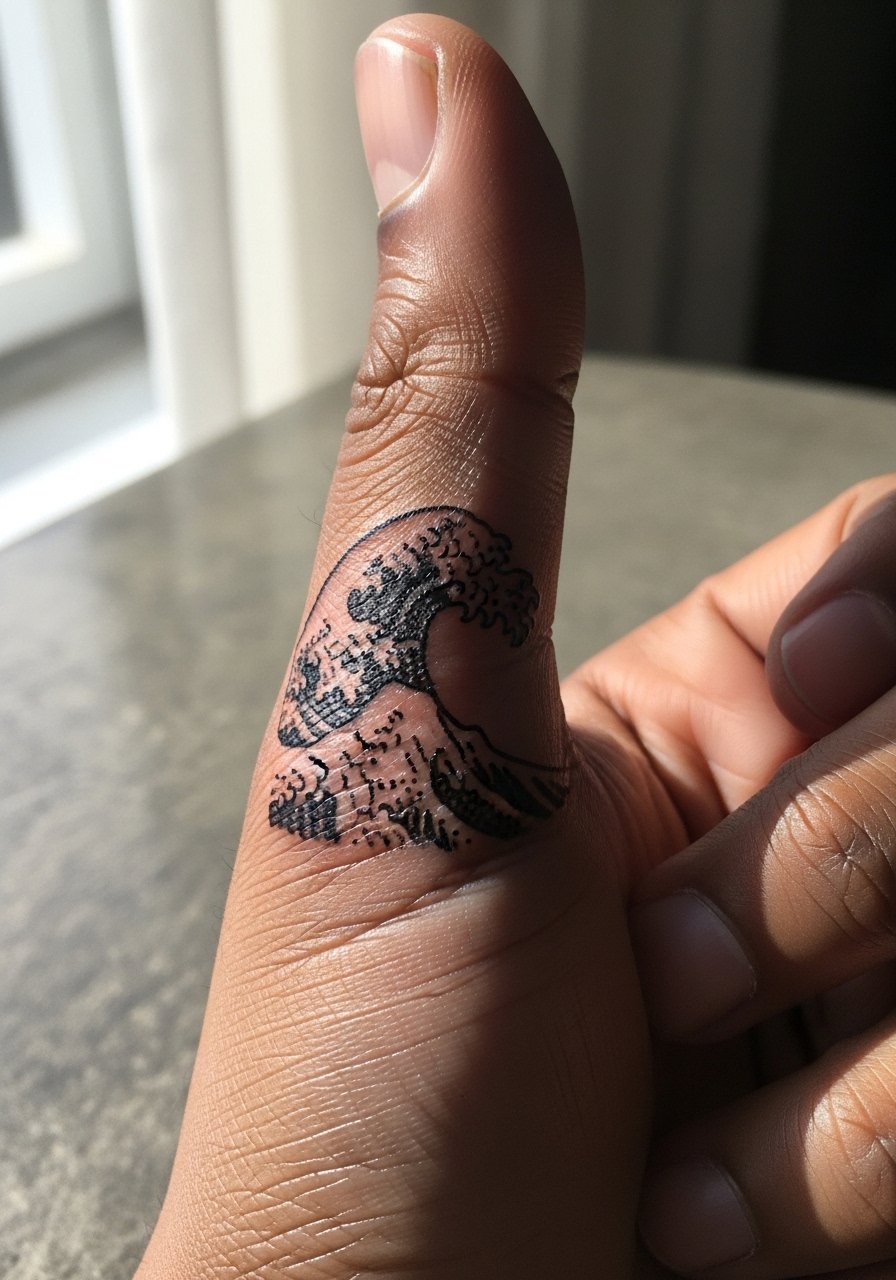
Aging/healing lead: dot-work on pads needs density without overpacking. Ask for a light stipple that reads from a short distance because dense dots can merge under high friction. The session feels tender and produces strong swelling for a day. Expect the dot-work to require a touch-up within the first 12 months. Keep the area dry and avoid heavy scrubbing during showers to preserve stipple contrast.
17. Small Torii Gate Above the Thumb Base
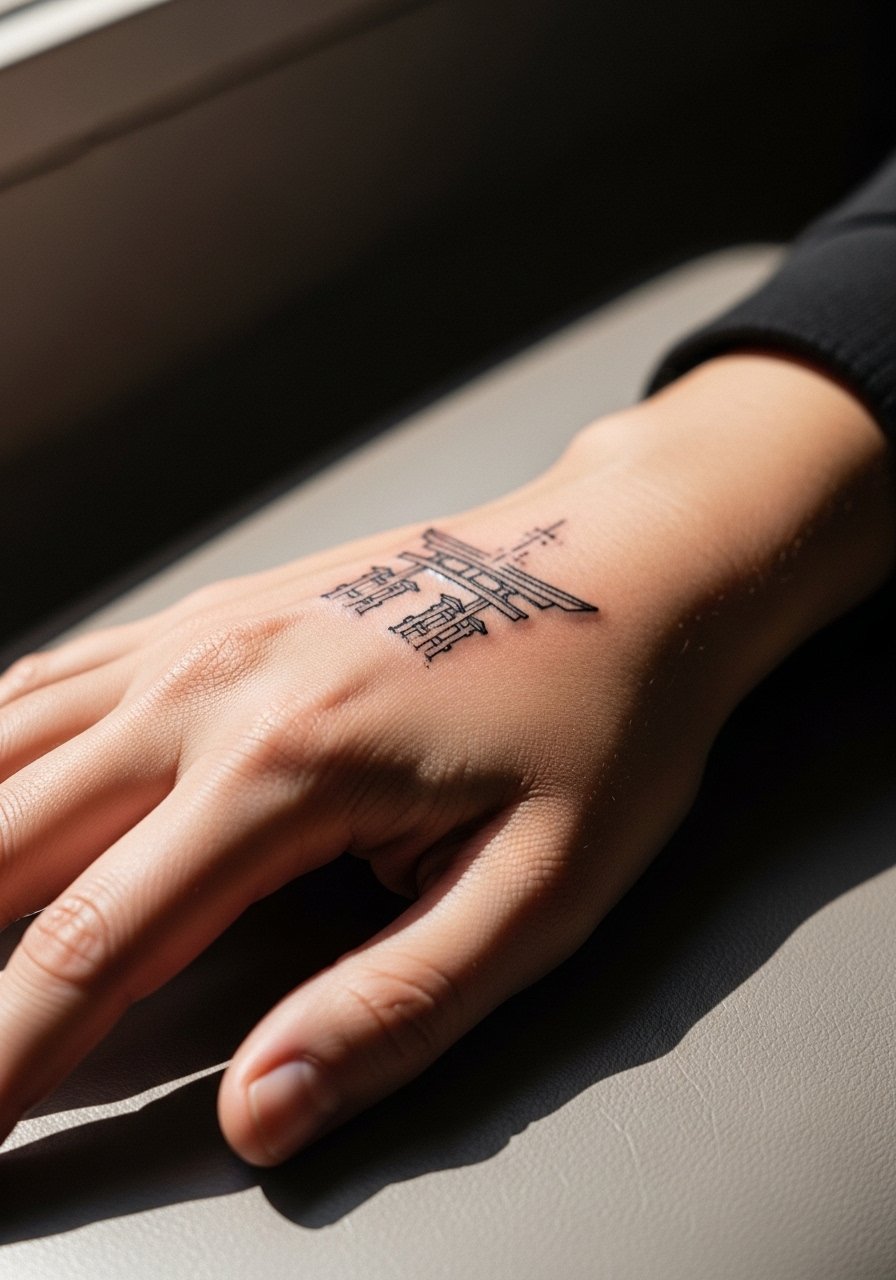
Styling lead: this architectural motif reads like a symbol necklace when placed near the thumb base. When you consult, ask for a compact gate with negative-space pillars and a bold crossbar so it reads at a glance. The session duration is short. A typical mistake is rendering the gate too thin, which dissolves under motion. For showing it off, pair with a thin chain pendant necklace that sits above the wrist without overlapping the gate.
18. Samurai Crest on the Back of the Hand
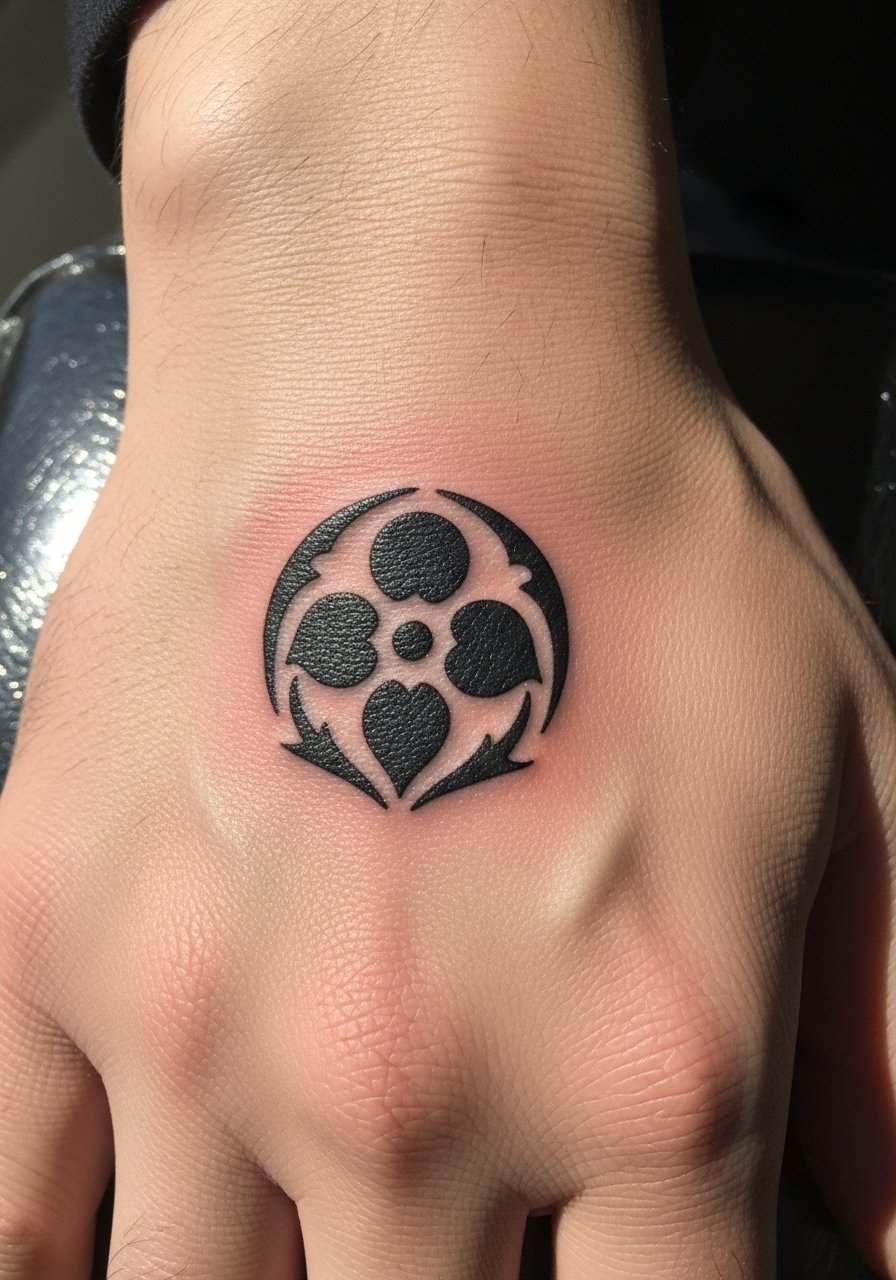
Personal observation: crest-style pieces with strong negative space around them age better on hands because the surrounding blank skin preserves contrast. Tell your artist you want the emblem treated like a logo with heavy outline and restrained interior detail. The session can be longer if you add micro-dot fills. Common mistake is burying the crest in patterning that fades quickly. For career-sensitive contexts, consider placing the emblem slightly toward the wrist where sleeve cuffs can conceal it if needed.
19. Tiny Fox Mask Near the Wrist Side
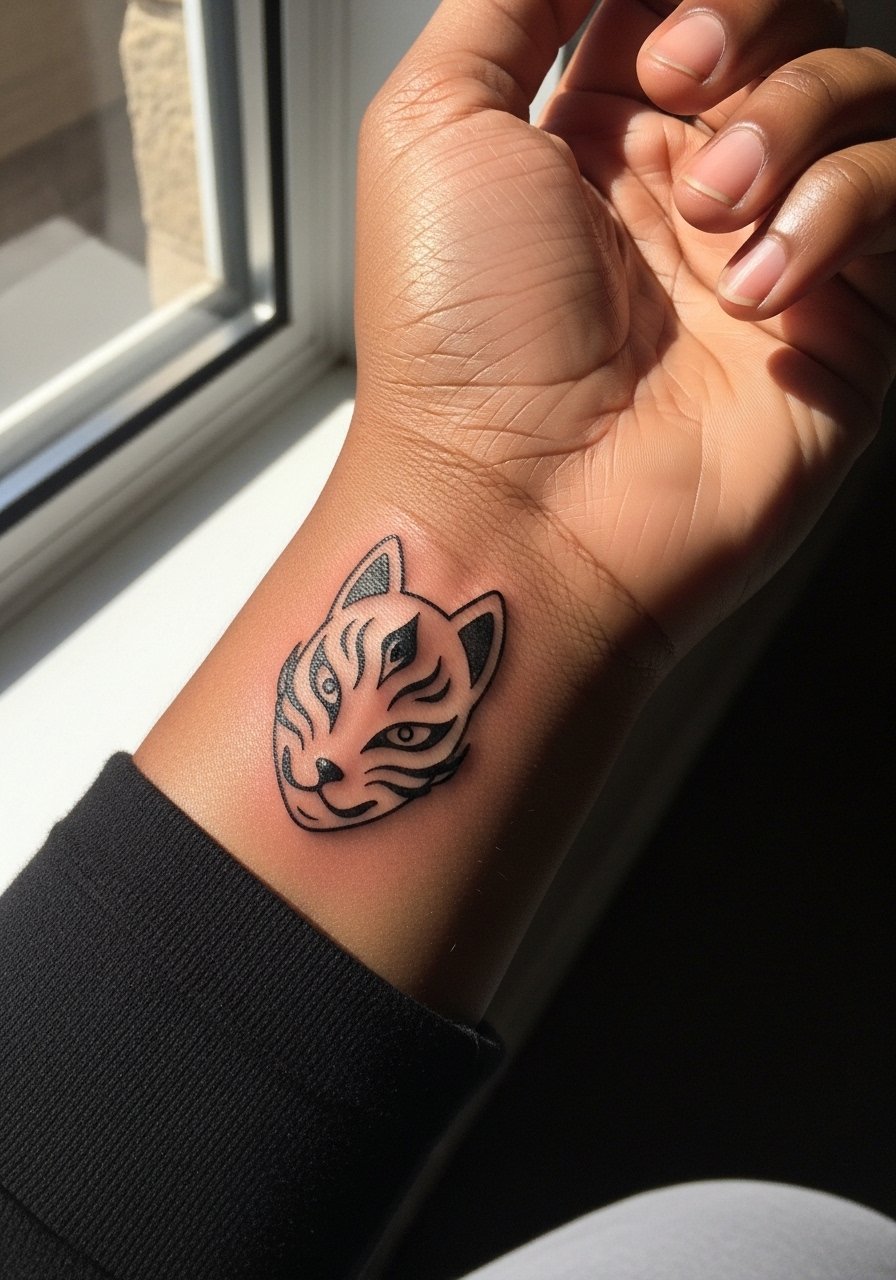
Mistake lead: small masks often suffer from too much facial detail. Ask for a stylized mask with bold eye shapes and simplified cheek markings. The session is short and the pain level is moderate. One fix many clients skip is planning a small touch-up after the first healing cycle to sharpen eyes that soften. For showing this piece at night, a rolled sleeve or cuffed shirt works well and keeps attention on the mask.
20. Bamboo Sprig Along the Side Hand
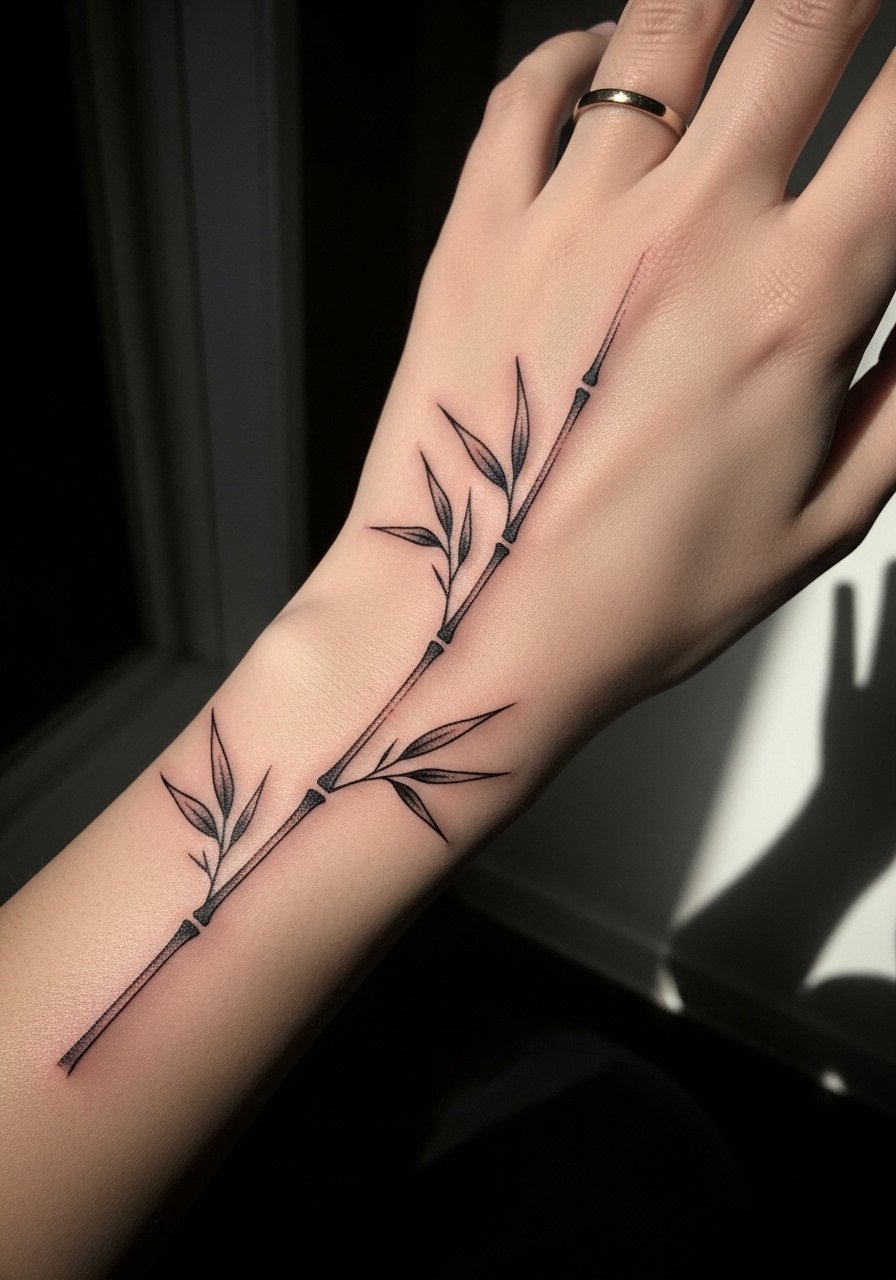
Pain warning lead: the side of the hand can be more sensitive because of thinner skin over bone. For a bamboo sprig, emphasize vertical spacing between nodes and use small negative spaces to avoid over-detail. The session may require short breaks. A common mistake is clustering leaves too tightly which blurs with movement. For the session wear a racerback tank you can move easily to stay comfortable during focused hand work.
21. Simple Kanji Accent on the Side of the Finger
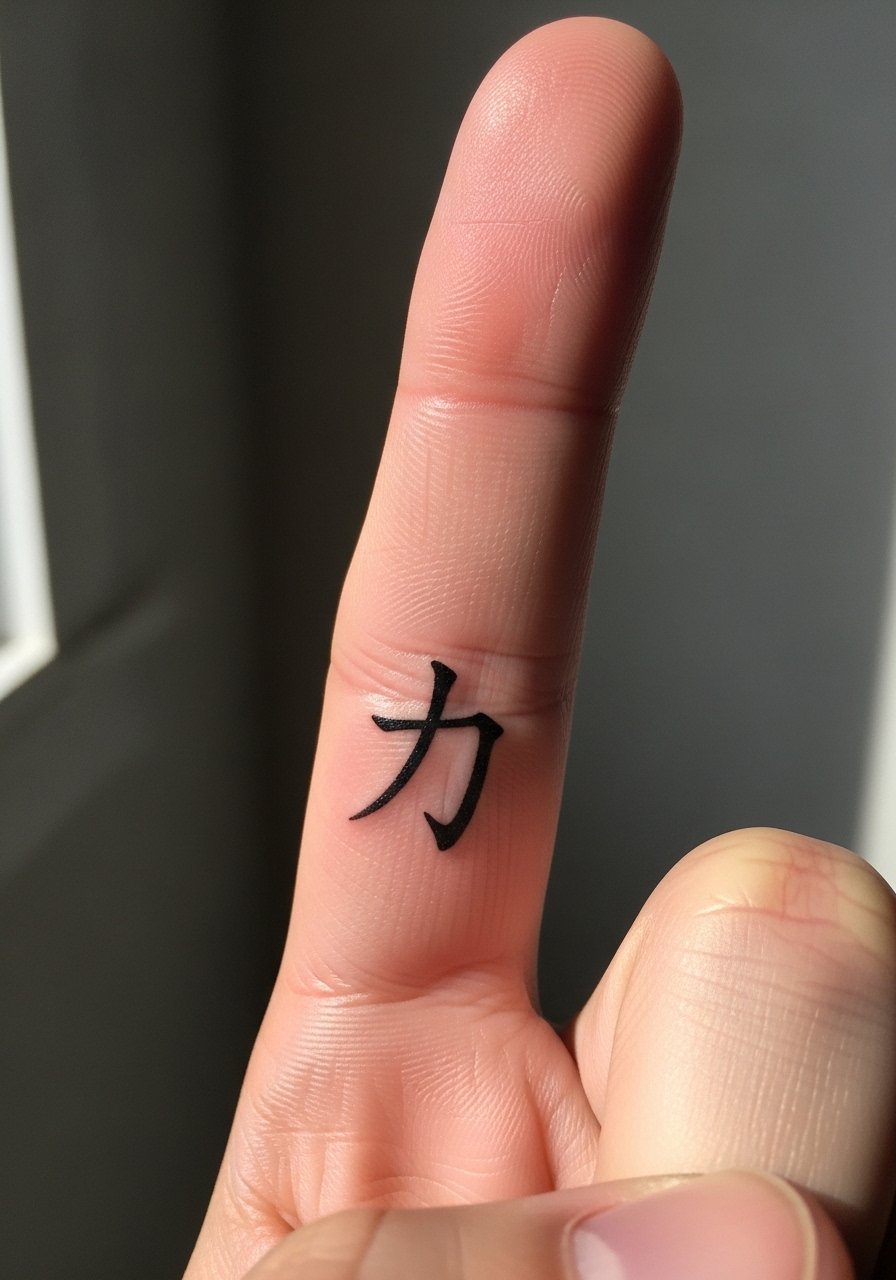
Consultation lead: when choosing kanji, specify the exact character and font you want so the artist can place it precisely and avoid garbling. Tell the artist the exact one-character text during the consult to ensure accurate composition. The session is quick but the character must be bold enough to survive daily use. The two camps on language tattoos are obvious: one side recommends using characters only if you deeply understand the meaning, the other side treats them as aesthetic elements. If you opt for the symbol, research its cultural weight through discovery pathways like language forums and community groups.
Frequently Asked Questions
Q: How long do Japanese-style hand tattoos typically hold detail compared to forearm work?
A: Hand skin endures more friction and frequent washing, so fine interior detail generally softens faster than on the forearm. Expect heavier outlines and negative space to last best, and plan on touch-ups sooner, often within one to three years depending on placement and care. Picking scale and spacing during consultation helps longevity.
Q: Can fine line Japanese motifs be done on fingers without rapid blur?
A: They can if the design prioritizes bold silhouette and limits micro-detail near joints. Ask your artist to convert fine interiors into negative space or controlled stipple. Be honest about willingness to book touch-ups because fingers are high-maintenance.
Q: Is it cultural appropriation to get traditional Japanese imagery if I'm not Japanese?
A: Opinions split. One camp sees direct replicas as inappropriate without cultural connection. The other camp supports respectful homage when you learn the symbolism and adapt the design thoughtfully. A good approach is to use discovery pathways like cultural resources, museum references, and community discussions to inform a design that honors origin rather than copies sacred imagery.
Q: What should I wear to a hand-focused appointment to make access easy?
A: Wear clothing that gives clear access to the arm and wrist without tight cuffs, such as a loose button-down shirt you can pull aside or a tank top. Keep jewelry off and bring a small resealable plastic bag to store rings during the session.
Q: How do I find an artist who understands Japanese-style motifs respectfully and technically?
A: Use regional directories, tattoo conventions, community hashtags, and portfolio searches on local shop pages to find artists with consistent Japanese-style work. Look for portfolios that show healed photos and work on similar placements. Discovery pathways like convention booth visits and local shop walk-ins help you see healed results in person.
