
Fine line tattoos are the flavor of the moment, but trends and longevity do not always match. Tiny designs that look flawless the day they are done can blur or wash out sooner than expected if placed over bone or in high-friction zones. This chart walks through 27 popular tiny placements, what the session actually feels like, what tends to age well, and what to ask your artist before you book.
1. Fine Line Wrist Star Constellation
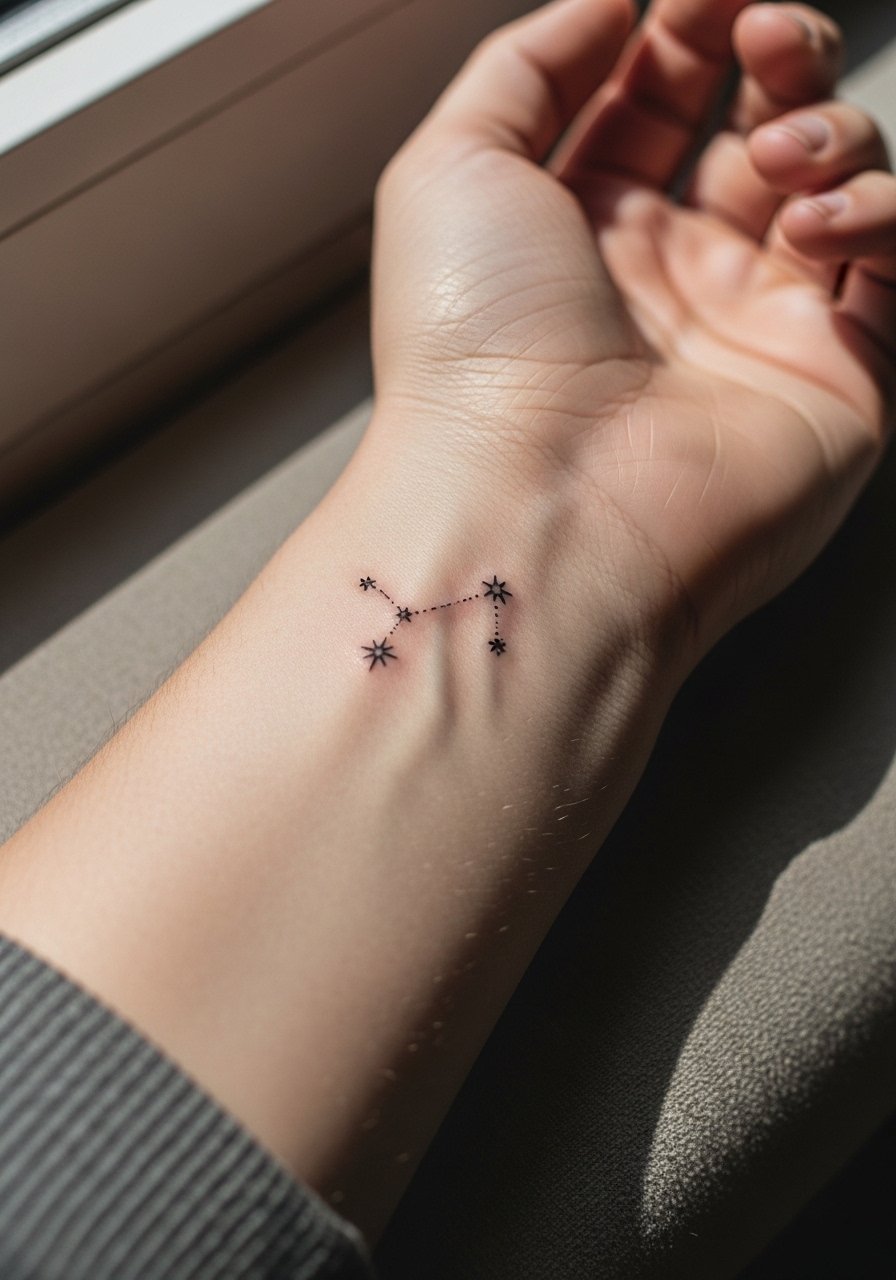
Wrist constellations read delicate and minimal, and they are a common first choice for people who want a visible but small piece. Tell your artist you want a slightly heavier line weight than the faint single-needle look to help the dots and tiny stars hold over time. Expect a sharp sting over the bone with a short session under 30 minutes. A usual mistake is cramming too much micro detail into a one-inch band. Pair this with a thin silver chain bracelet on the opposite wrist when you show it off, and wear a short-sleeve tee to your appointment for easy access.
2. Minimalist Ankle Wave Line
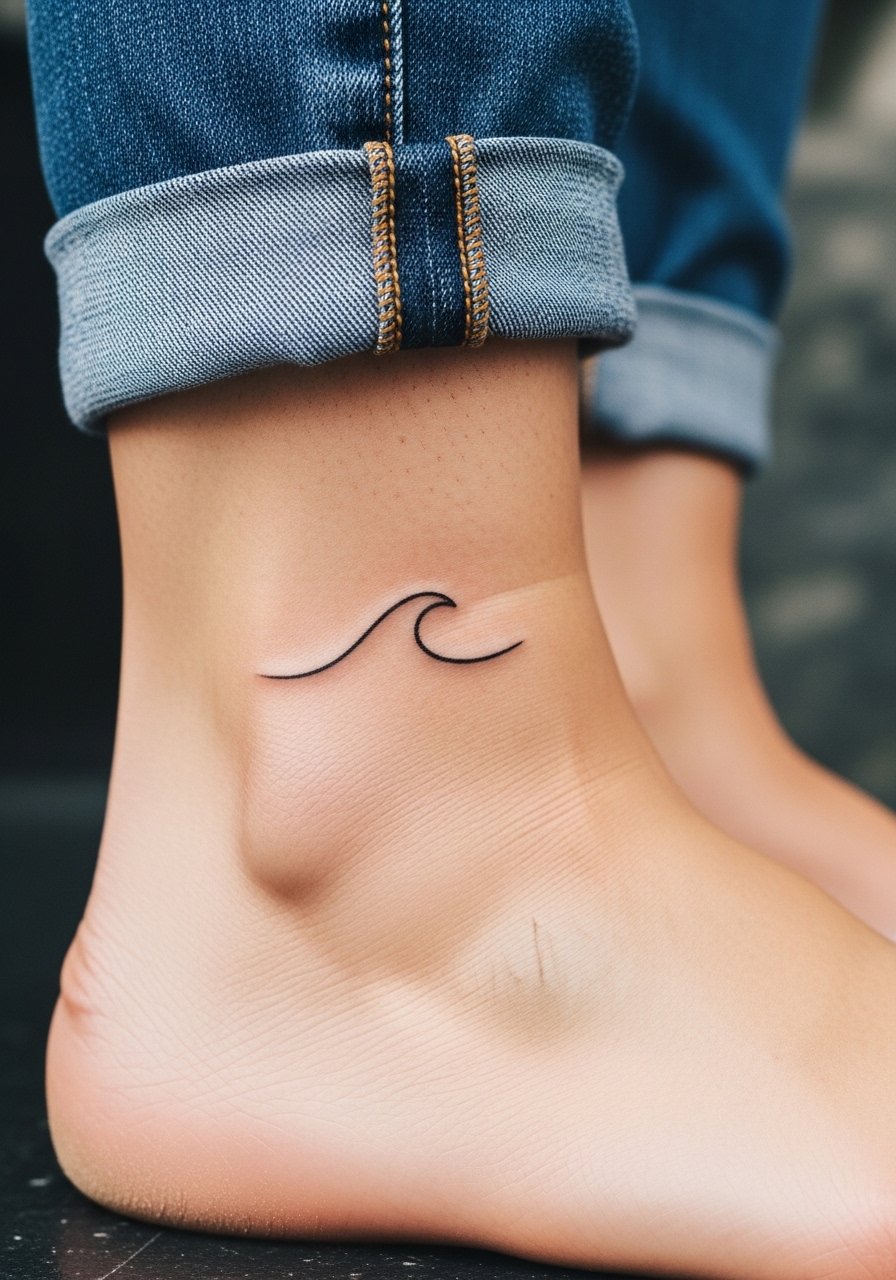
Outer ankle waves look great on low-visibility placements, but the area sits close to bone and often swells after sessions. Practical prep is to bring easy shoes you can remove and plan to elevate your foot the first 48 hours. There is a heated debate about protective film on ankles. One camp says barrier film greatly cuts infection risk and reduces swelling. The other camp warns that trapping moisture on flex points can cause scabbing that pulls ink. Ask your artist which approach they prefer for ankle flex. For show-off outfits, cuffed straight-leg jeans or strappy flat sandals make the design pop.
3. Micro-Realism Side Finger Heart Outline
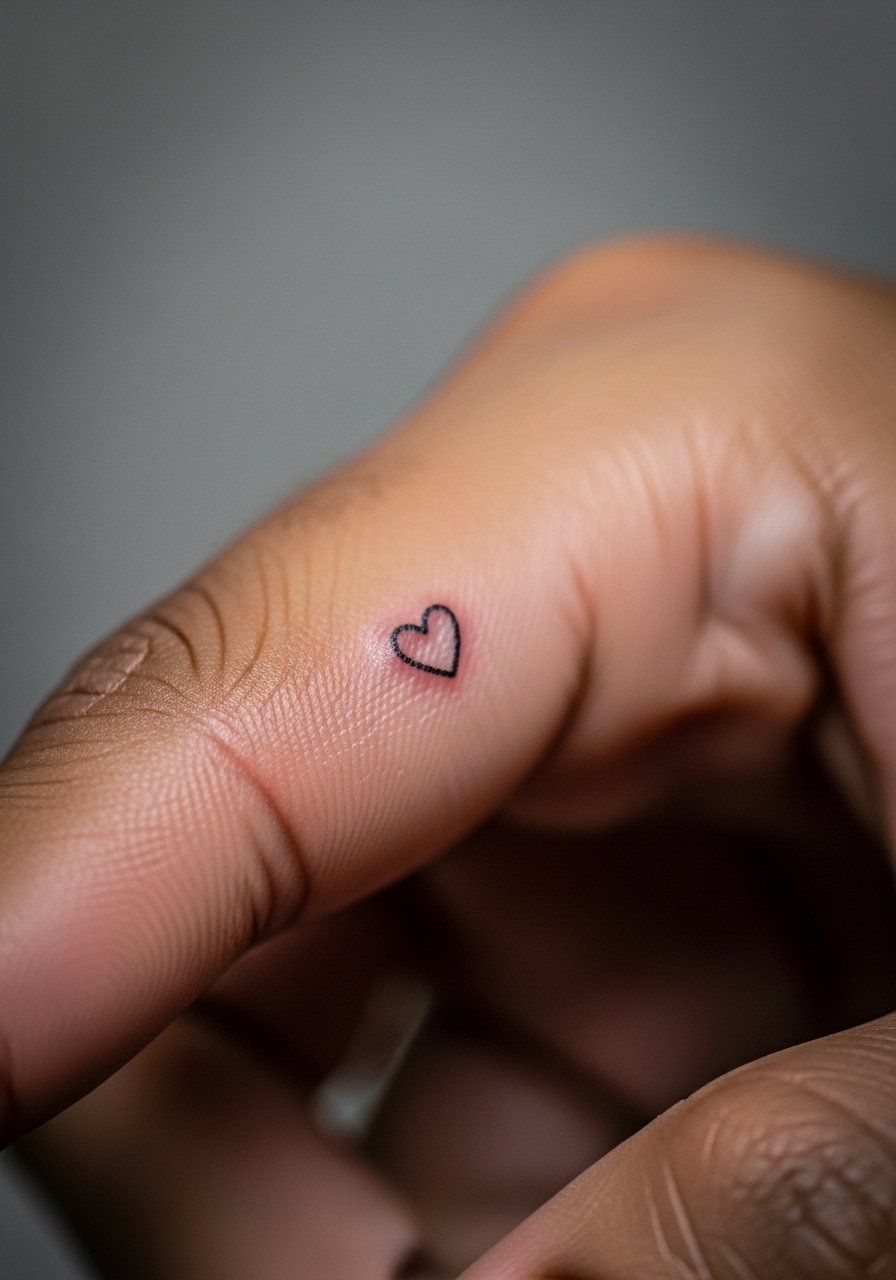
Finger outlines are efficient sessions but suffer from heavy wear. Expect sharp needle stings during the session and faster fading because fingers see constant washing and motion. Ask for slightly bolder contour lines and plan on a touch-up at year one rather than assuming permanent clarity. A common error is asking for complex shading in a half-inch design, which tends to blur. For the appointment, remove rings and bring a pair of loose gloves or a soft cloth to prevent accidental rubbing afterwards.
4. Fine Line Ribcage Quote Script
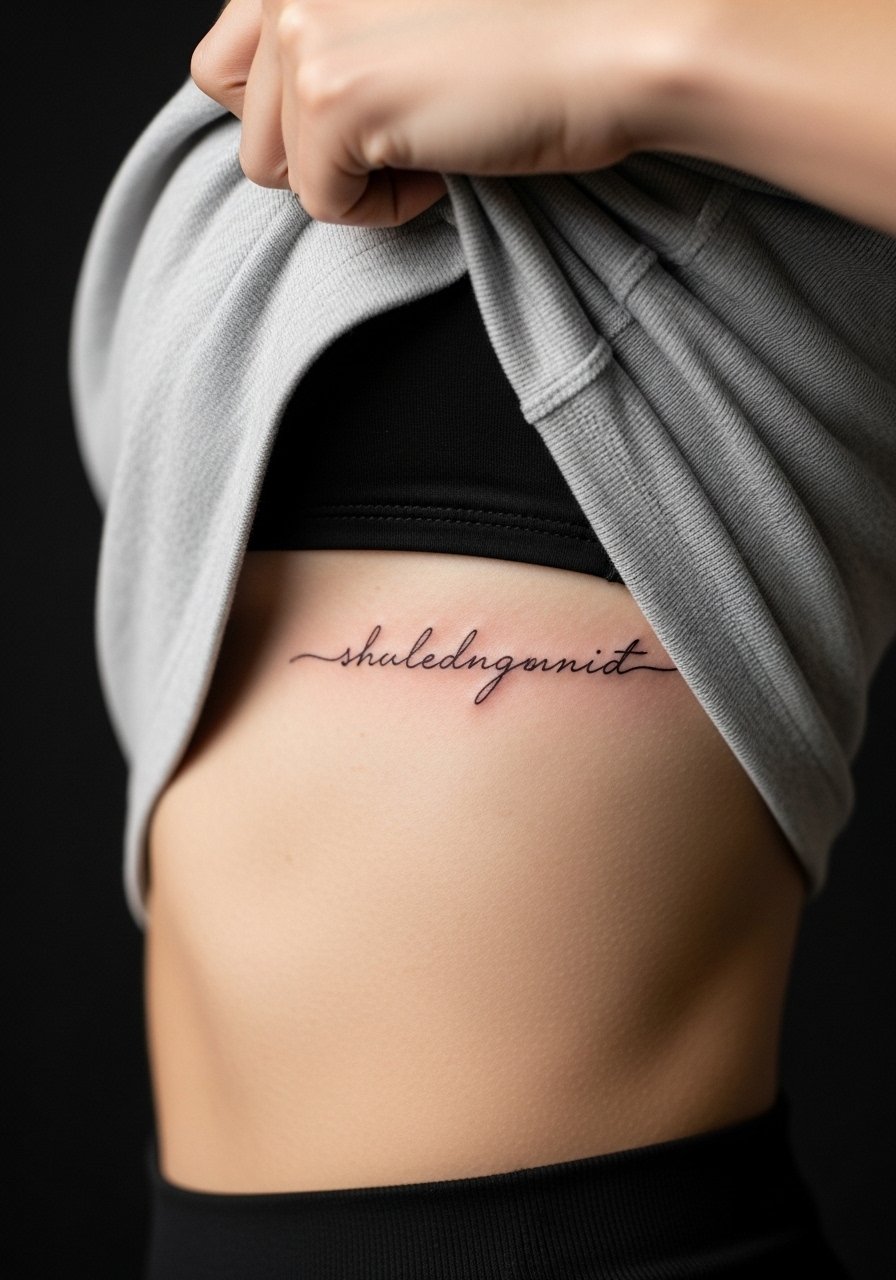
Rib quotes carry a reputation for being intense while sitting in the chair. Expect a series of sharp, bone-adjacent stings during a 30 to 60 minute session depending on length. Artists split into two camps on fine line here. One group argues fine script blurs quickly on the ribs because the skin stretches and scabs differently. The other group says with measured needle depth and spacing the lettering can settle well. Ask the artist which camp they follow and whether they recommend heavier line weight or added spacing. For the session wear, pull on a side slit crop tank so your artist can expose only the area needed.
5. Blackwork Inner Elbow Mandala Dotwork
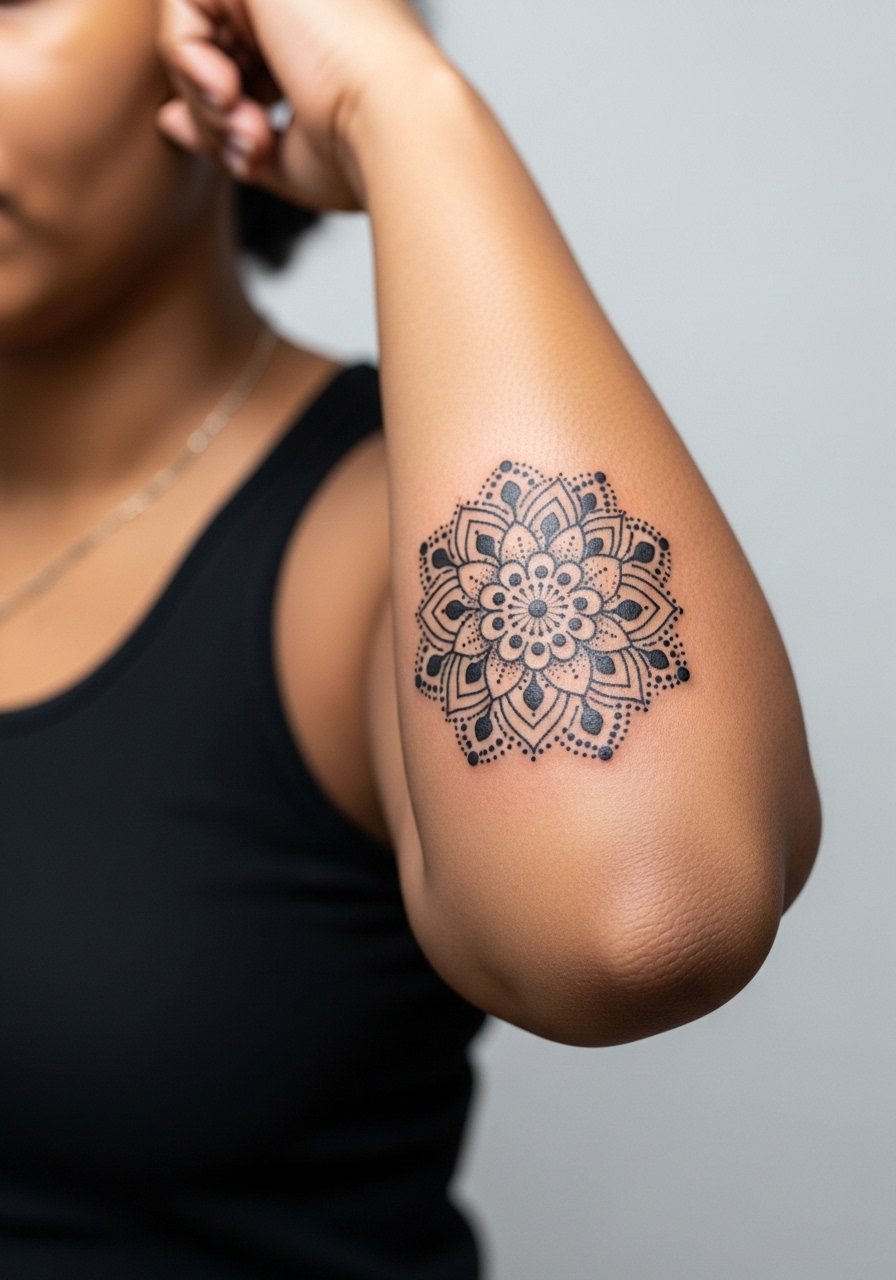
Inner elbow pieces look striking when built with dot work and stippling, but shading passes amplify vibration and can feel intense. Expect the first pass to be moderate, with shading runs feeling like deep buzzing. A common mistake is asking for dense stipple in a space that flexes daily, which can compress and age oddly. For longevity, ask for more open negative space in the mandala so it reads clean after two years. This placement benefits from loose session clothing, like a loose button-down shirt you can pull aside.
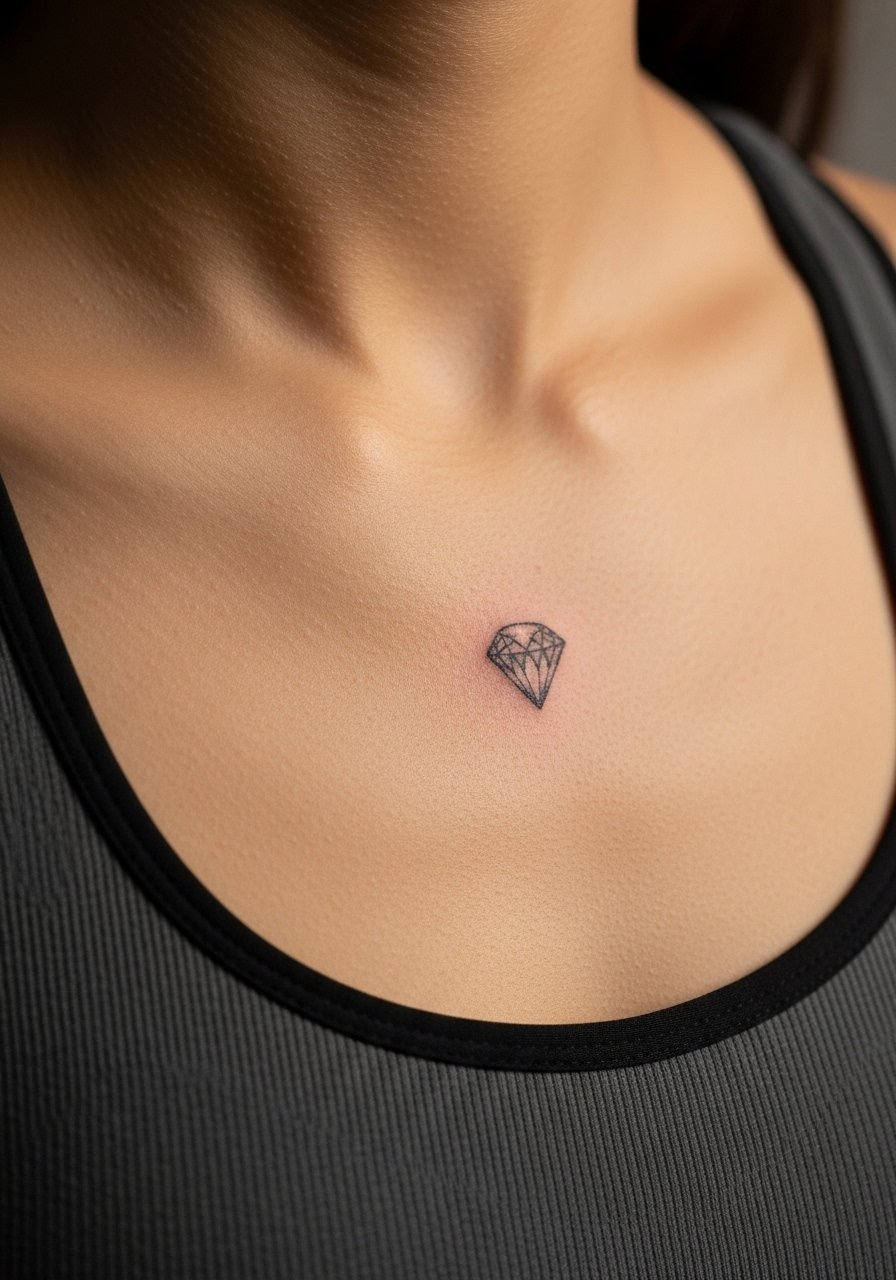
6. Minimalist Collarbone Arrow
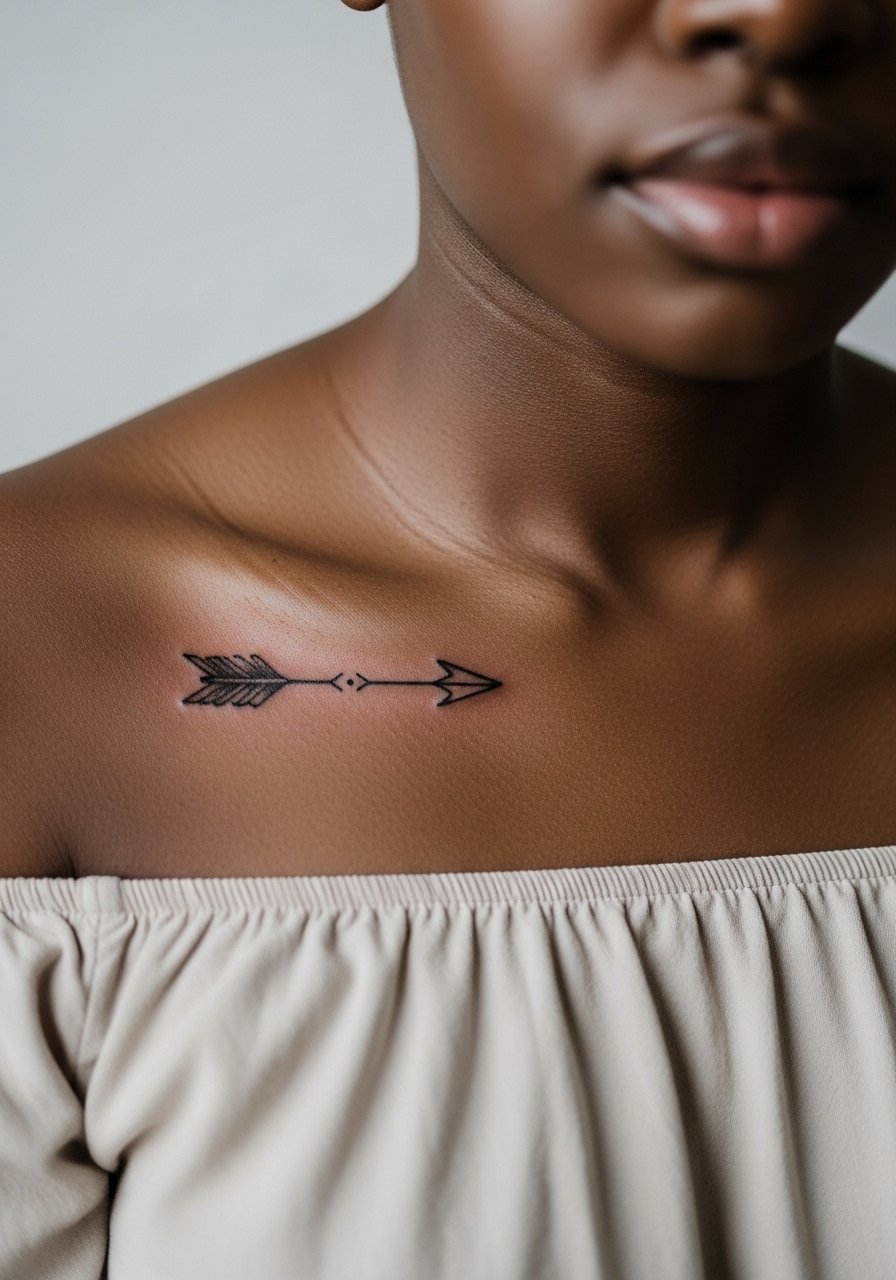
Collarbone arrows buzz over bone and can feel like a sharp vibration rather than a burn. Sessions are typically quick, under 30 minutes for a two-inch piece. The biggest mistake is placing super-fine single-needle lines directly on the clavicle with no room for spacing. Ask your artist for a slightly firmer line weight that will sit clean for years. For showing off, go with an off shoulder blouse or a strapless top. For the chair, a strapless bra or loose tee makes access easy.
Pre-Session Essentials
The wrist, finger, chest, and ankle pieces above each behave differently in the chair and the first week after. A few targeted items smooth the session day and early healing.
-
Hustle Butter Deluxe. A non-greasy balm many people switch to for areas like ribs because it absorbs quickly and does not leave a thick residue.
-
Frida Ink Balm. A thinner ointment that works for flex spots such as ankles and inner elbows without glossy build-up.
-
Tattoo Goo Breathable. A breathable alternative for elbow and forearm work where trapped moisture can feel uncomfortable.
-
Australian Tea Tree Salve. A calming salve some people use for thigh and lower body irritation in the early days.
-
Aquaphor Healing Ointment. A thin protective layer for the first days that many still use for delicate fine line pieces.
7. Fine Line Inner Thigh Leaf
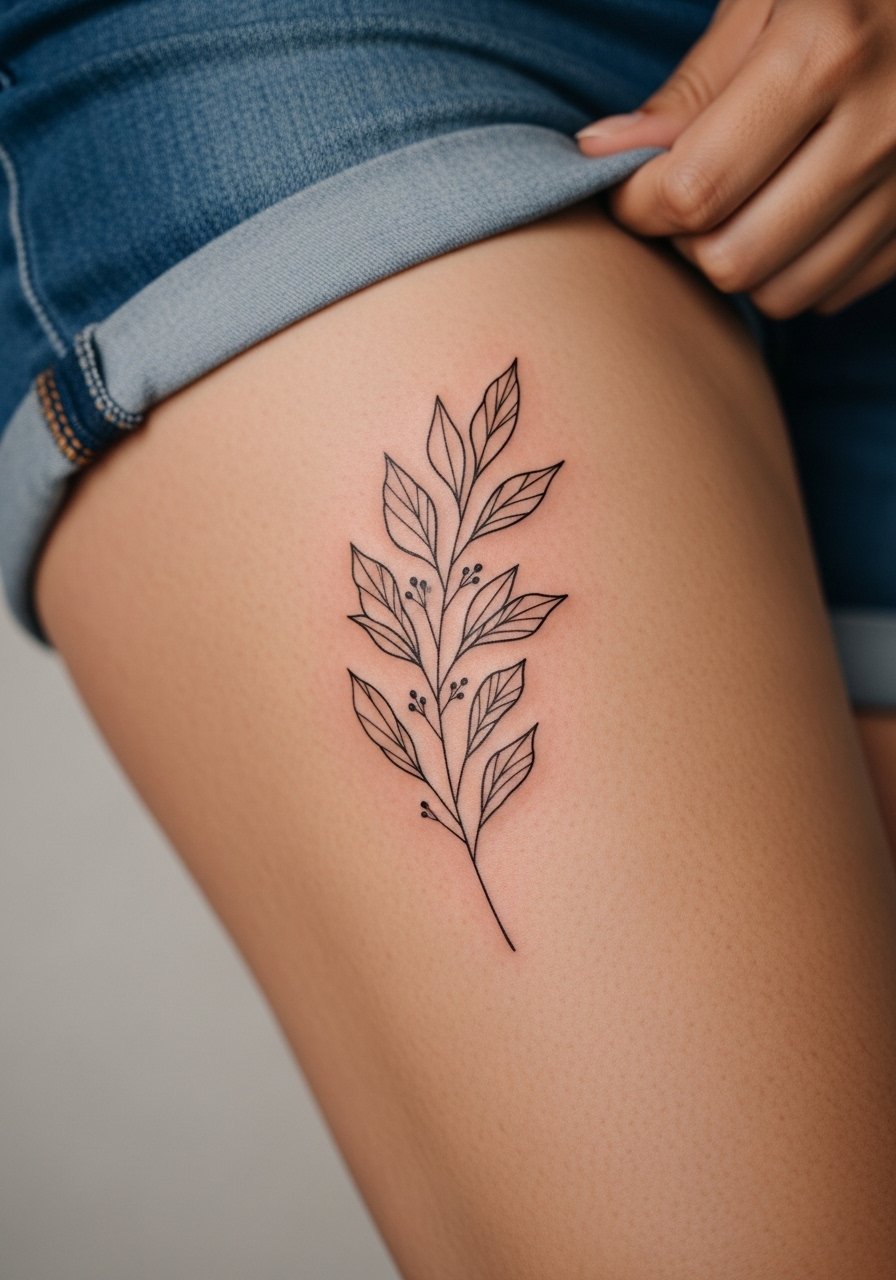
Inner thigh pieces are private by design and can be surprisingly tolerable for first-timers on the outer thigh. The inner quadrant registers higher sensitivity because of tactile motion nerves and thin padding. A common regret is placing extremely intricate leaves too near areas that expand with movement, which can distort with weight changes. Ask your artist about placement that follows muscle lines. For the session wear, bring loose basketball shorts you can shift to show only the needed strip.
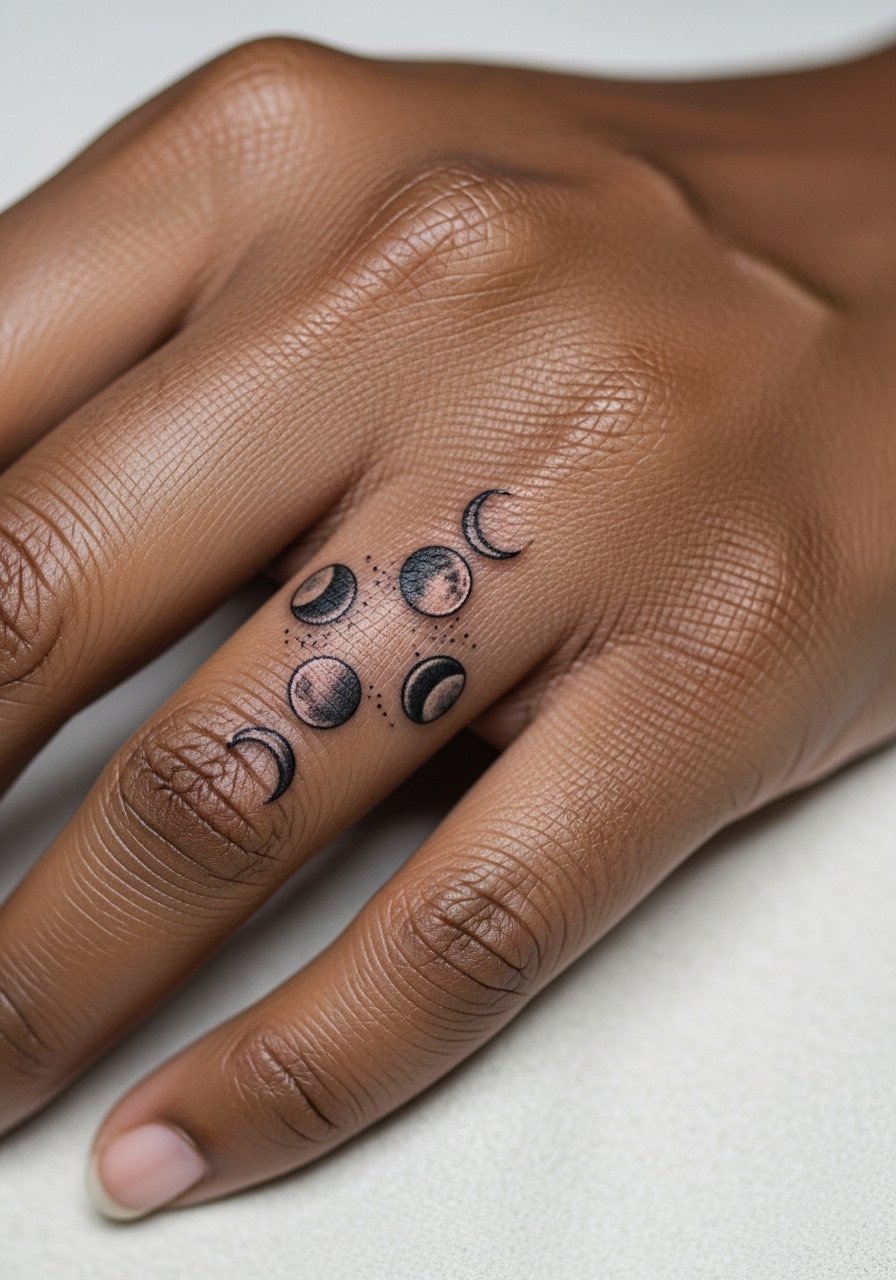
8. Micro Finger Moon Phase Stack
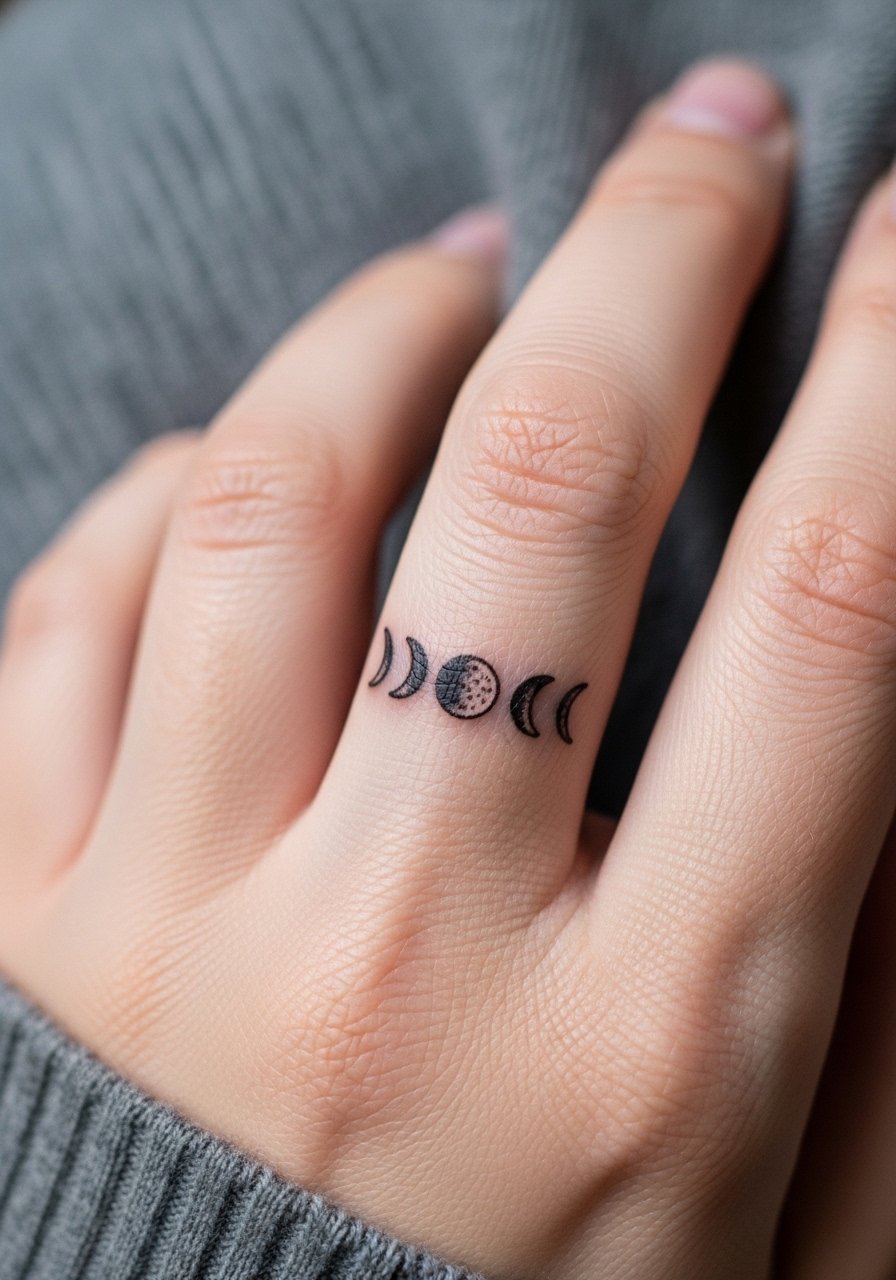
Moon phases are perfect for stackable fingers and ring zones, but fingers are a harsh environment for ink retention. Expect stinging during the session and faster blurring over the first year. Request bolder outlines for moons that are meant to stay crisp, and avoid tiny gray shading that can smear. A typical real-world outcome is needing a touch-up earlier than other placements. Remove jewelry before the session and plan to avoid long soaking in water while the skin seals.
9. Blackwork Shin Tribal Band
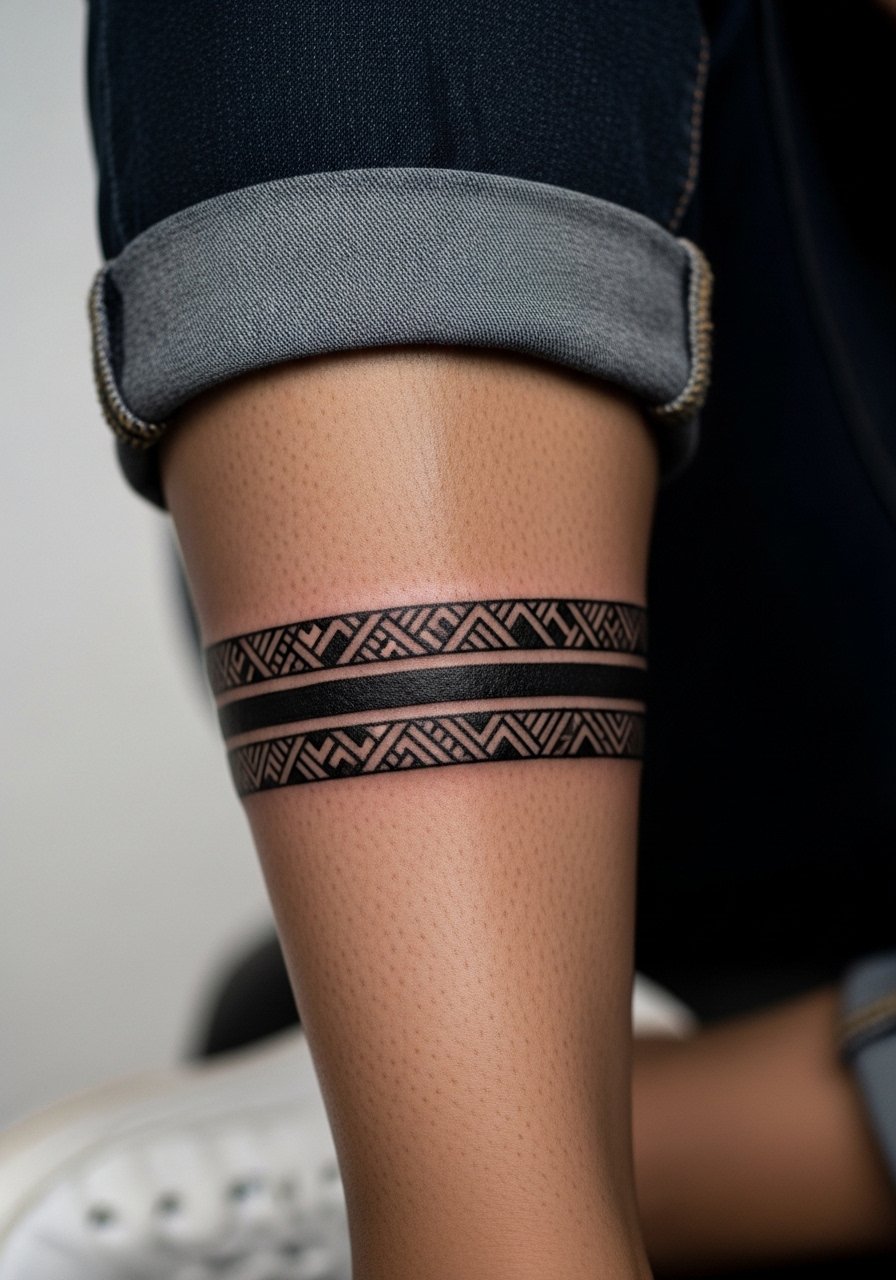
Shin bands take longer than tiny wrist pieces because of saturation and how solid black sits on the muscle. Expect deep ache during sessions and a two-pass plan for full saturation. The upside is bold black holds extremely well compared with fine line on wrists. Avoid overly thin gaps within a band since those can show inconsistently after healing. Wear loose pants you can slide up so the artist has clear access.
10. Fine Line Inner Forearm Pulse Line
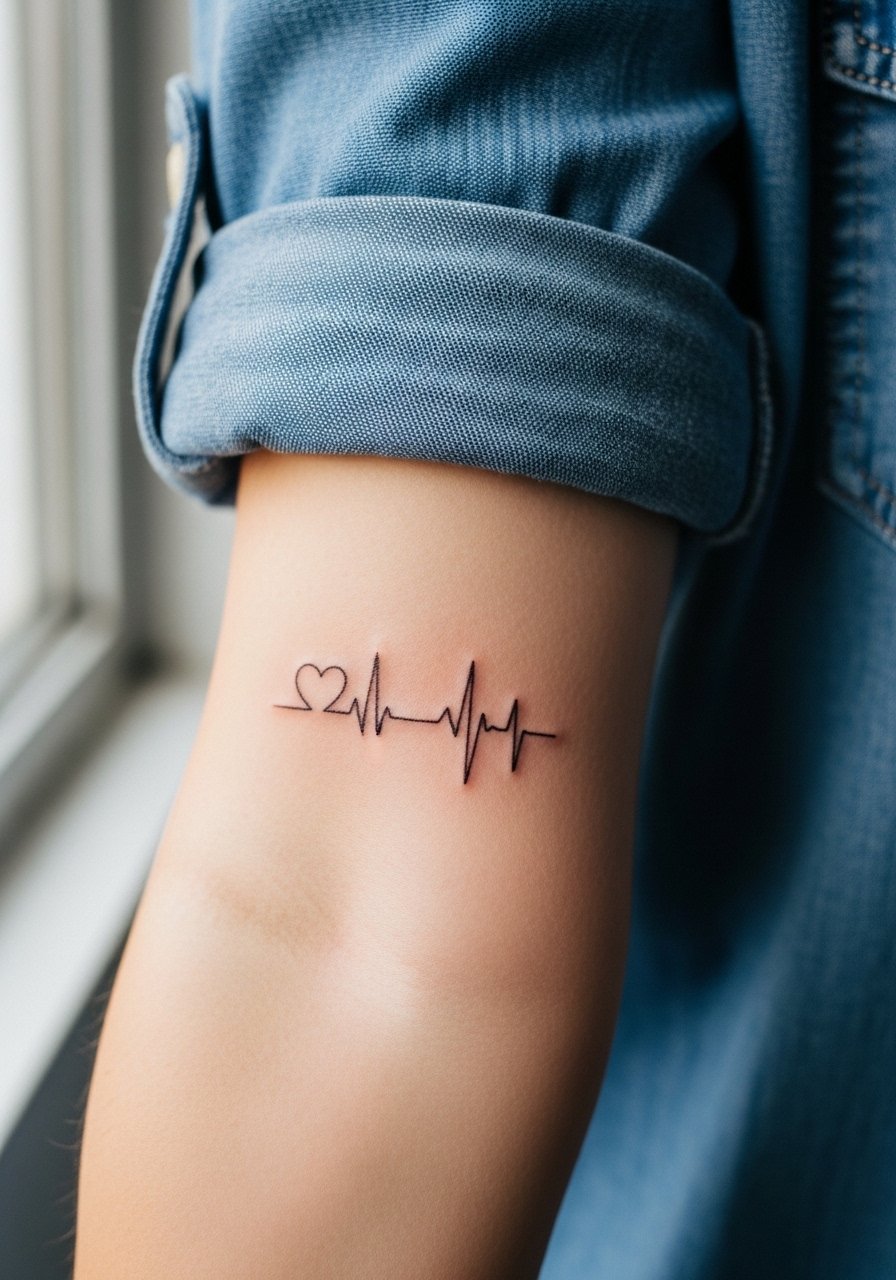
Inner forearm space gives padding that helps fine line work age better than wrist or fingers. I have seen pulse lines on forearms remain legible after several years when the line weight was slightly increased at the outset. During consultation, specify continuous linework and ask the artist to avoid stop-start tiny dots that can soften. Session time is short and tolerable for most. Pair the healed piece with rolled-sleeve shirts like a chambray button shirt for a casual reveal.
11. Minimalist Foot Arch Semicolon
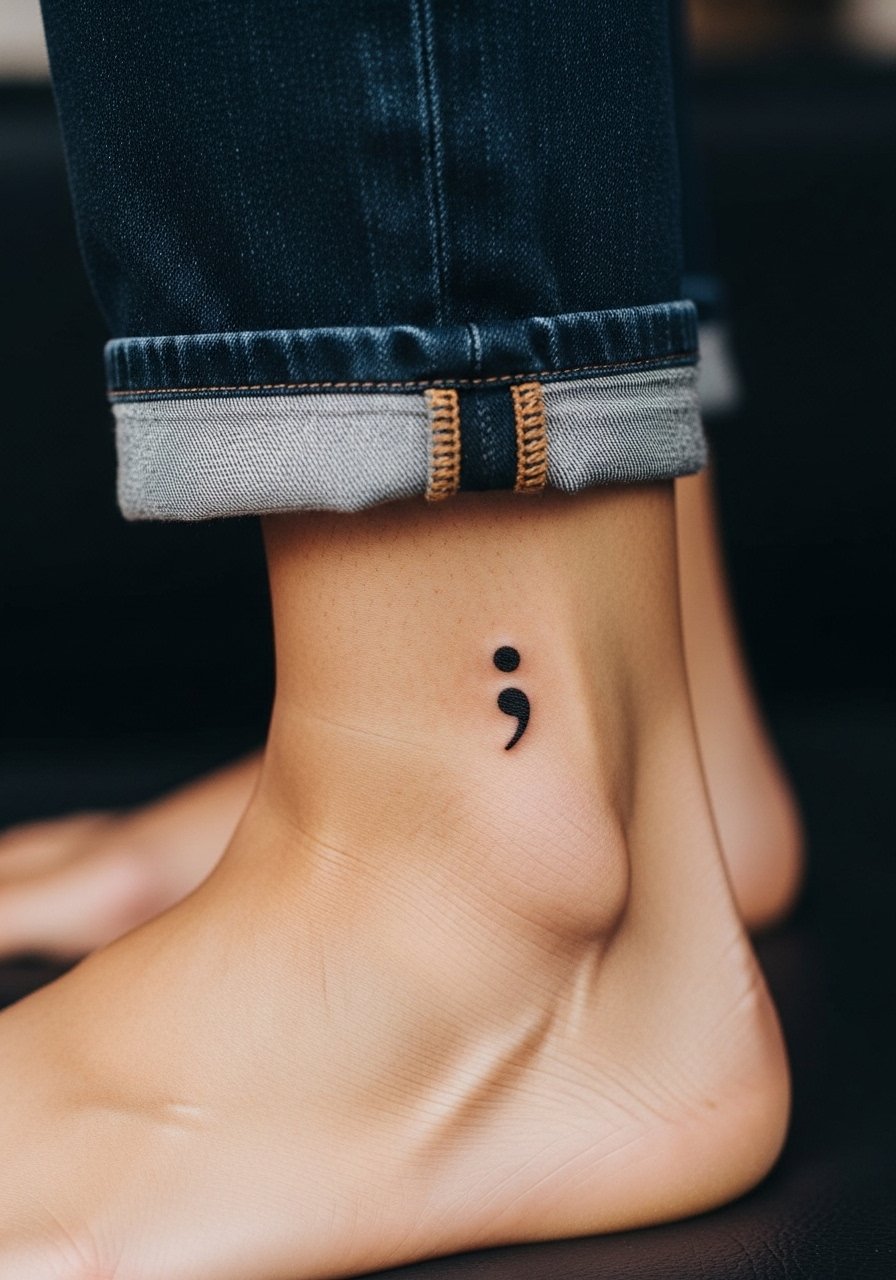
Foot arch tattoos hurt as they sit over sensitive tissues and flat surfaces. Expect sharp stabs while the needle moves and a tender few days where socks or shoe straps will rub. People often underestimate swelling here. Keep the foot elevated after the session and avoid tight shoes. For showing off later, barefoot sandals or cropped pants frame the arch well. Bring no-show socks and shoes that are easy to take off to the appointment.
12. Neo-Traditional Outer Elbow Rosebud
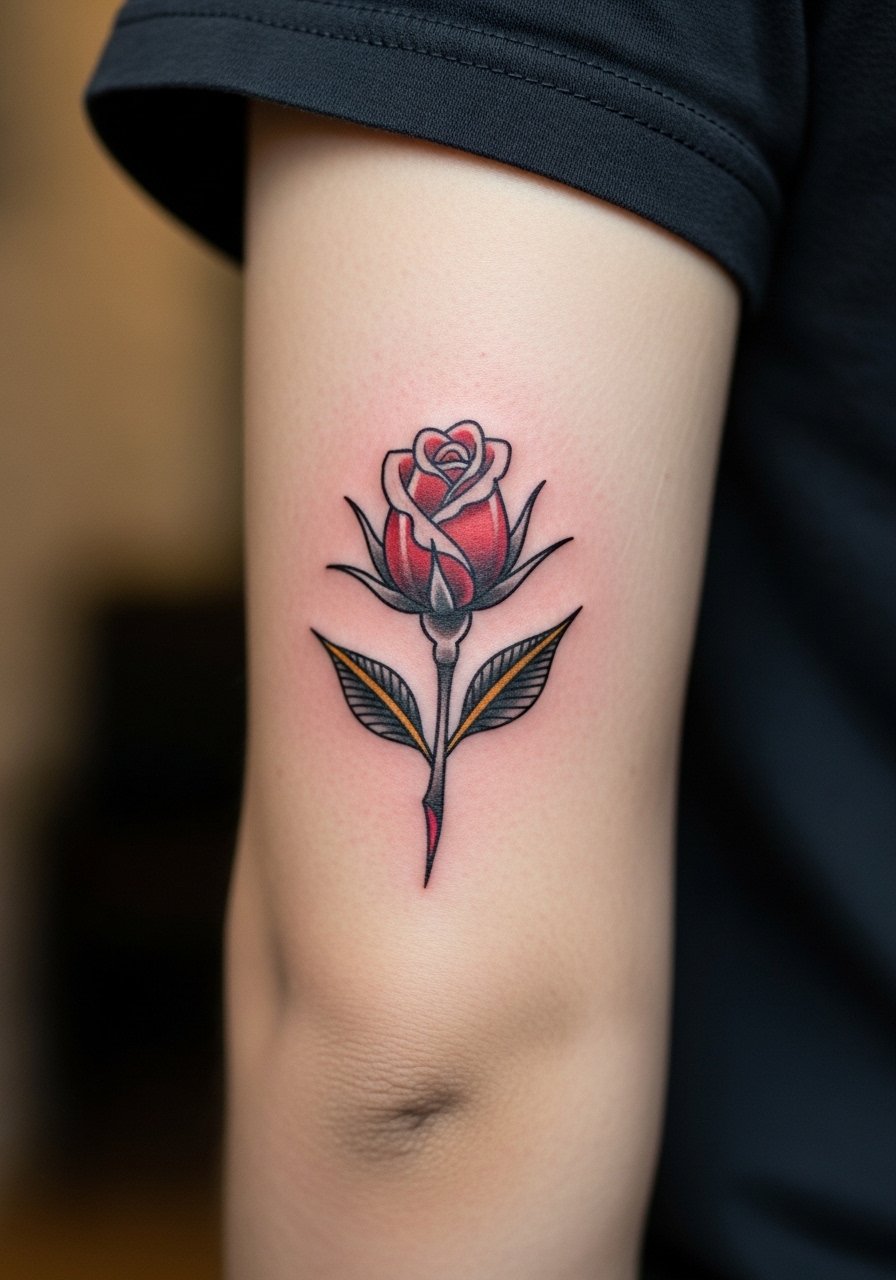
Outer elbow pieces ride the bump of the joint and often feel like buzzing over a hard surface, especially when color packing starts. Shading passes can amplify discomfort. The most durable versions use bold outlines and saturated color blocks rather than micro shading. Ask for a two-pass plan if you want consistent saturation. For the day, wear a loose short-sleeve tee so the artist can access the elbow without a full arm stretch. Pair the healed rosebud with rolled midi sleeves when you show it off.
13. Micro-Realism Ring Finger Moon
Wedding-adjacent ring finger moons are symbolic but face extreme abrasion and sunlight exposure. Sessions are quick but expect regular touch-ups compared with forearm pieces. A frequent error is choosing tiny gray shading for lunar craters. That soft shading rarely holds on finger flesh. If you want longevity, pick a slightly bolder silhouette and plan for a retouch after the first year. Keep rings off the finger for a week if possible.
14. Fine Line Ankle Constellation Variation

Clusters of tiny stars across the ankle look delicate but live where socks and shoes rub. The common complaint is excessive scabbing and soreness from footwear. If you love a cluster, tell your artist to space stars further apart so each mark breathes. The session itself is short but expect swelling for a few days. For summer reveals, cuffed jeans and cuffed ankle jeans highlight the placement.
15. Hand Knuckle Micro Dots
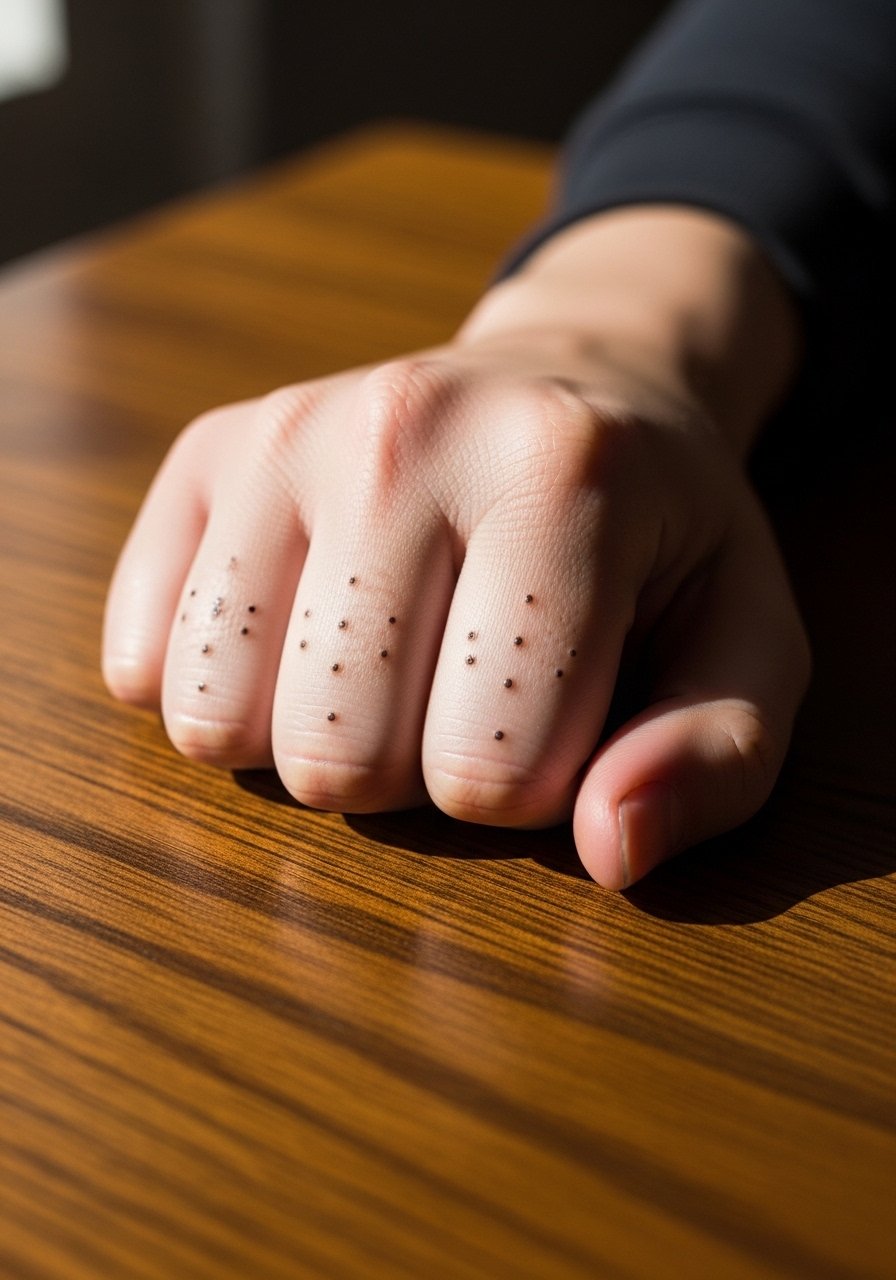
Knuckle micro dots are bold despite their tiny size because hands get massive daily wear. Expect sharp discomfort during the session and a higher chance of early fading. A usual mistake is asking for intricate shapes over small knuckle real estate. If you want resilience, keep designs simple and stark. For session prep, avoid topical creams that make skin slick and wear a shirt with sleeves you can roll up easily.
16. Fine Line Sternum Botanical
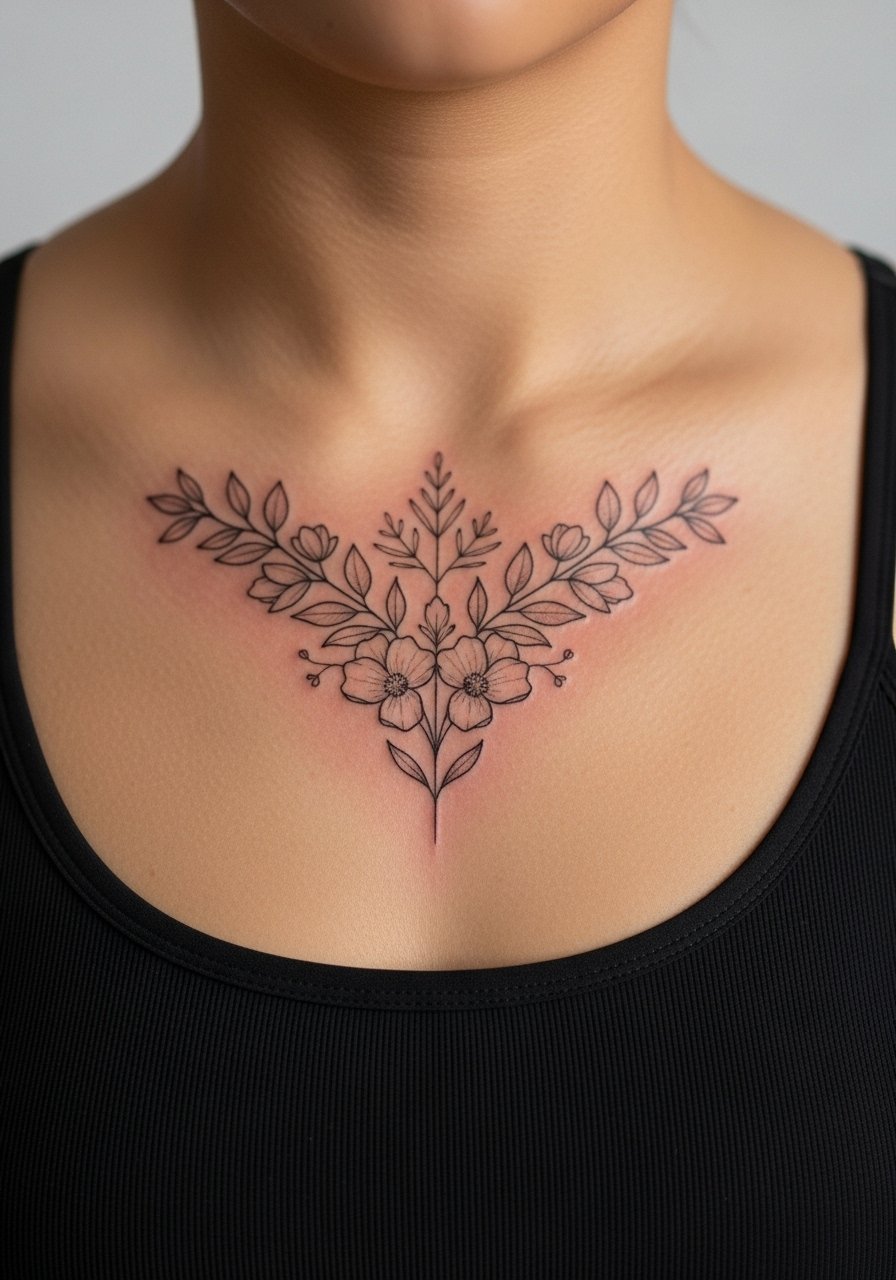
Sternum pieces are intimate and can have varied sensitivity depending on chest structure. The area often tolerates longer sessions than ribs but still registers sharp stings near the center. Many people prefer a subtle botanical in this spot because it reads as private and elegant. For the session, wear a fitted sports bra so only the targeted area is exposed. Consider spacing and slight bolding of lines to help the script or stems hold over five years.
17. Fine Line Outer Thigh Tiny Leaf
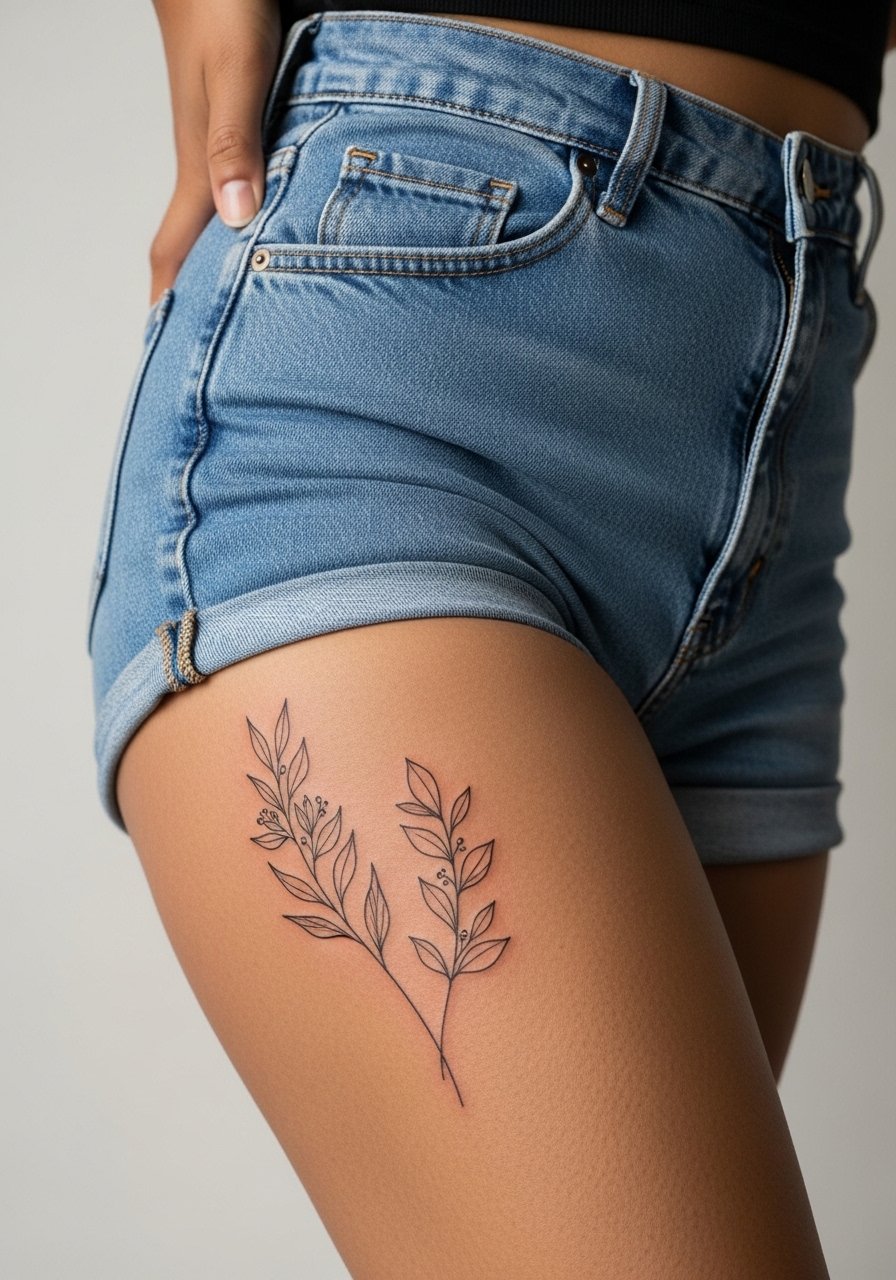
Outer thigh pieces sit on fleshier padding and usually go down as among the least painful tiny placements. Sessions are relaxed and often under 45 minutes. Avoid placing designs right on areas prone to stretch with weight fluctuation. The outer thigh tends to preserve fine detail well, so a crisp single-needle leaf can look great for years. For show-off outfits, high-cut shorts or thigh-slit dresses frame the area nicely.
18. Fine Line Forearm Mini Mountain Range
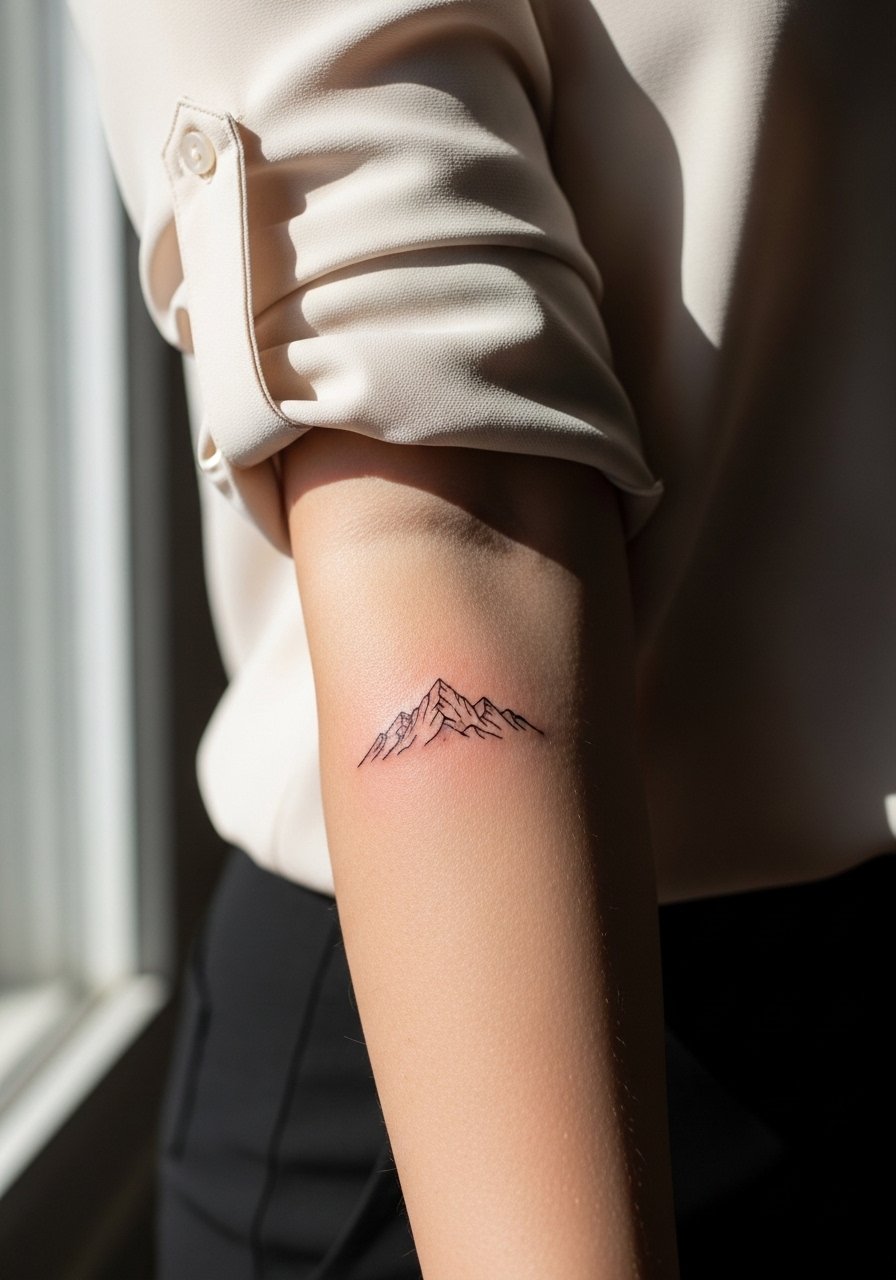
Outer forearm has padding that helps fine line work sit clean and last longer than wrist lines. I have seen single-line mountains hold crisp detail for several years when spacing is respected. During consultation, bring reference photos that show the exact line weight you like so the artist can match depth and spacing. Session time is short and the sensation is a moderate vibration rather than an edge. Pair the piece with rolled sleeves and delicate hoop earrings for a casual reveal.
19. Micro-Realism Nape Star
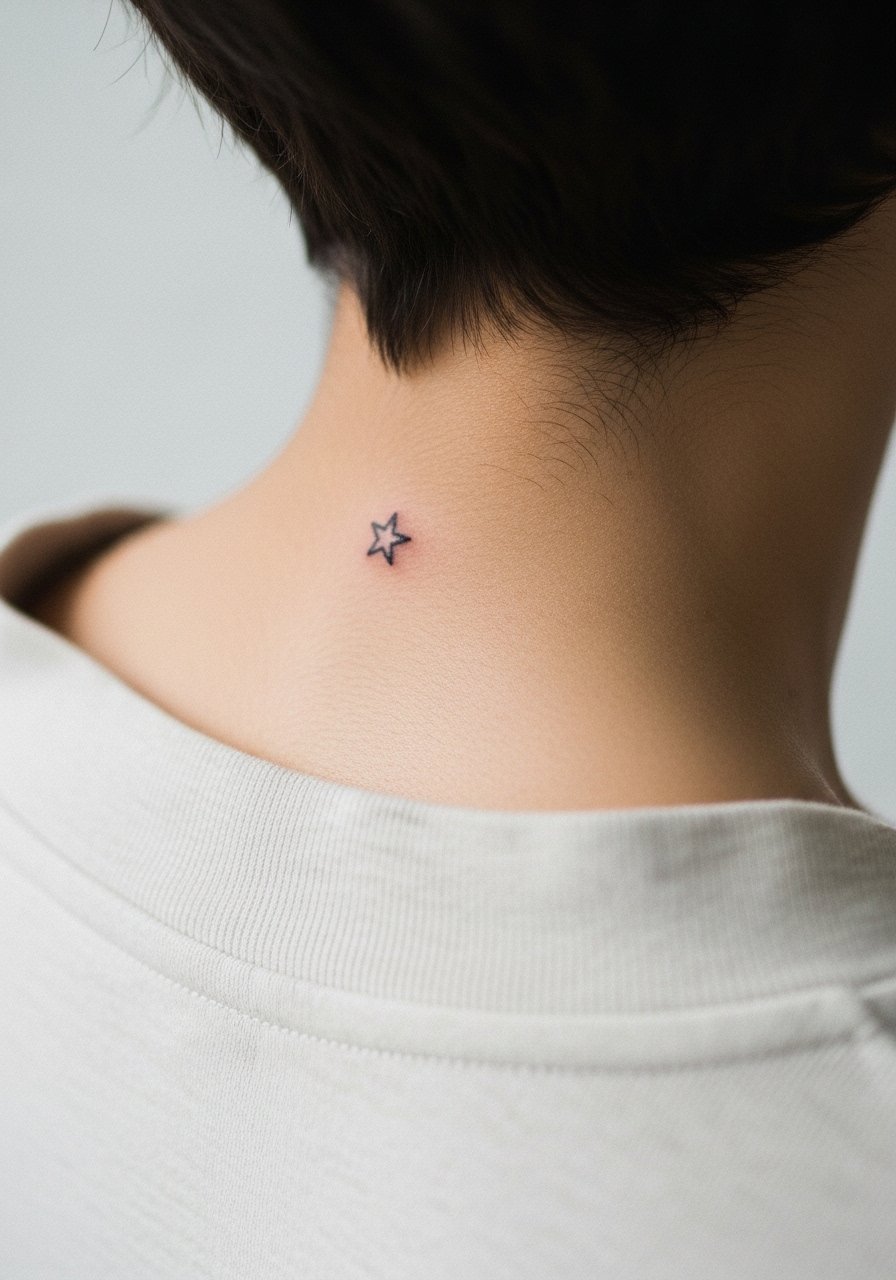
Nape placements are small and visible under certain hairstyles. They can sting more than outer forearm but less than rib spots. Ask for placement tests with stencil hair up so you know exactly how it will peek out. A frequent oversight is neglecting hairline changes that can later hide the piece. For session wear, a wide-neck shirt pulled to one side makes the area easy to access and respectful.
20. Minimalist Calf Crescent Moon
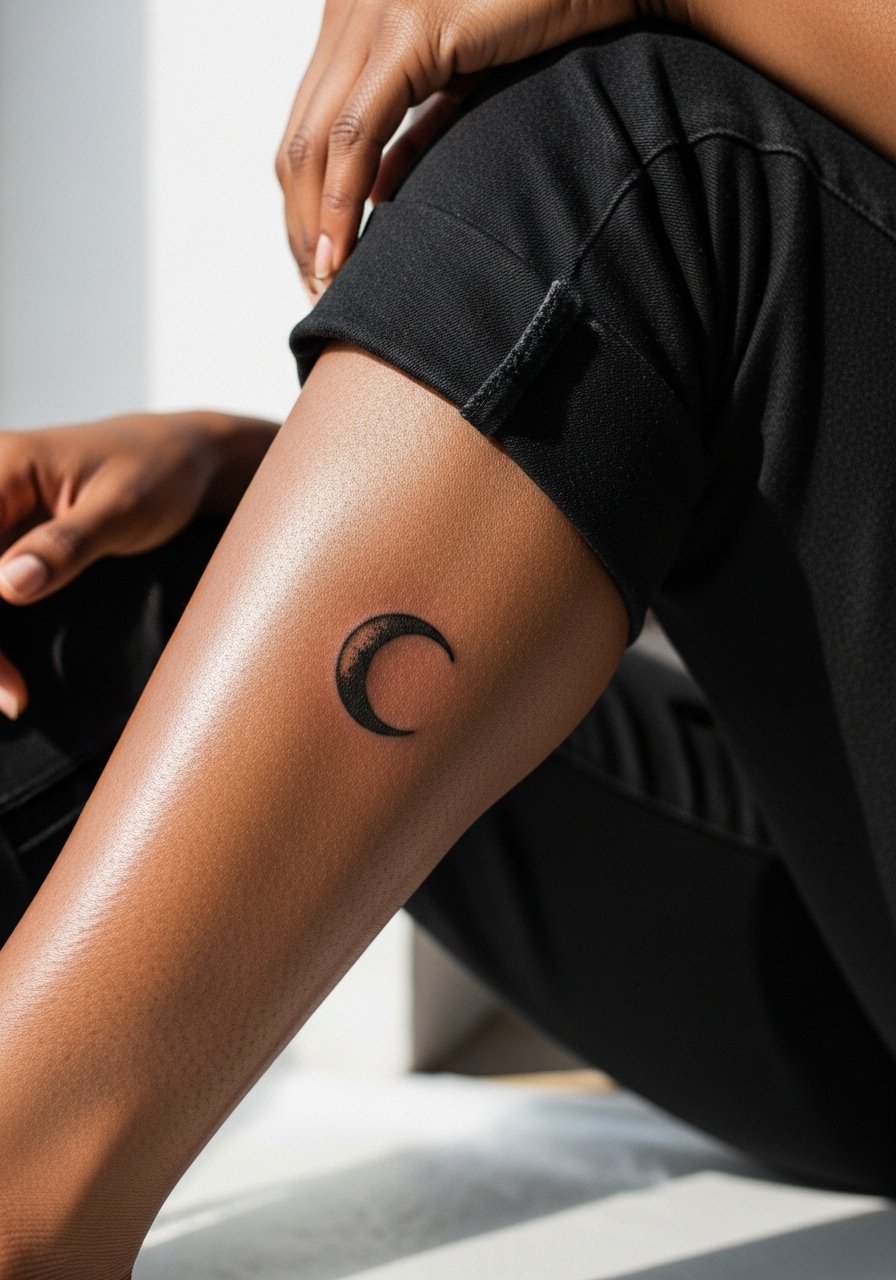
Calf tattoos, even tiny ones, sit on muscular terrain that takes ink well. Sessions are comfortable and usually fast. If the design is intended to be visible with skirts or shorts, place it slightly to the outer calf so boots or long pants do not always hide it. A common mistake is placing tiny details on the inner calf where friction with clothing can abrade the piece. Wear loose pants to the appointment so the area can be exposed without stretching.
21. Fine Line Ankle Cross Alternative
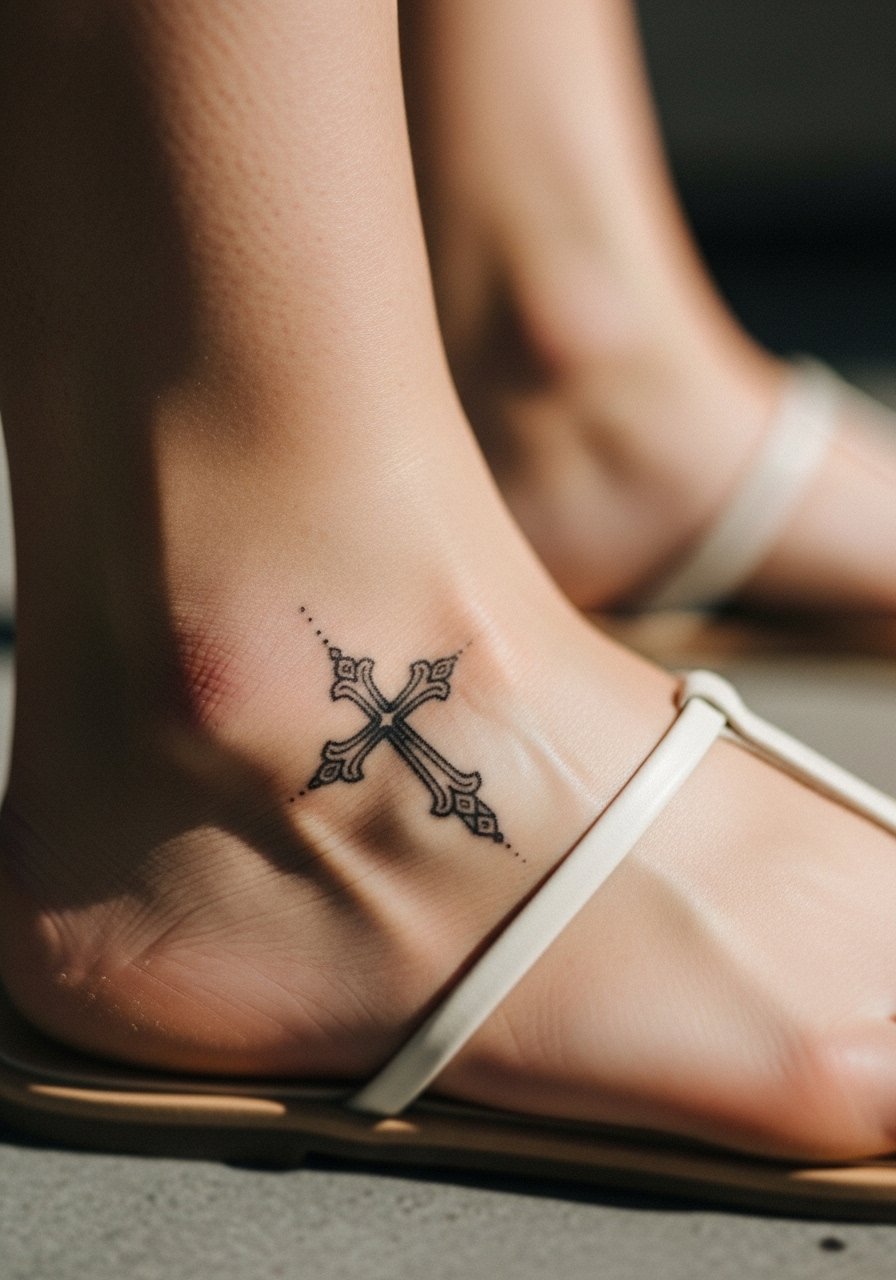
Crosses and small religious symbols near the ankle are a discreet option but they sit where shoes can irritate fresh ink. Expect sharp stings on the bone and an irritated first week if footwear is not chosen with care. Tell your artist if you plan to wear shoes immediately after. For showing it off, try cropped pants or sandals and consider a neutral pedicure to frame the piece.
22. Micro Script Behind the Ear
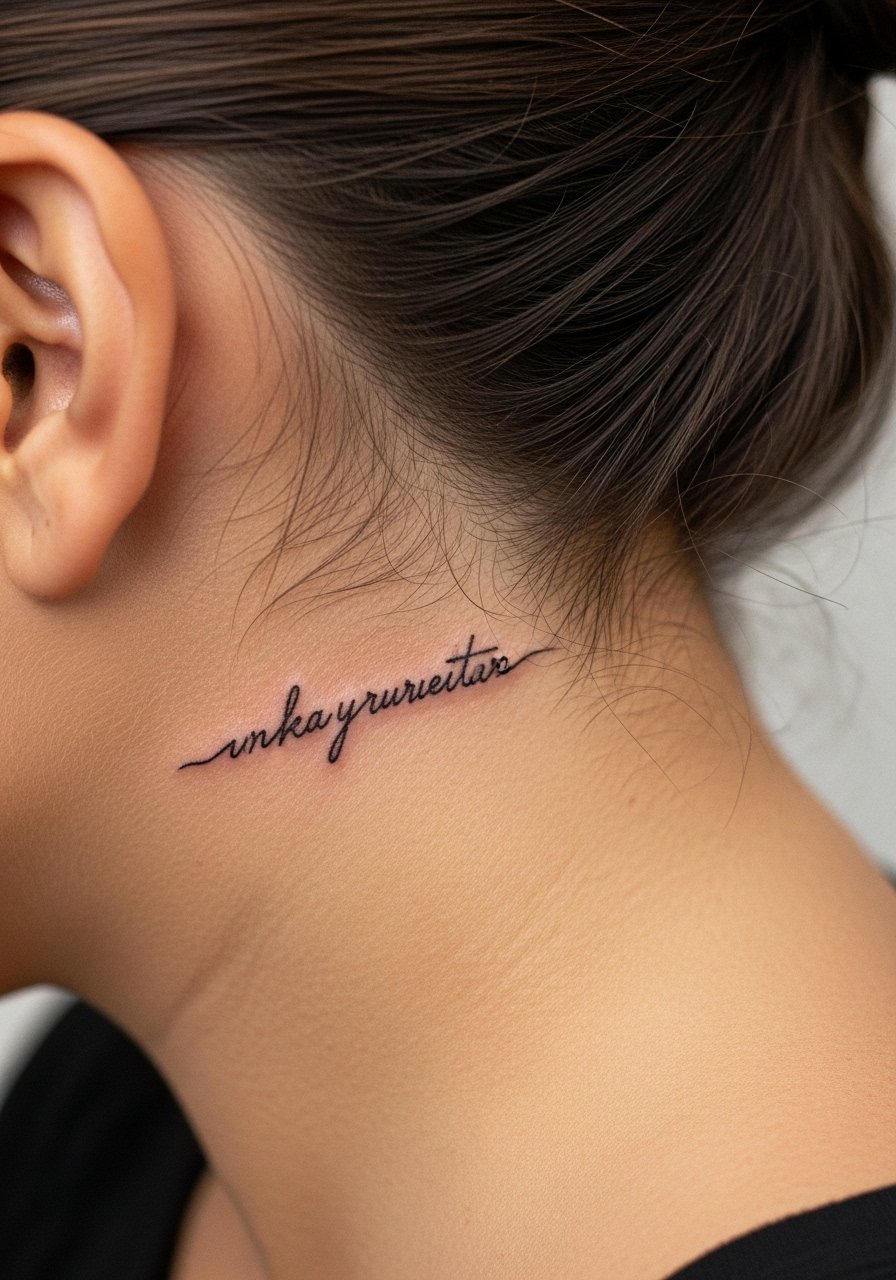
Behind-the-ear micro script is subtle and heals quickly when done by an experienced hand. The area can be tender because of proximity to bone and the thin padding there. Always provide exact text to the artist so line spacing is precise. For session comfort, wear a hairstyle you can shift easily and avoid heavy perfumes that could irritate the healing skin.
23. Fine Line Sternum Script Small
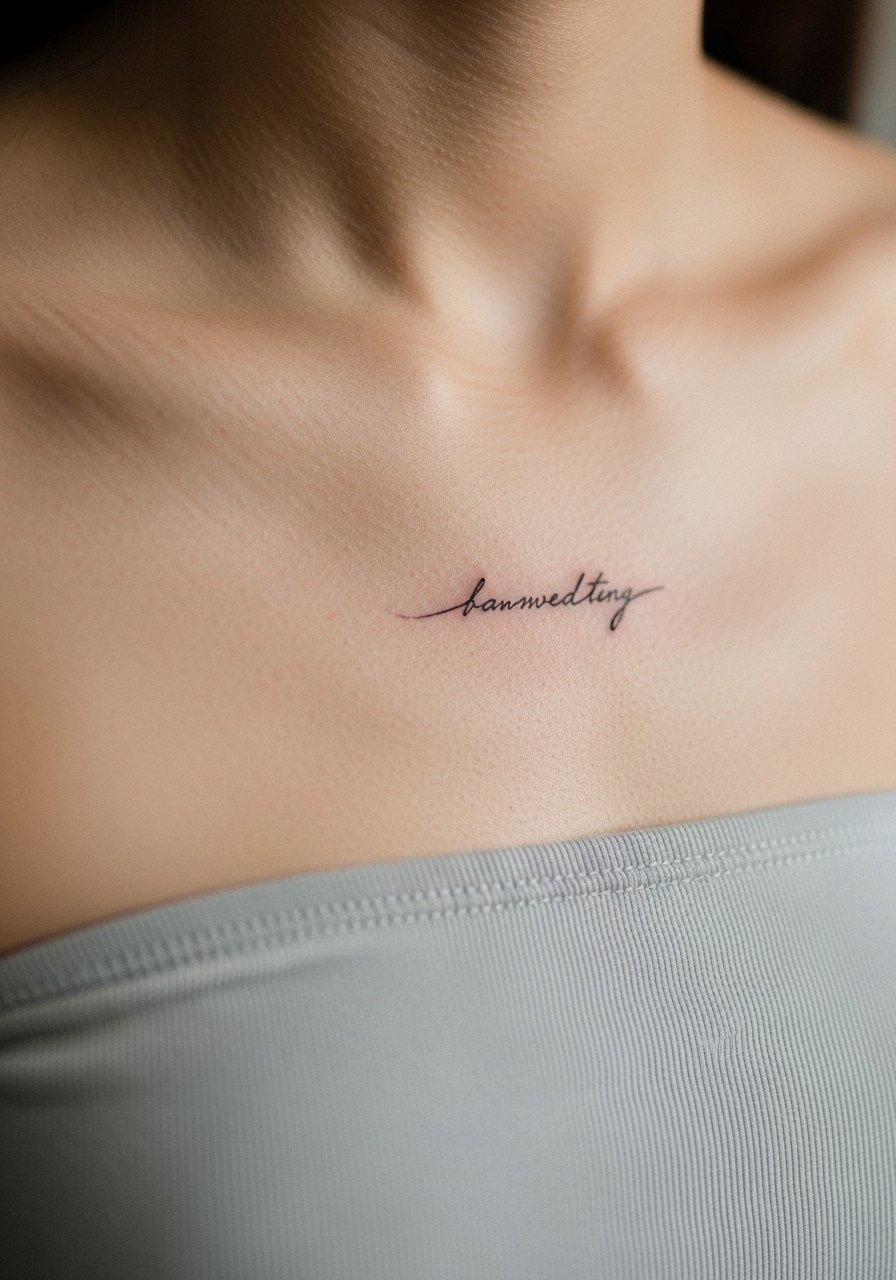
Sternum script that sits near clothing lines can be tender but often heals without issue if the band of fabric does not rub the site. One real mistake is placing letters too closely so they merge during healing. Ask for slight kerning between letters and plan a few days without tight bras. A fitted bandeau or sports bra makes the session easier.
24. Tiny Compass on the Collarbone Edge
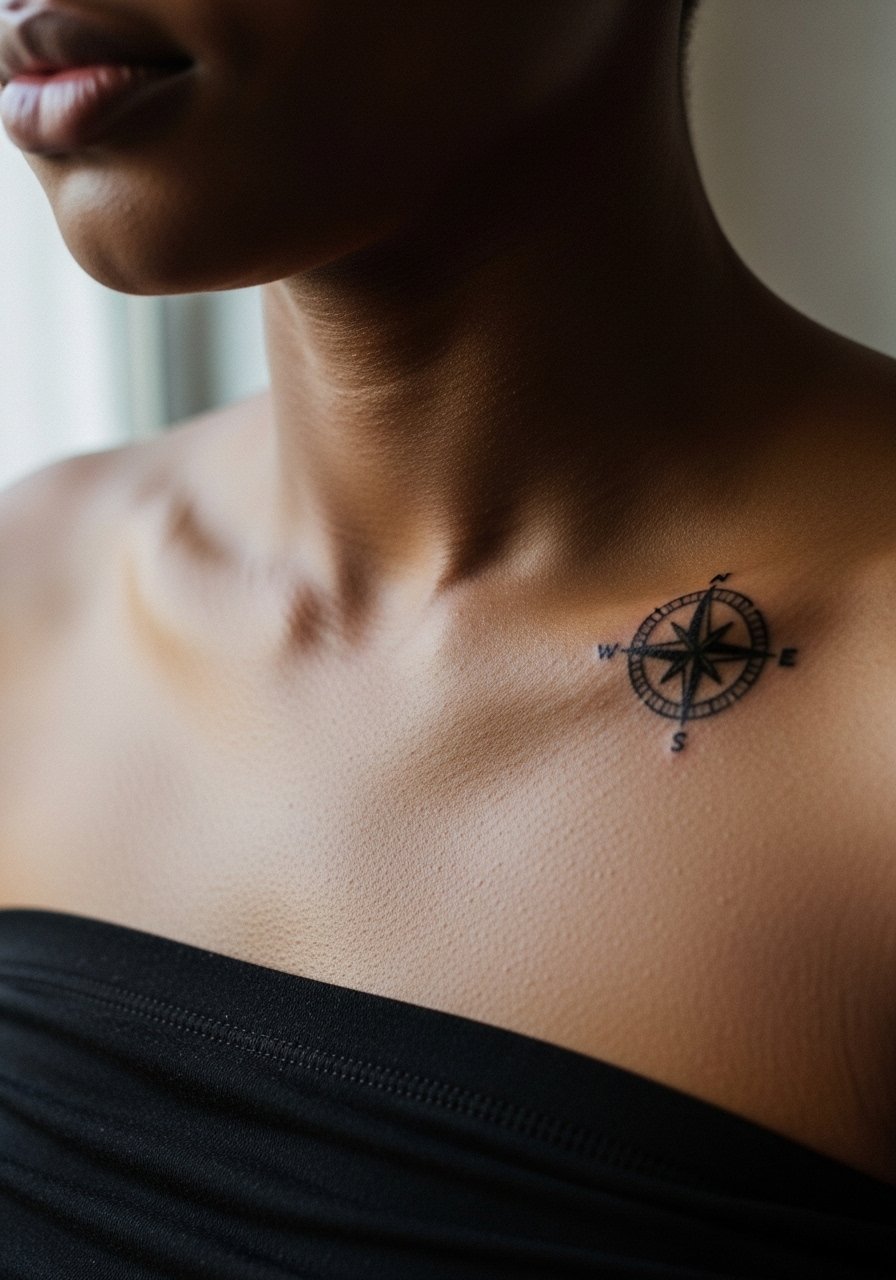
Edge collarbone placements buzz over bone and sometimes make people flinch at the first pass. Keep the design simple and bold rather than heavily detailed. For show-off styling, a long pendant that sits just above or below the mark keeps attention in the area. Wear a strapless bra or loose tee to the appointment so the artist has clear access.
25. Hip Floral Accent
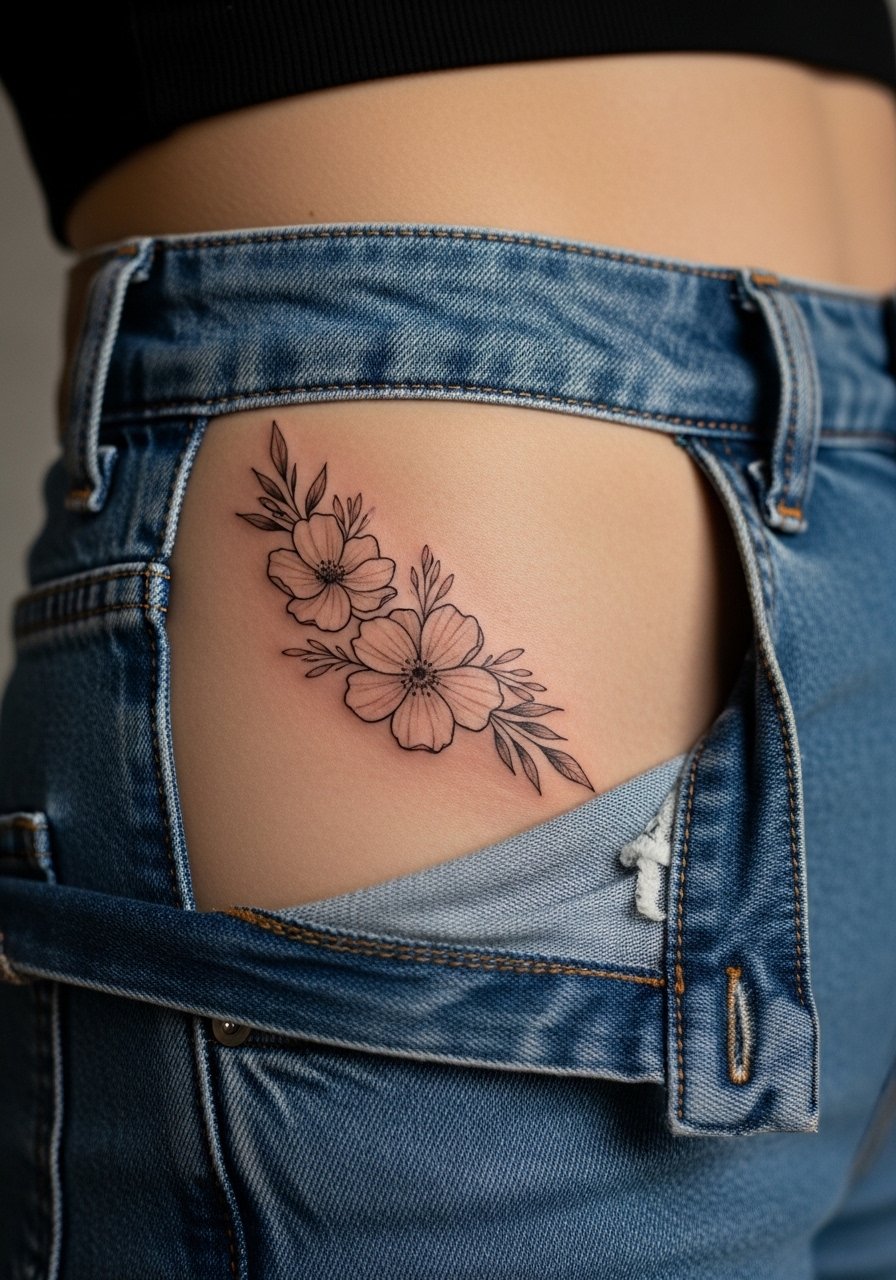
Hip tattoos hit a fleshy area that tends to be less sharp during the session but can ache if the needle reaches near bone. People seeking private spots like the hip often choose medium complexity pieces that age well because the area is less exposed to sunlight. For the session, high-waisted bottoms you can shift are ideal. Consider how your clothing will reveal the piece later and place accordingly.
26. Tiny Sternum Gem Motif
A small geometric gem over the sternum reads modern and keeps lines limited, which helps with longevity. Sessions are quick and the sensation is a focused sting. The main mistake is overcomplicating geometric detail in a very small space. Keep facets minimal and ask the artist about contrast so the motif reads after healing. Wear a sports bra for comfortable access.
27. Tiny Spine Dots Near Upper Back
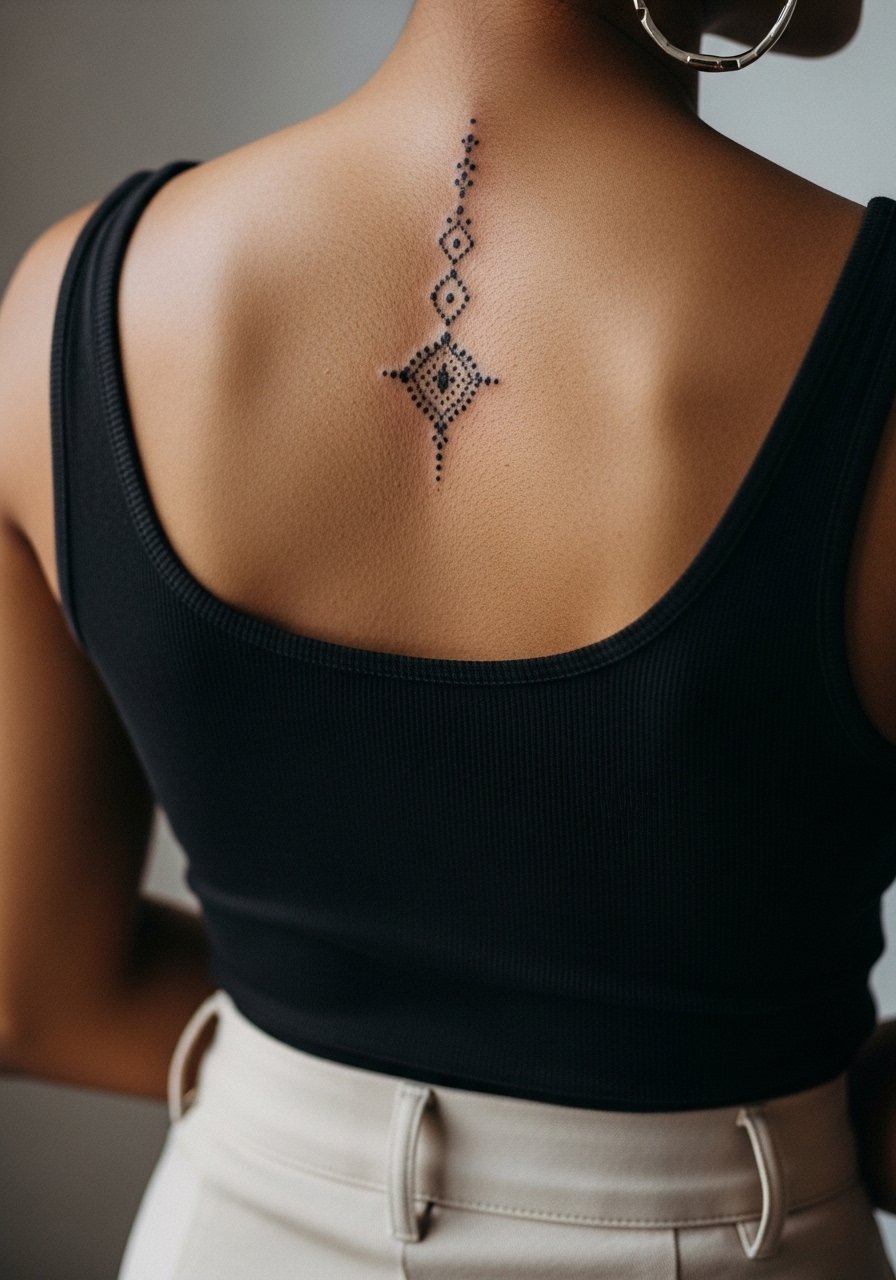
Upper spine dots are low-visibility and settle well when spaced. The area can be twitchy during the needle passes if the shoulder blades move, so breathe with the artist and relax your shoulders. A frequent error is stacking dots too tight along the spine, which can look like a line instead of distinct points. For the session, a tank top with easy shoulder access works best for both comfort and modesty.
Frequently Asked Questions
Q: Do fine line wrist pieces really fade faster than bolder work, and why does that happen?
A: From what I have seen, wrists often lose crispness sooner because the area is exposed to more sun and friction. Fine single-needle work gives a delicate look initially, but without slightly heavier line weight or more spacing it can soften within a couple of years. Ask your artist about a modest increase in line weight if you want longer clarity.
Q: For ankle and foot arch tattoos, how should I plan footwear and activity in the first week?
A: Keep shoes loose and avoid tight socks that rub the site. Elevate the foot after the session and skip long walks for 48 hours if you can. If the artist prefers a barrier film on ankles, follow their plan since they will have seen what heals best for that studio.
Q: If I want a micro piece on a finger or knuckle, what should I ask in consultation to avoid early fading?
A: Request bold, simple shapes rather than tiny shaded areas and discuss realistic touch-up timelines. Ask the artist about their history with hands and fingers and whether they do regular touch-ups for that placement. Bring reference images that show the exact size and line weight so expectations match.
Q: How do ribcage quotes compare with sternum scripts for discomfort and healing?
A: Ribs tend to register a sharper, bone-adjacent sensation and often require steadier breathing during the session. Sternum scripts can be slightly easier if the design sits over more padding and is kept small. Both areas need careful after-session clothing choices to avoid friction from bands or straps.
Q: Any tips for styling small forearm or wrist pieces for work outfits without drawing too much attention?
A: Keep bracelets minimal or wear a thin chain on the opposite wrist when you want a subtle look. A minimalist bracelet stack can balance attention without overshadowing a tiny wrist piece. For appointments, roll sleeves for clear access and avoid jewelry that must be removed during the session.
