
Fine line trends look incredible on feeds, but the pieces that still read clean after five years are rarely the same ones that got the most likes the day they were fresh. The ace of spades has been remixed into neo-traditional crowns, blackwork skulls, watercolor roses, and micro-realism eyes. Below are 27 ace of spades tattoo ideas that balance how they look now with how they age, plus practical notes for bookings and sessions.
1. Neo-Traditional Ace With Crown on Forearm
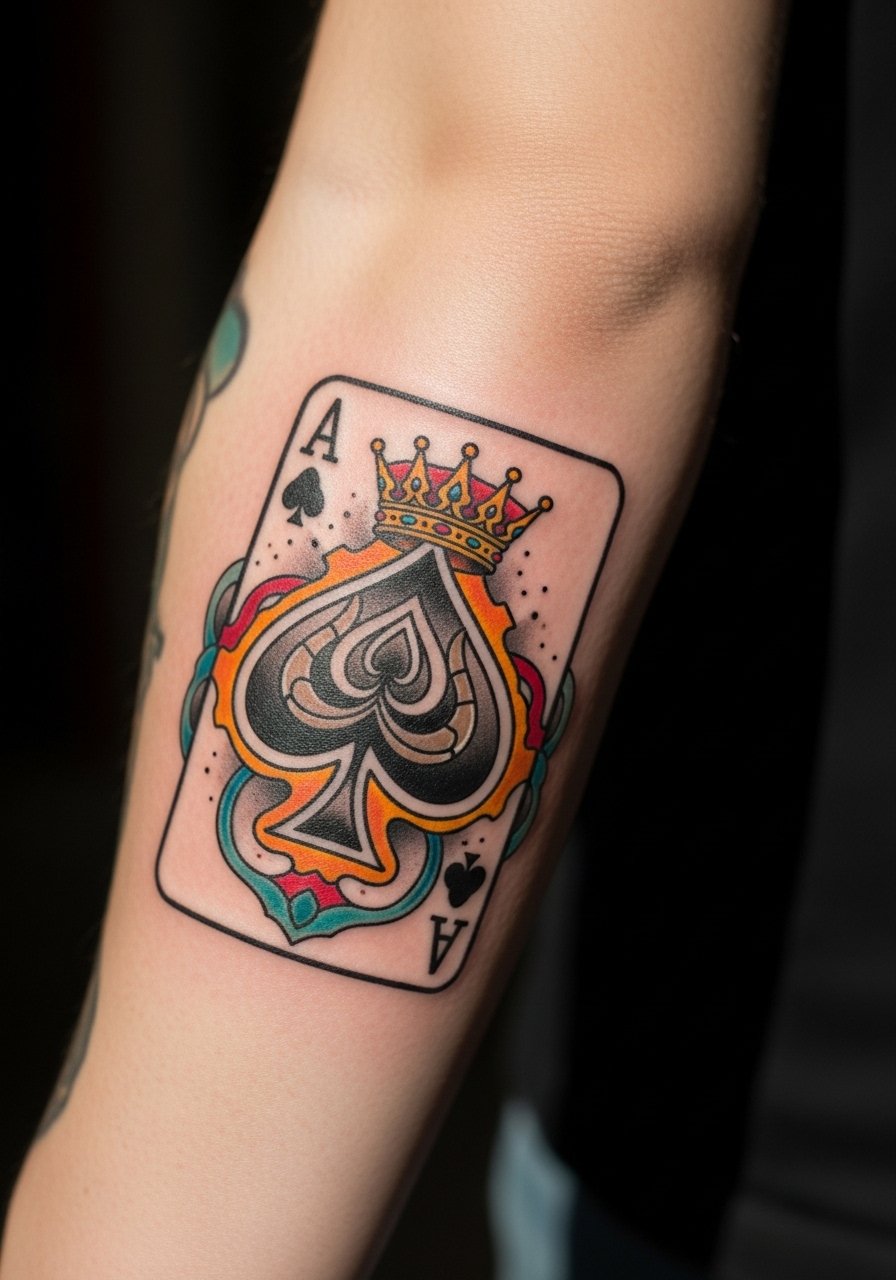
I've seen this on rolled sleeves around town and it reads like authority without shouting. Ask your artist for slightly thicker linework inside the crown and a saturated black field in the spade so the colored highlights pop without bleeding. Fair warning, forearm sessions hurt less than wrists but more than the outer bicep, and most of this fits into a single two-hour session. Common mistake is shrinking the crown detail too small, which looks muddy at year two. For showing it off, roll up a rolled sleeve chambray shirt so the piece sits in natural light.
2. Blackwork Skull Ace on Chest
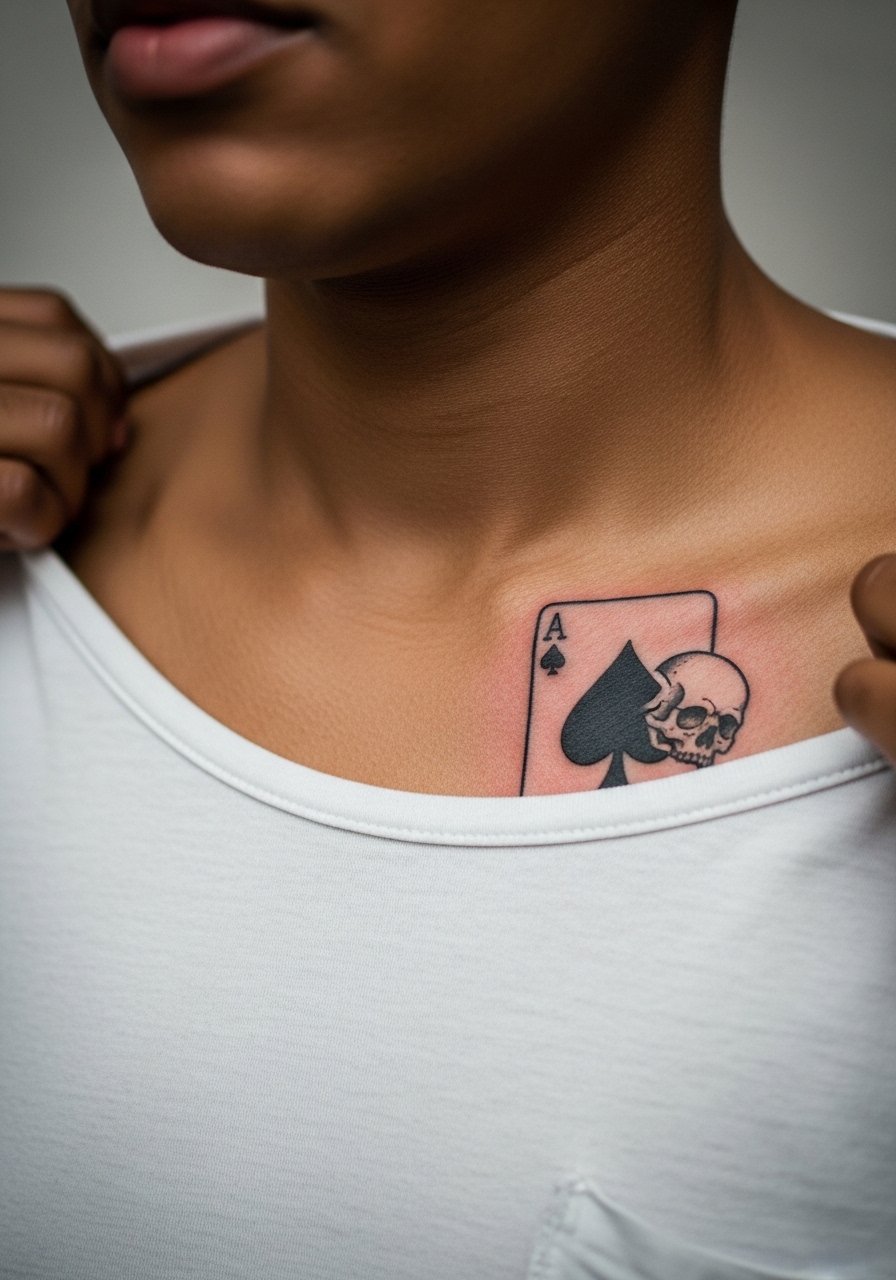
Fair warning: chest work pushes session length and sensitivity. This style benefits from dense saturation to avoid patchy fading on darker skin tones. In consultation, say you want solid black fills and a touch-up window at six months. Many people underestimate blowout risk near the sternum if linework runs too fine. Expect two sessions for large chest pieces and a touch-up around the year mark. Pair it with a v neck black tee to frame the collarbone without covering the art.
3. Dotwork Floral Spade on Shoulder Blade
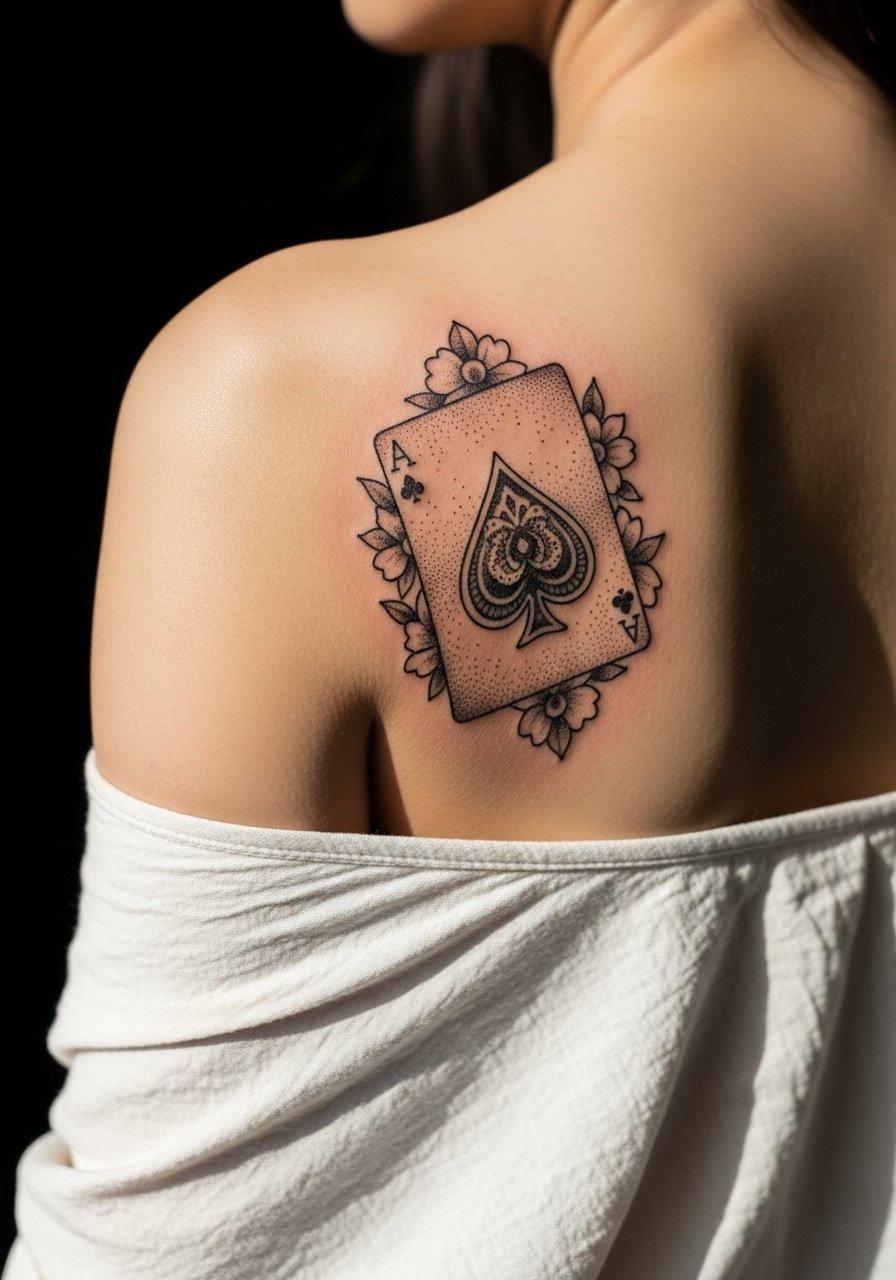
Most dotwork ages beautifully when spaced correctly. Tell your artist you want stipple shading and leave negative space between clusters so the pattern can breathe as it heals. The shoulder blade is forgiving against blowout, but long sessions lying face down can create stiffness. A typical appointment moves slowly to allow the needle to layer dots for texture, often two sessions depending on size. For show, pair this with an open back blouse so the mandala framing reads without visual clutter.
4. Realism Eye-in-Ace on Calf
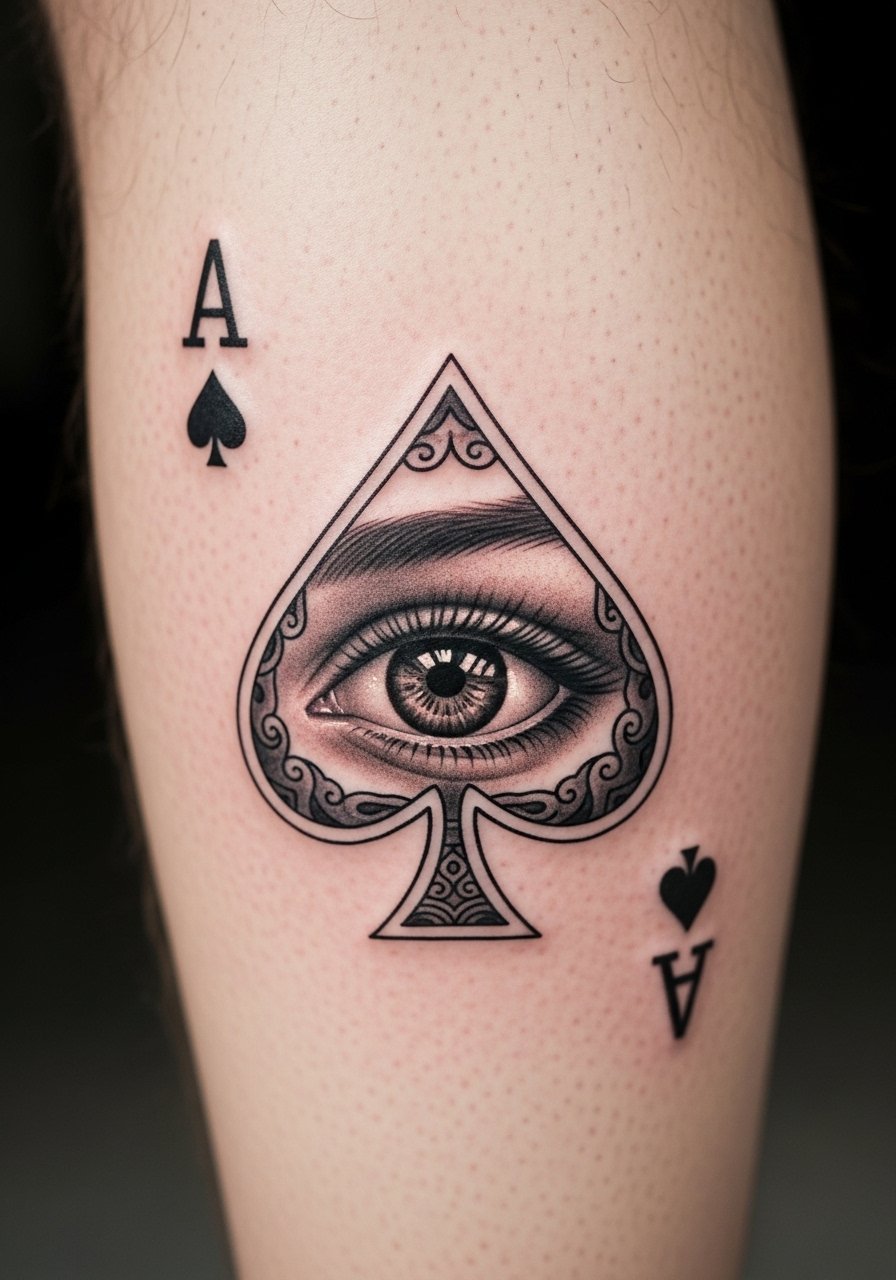
There is more demand for eye-in-spade pieces than people realize, and the calf is a great canvas for realism because it moves less than the forearm. In the consult, bring close-up references of eyelids and lashes so the artist matches pupil reflection and contrast. Realism needs slightly larger scale to keep fine details readable at year two and beyond. Expect two to three sessions and plan for compression in tight pants while healing. For the session wear, pull on loose fit gym shorts so the artist can access the area without friction.
5. Watercolor Rose Ace on Wrist
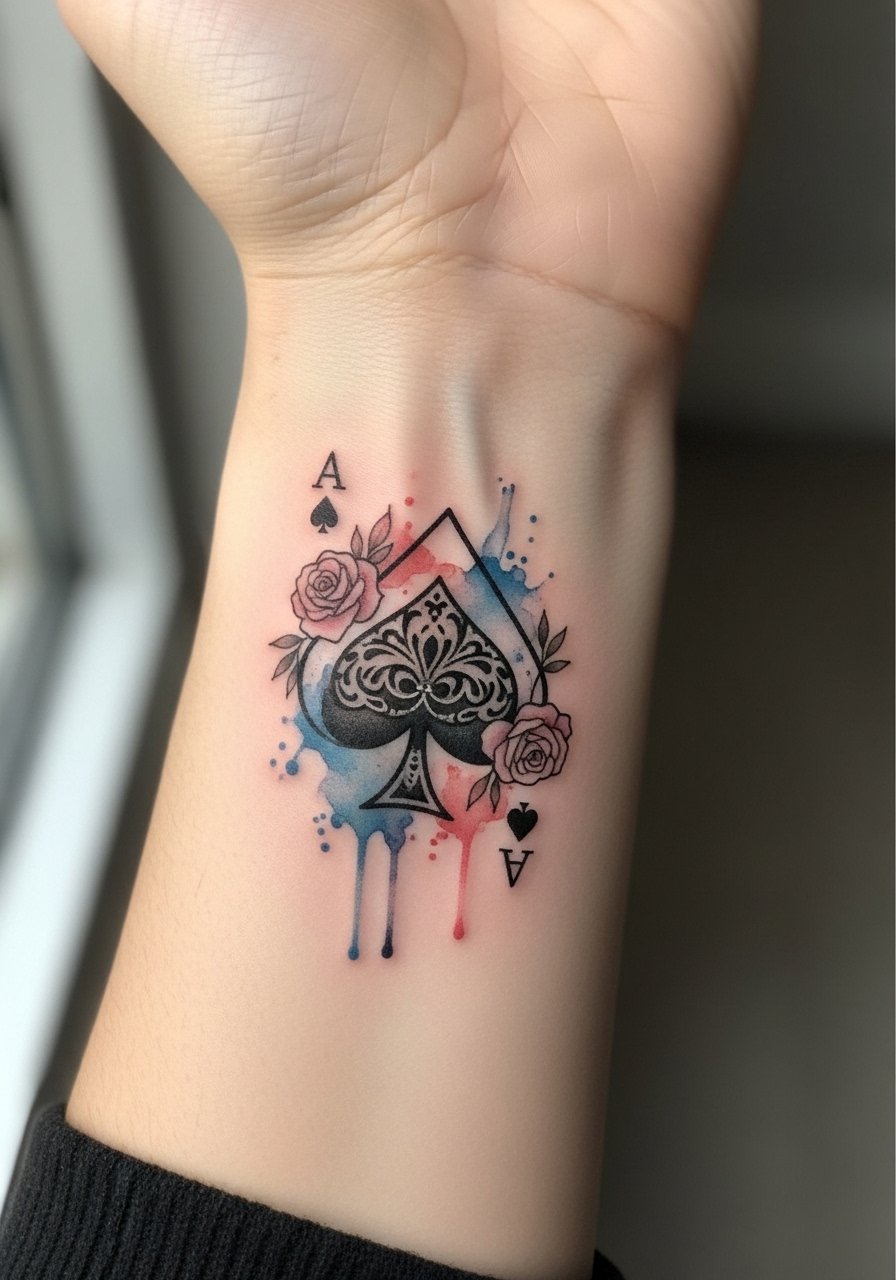
Wrist pieces read intimate and delicate but also face a lot of friction. If you want watercolor, tell your artist to anchor it with a thin outline inside the spade so the pigments have structure as they age. The wrist will require a touch-up sooner than an arm because of constant washing and movement. Expect a shorter session but plan a touch-up window at year two. For everyday styling, stack a thin silver chain bracelet opposite the tattoo so the skin pattern shows without being overwhelmed.
6. Neo-Traditional Dagger Piercing Ace on Outer Forearm
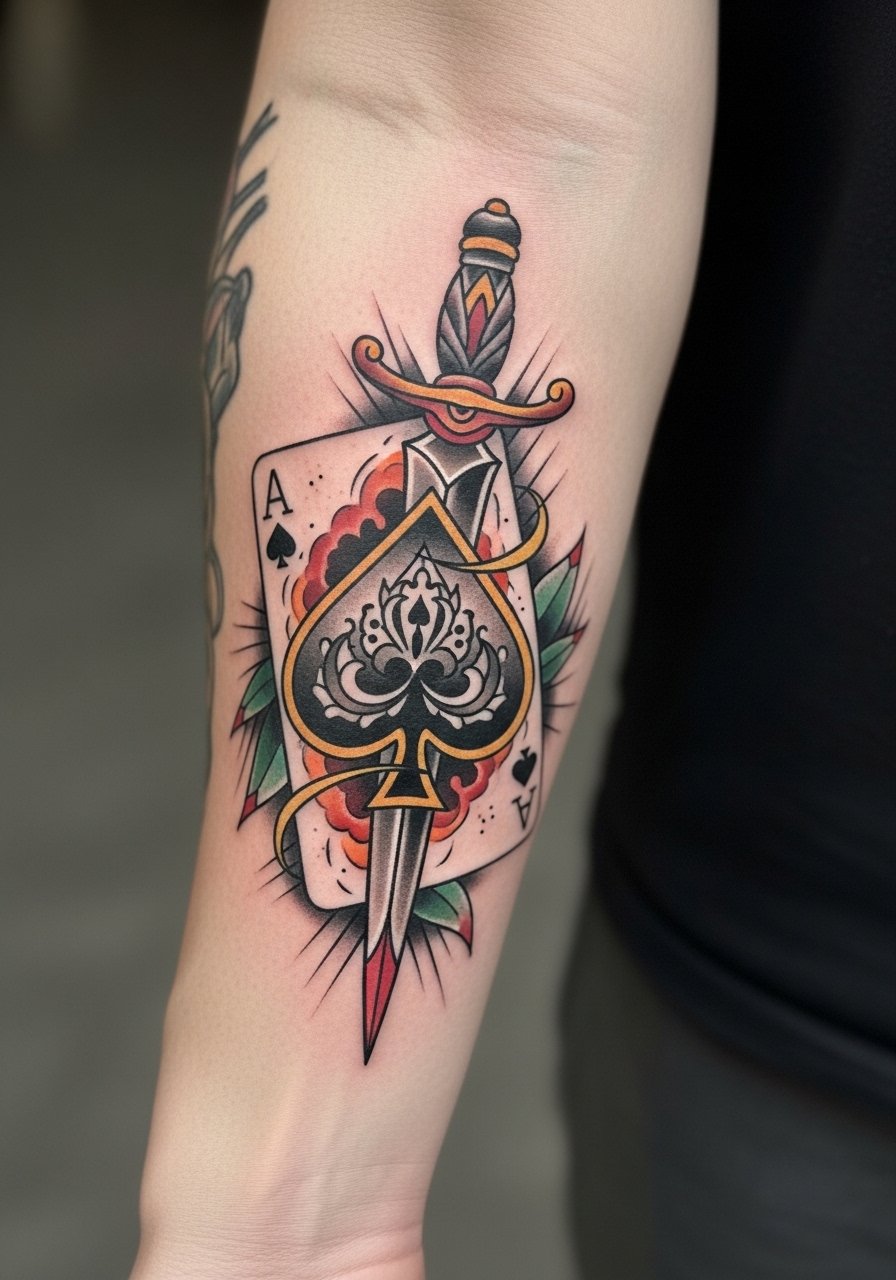
When someone wants a dagger through the spade, I tell them to commit to solid outlines and medium scale. The outer forearm tolerates bold work and holds saturation well. Common mistake is crowding ornamental details into the dagger handle, which blurs as the ink settles. Pain is moderate and most of this finishes in a two-hour session with one touch-up if needed. Wear a navy button down short sleeve for the session so the artist can roll the sleeve without constricting the arm.
Studio Day Picks
Those first six ideas include wrists, forearms, chest, and shoulder blade work, so a few targeted items make the studio day smoother and the first week more predictable.
-
Stencil transfer paper kit. Lets you preview the line placement on the skin, which matters for tiny crowns and wrist pieces.
-
Topical numbing cream. Applied before wrist or chest sessions it can reduce the initial bite, which helps if you are sensitive to forearm or wrist pain.
-
Thin protective film roll. Useful for high-friction zones like the wrist during the first days of healing.
-
Fragrance-free body wash. Cleanses healing areas gently without stripping saturation, helpful for chest and shoulder pieces.
-
Aquaphor healing ointment. Thin layers for the initial days lock moisture without suffocating the needle channels for fine line work.
7. Blackwork Phoenix Ace on Thigh
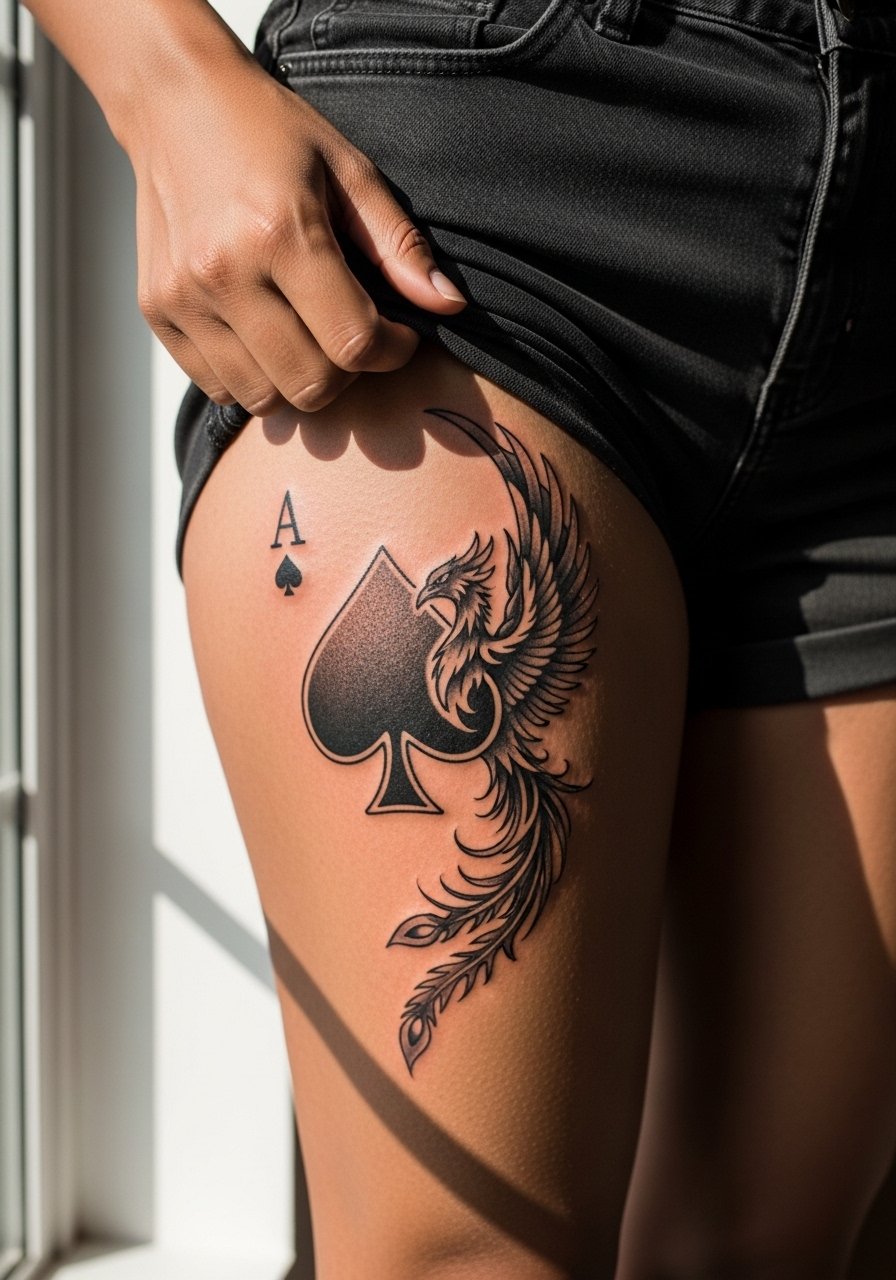
This rebirth angle reads well on the thigh where you can go large and let solid fields breathe. The thigh tolerates deep saturation and heals with less stretch distortion than the forearm. In consults I suggest a two-session plan for saturation and then a follow-up at three to six months. A common mistake is cramming too many tiny feathers into a small space, which loses definition at year two. Bring a pair of tailored athletic shorts for the session so you can roll fabric down without rubbing the fresh ink.
8. Fine Line Ace Outline With Text on Collarbone
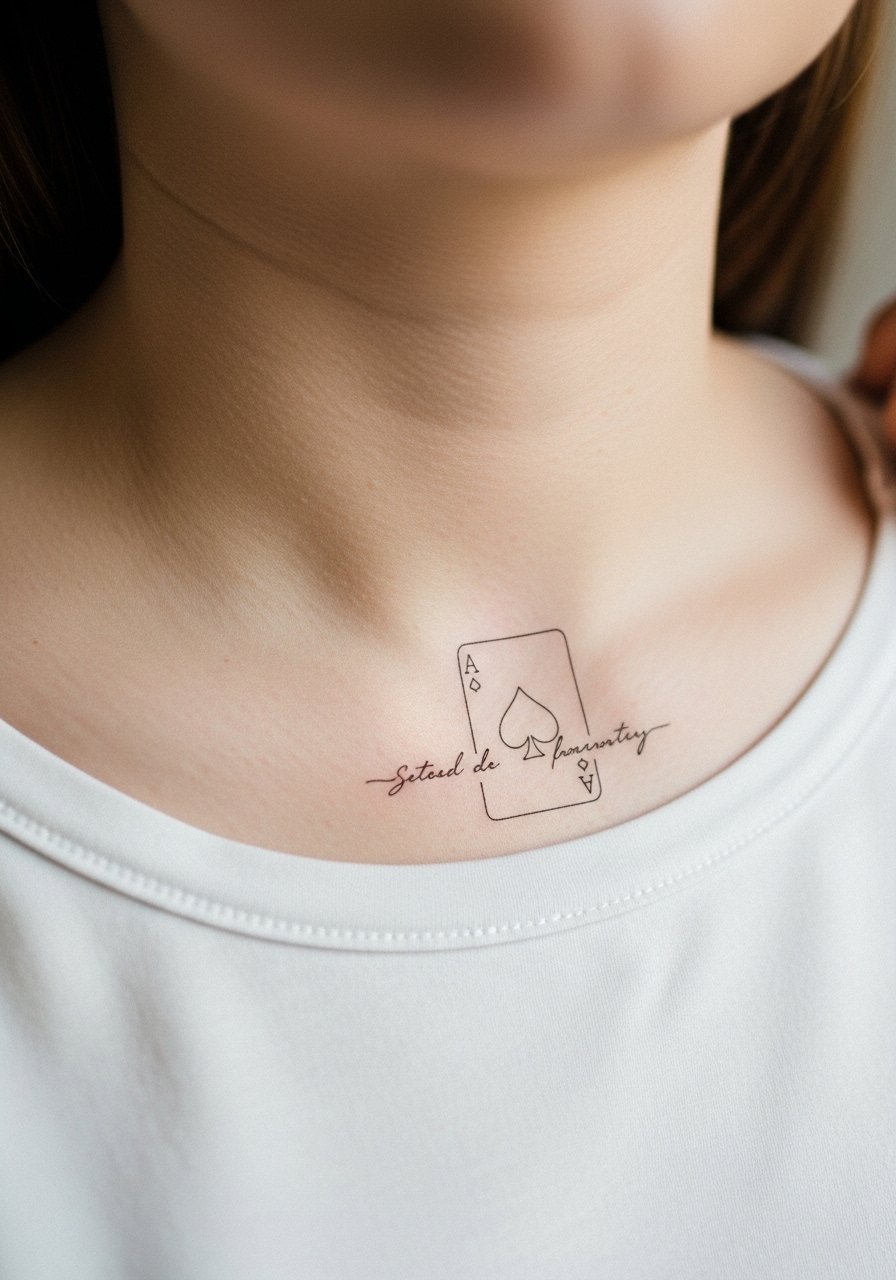
Artists split on fine line on collarbones. One camp says the bone area and thin skin make lines blur faster. The other camp argues that careful depth and spacing keep lines readable for years. Name both camps and ask where your chosen artist stands. This piece is low-pain but very visible, and lettering should be bold enough for legibility at five years. Mistake to avoid is requesting hairline script where the letters are too tight. For sessions, wear an open collar shirt you can slide aside without stretching the skin.
9. Ornamental Mandala Spade on Ribcage
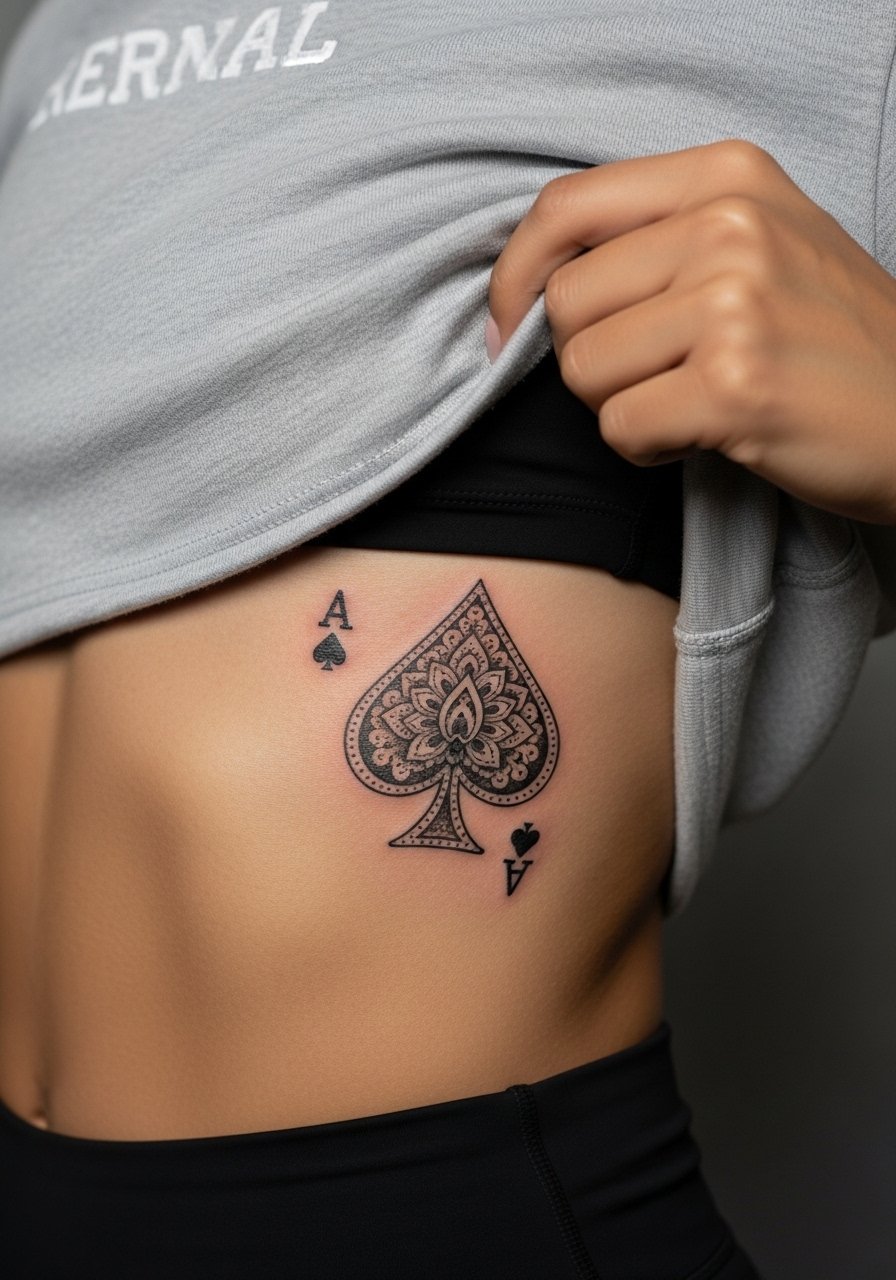
Fair warning: ribs are a three-out-of-ten on most pain charts and the skin moves with breathing. The mandala needs spacing so tight stipple patterns have room to age. A common mistake is building too-dense central detail which then fills in after healing. Expect shorter sessions with breaks and a touch-up later on. If you get this, book shallow breathing practices before the appointment and plan for a longer post-session rest period.
10. Traditional Ace With Lucky Motifs on Calf
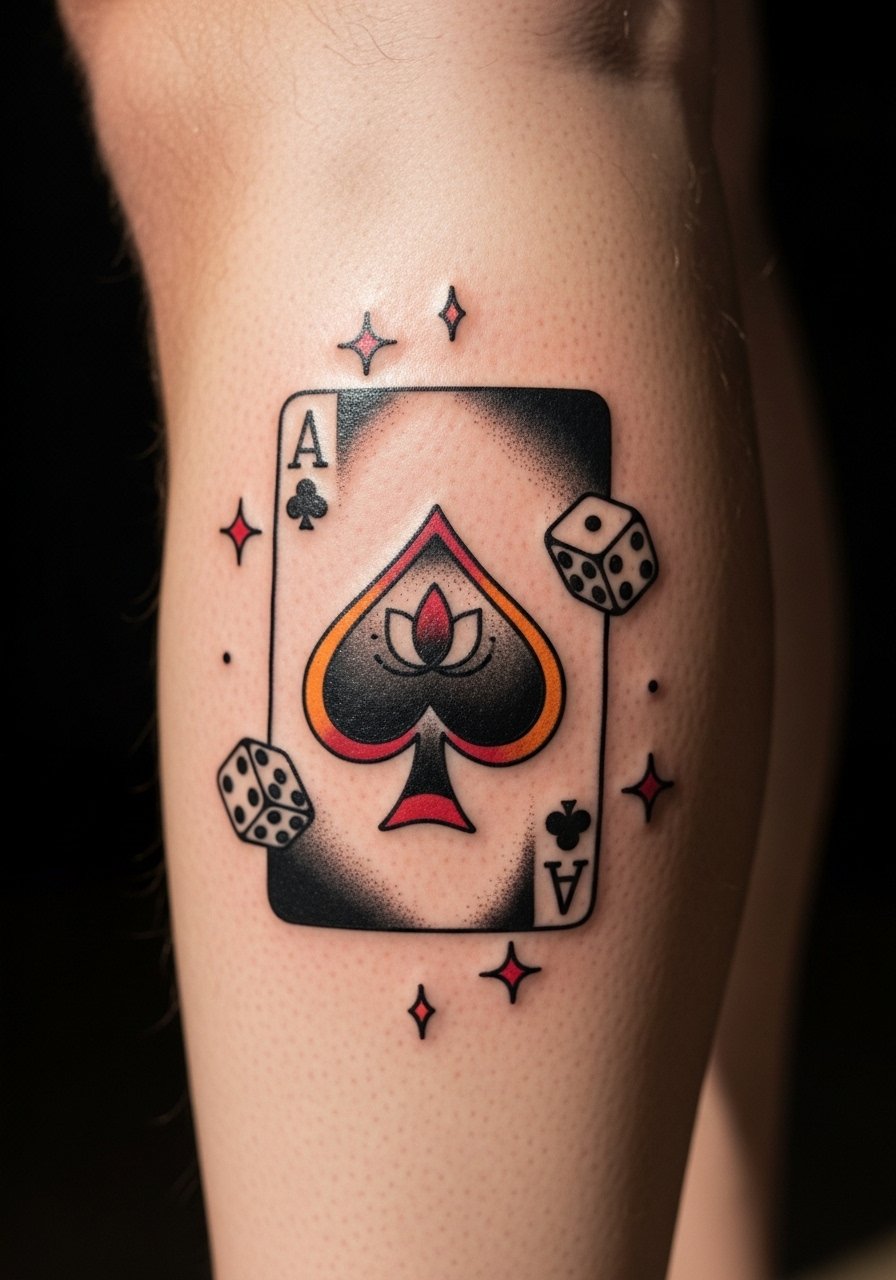
Traditional line and saturation age predictably because the outlines are robust. For calf placement, recommend classic bold outlines with limited color fields so it reads from a distance and also tight up close. A mistake is adding tiny stars that are too close to the main spade, those details blur by year three. Session pain is low and most of this finishes in a single session. Wear canvas low top sneakers and shorts for the session so the leg stays accessible without compression during healing.
11. Micro-Realism Skull Fusion on Upper Thigh
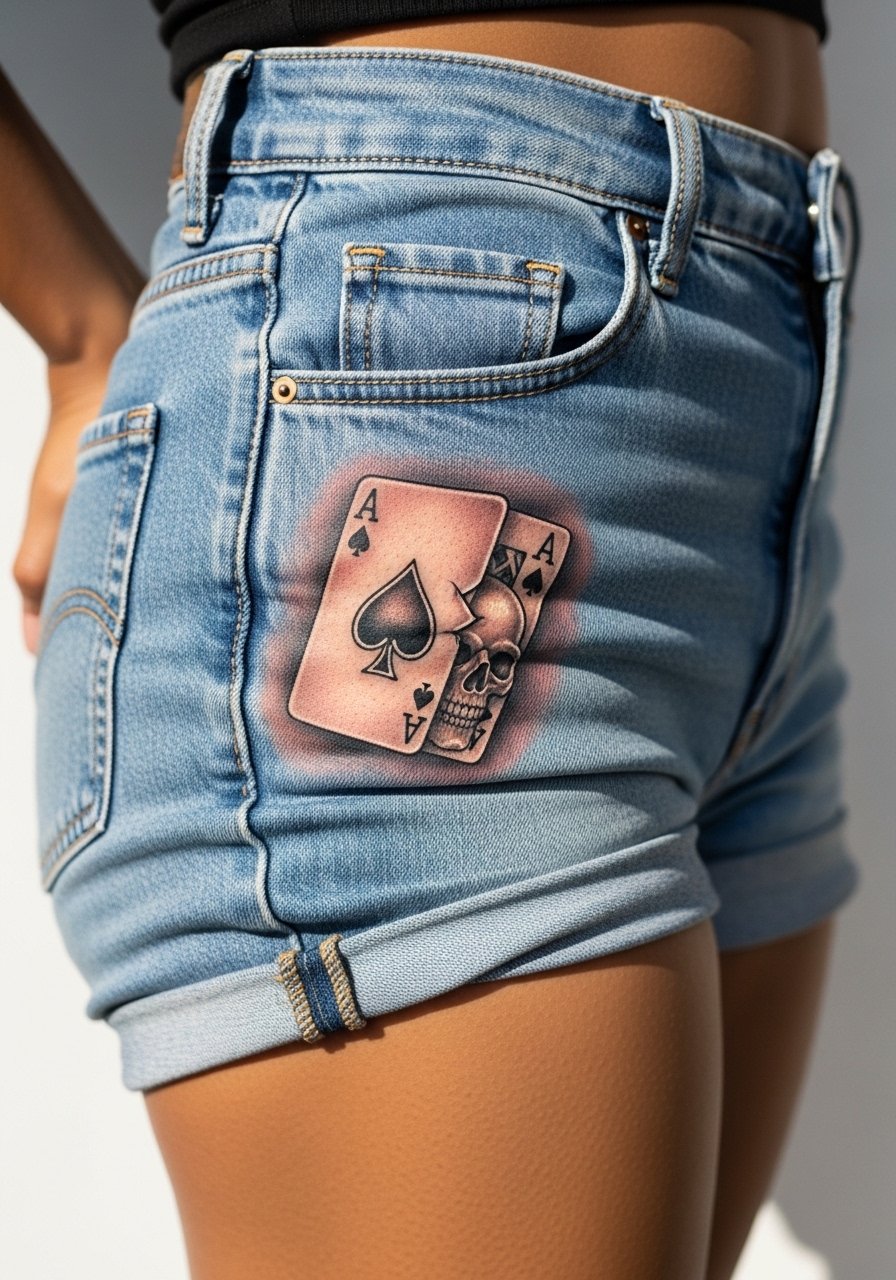
Micro-realism demands scale and contrast. On the upper thigh you can keep detail without compromising clarity. Tell the artist you want high-contrast grayscale and to avoid tiny hairline detail under heavy shading. Expect multiple sessions and a likely touch-up at year one for micro realism. A common mistake is compressing the skull eyes too small, losing emotion in the piece. For the session, shorts you can shift easily work best.
12. Ignorant-Style Spade With Tribal Edges on Outer Bicep
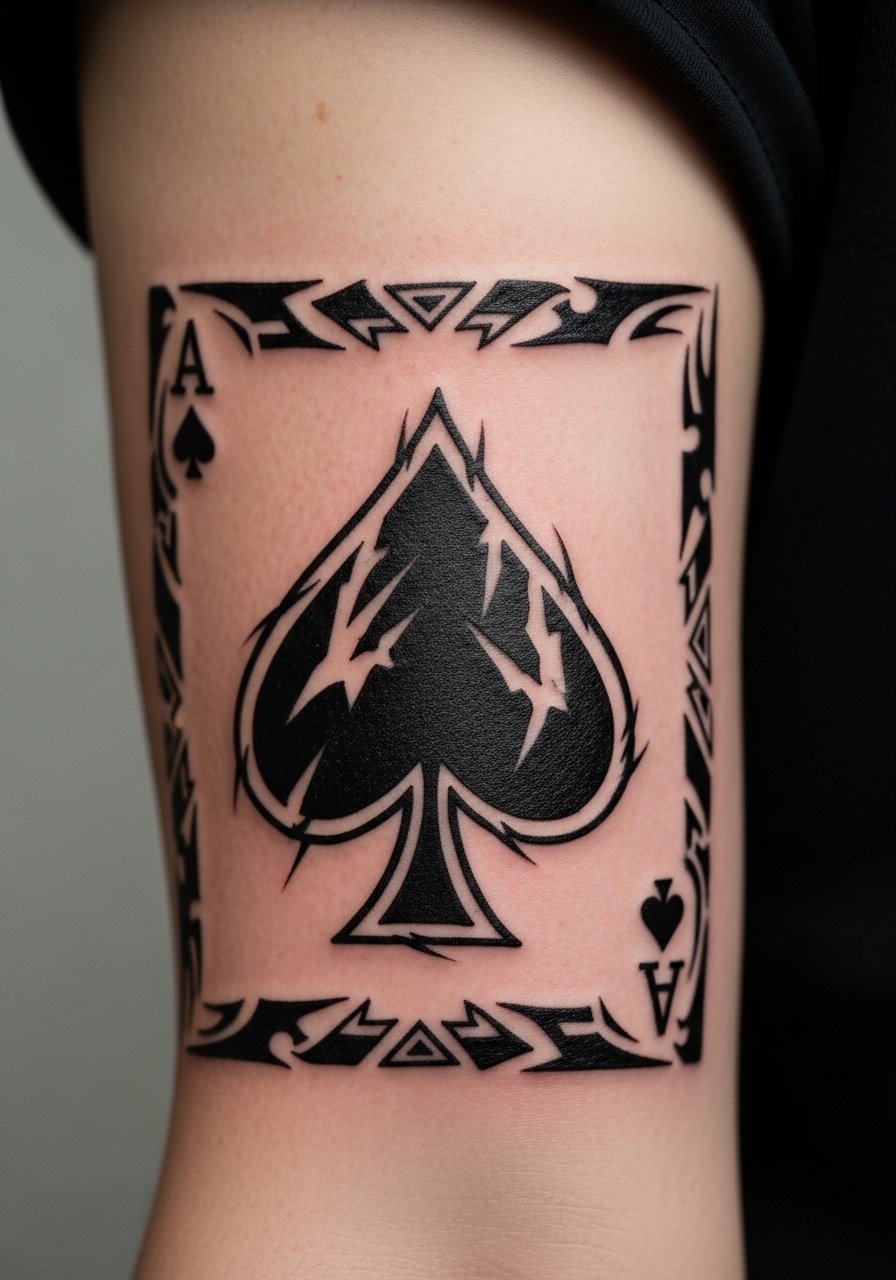
This raw aesthetic reads intentionally primitive and often heals without much softening because the lines are thick. The outer bicep tolerates bold needlework and has low blowout risk. The biggest mistake is letting an artist mimic the style without confidence in heavy lines. One session typically does the job. For show, a sleeveless muscle tee keeps the area visible and frames the bicep curve.
13. Eye-in-Ace Realism on Forearm
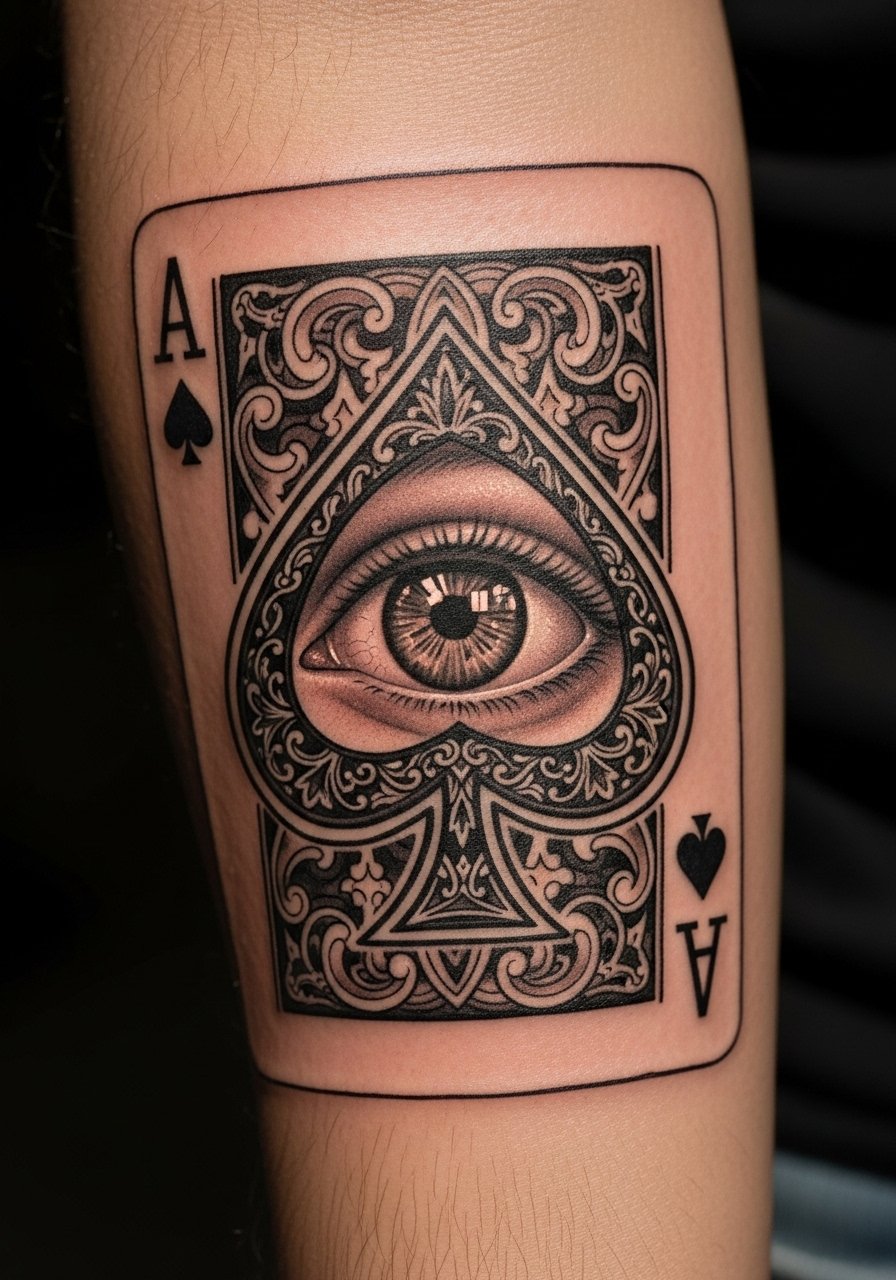
Personal observation: forearm realism reads best when scaled slightly larger than you think. The inner forearm gives a flat surface for detail but moves with muscle flex. Ask your artist to prioritize contrast in the pupil and to leave more negative space around the spade edge to avoid crowding. This piece often needs two sessions and a touch-up at six to twelve months. Expect soreness when you sleep on it the first night. For session wear, a loose short-sleeve tee that rolls easily is ideal.
14. Floral-Wrapped Ace on Shoulder Cap
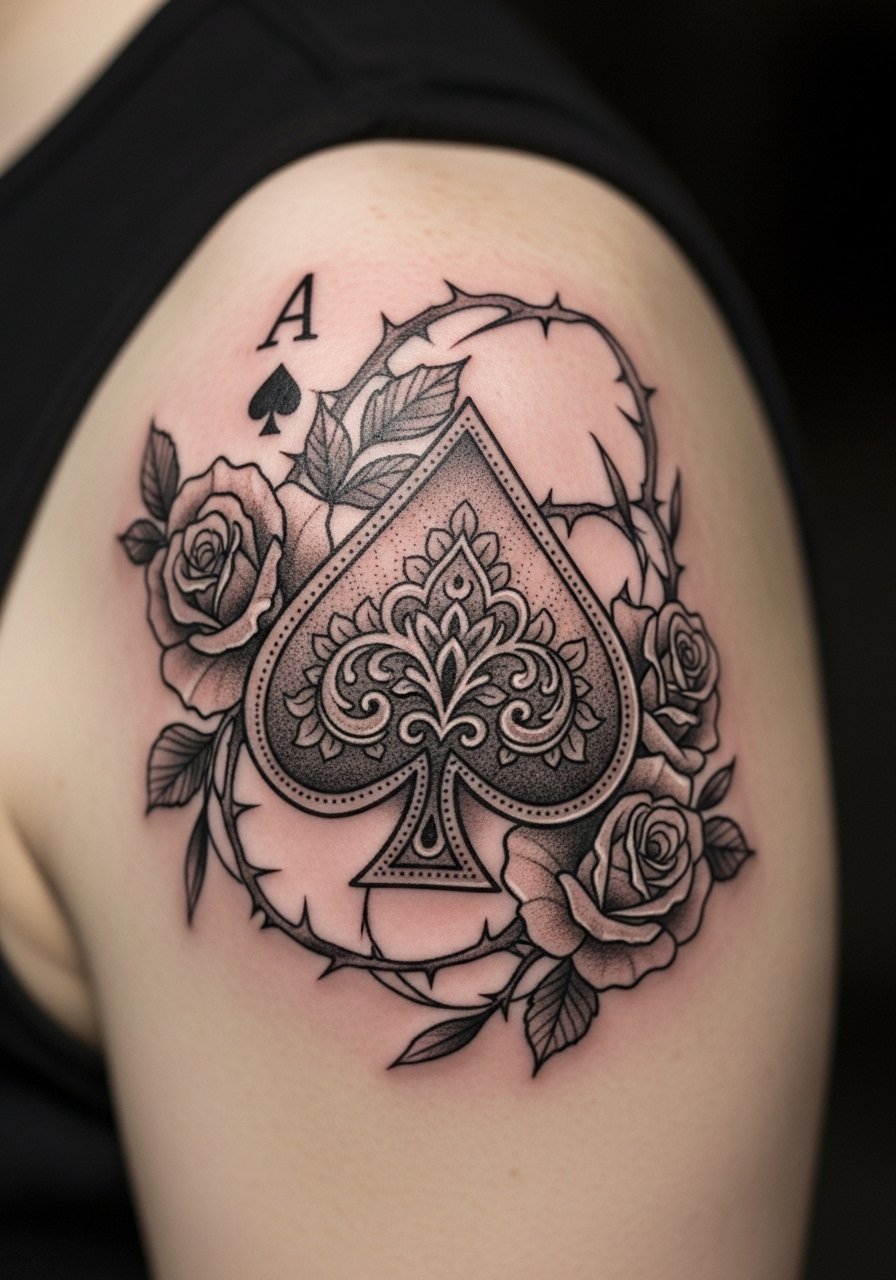
Visual impact lead: floral wraps soften the spade's edges while keeping the symbol readable. On the shoulder cap this hybrid sits nicely under sundresses and tees. Tell your artist to use separate shading techniques for petals and spade so textures do not merge. A common mistake is saturating petals with color that competes with the black spade, reducing contrast at year two. Sessions are moderate and often finish in one to two sittings.
15. Minimal Finger Ace Accent
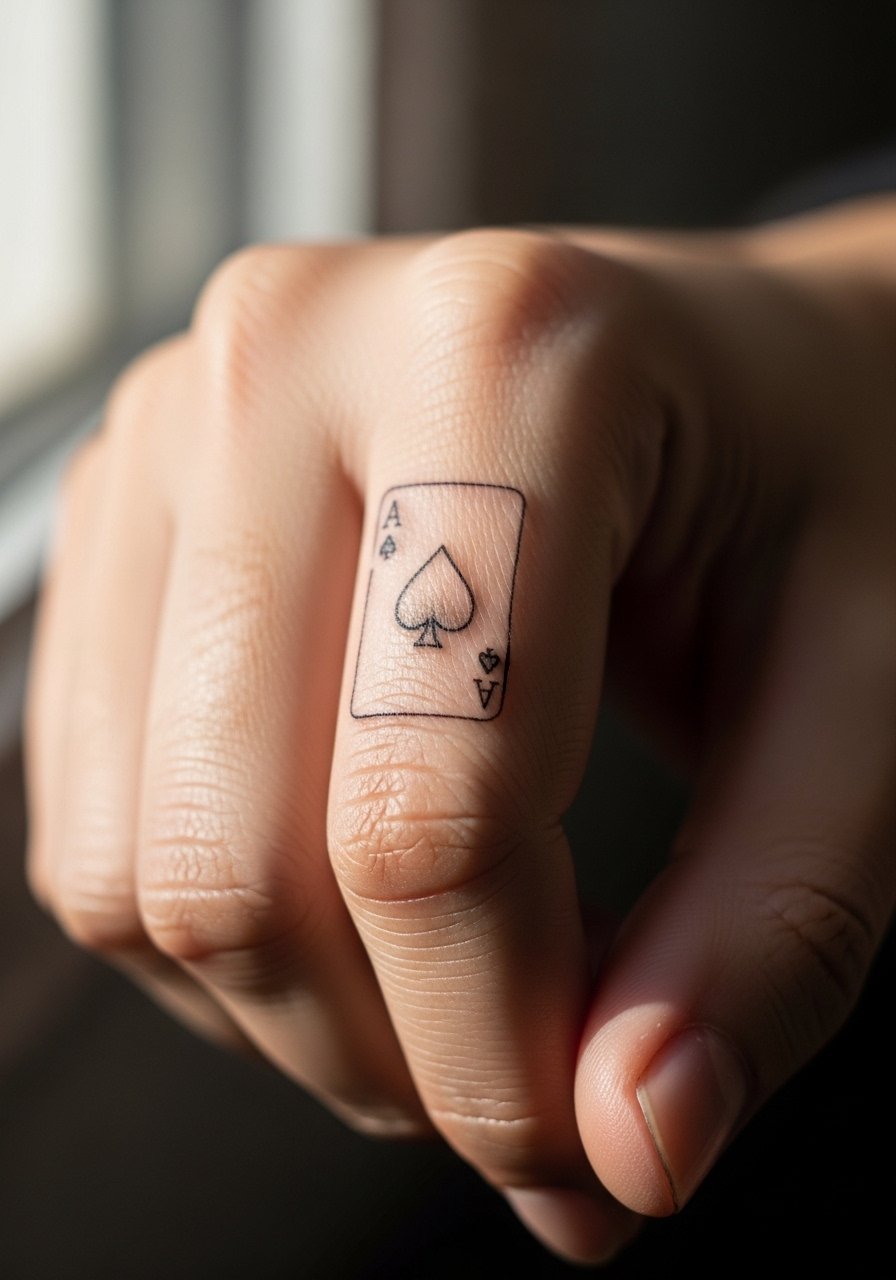
Mistake lead: finger tattoos are small and subject to heavy wear, which means they fade faster. Choose simplified geometry and thicker line weight than you think. Expect touch-ups sooner, often yearly, because skin here regenerates and friction from washing wears ink down. The session is short but the commitment is long term. For daily styling, a minimalist cuff bracelet on the opposite wrist keeps attention balanced without rubbing the fingers.
16. Ornamental Ace With Mandala Halo on Back
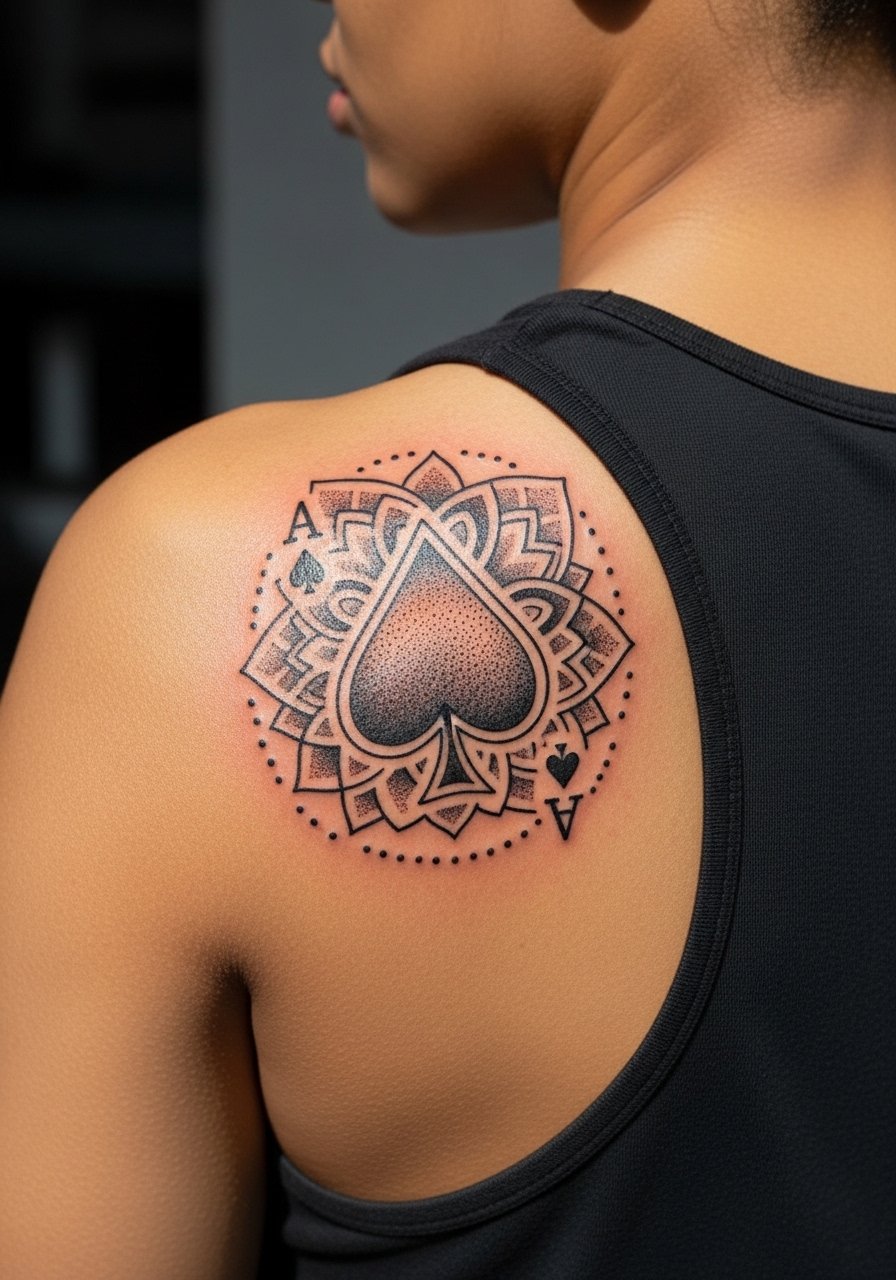
Consultation lead: when you sit down for a large back ornament, bring layout references that show spacing. The back lets artists scale up filigree and dotwork so negative space stays intact as it heals. A common error is packing the halo with too many tiny elements, which merge after a few years. Sessions are longer and usually split into two or more visits. For showing, a backless tank top reveals the work elegantly.
17. Ace With Eye and Script on Collarbone
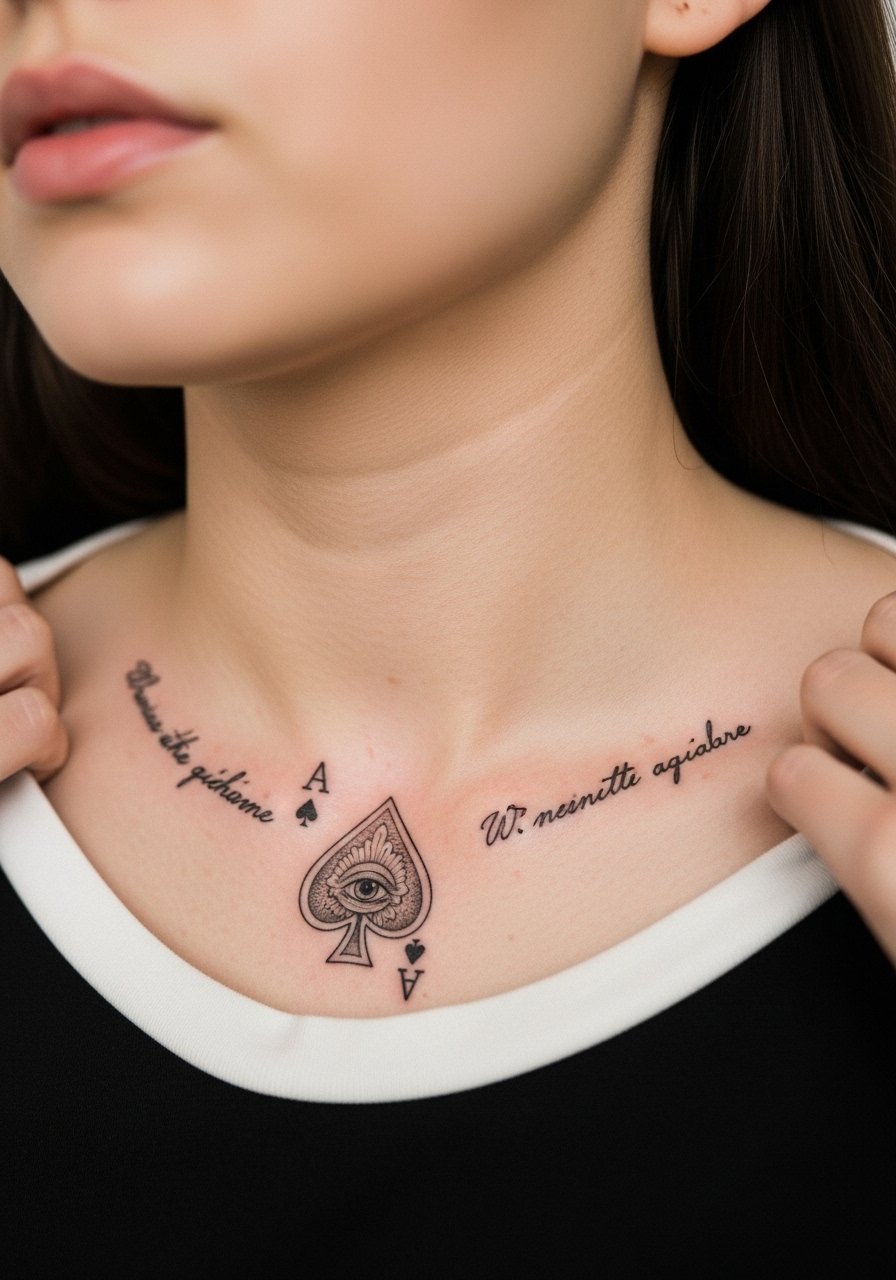
Mistake lead: pairing tiny script with fine line art on the collarbone can cause legibility loss if the letters are too close. If you want a phrase, ask for slightly bolder type and wider letter spacing. The collarbone area moves and the skin is thin, so expect a touch-up window at year two. Pain is moderate and sessions are short. For styling, a thin chain necklace can sit above the script without competing.
18. Geometric Ace With Dotwork Frame on Inner Bicep
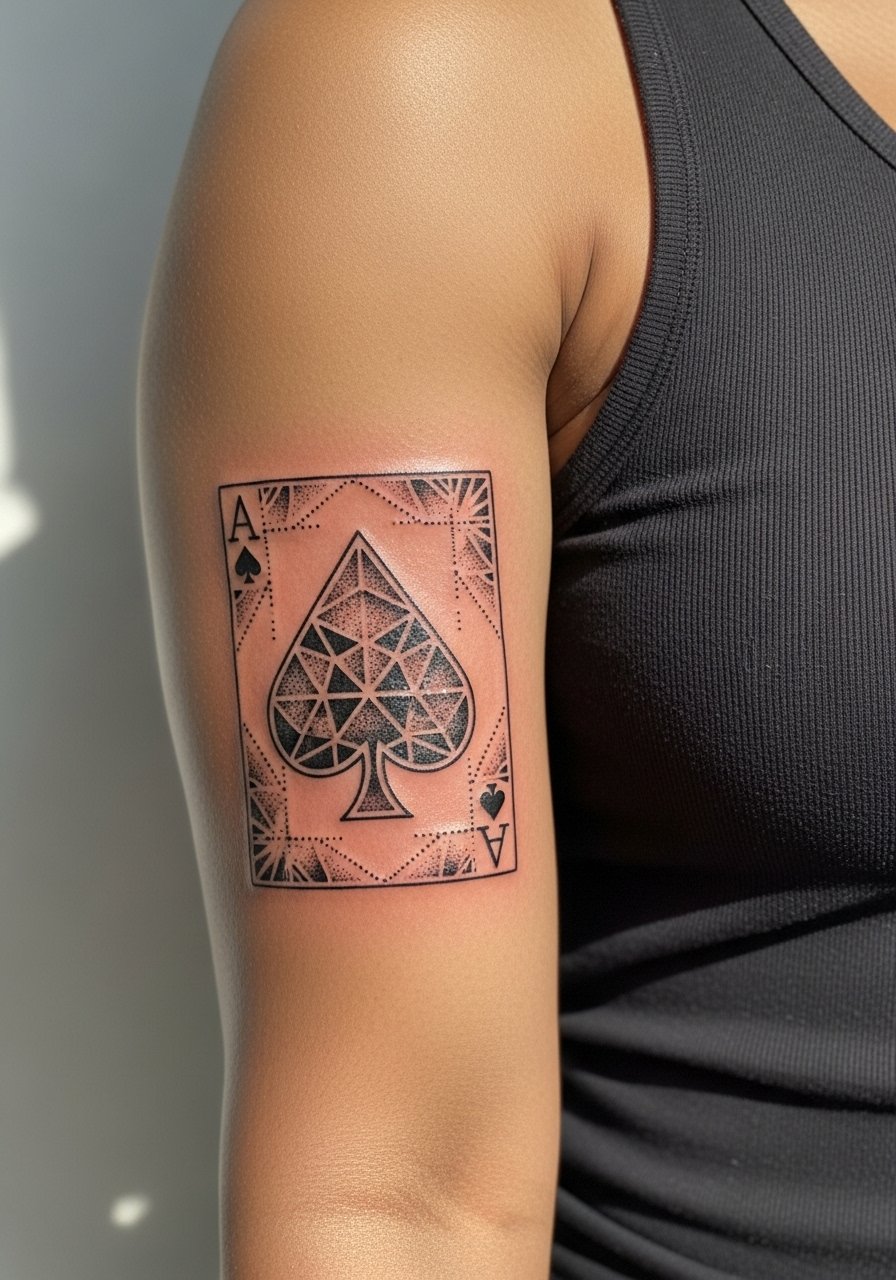
Pain warning lead: inner bicep can be sensitive and the skin is thinner, which affects line stability. Geometric work needs laser-straight spacing and slightly larger negative margins to avoid merging dots. Sessions usually include breaks for comfort and to prevent sweating which can affect ink settling. A mistake is asking for micro-rotational repeat patterns too tight for the body area. For session wear, a loose tank top that lets you lift the arm is best.
19. Ace With Rose and Watercolor Splash on Ankle
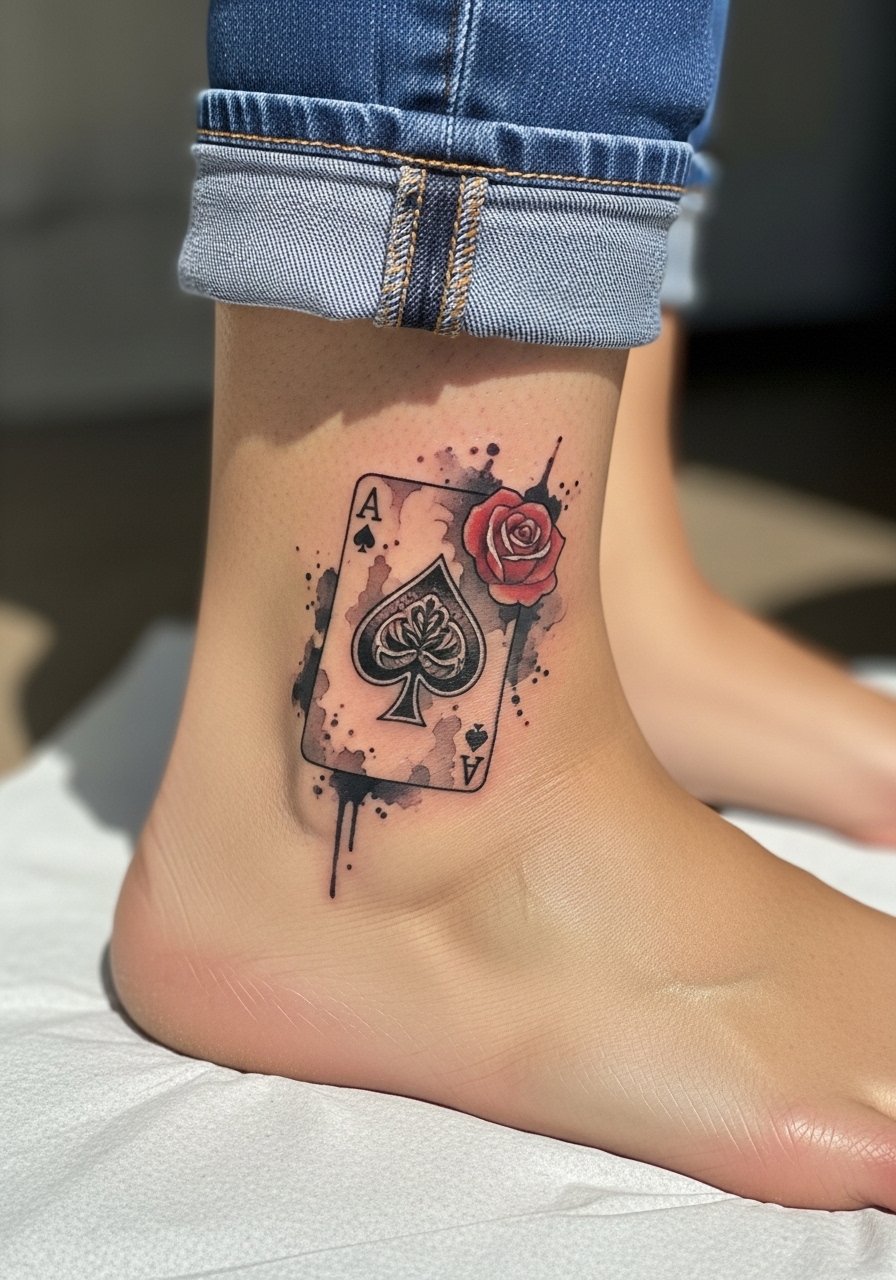
Visual impact lead: ankle tattoos face a lot of abrasion from socks and shoes, so watercolor needs anchoring lines. Ask for a thin inner outline inside the spade to stop pigment bleed along edges. Small ankle pieces usually finish in one session but expect earlier fading. Mistake is placing too much soft wash without an outline. For summer show-off, roll up slim pants or try ankle rolled pants.
20. Ace With Dagger and Banner on Hand Back
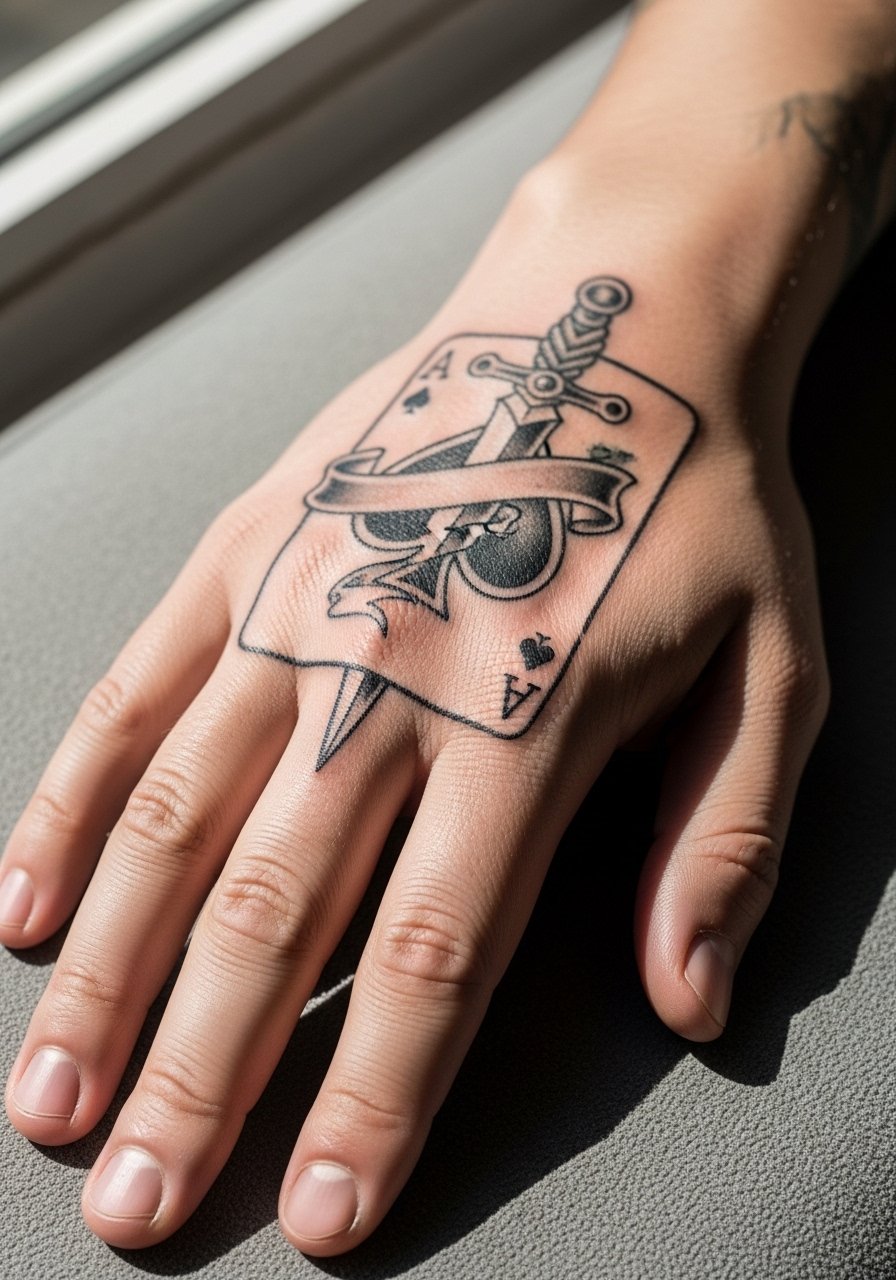
Mistake lead: hand tattoos fade quickly because of constant washing and sun exposure. Use simple bold outlines and accept regular touch-ups if you want longevity. The back of the hand is very visible so consider the career implications before committing. Sessions are short but healing demands caution. For visibility control, short-sleeve layers and neutral accessories help.
21. Ace Composed of Tiny Symbols on Sternum
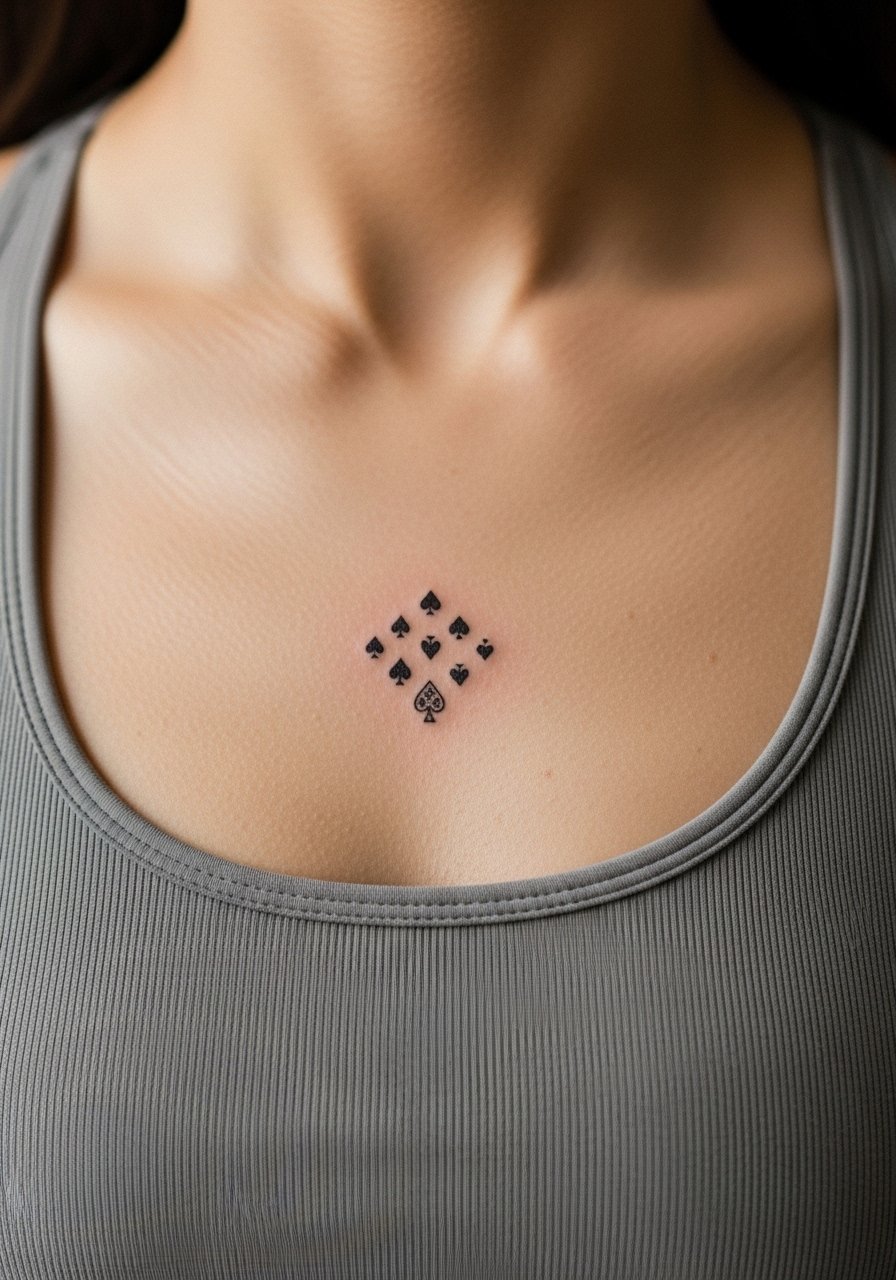
Pain warning lead: sternum work is sensitive and the skin sits above bone, which affects how lines settle. The design reads best when elements are slightly spaced so the negative zones remain clear after healing. Artists split opinions on numbing cream usage for sternum work, with one camp advocating for it for first-timers and another cautioning it can affect ink settling. Ask your artist where they stand. Expect breaks and plan for a calm recovery day.
22. Ace and Phoenix Hybrid on Back
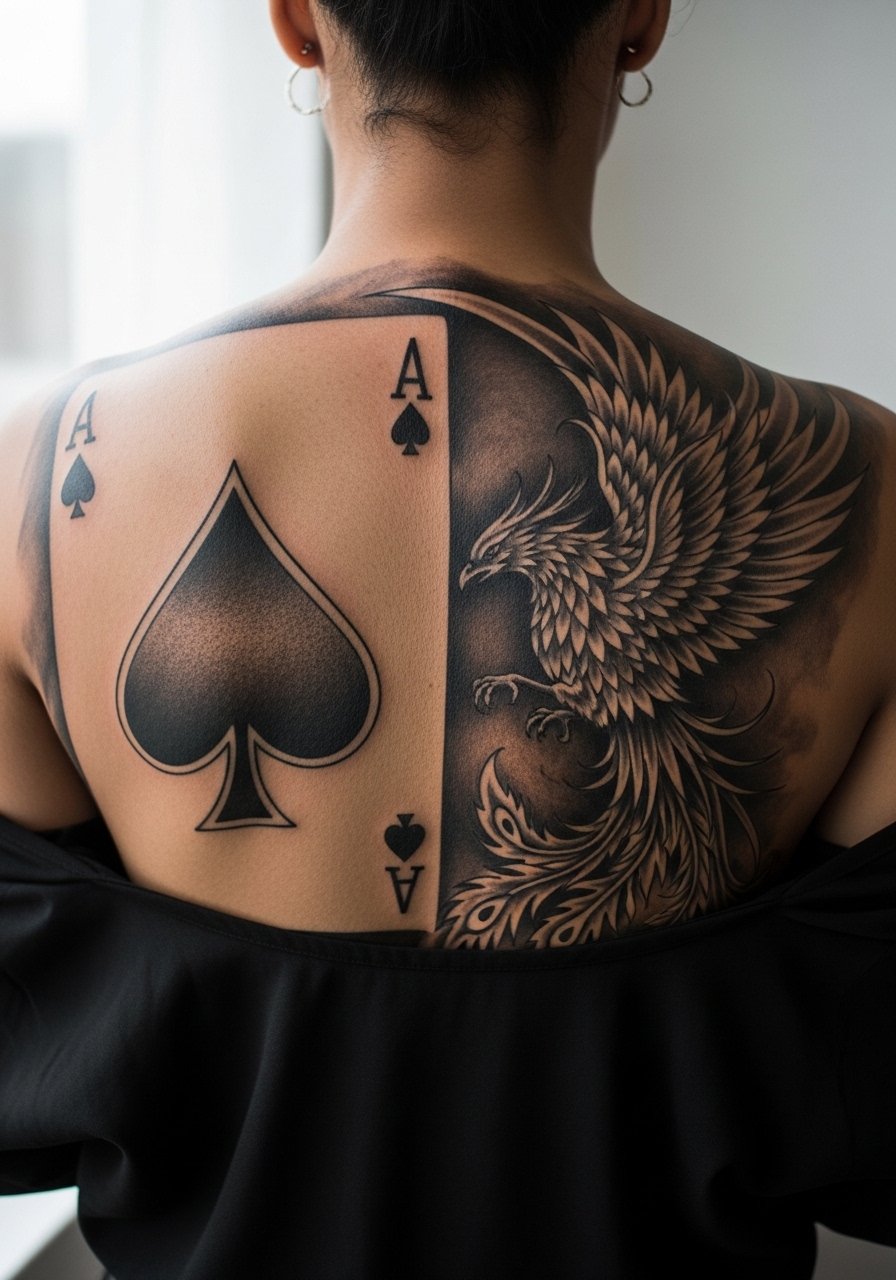
Visual impact lead: back work lets you push scale for mythic subjects. For a phoenix hybrid, keep large areas of solid black balanced with highlighted feathers to retain motion at distance. A mistake is over-detailing feathers near dense black fields which then flatten. This is multi-session territory with a planned touch-up at six months to one year.
23. Small Micro-Ace Behind the Ear
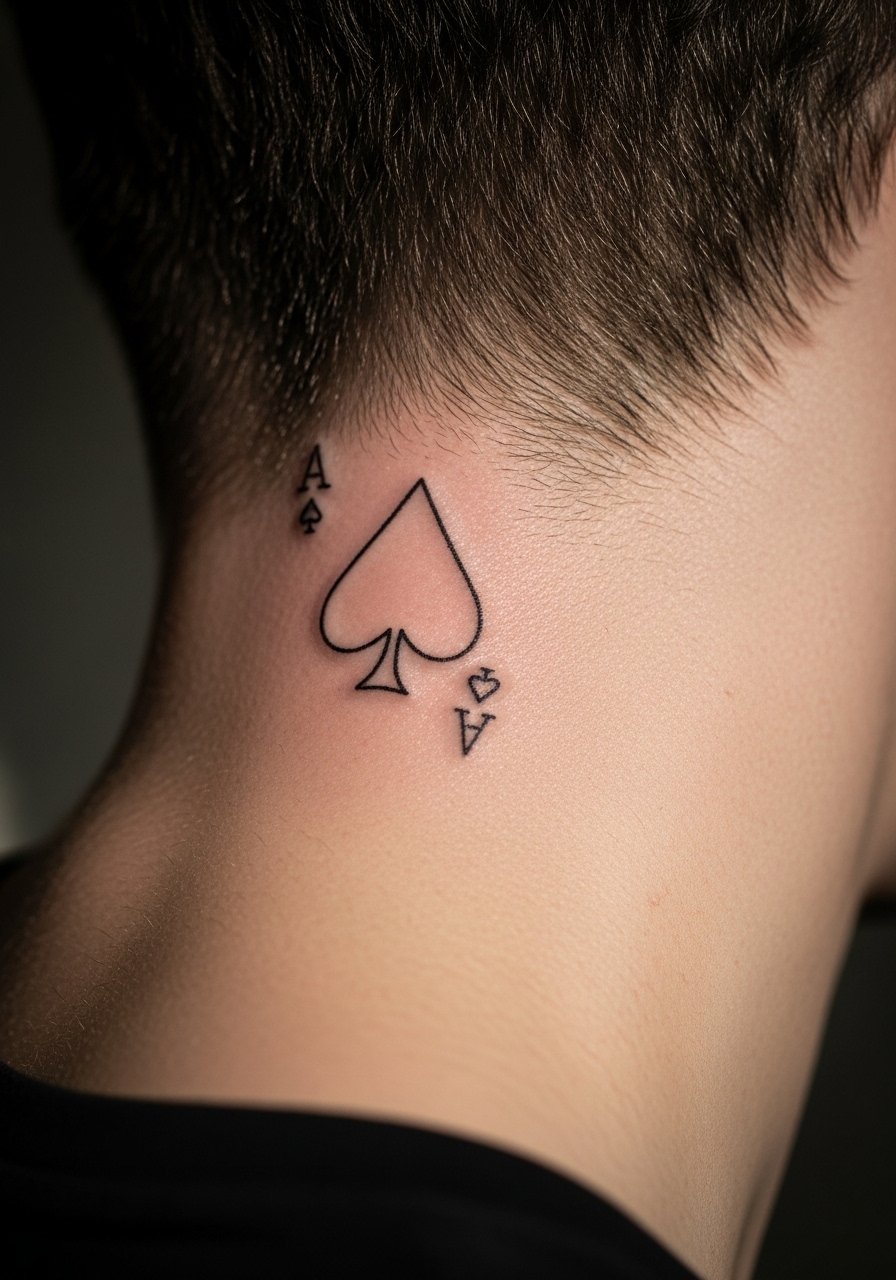
Consultation lead: behind-the-ear pieces should be exact on placement because hairlines hide them partially. Tell the artist you want a precise distance from the hairline so you can show or hide the piece easily. The skin is thin here so keep the scale very small and favor slightly bolder lines than you imagine. Session pain is low and healing is quick. This placement is subtle for people who want a hidden accent.
24. Ace Surrounded by Thorns on Upper Arm
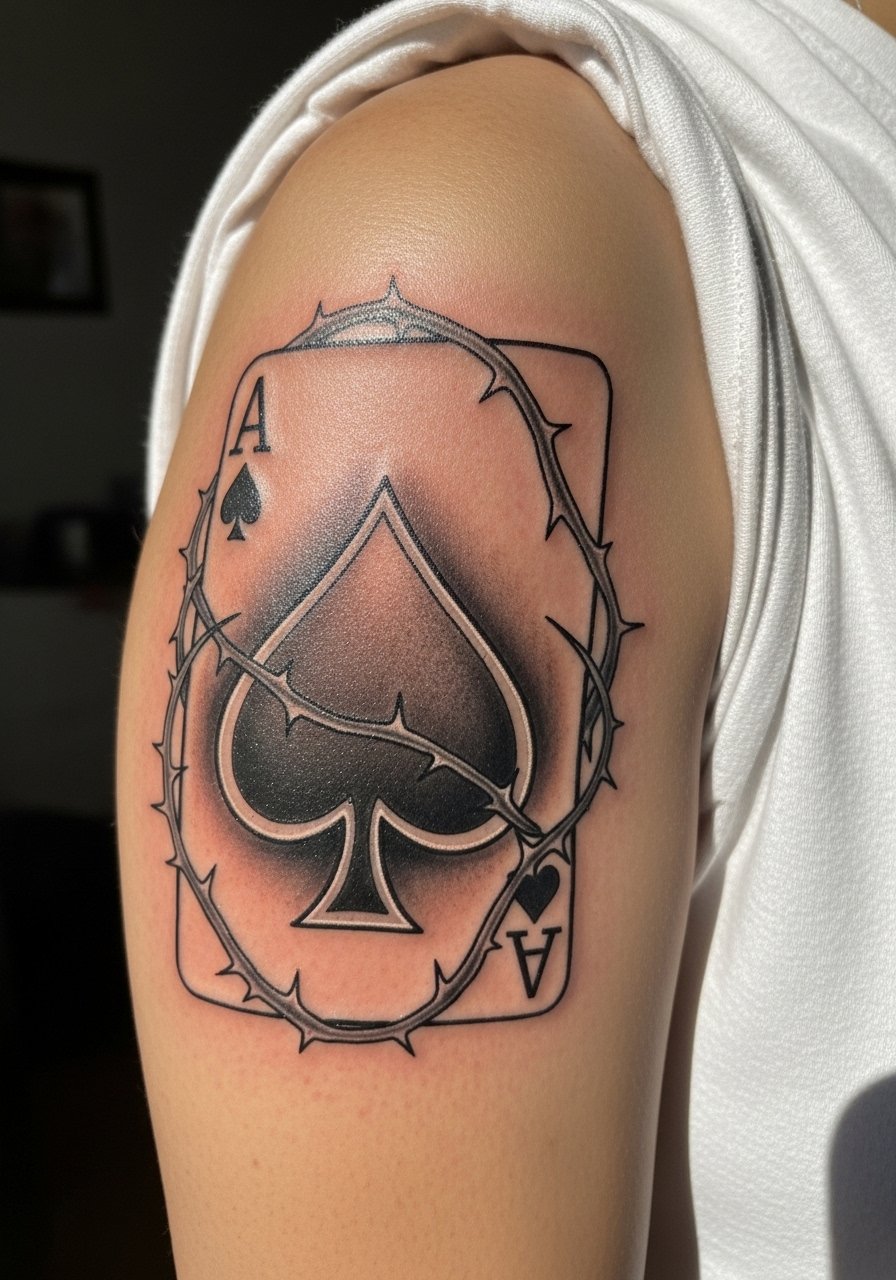
Personal observation lead: upper arm pieces age well because the skin is stable and the area gets moderate sun exposure. Thorn wraps look aggressive but can soften with negative space. During consult, emphasize shadow direction so the spade sits as the focal point. A common error is layering too many crossing vines which creates visual noise as the ink settles. One session usually handles medium-sized designs.
25. Ace With Phoenix Feather Tail on Thigh Side
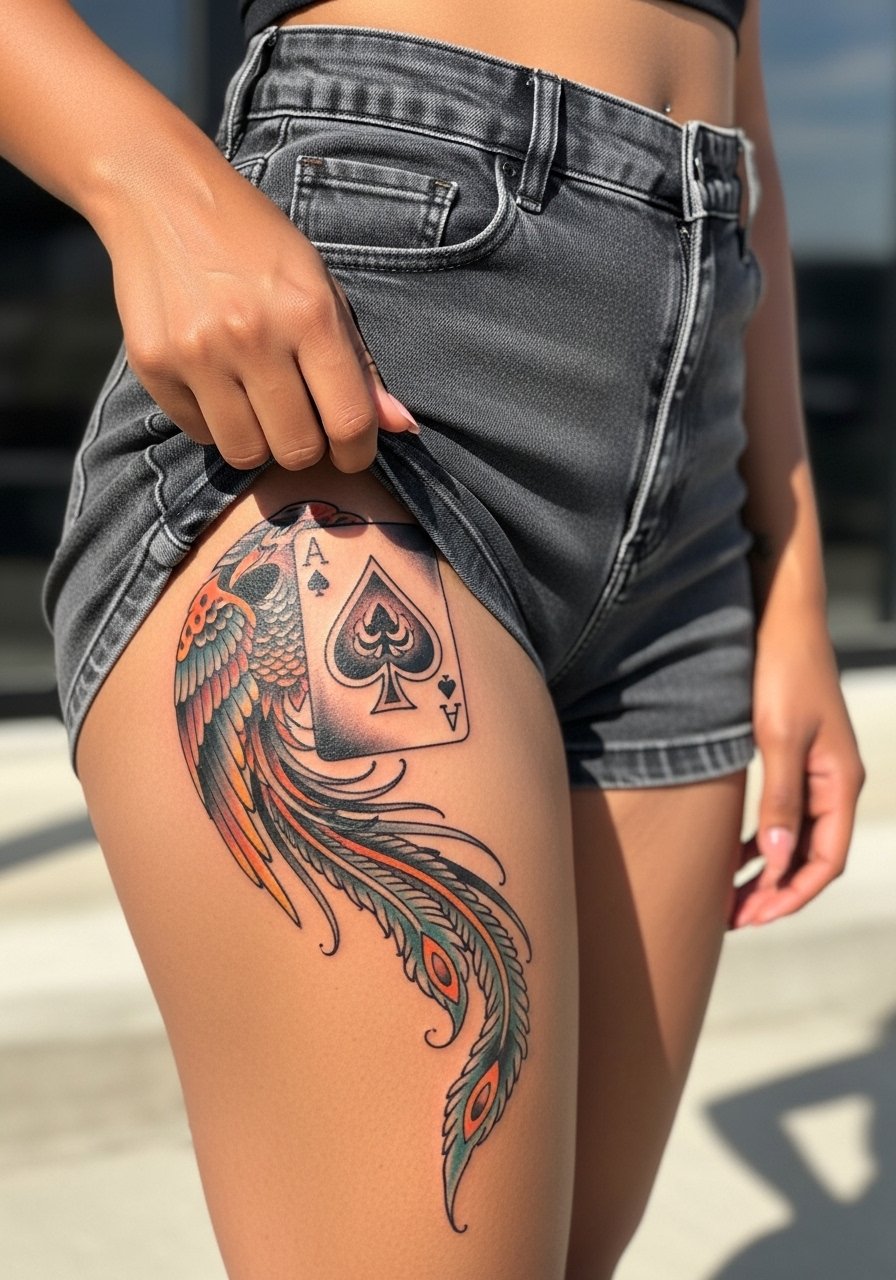
Aging lead: thigh placement keeps pigment deeper from sun exposure and friction, which helps color stay truer longer. For flowing feather tails ask the artist to map motion so the lines compliment the leg's natural curve. Expect multi-session work if the tail extends far down the thigh. Mistake to avoid is overly thin feather lines that don't read from a distance.
26. Ornamental Ace on Lower Back
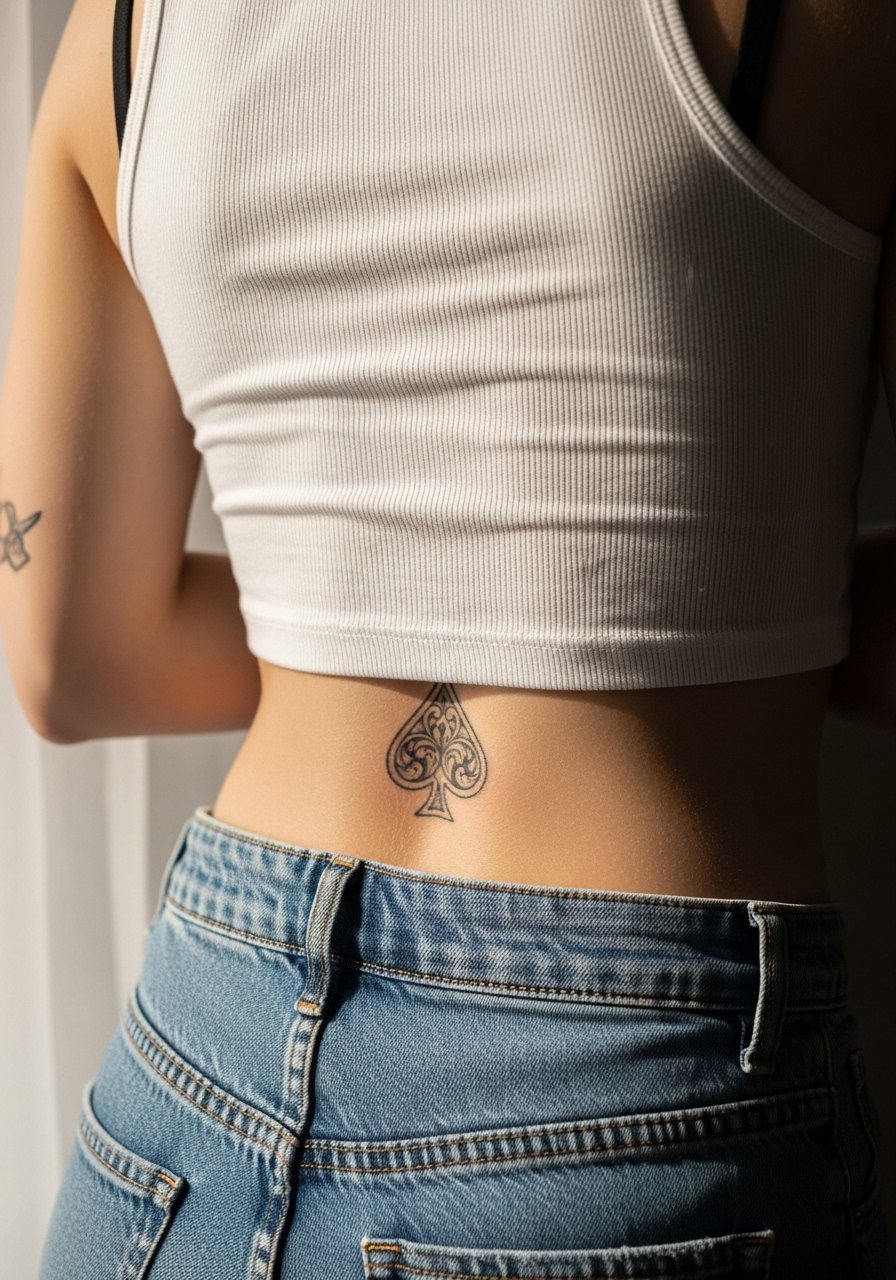
Consultation lead: lower back pieces let you use symmetrical ornamentation that reads under cropped tops. Ask for a balance of negative space and filigree so the design keeps shape as skin changes. A common mistake is packing too many tiny curls into the lower back where movement can soften them. Sessions are moderate and healing is straightforward with topical care.
27. Ace Mosaic Sleeve Accent
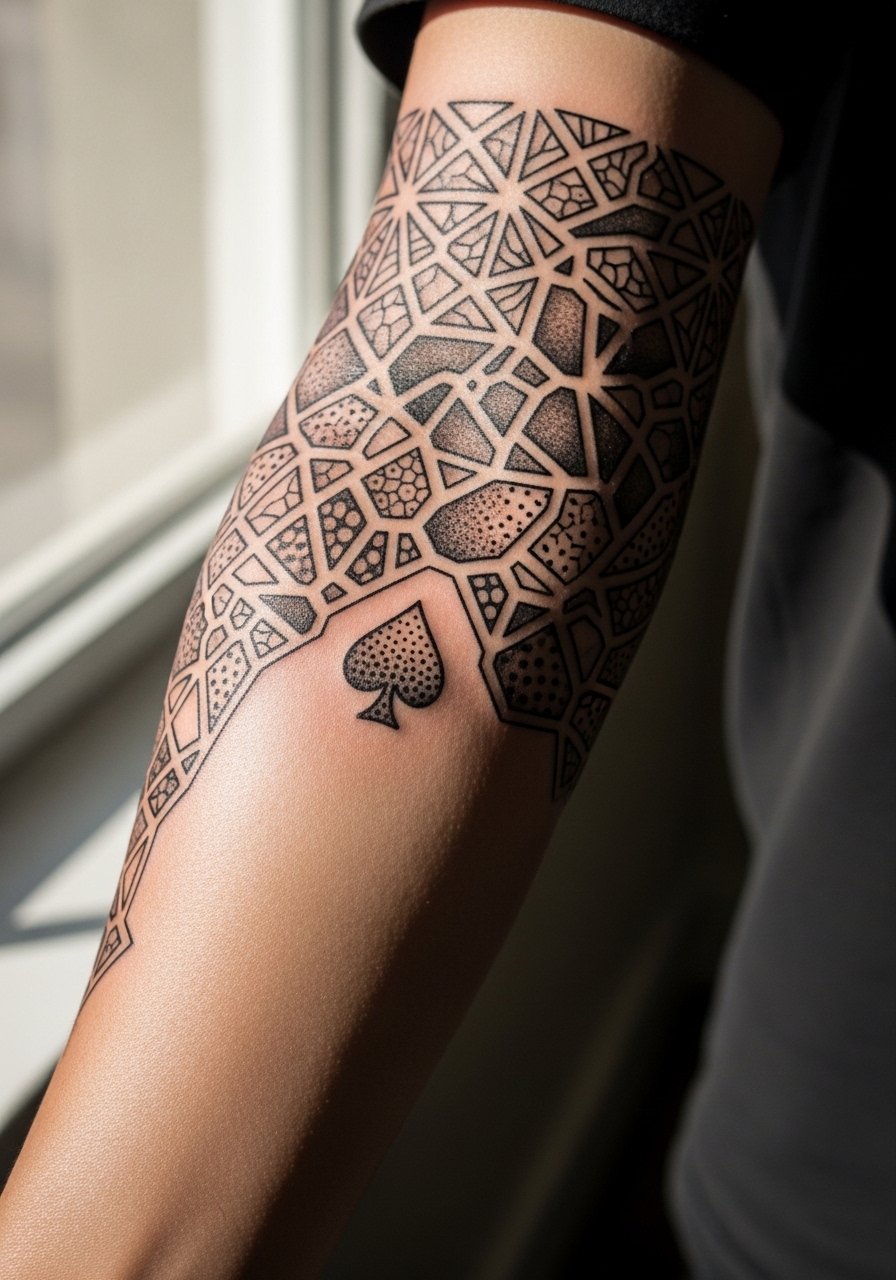
Visual impact lead: when adding a small ace into an existing sleeve, match the original saturation and lineweight so it merges naturally. Tell your artist which elements to echo from the sleeve so the ace does not look pasted on. The forearm integrates new fills well but watch for mismatched black density. Touch-up schedules vary by how old the existing work is and the contrast needed.
Frequently Asked Questions
Q: Will a fine line ace on my ribcage blur faster than one on my forearm?
A: It depends on your skin and the artist's technique. Ribs move with breathing and the skin can stretch, which increases the risk of lines merging. Some artists avoid ultra-fine line on ribs and recommend slightly thicker strokes and more spacing. Ask your artist how many years of healed rib photos they can show.
Q: Are watercolor accents a bad idea for a wrist ace if I have darker skin?
A: Watercolor can read beautifully on medium and dark skin if the artist places saturated anchor points and uses contrast to prevent washout. The key is structure, so ask for a subtle outline or darker touchpoints inside the spade. Expect touch-ups sooner than for blackwork.
Q: How much should I budget for touch-ups on a micro-realism ace placed on the thigh?
A: Budgeting is variable and depends on size and artist. Realistically, plan for a touch-up within the first year and then every few years for micro-detail pieces. A candid booking conversation that includes a touch-up window will give you a clearer estimate.
Q: Should I use numbing cream for a wrist or sternum ace session?
A: Artists are split. One camp recommends numbing cream for first-timers to manage the initial pain. The other warns that topical anesthetics can slightly affect ink settle. If you consider numbing, tell your artist in advance and follow their prep instructions.
Q: Where can I find local artists who specialize in blackwork ace designs?
A: Search local filters on platforms like Tattoodo, check hashtags such as #aceofspades or #blackworktattoo, and read recent shop reviews on Booksy. These discovery paths help you see healed photos and find artists who post consistent portfolios.
