
Fine line sleeves are trending online, and they photograph beautifully for a week. The reality is those same thin lines need spacing, proper depth, and the right placement to still read crisp at year three. If you want a sleeve that looks considered both fresh and healed, pick styles and placements that factor aging into the stencil, then bring clear reference photos to your consultation.
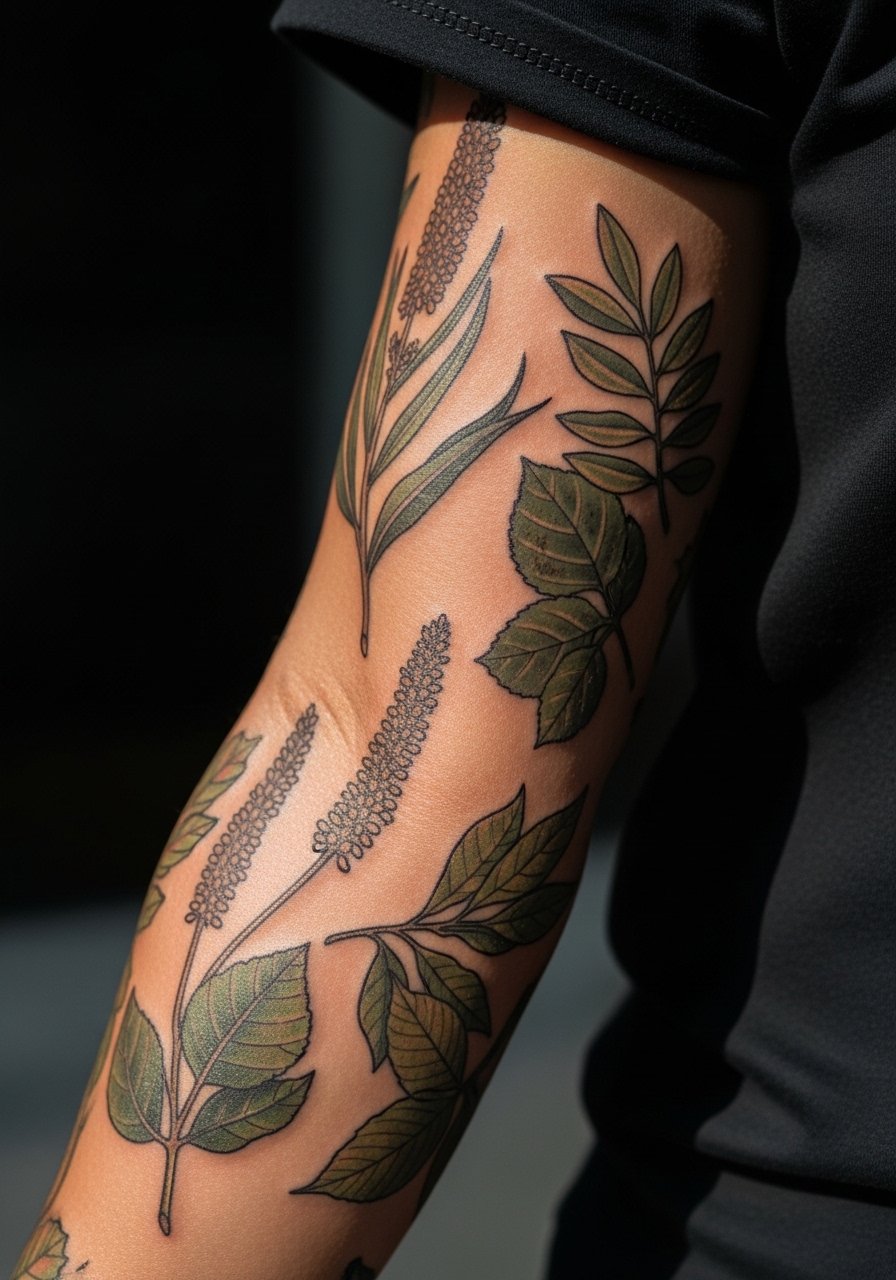
1. Fine Line Botanical on Inner Forearm
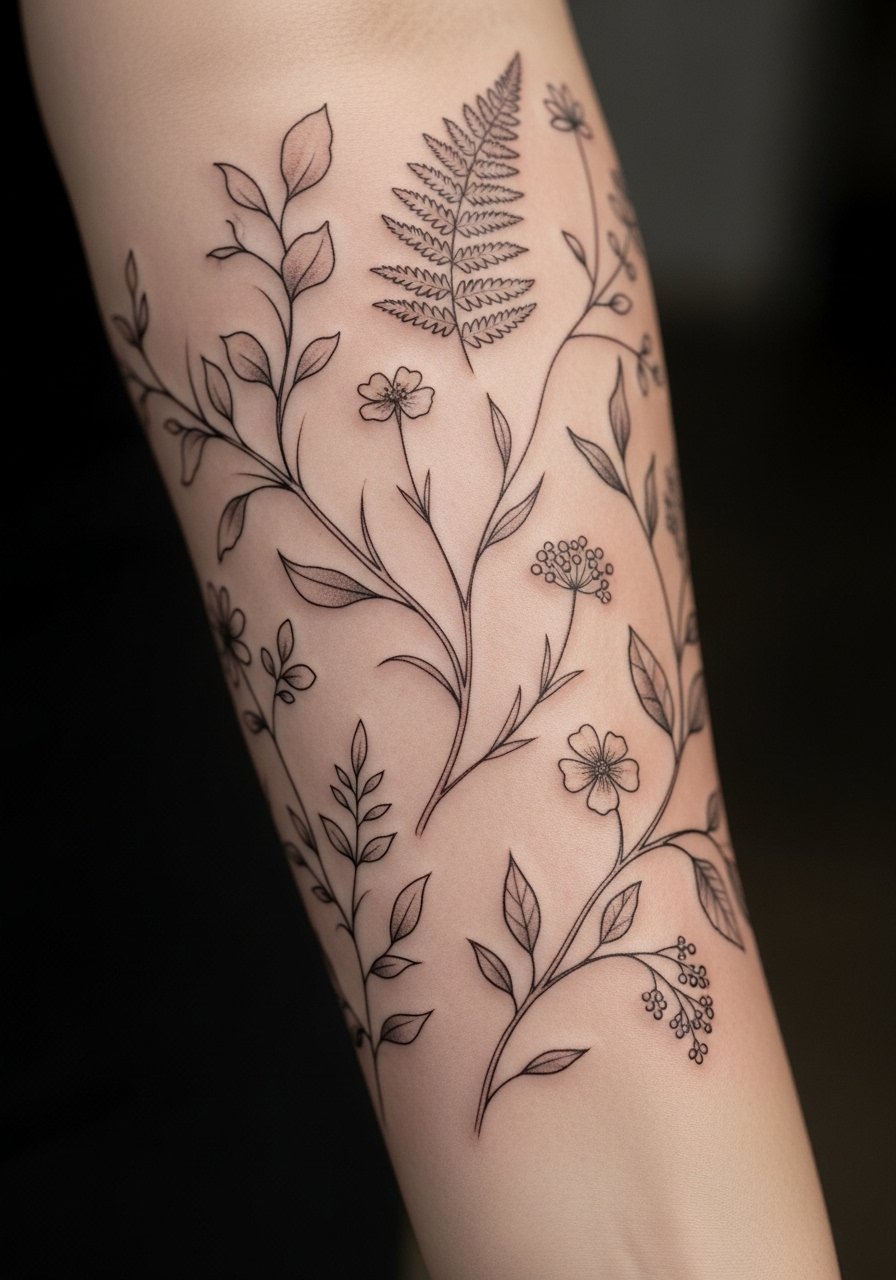
I've seen thin botanical sleeves hold well when artists give each stem room to breathe rather than packing tiny leaves into a tight column. For this placement expect a 3 out of 10 on most pain scales and sessions of one to two hours for each block of work. Tell your artist you want single-needle lineweight with slightly increased spacing between clusters so the detail does not merge over time. The common mistake is asking for ultra-fine detail across the whole arm. For showing it off, roll up a linen button-down shirt and wear minimal bracelets so the linework stays the focus.
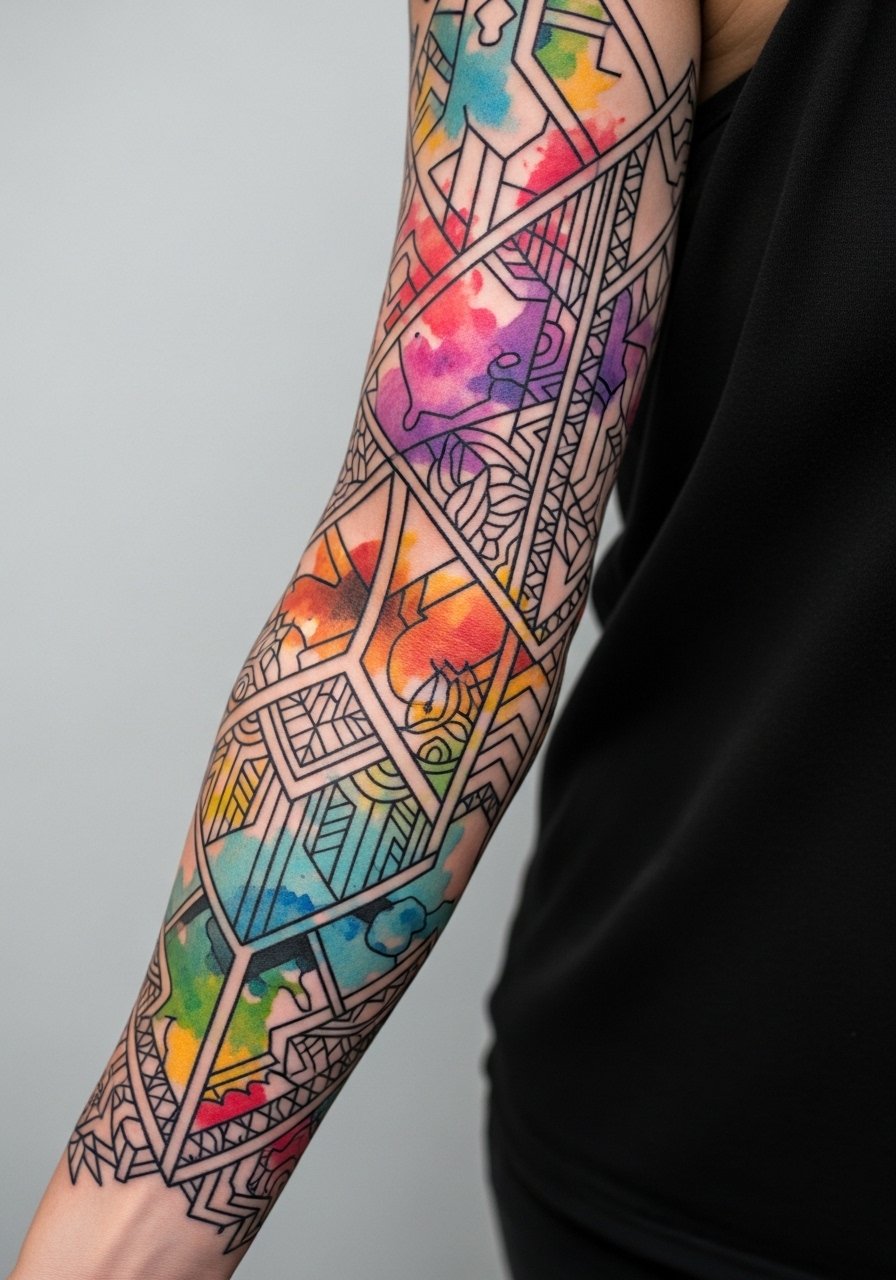
2. Watercolor Floral Cascade on Outer Forearm
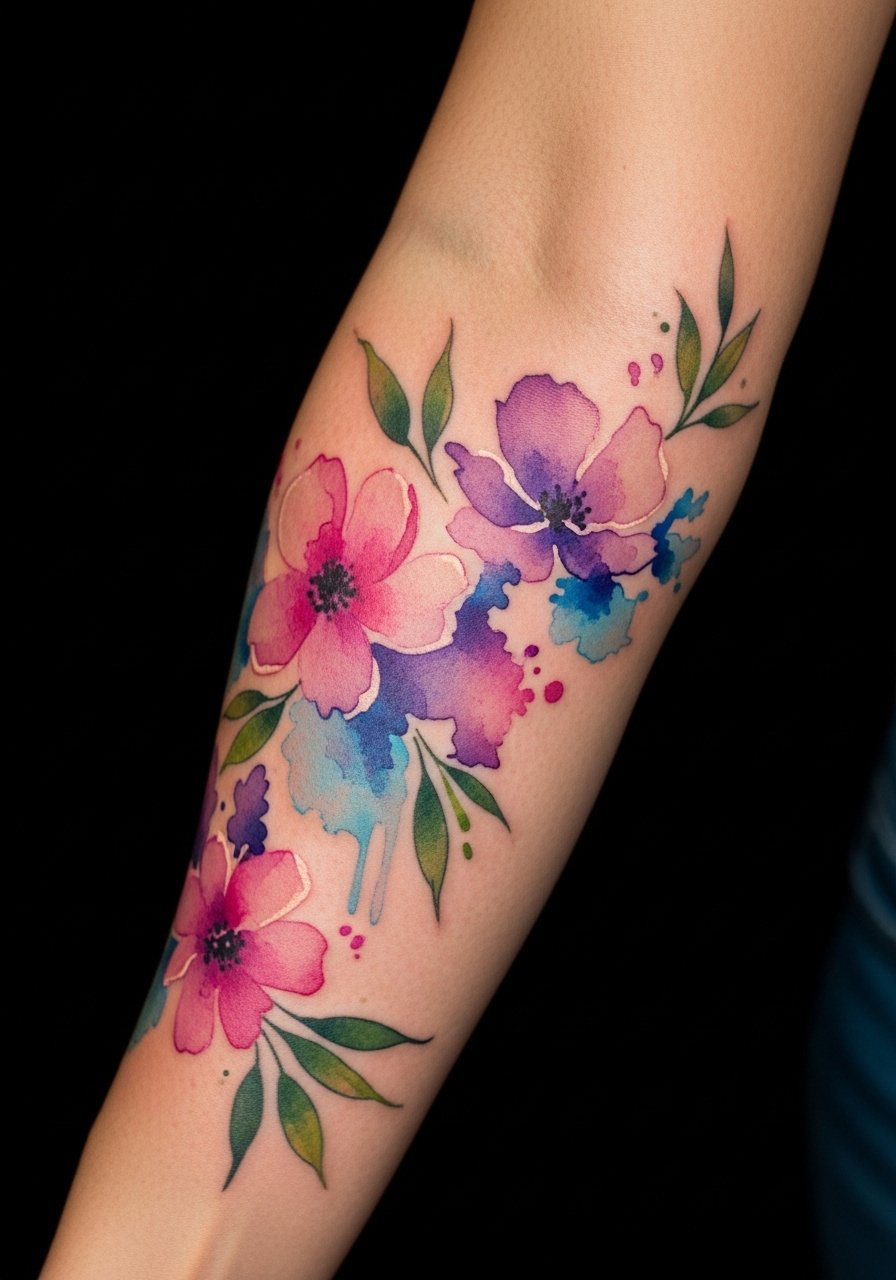
Most watercolor-style sleeves need more saturation near the focal motifs so the washes hold after a year. Start sessions with the main blooms and add color washes around them in later appointments. A common aging issue is letting washes sit too faint initially, which leads to ghosted color by year two. During the consultation ask for pigment saturation in center motifs and softer washes as filler. For session wear, a loose short-sleeve shirt keeps the area accessible and clean. Pair evenings out with a simple thin chain bracelet on the opposite wrist so the watercolor reads without competing jewelry.
3. Neo-Traditional Blossoms with Bold Outlines
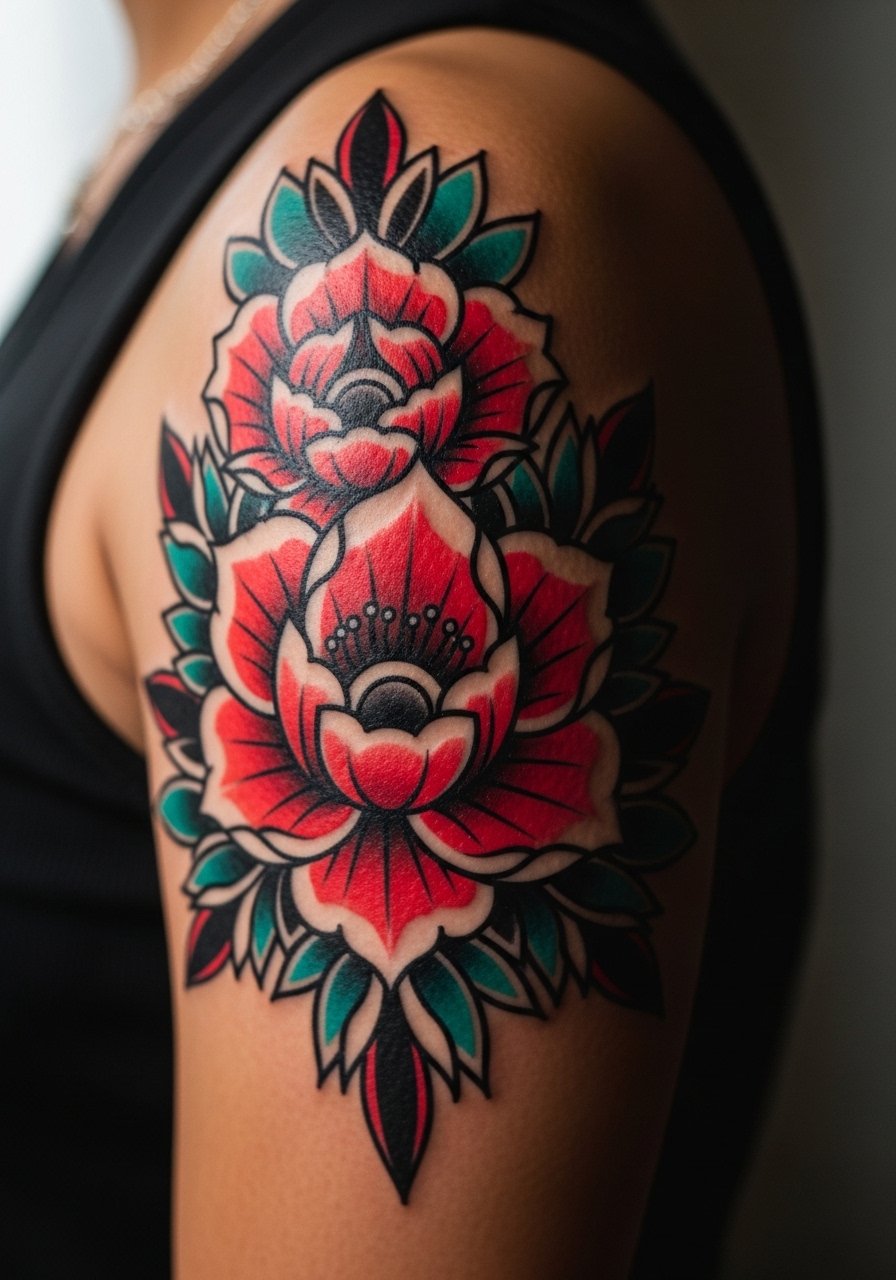
Bold neo-traditional saturation ages differently from fine line work, it tends to hold color and silhouette longer. If you want longevity, pick larger petals and stronger outlines around small details. During consult mention you prefer deep saturation in core motifs and softer blends in backgrounds. A mistake collectors make is asking for tiny neo-trad details that get lost as pigment spreads. For show-off styling, a sleeveless tank top in a solid neutral keeps the sleeve readable from a distance.
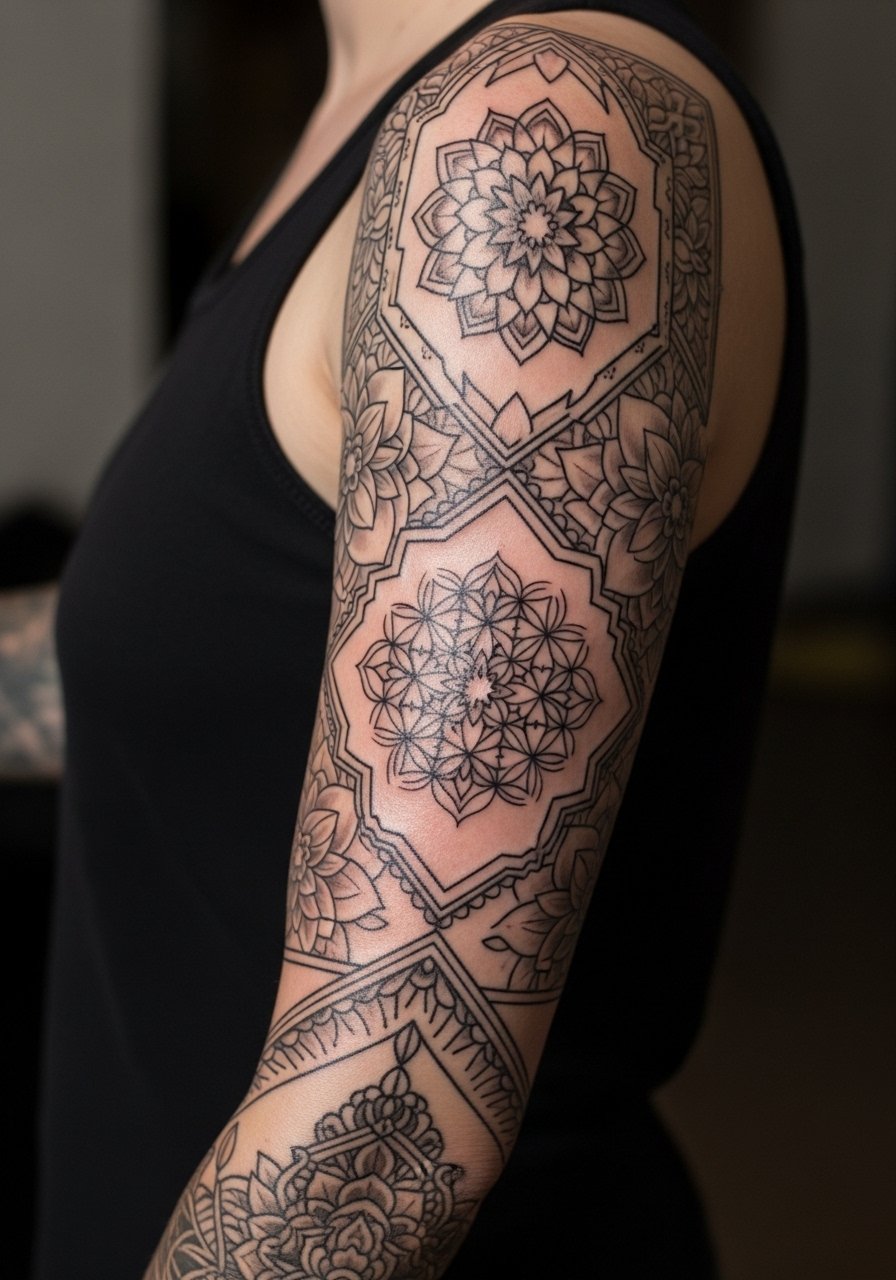
4. Geometric Mandala Wrapping the Upper Arm
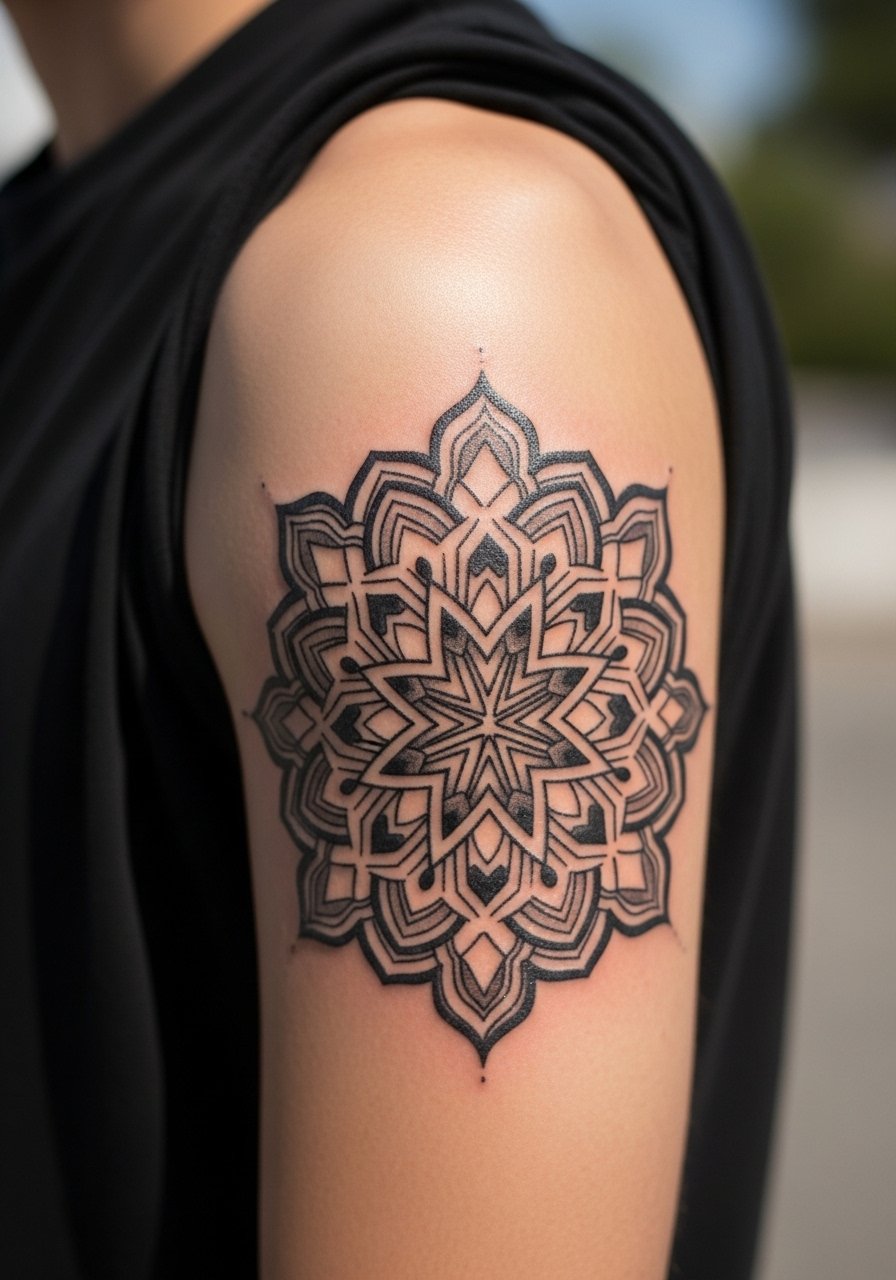
The trick with dense mandala work is scale. Small mandalas on the upper arm often lose crispness, so scale shapes slightly larger and allow negative space between rings. Tell your artist to test spacing on a stencil area to see how the symmetry reads on your curvature. The session feels like focused linework, expect repeated short passes and a steady hand from the artist. Avoid the common request for ultra-fine concentric rings that the skin will blur into one mass. For wardrobe, a loose button-down shirt you can pull aside makes the appointment easier and keeps sleeves visible afterward.
5. Celestial Constellation Sleeve Across Wrist to Forearm
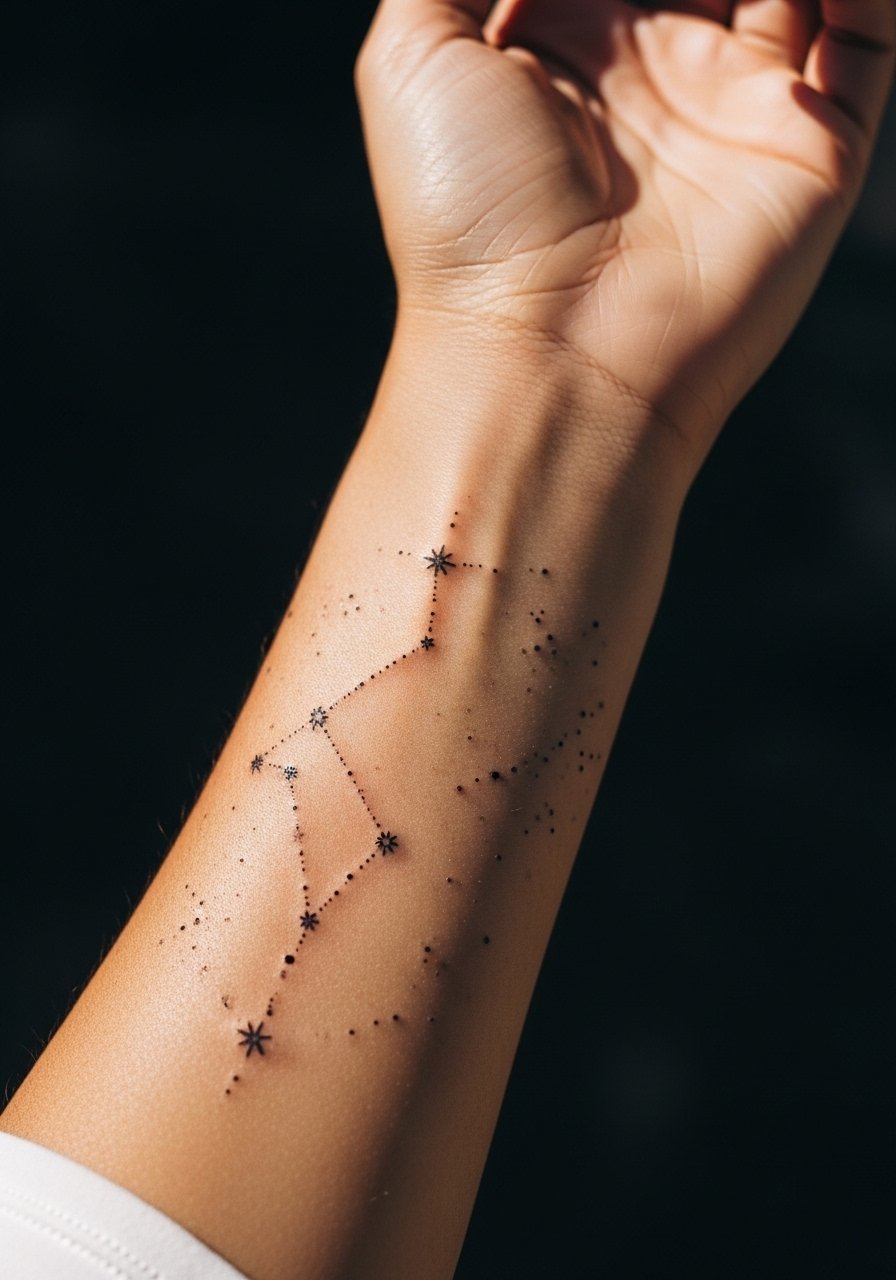
Fine dot work and tiny stars look charming but they rely on spacing and contrast. Ask your artist to slightly thicken anchor points like major stars so the pattern stays readable as dots soften. A common mistake is packing constellations too close to the wrist joint where constant motion accelerates fading. Expect short sessions focused on precise dot placement and light shading. For showing this off pair the tattoo with a minimalist watch on the opposite wrist and remove any bracelets during the session.
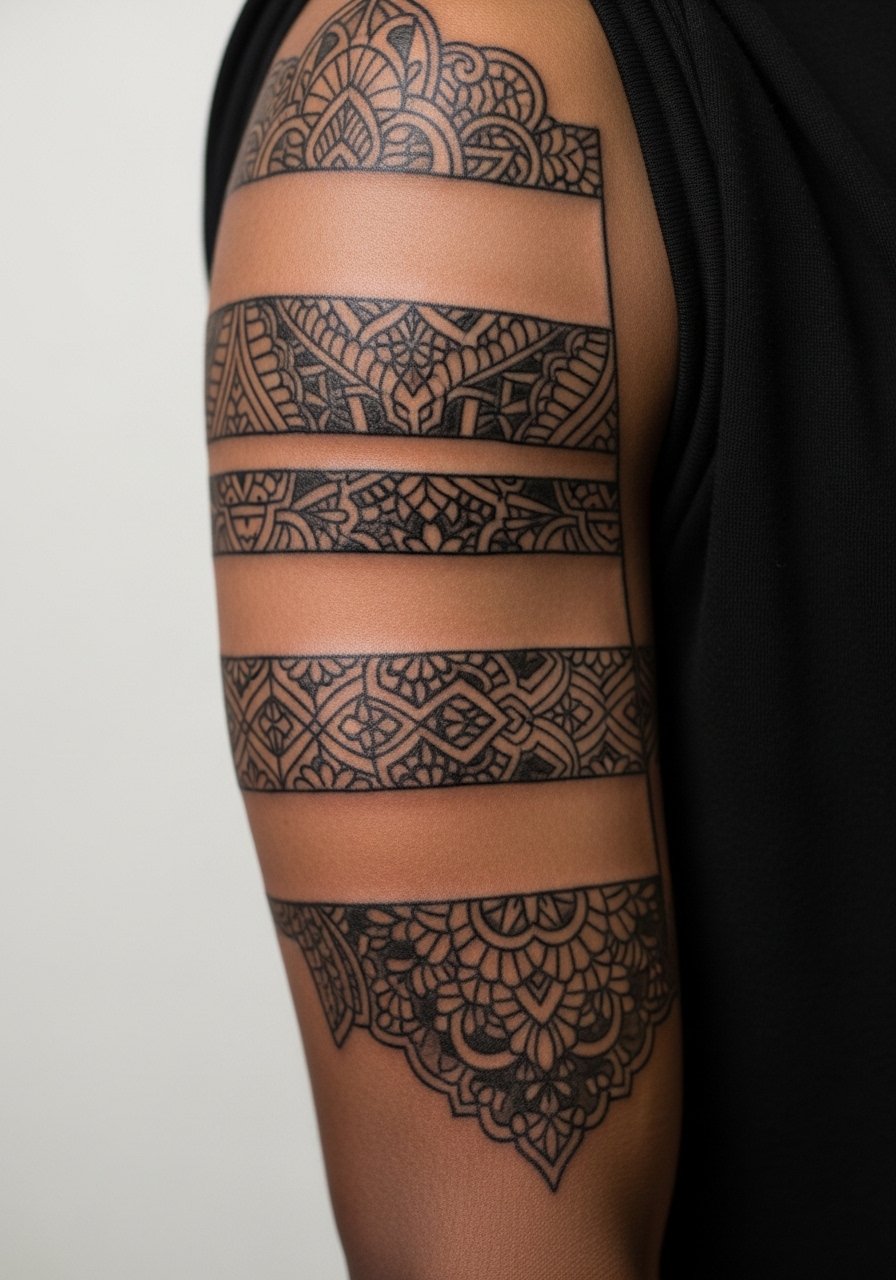
6. Lace and Ornamental Sleeve for a Delicate Cover
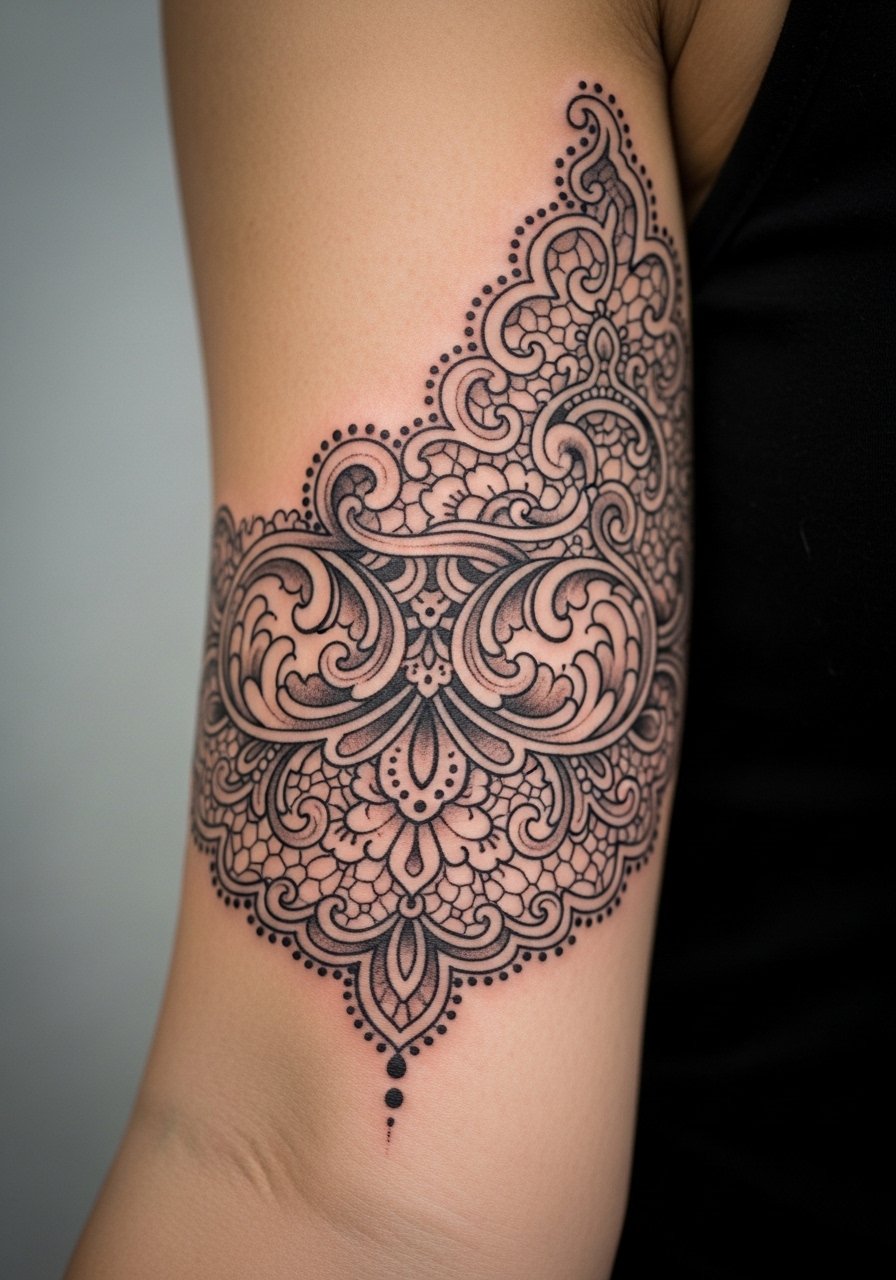
Lace sleeves can read both soft and bold depending on lineweight choices. Ask for slightly thicker anchor lines and single-needle filigree within larger shapes to prevent the pattern from filling in. The armband and cuff areas need more negative space so the lace breathes as you move. The main regret is requesting filigree that is uniformly thin across a full sleeve, which tends to muddle. When you want to highlight the lace, rolled-up sleeves or a dainty stacked bracelet work well because they frame rather than cover.
Studio Day Picks
The wrist-to-forearm and upper arm pieces above can all benefit from practical prep and a few small aftercare items to smooth the first week.
-
Stencil transfer paper kit. Lets you preview how repeated motifs sit on curved areas like the forearm and wrist before the needle touches skin.
-
Topical numbing cream. Applied as directed before sessions can ease sensitivity for wrist and inner forearm work without changing the tattooed lines.
-
Thin protective film roll. Helpful for small sleeve sections that rub against clothing during the first few days.
-
Fragrance-free gentle body wash. Cleans healing areas without stripping pigment from fine line or watercolor fills.
-
Aquaphor healing ointment. A thin layer in the immediate days after in-studio care can protect delicate linework while skin closes.
7. Blackwork Floral Full Sleeve
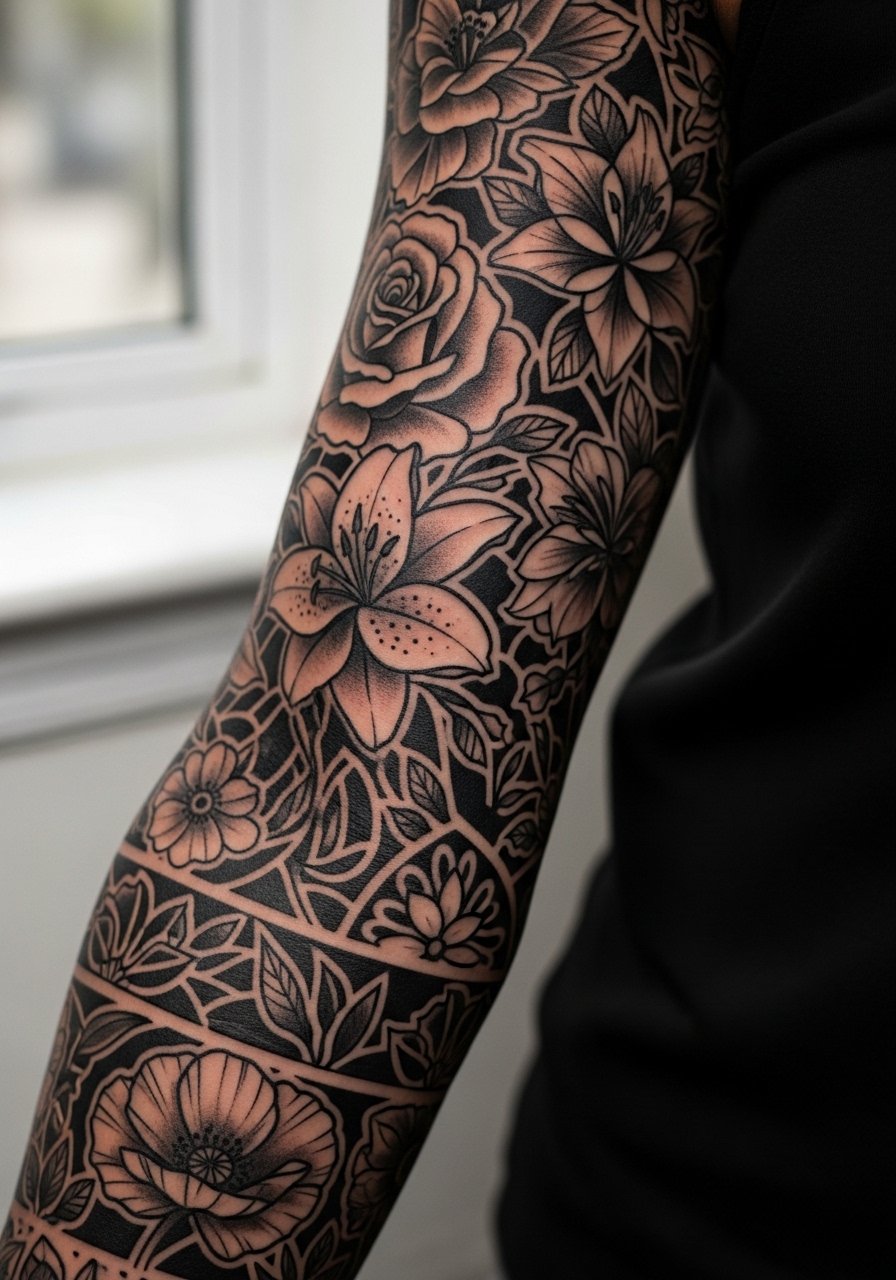
Blackwork ages into strong silhouettes so it is forgiving if you want a dramatic sleeve that keeps form over years. Tell your artist you want heavy saturation and clear negative-space channels within flowers so shapes remain distinct as skin changes. A common error is requesting tiny crosshatch filler in blackwork, which blurs faster than open black fields. Sessions are often longer and feel more intense than fine line because saturation requires multiple passes. For showing off, a short-sleeve tee in solid color keeps the silhouette readable and bold.
8. Patchwork Sleeve Built Over Years

Patchwork sleeves are a practical way to build a sleeve over time and with different artists, but they work best with a planning stitch. Start with a unifying motif like thin black borders or shared negative-space bands so later pieces link visually. During consultation bring the older pieces and ask how to bridge gaps with background elements. People often regret not planning transitions, which leaves visible seams between styles. For session-day comfort wear a loose button-down shirt you can pull aside and a lightweight scarf for warmth afterward.
9. Animal Portrait Sleeve in Micro-Realism
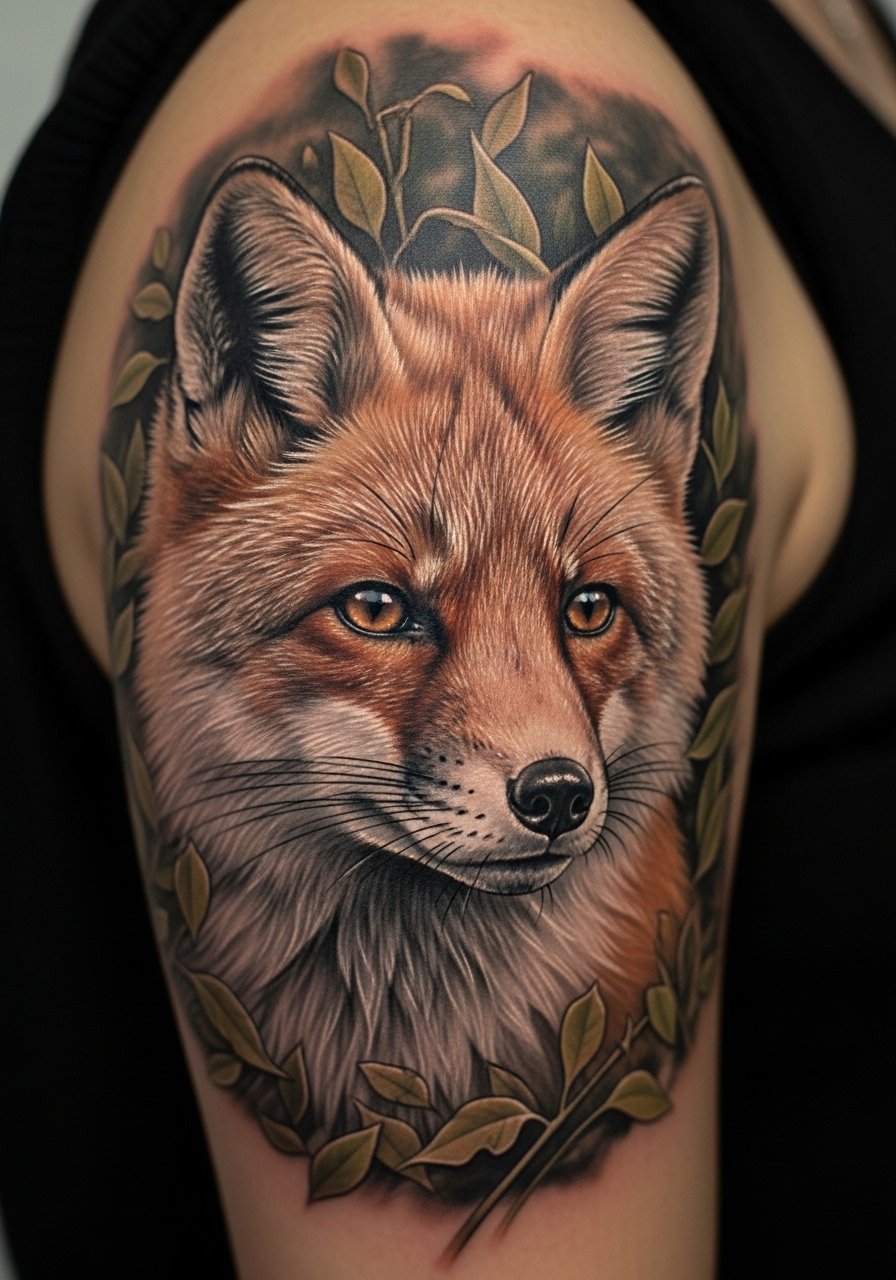
Portrait-style sleeves need careful reference work and realistic shading to hold over time. Tell your artist you want the portrait elements done as focal panels with softer transitions into botanical fillers so the face keeps contrast. The common mistake is stretching a small portrait across too much curvature which distorts the subject. Expect longer sessions and a steady, shading-focused hand from the artist. For wearing after sessions, a sleeveless tank top keeps the area unobstructed and comfortable.
10. Mythical Creatures and Narrative Scenes
Narrative sleeves that include creatures and landscapes need composition planning so the eye reads from shoulder to wrist. Ask your artist to sketch a rough flowline before inking so important motifs sit on flatter planes of the arm. A common ageing issue is cramming too many tiny elements into a scene which creates visual noise later. Sessions alternate between outline and progressive shading which can feel like a long nap broken into focused bursts. When showing the piece off, pair it with a statement earring if the work reaches the shoulder so the visual weight balances.
11. Script and Calendar Sleeve with Personal Dates
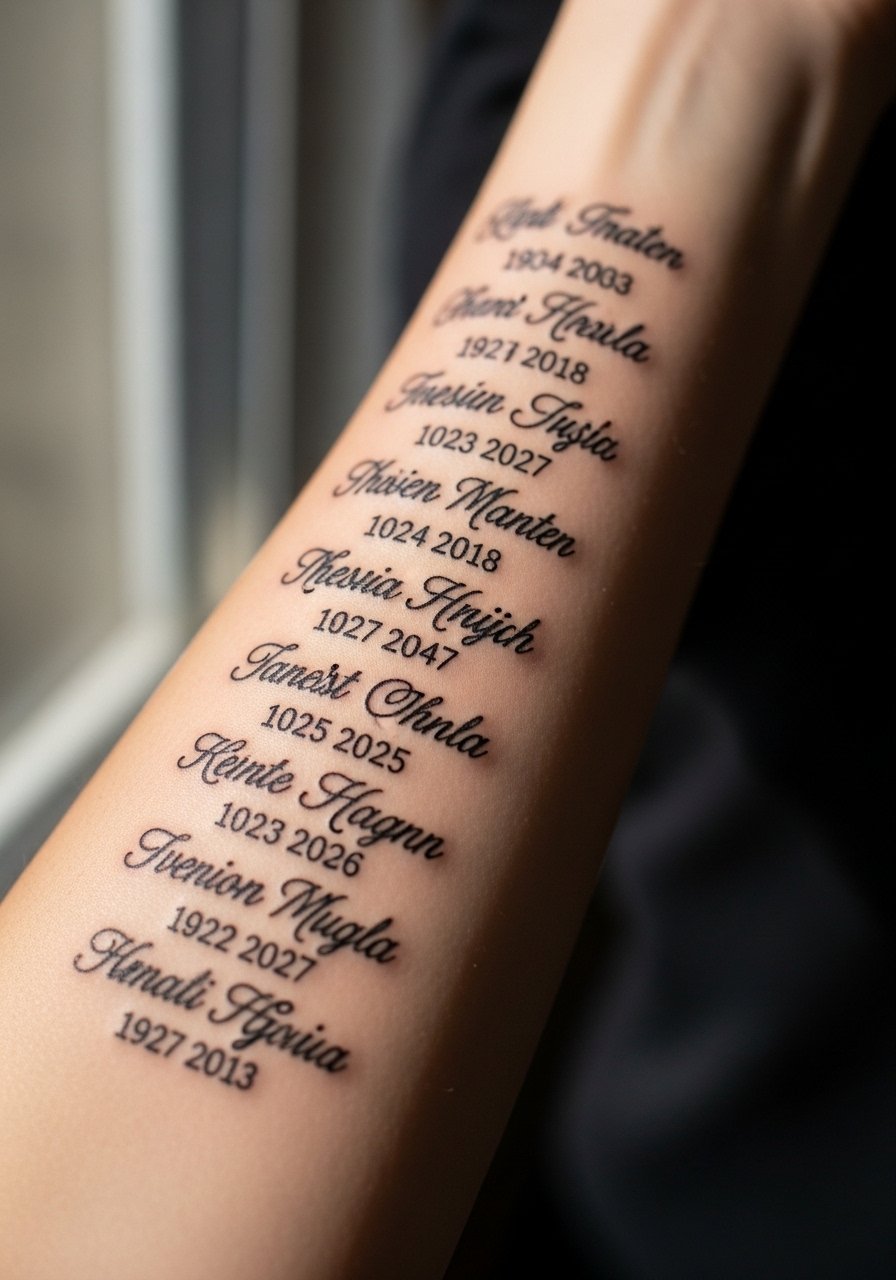
Text-based sleeves require precise spacing and font choice because letters expand slightly as they heal. Bring exact text and preferred fonts in the consultation and ask the artist to test the size on your skin. The worst mistake is replicating tiny typefaces used in print which look illegible as fine line ages. Expect short, meticulous sessions for each line of script. For everyday styling, a thin chain pendant necklace sits above wrist script without competing for attention.
12. Oceanic Sleeve with Waves and Sea Creatures
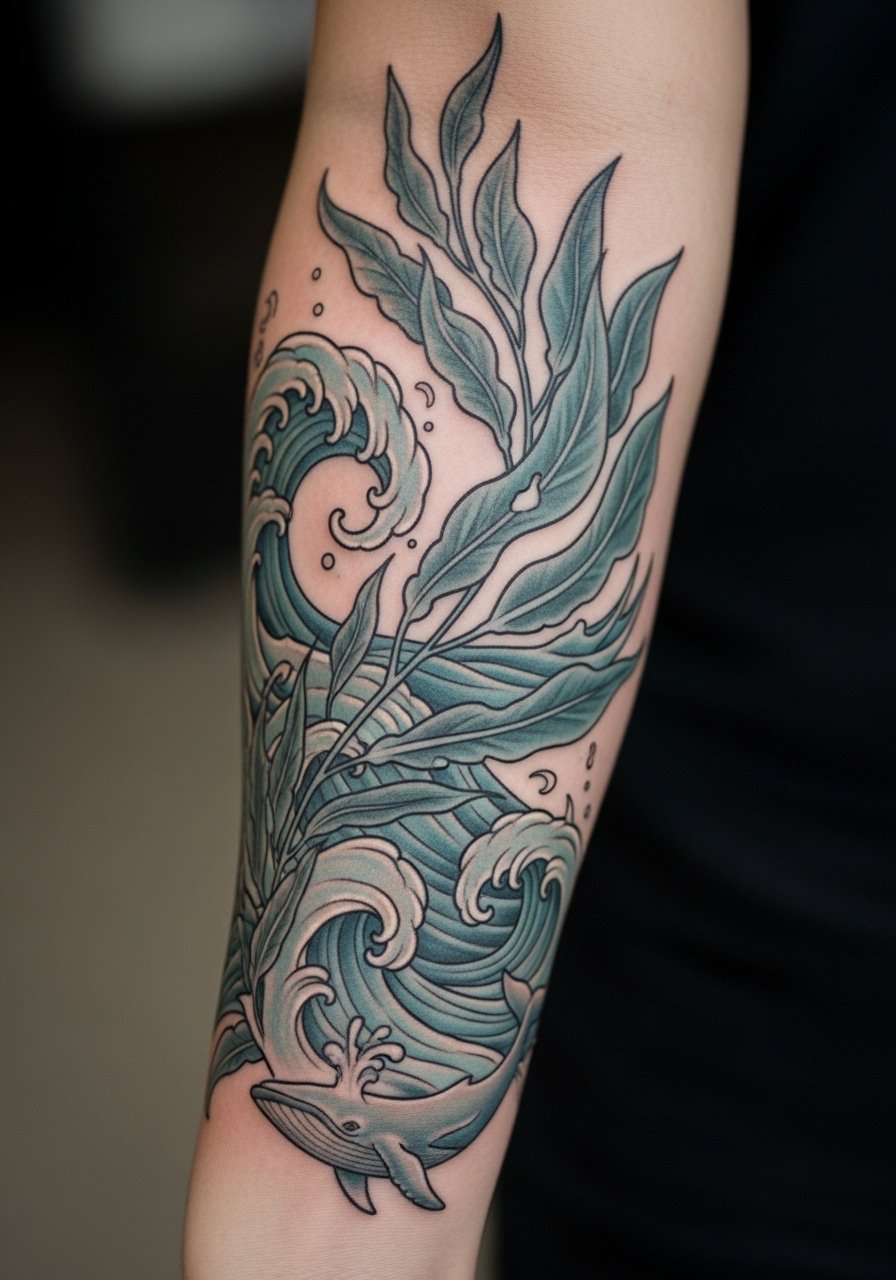
Ocean sleeves give you a natural flow that follows the arm's movement, which helps with longevity. Ask your artist to use layered shading and stronger outlines on major sea creatures while keeping background washes softer. A common mistake is overusing small blue washes that fade into indistinct patches. Session feeling varies from light shading to deeper color packing for darker forms. For show-off looks pair the sleeve with rolled-up sleeves or a racerback tank top so the lower-arm motifs remain visible.
13. Geometric Sleeve with Negative Space
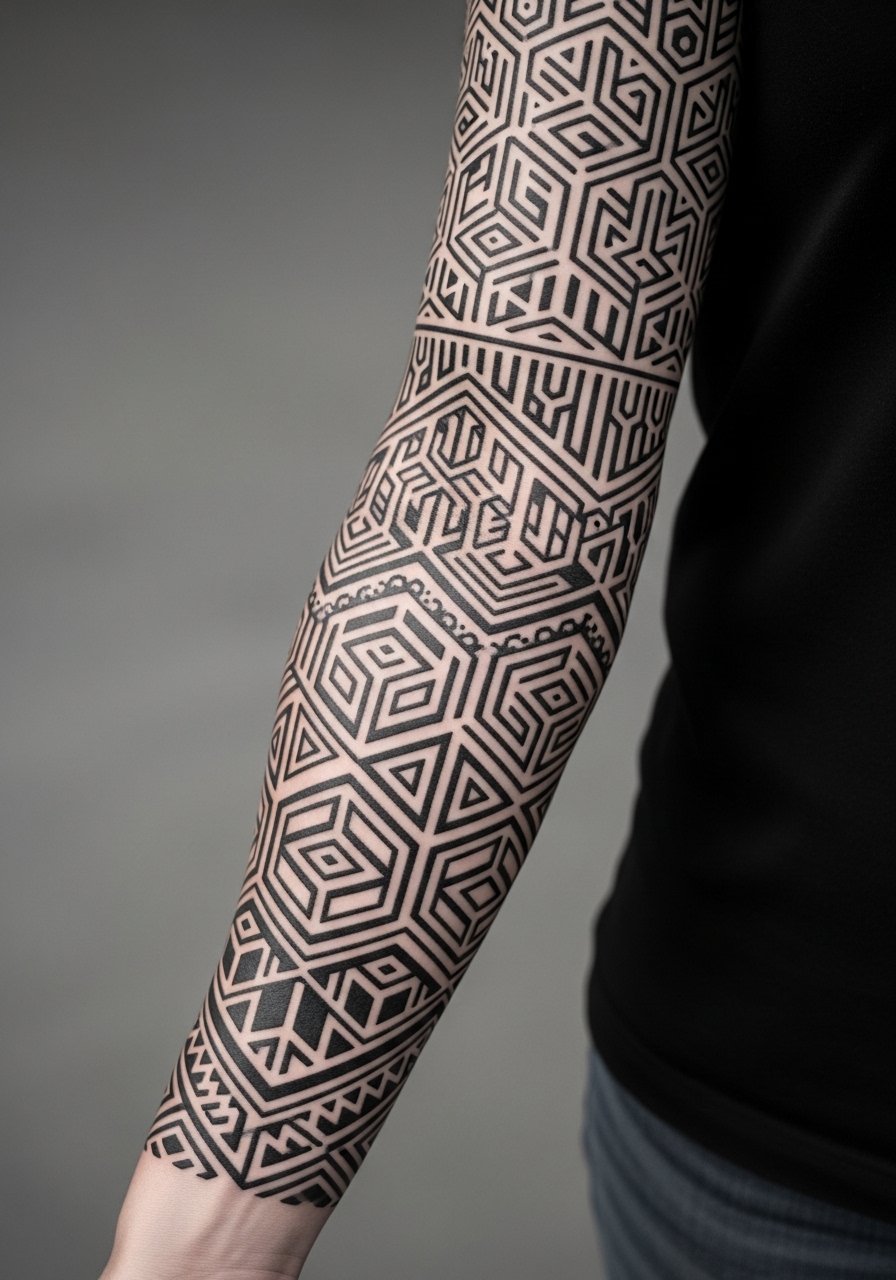
Geometric sleeves rely on perfect spacing and consistent linework to maintain the optical effects. Tell your artist you want some elements slightly larger than the smallest printable size so the geometry does not collapse into gray over time. A frequent error is requesting ultra-fine parallel lines that cause moiré-like blur as skin ages. Sessions are steady and repetitive, so bring headphones and expect long stretches of precise linework. To highlight shapes wear short sleeves or a loose button-down shirt pulled aside.
14. Botanical Sleeve with Native Plant Motifs
Choosing native plants adds a grounded theme to a sleeve while offering clear shapes to anchor future work. Ask your artist to place the largest plants where skin sits flatter so leaf veins hold detail. People sometimes ask for extreme micro-detail across every leaf which ends up muddy when healed. Sessions alternate between linework and layered shading which can feel meditative. For outfits pick rolled cuffs or short sleeves and a dainty stacked bracelet on the opposite arm to frame the botanical forms.
15. Black and Gray Portrait Sleeve
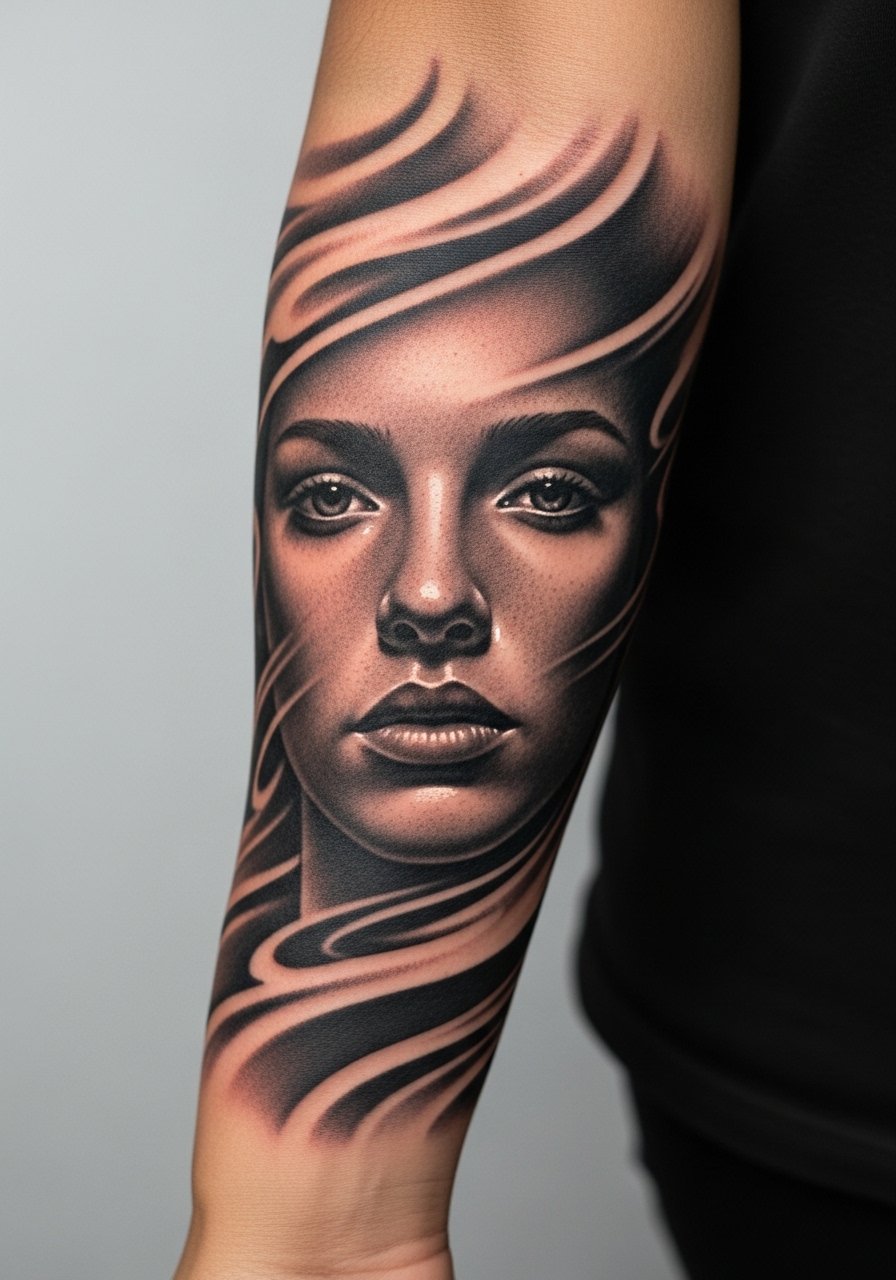
Black and gray portrait sleeves need high-contrast focal points and soft transitions into filler textures. During consult point to the exact facial reference and decide on contrast levels for highlights so the portrait keeps its focus. A common misstep is diluting contrast across the whole sleeve which makes faces look flat after a few years. Sessions are shading heavy and may require multiple sittings. For session wear, a loose short-sleeve shirt keeps the artist's access clean without stressing the skin.
16. Floral Sleeve with Hidden Script Accents
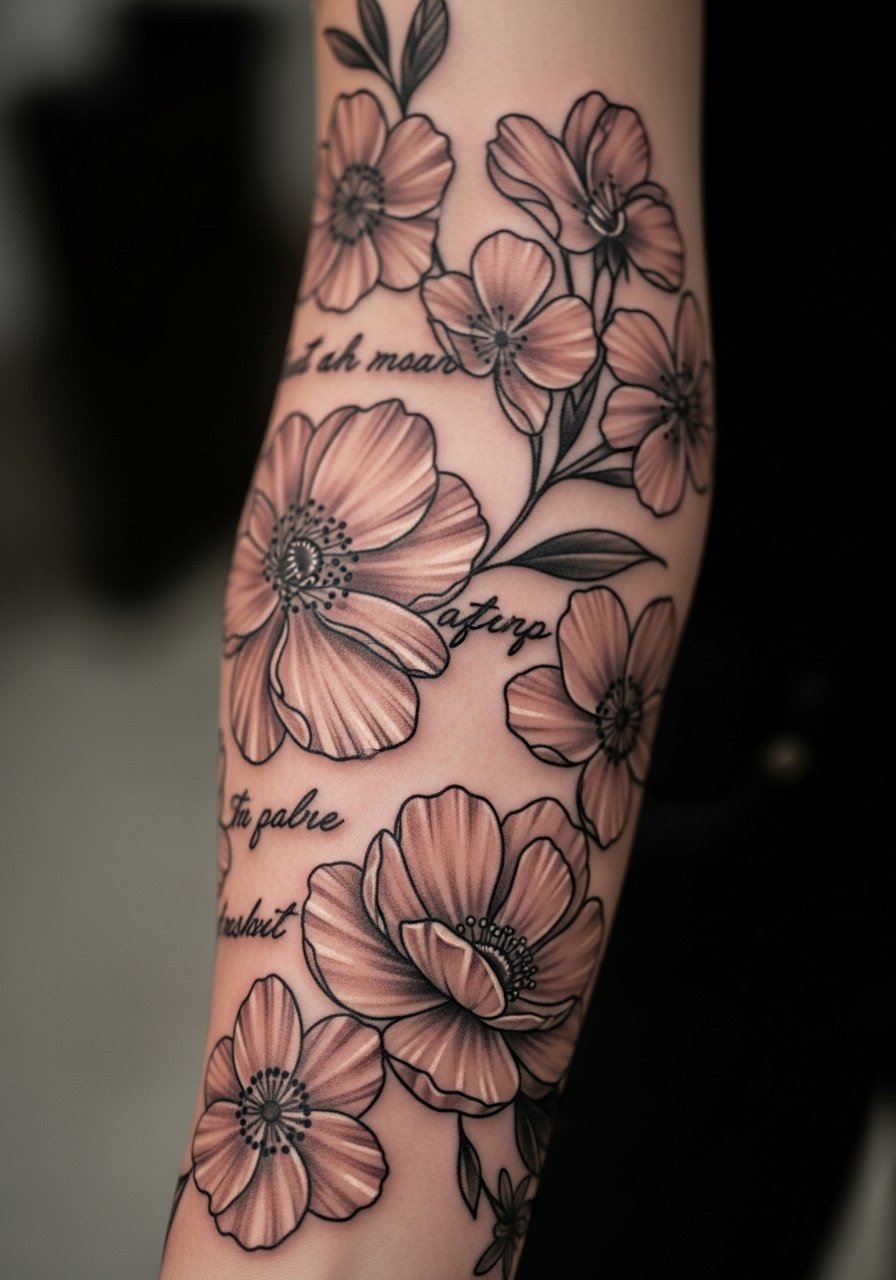
Tucking tiny script between petals creates private details without dominating the sleeve, but the words must be bold enough to survive healing. Ask your artist to slightly enlarge letter spacing for the enclosed script so it remains legible at year two. Many people hide text too small and later regret it. Sessions for hidden script are short but require precision. For showing off this subtlety choose rolled sleeves and a dainty gold necklace that draws attention to the upper arm area.
17. Full Sleeve with Botanical and Geometry Mix
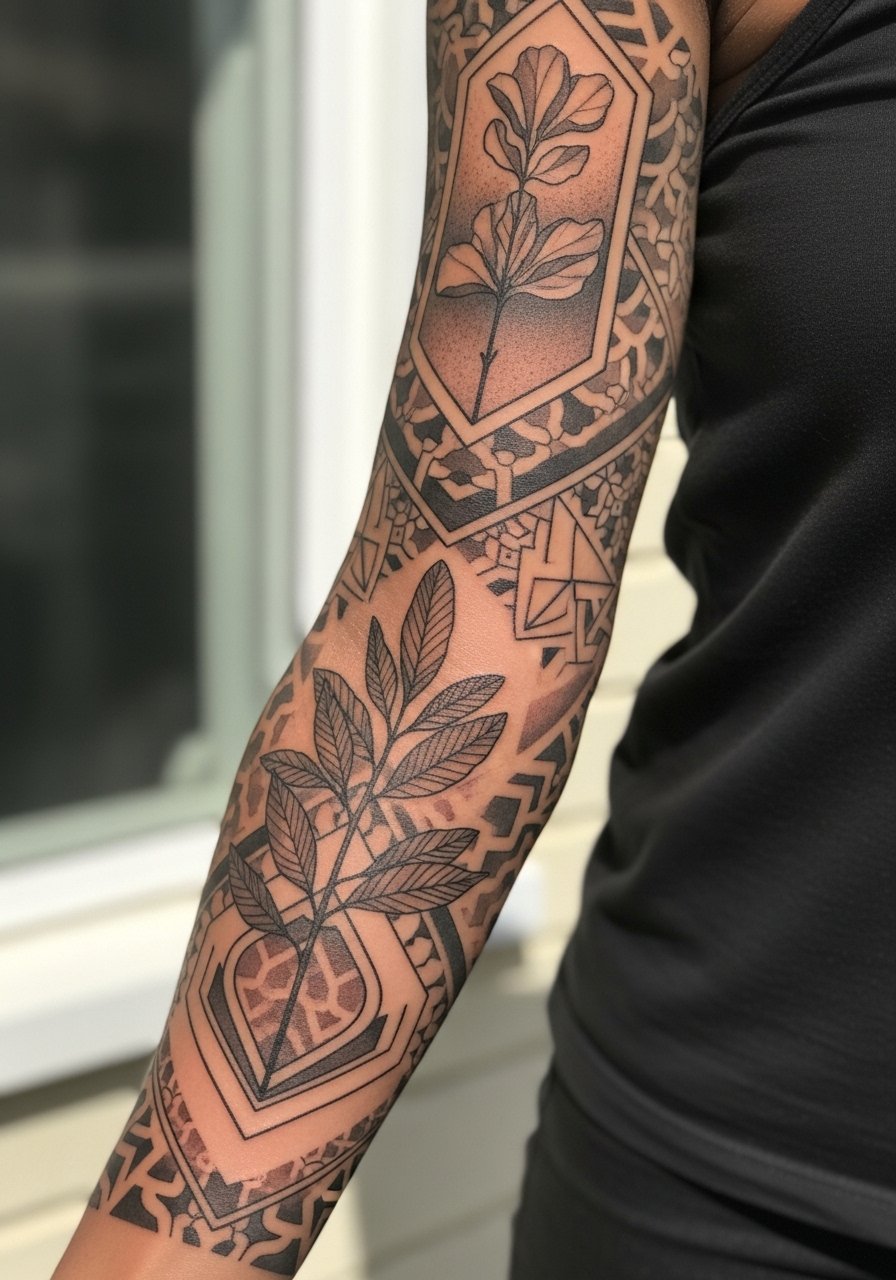
Mixing styles keeps sleeves visually interesting but needs a plan so motifs do not fight. Ask your artist to use a unifying element such as consistent lineweight or color palette to tie the sections together. The common mistake is applying different artists' flash pieces without a bridging background which makes the page look disjointed. Sessions depend on the dominant technique and may switch from delicate line to denser blackwork. For a pulled-together look wear neutral tones and a sleeveless tank top when you want the whole arm visible.
18. Anime-Inspired Sleeve with Neo-Traditional Flair
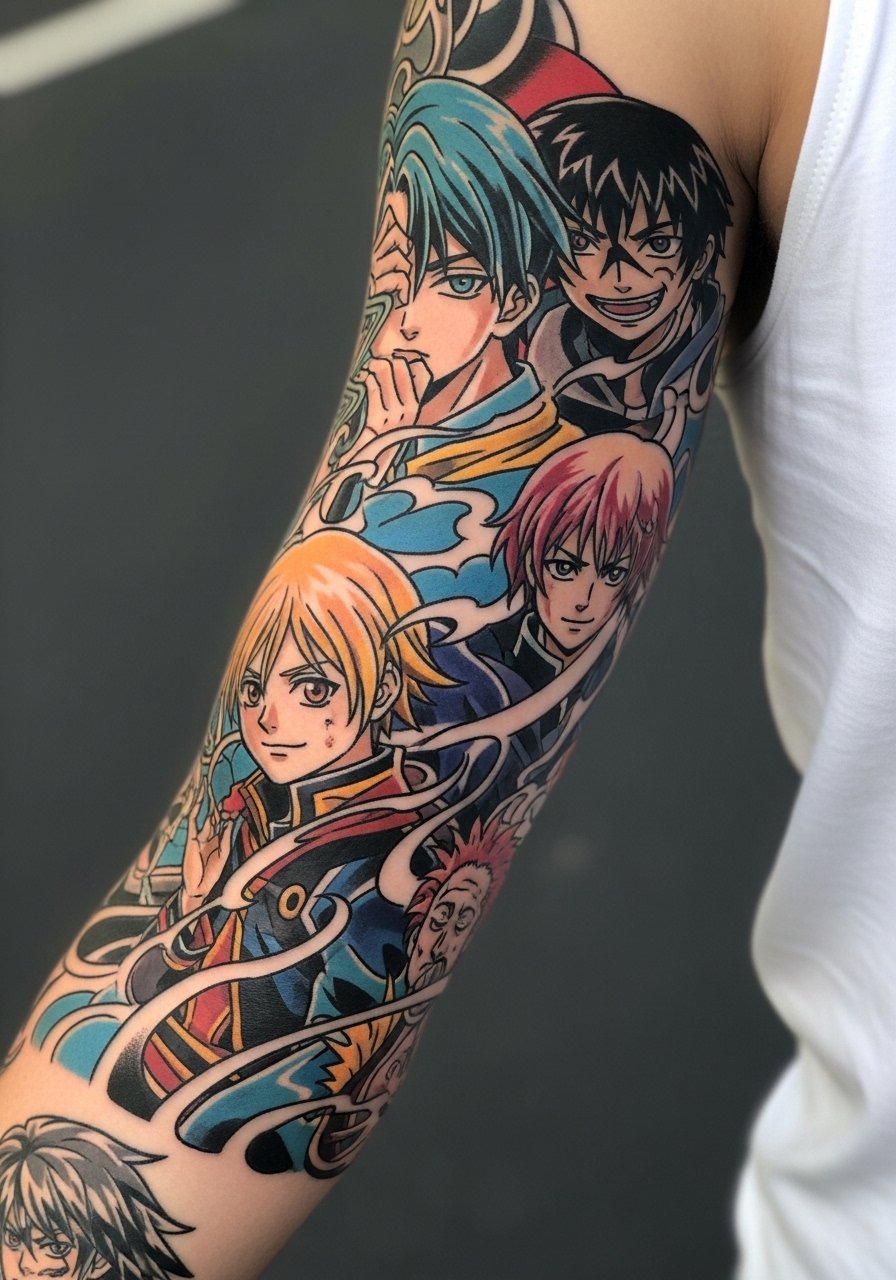
Pop-culture sleeves translate best when adapted for long-term wear, which means avoiding ultra-fine detail in character faces and emphasizing silhouette. Tell your artist you want stylized features with stronger outlines for the principal character and softer background motifs. Rookie mistake is copying screen-resolution imagery that loses nuance when scaled to skin. Session pacing alternates between bold outlines and color packing which can feel tiring but rewarding. For casual show-off styling try a short-sleeve tee so key panels are visible.
19. Sleeve That Incorporates Negative Space Portraits
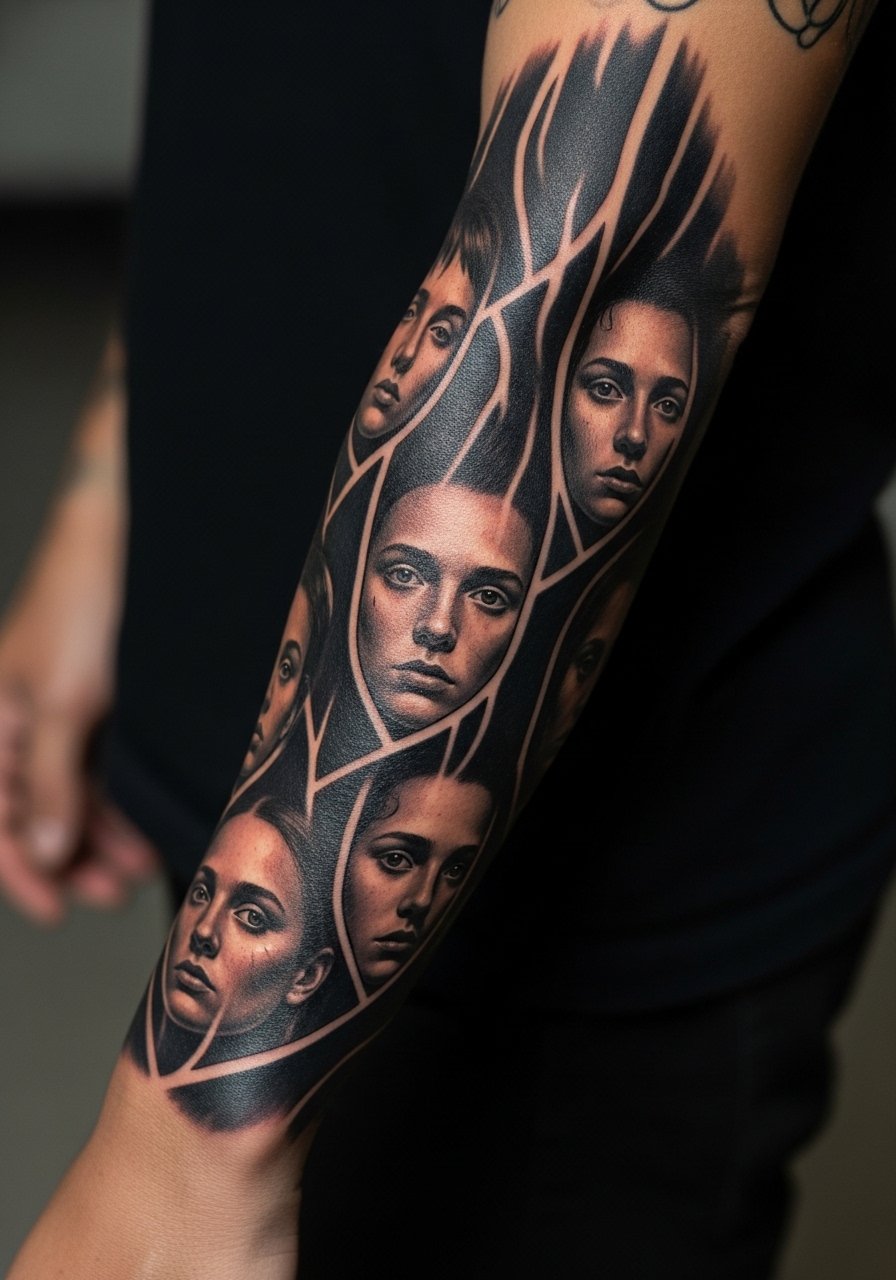
Negative-space portraiture depends on planned dark fields that preserve the subject silhouette rather than relying on fine internal detail. Ask the artist to map the dark negative shapes first and test the silhouette at stencil stage. An error is asking for both heavy negative ground and tiny internal detail which competes and fades. Sessions feel like controlled blocking followed by touch-up passes. For an evening look pair with rolled cuffs and a thin chain bracelet to keep attention on the silhouette.
20. Sleeve with Tribal-Inspired Bold Lines
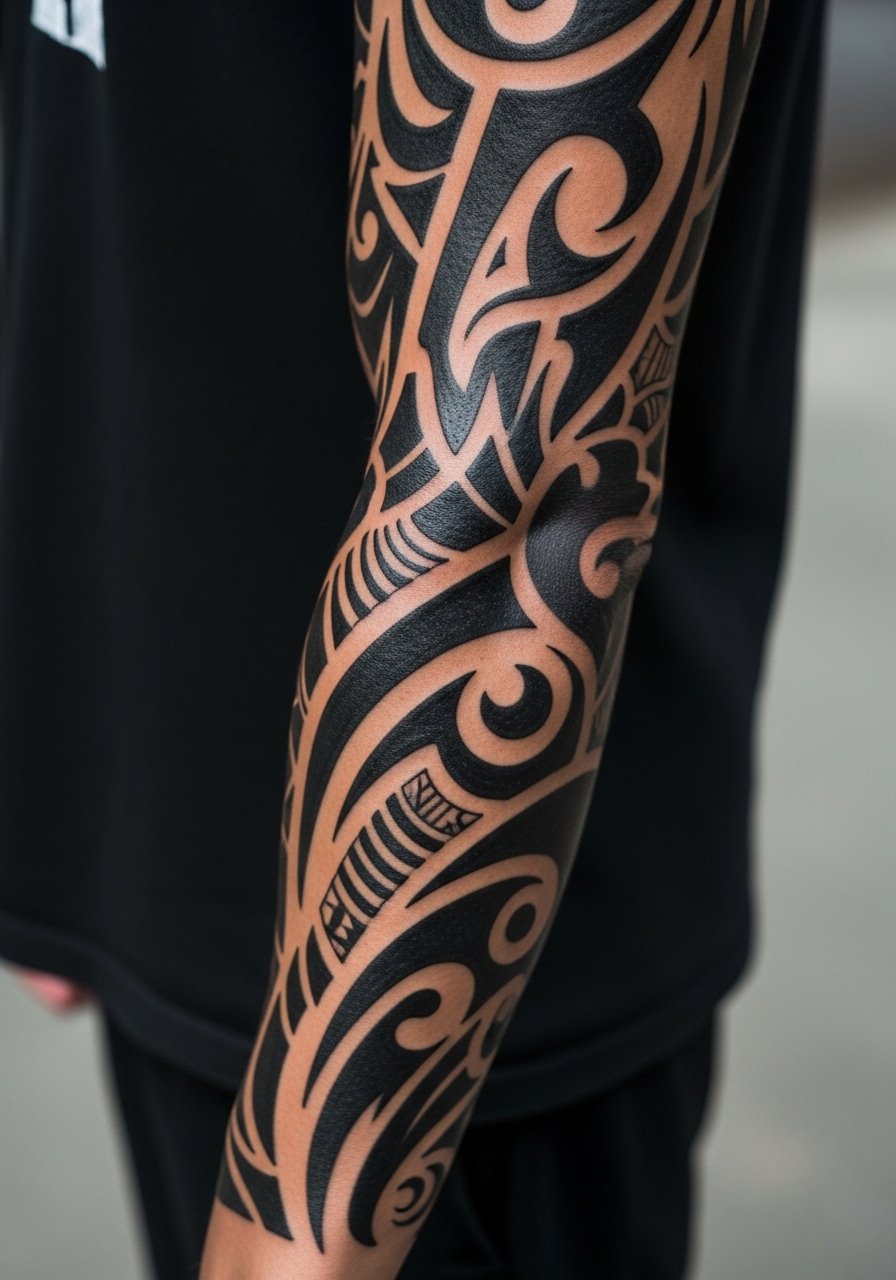
Tribal-style elements translate well into sleeves if the curves follow muscular contours so the pattern reads naturally in motion. Tell your artist you want anchor motifs over flatter planes to reduce distortion. A frequent mistake is starting a tight band where joints flex which leads to early distortion. Sessions are often outline-heavy with saturation passes. For styling choose a sleeveless tank or a neutral tee so the movement of the lines is visible.
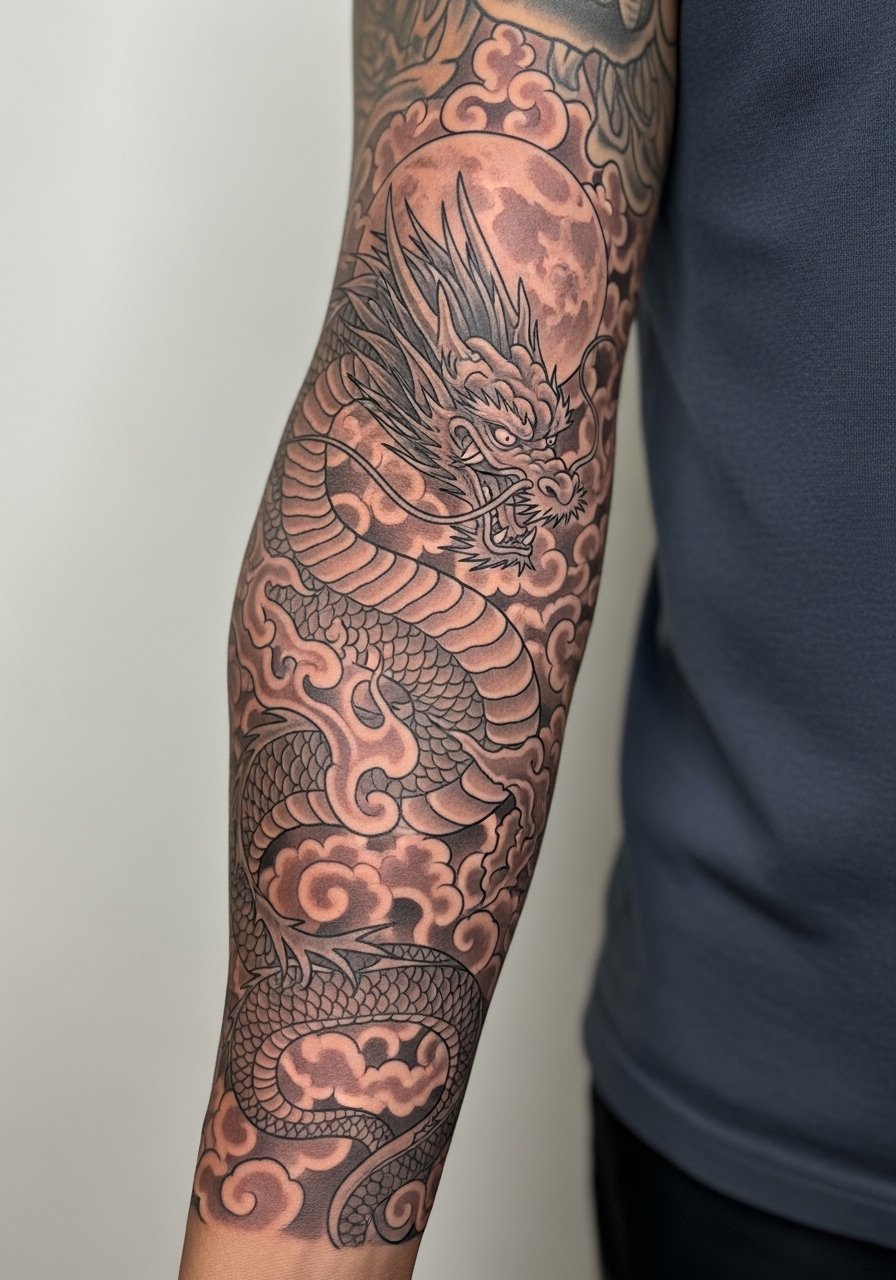
21. Sleeve Inspired by Myth and Folklore
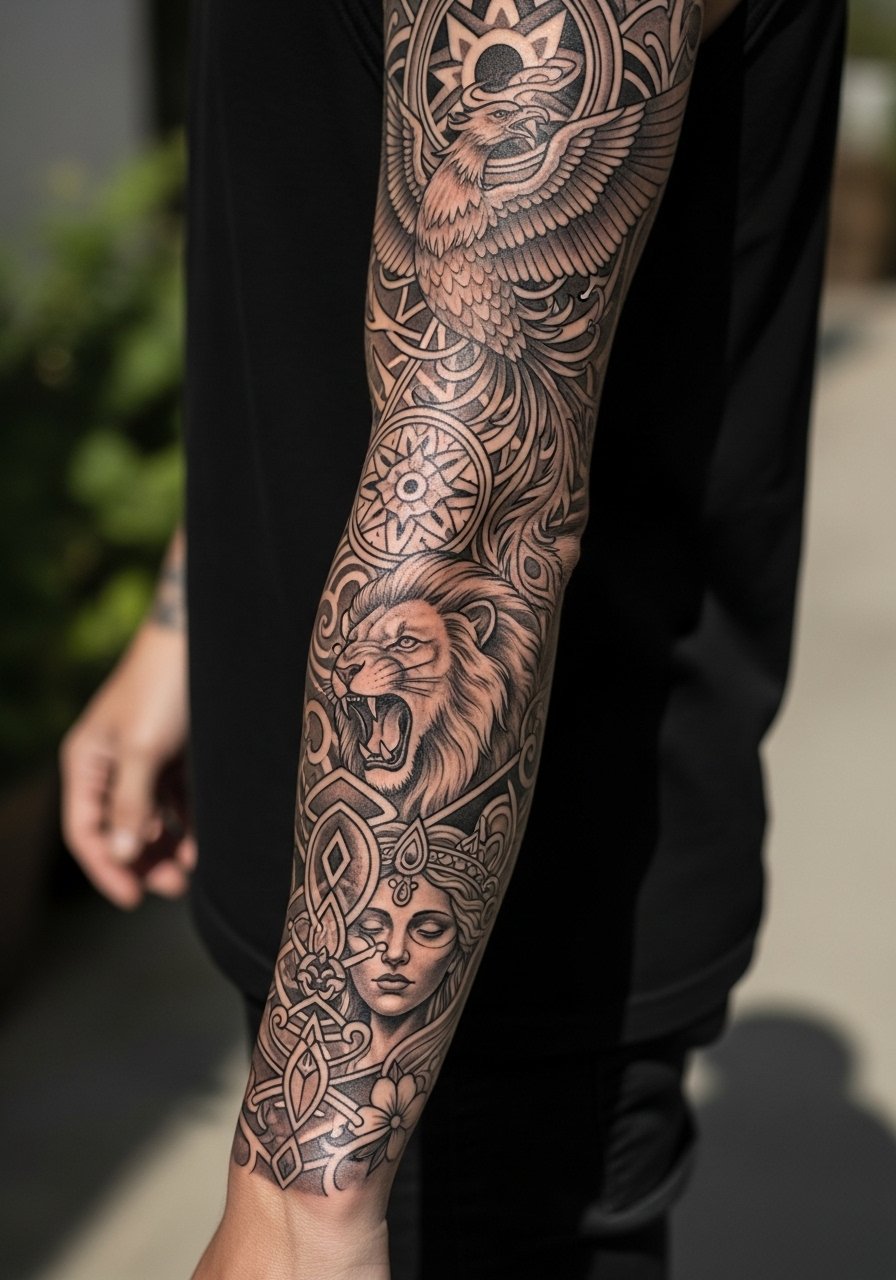
Mythic sleeves work best when you pick a clear narrative thread and limit competing iconography. In the consultation decide the central figure and which supporting symbols are essential so the piece reads as a story. The common regret is adding too many unrelated motifs which weakens the narrative. Session rhythm alternates dramatic panels with connecting filler which helps the visual flow. For gallery moments pair with a statement earring that balances shoulder-level work.
22. Ribcage Sleeve with Floral and Script
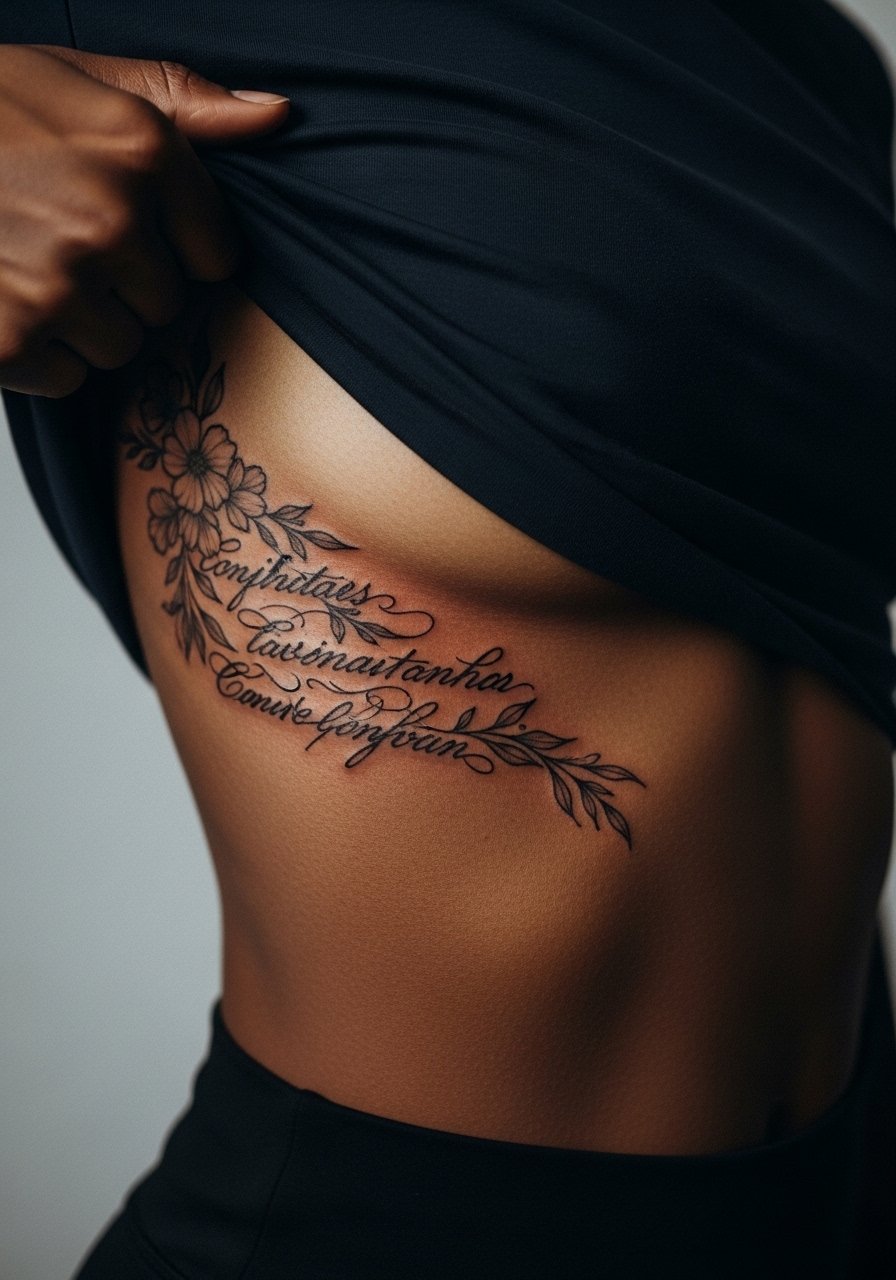
Artists split on fine line on ribs into two camps. One camp says the skin in that area stretches and moves too much so thin lines blur within a couple of years. The other camp argues that with controlled needle depth and slightly increased spacing the lines settle fine. Ask your artist where they stand and request a test stencil area or slightly bolder anchors if they favor aggressive spacing. Pain is higher here, typically an 8 out of 10, and sessions are often short. For the appointment wear a removable sports bra or fitted crop top you can lift so the artist has clear access.
23. Sleeve with Mixed Media Look, Watercolor Meets Linework
Combining watercolor with crisp linework gives a layered effect that can age well if the line anchors are prioritized. During consult decide which elements remain crisp and which are intended to soften into washes. The mistake is letting washes dominate anchor motifs which leaves no readable focal points after a few years. Expect both delicate stippling sessions and deeper color packing. Wearing a loose tank top helps the artist move freely across the arm.
24. Sleeve with Architectural Lines and Cityscape
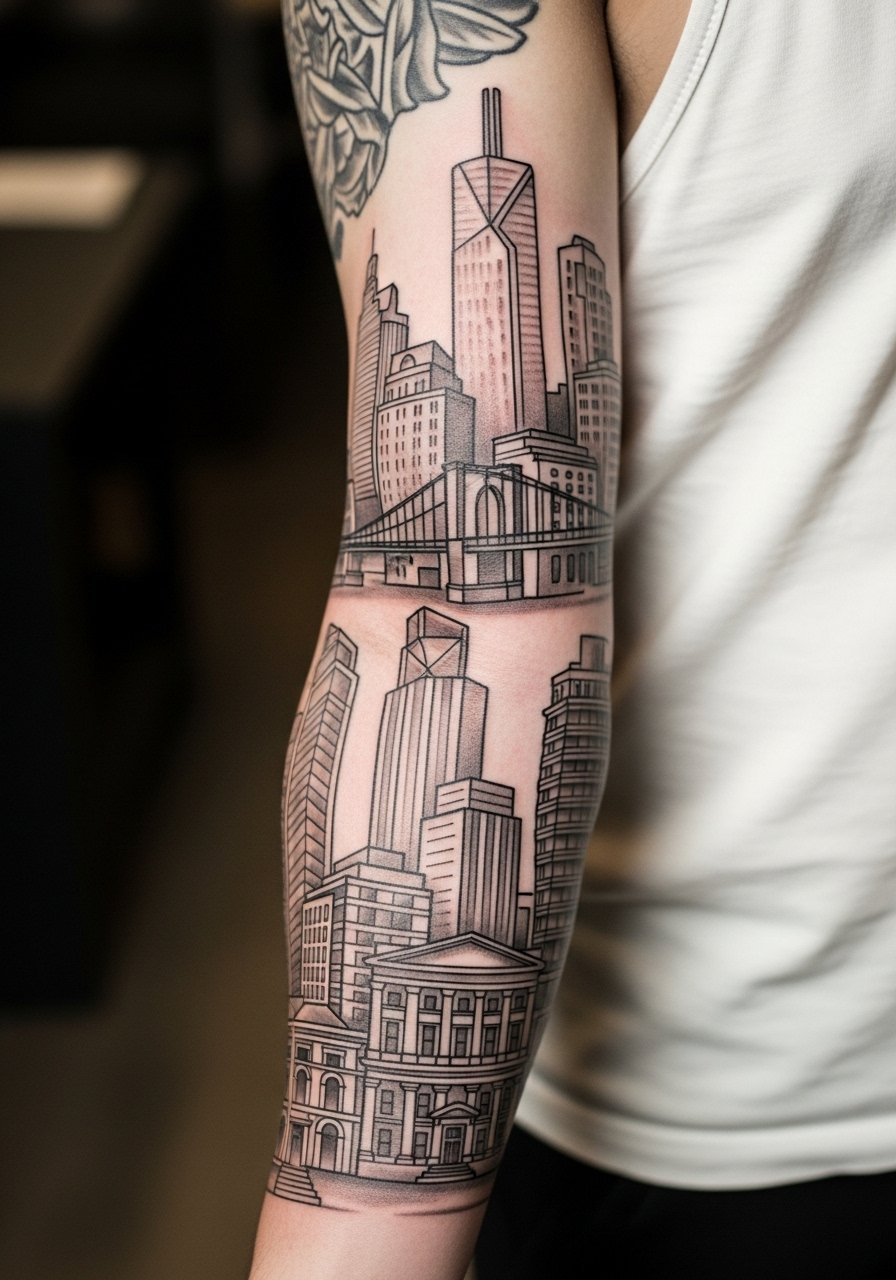
Architectural sleeves need careful perspective planning so landmark features do not skew around joints. Ask your artist to place major skyline lines on flatter planes and reserve curved areas for organic filler. A common error is mapping rigid straight lines across rounded muscles which distorts shapes. Sessions alternate between long consistent lines and block shading. For showing off pair with a loose button-down shirt you can pull aside.
25. Calf-to-Ankle Sleeve with Constellations
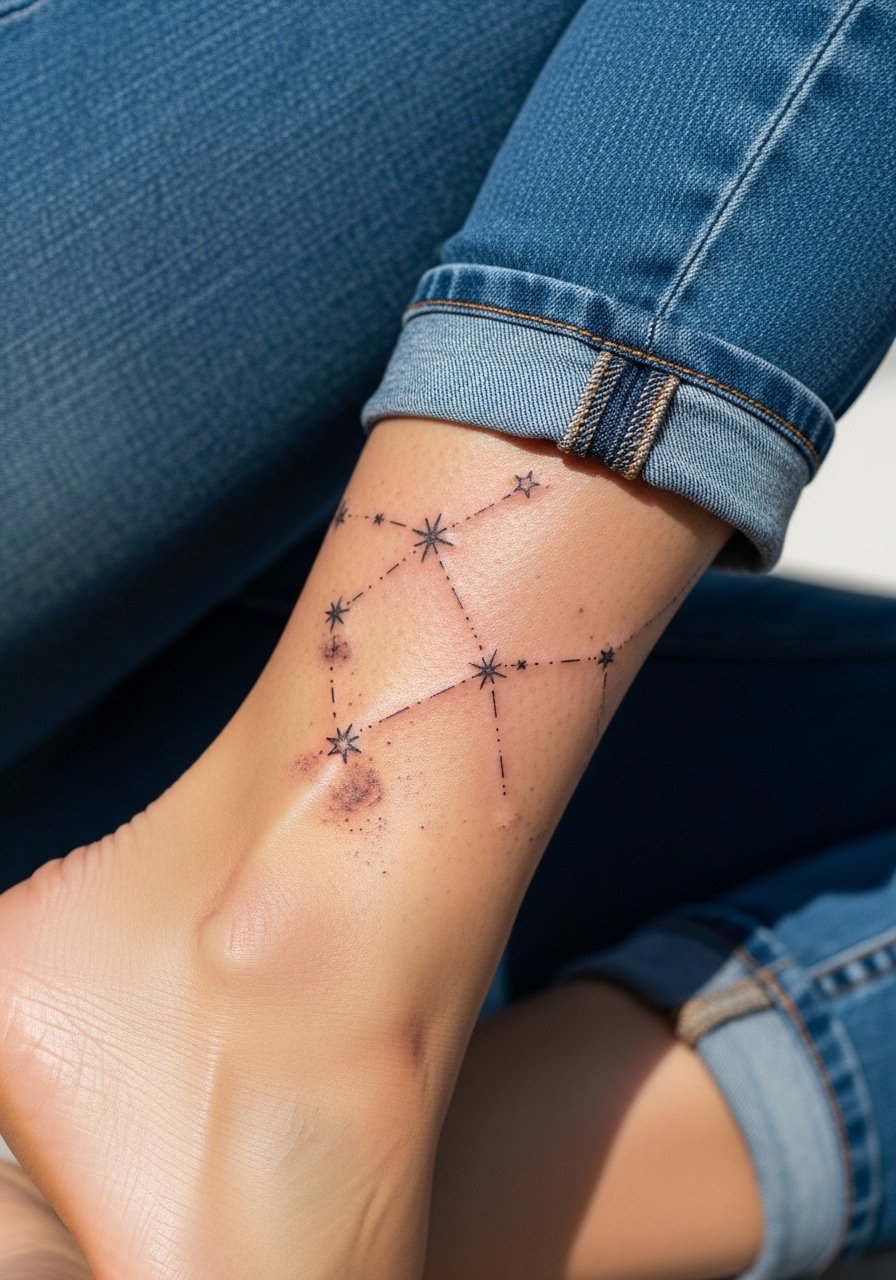
Lower-leg sleeves with small star fields benefit from leaving space between constellations so each cluster reads even with ankle movement. Tell your artist to emphasize anchor stars and vary dot sizes. A mistake is putting dense dot work near the ankle where repeated friction from shoes accelerates fading. Sessions are often split to keep circulation comfortable. To show the work, roll jeans or wear cropped pants and an ankle minimalist anklet to frame the design.
26. Sleeve Merging Mandalas and Floral Frames
Pairing mandalas with floral frames works when you treat the mandalas as anchors and let petals bridge between them. Ask your artist to vary lineweight between geometric core and organic floral edges. A common mistake is matching lineweight across both elements which flattens the composition over time. Sessions include precise circular work and open shading passes. For an elegant reveal try an open-back dress or a sleeveless tank for evenings out.
27. Sleeve That Plans for Future Additions
If you want a sleeve that grows with you, plan where future panels will sit and leave intentional negative space as connective tissue. During consultation sketch where you would add color, portraiture, or scripts later so each session plugs into the master layout. The mistake is filling every gap early and losing the option to adapt the sleeve. Sessions are often modular when building over years which helps with life changes. Wear a sleeveless tank top for studio days so the artist has clear access to layout zones.
Frequently Asked Questions
Q: Will fine line tattoo sleeves blur faster than bold blackwork?
A: From what I have seen, fine line work tends to soften sooner because the lines have less pigment mass to resist spreading. Bold blackwork keeps its silhouette longer, so if longevity is your priority choose slightly heavier lineweight and spacing for the parts of a sleeve you expect to keep sharp.
Q: How should I find an artist who specializes in sleeve flow without naming specific people?
A: Use style-specific hashtags like #finelinetattoo and #neotraditionaltattoo, check directories that organize by style, and bring a curated board to consultations. Ask artists about previous sleeves they completed and request close healed photos so you can evaluate how their work ages.
Q: Is it risky to mix multiple styles in one sleeve?
A: It can be risky if you do not plan transitions. The fix is a unifying approach such as a consistent lineweight, shared color palette, or repeating background elements. Discuss bridging options during your first layout session so pieces look intentional later.
Q: How do placement and body changes affect a sleeve over time?
A: Areas that stretch or move a lot, like the ribs and inner elbow, tend to alter fine details more quickly. If you expect significant body changes, favor larger motifs and stronger anchors. Ask your artist for placement recommendations that work with your body movement.
Q: Should I use protective film or traditional dry healing for a sleeve?
A: Artists are split on protective film versus dry healing. One group prefers second-skin film for the first few days to reduce scabbing and friction. The other group favors minimal covering and short ointment periods to allow skin to breathe. Choose an approach after asking your artist why they prefer one method and how it has worked on sleeves they have done.
