
Fine line trends dominate feeds, but vintage black work often wins the decade test when planned with spacing and saturation in mind. Expect solid ink packing to feel tougher than small-line pieces, uneven fading to show up sooner on darker skin tones, and blackout sessions to demand extra budget and stamina. Read on for 27 vintage black work directions that account for pain, aging, and wardrobe so you get a design that actually lives well on skin.
1. Geometric Sacred Geometry Mandala on Forearm
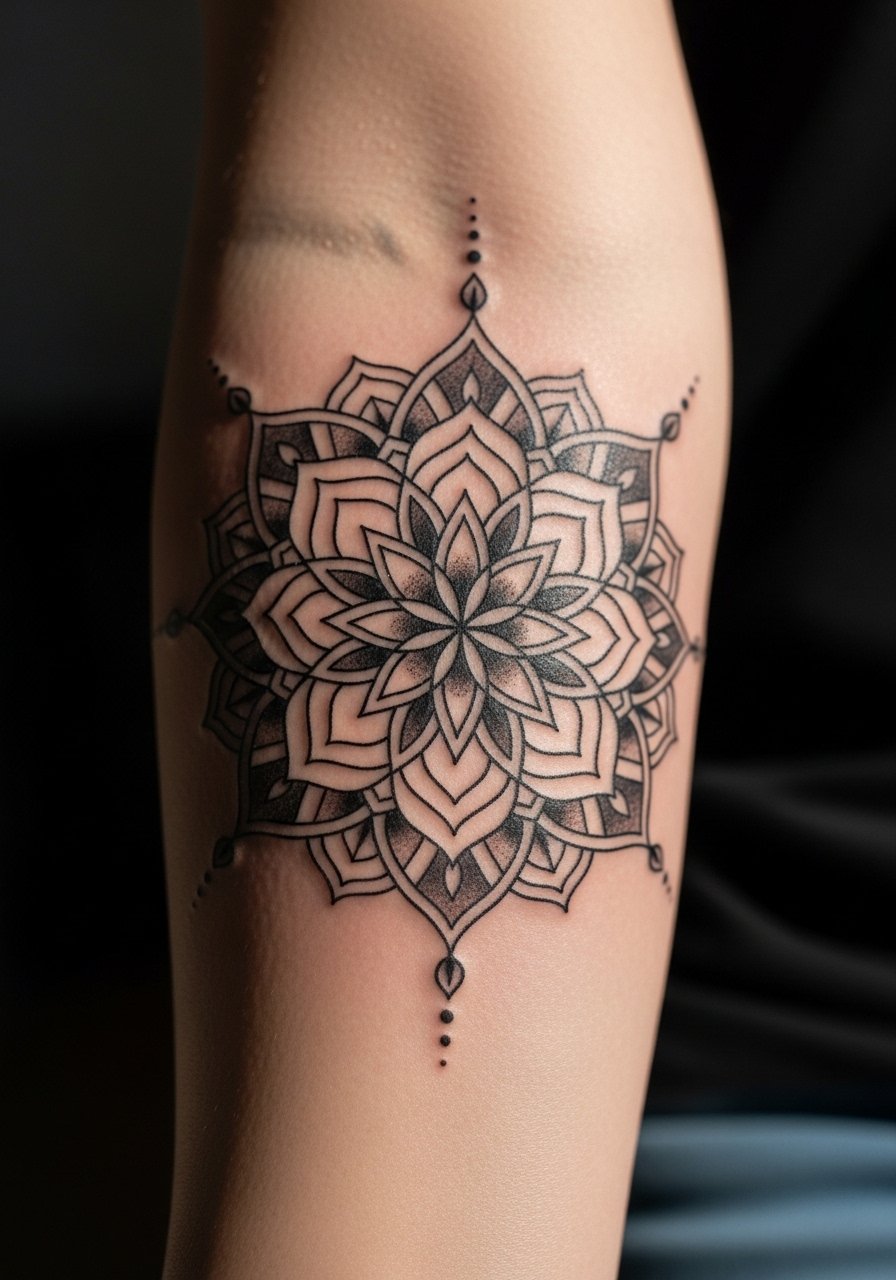
I've seen mandalas that read clean for years when they have room to breathe. For a forearm mandala ask for slightly heavier linework and deliberate negative space between repeating elements. The biggest mistake is shrinking the design to fit a narrow wrist then trying to cram detail in. Expect a long single session or two shorter sittings depending on scale, and plan a touch-up around year two if lines soften. For showing it off pair with a rolled sleeve leather jacket or a loose fit black tank men for a vintage contrast.
2. Tribal Polynesian Panel on Shoulder
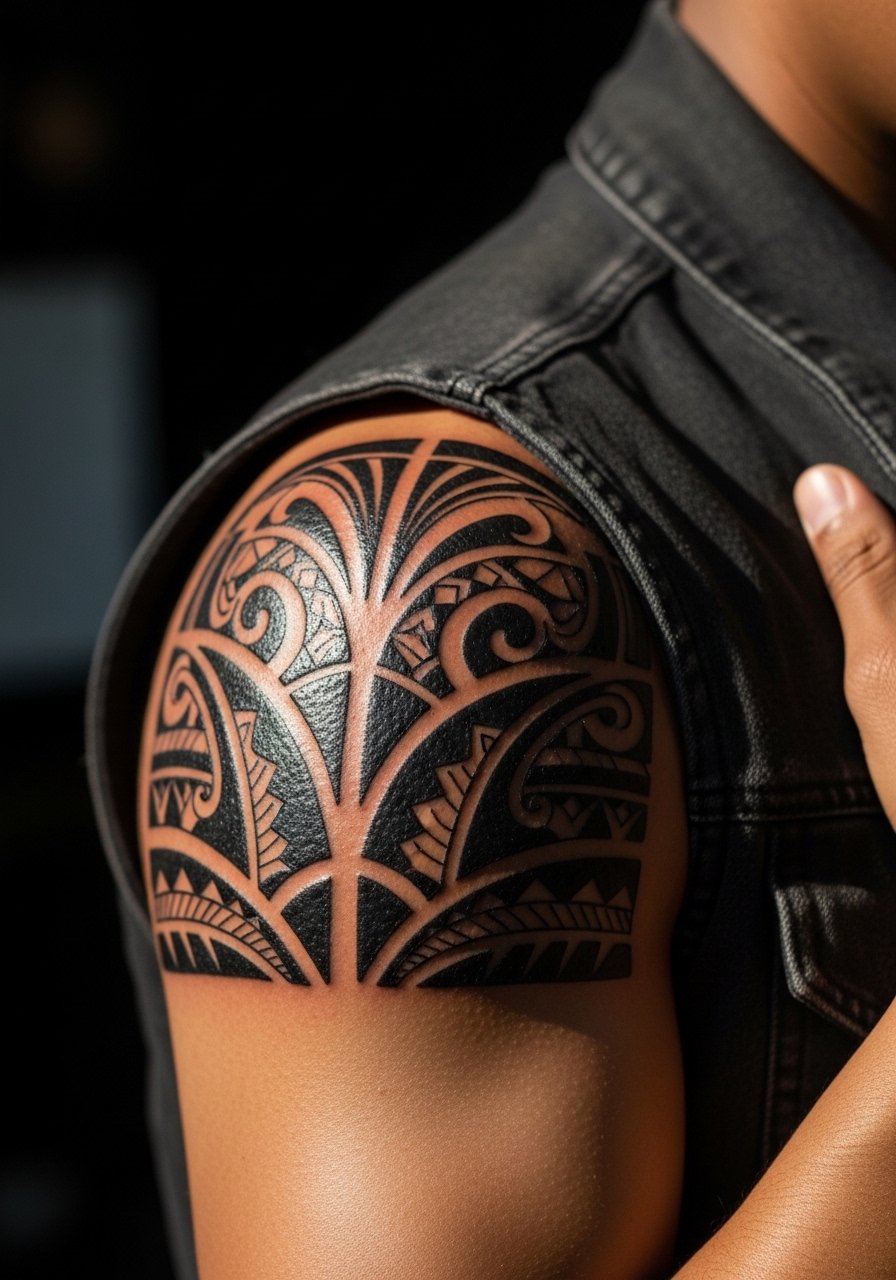
This shoulder placement gives tribal shapes room to read over time. In consultation mention cultural respect and say you want abstracted motifs rather than direct cultural symbols. A common aging error is letting fine filler lines live inside large blocks, which can disappear into the fill. Sessions feel manageable since the muscle gives some cushion, though heavier packing can sting. For the session wear a button front camp shirt you can pull aside, and for showing it off pick an off-shoulder top or sleeveless vest in earth tones.
3. Dotwork Mandala with Negative Space on Upper Back
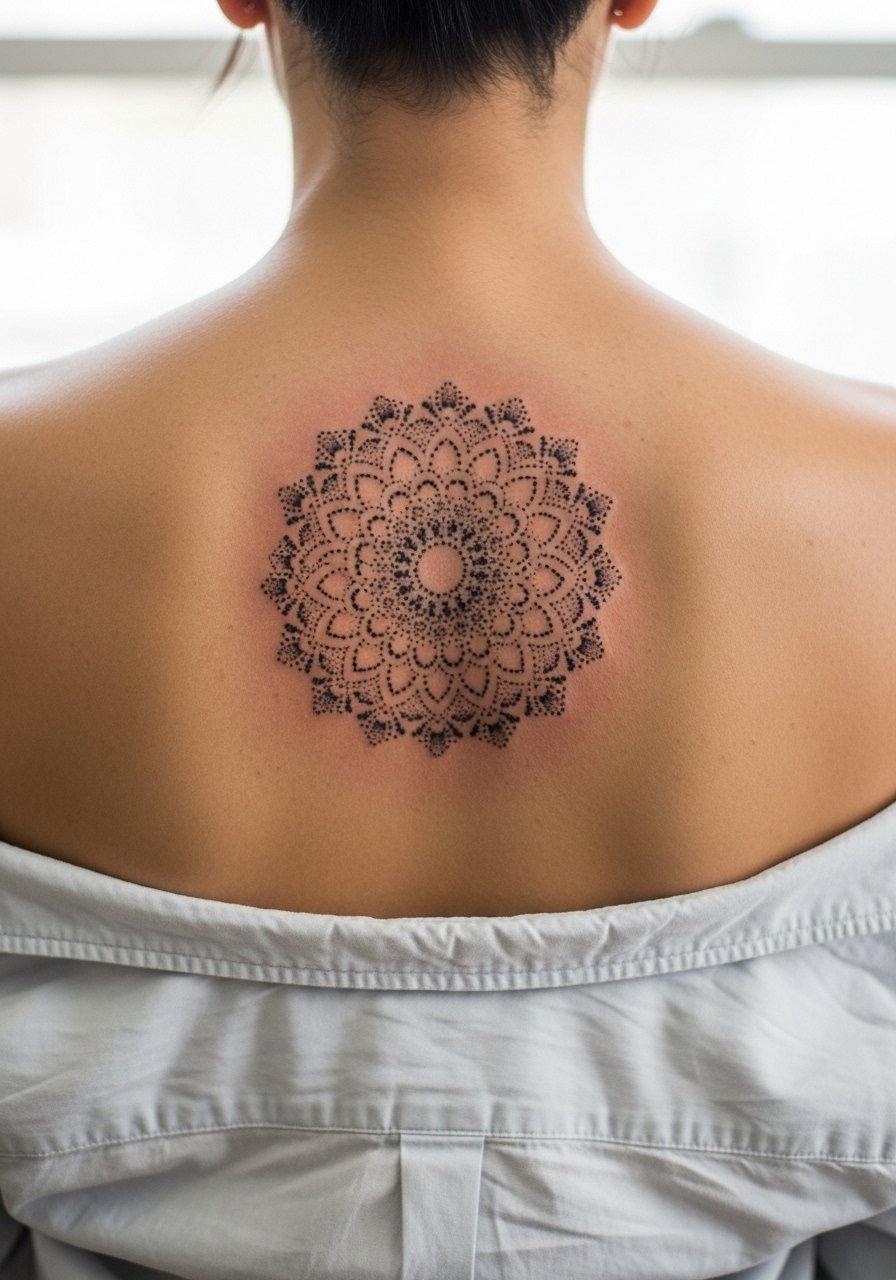
Dotwork relies on tiny stipple shading for depth. Tell your artist you want dot gradients rather than gray wash so the texture holds without appearing muddy. A lot of heal problems come from overworking dense dot areas, so ask for staged sessions to avoid scabbing. At six months the dots sit with subtle texture, by year two finer dots can soften in tight clusters, and a touch-up keeps the pattern crisp. For after the session consider a low-back friendly top like a backless black tank when you want to show the piece.
4. Blackout Arm Block with Cutout Motifs
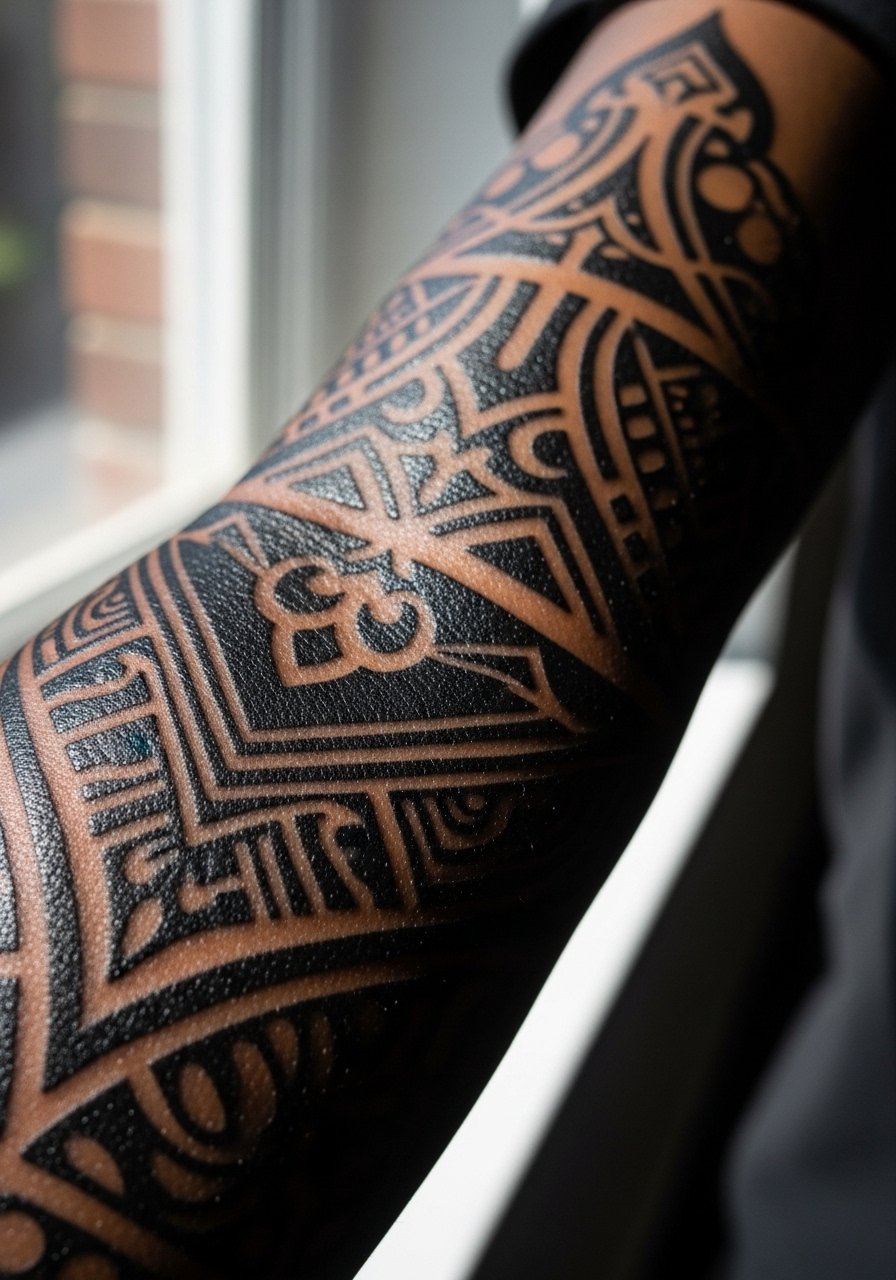
Blackout work packs a lot of ink which increases session time and skin trauma. Artists split into two camps on technique. One camp insists on faster, heavier packing to lock the pigment in. The other camp prefers phased layering to let the skin calm between passes. Both approaches can work if the artist knows how to read skin. Budget for multiple long sessions and expect soreness during and after. Avoid tiny cutouts that will close up if spaced too close. During consultations reference flash that balances fields of black with breathing gaps.
5. Abstract Swirl Bands on Wrist
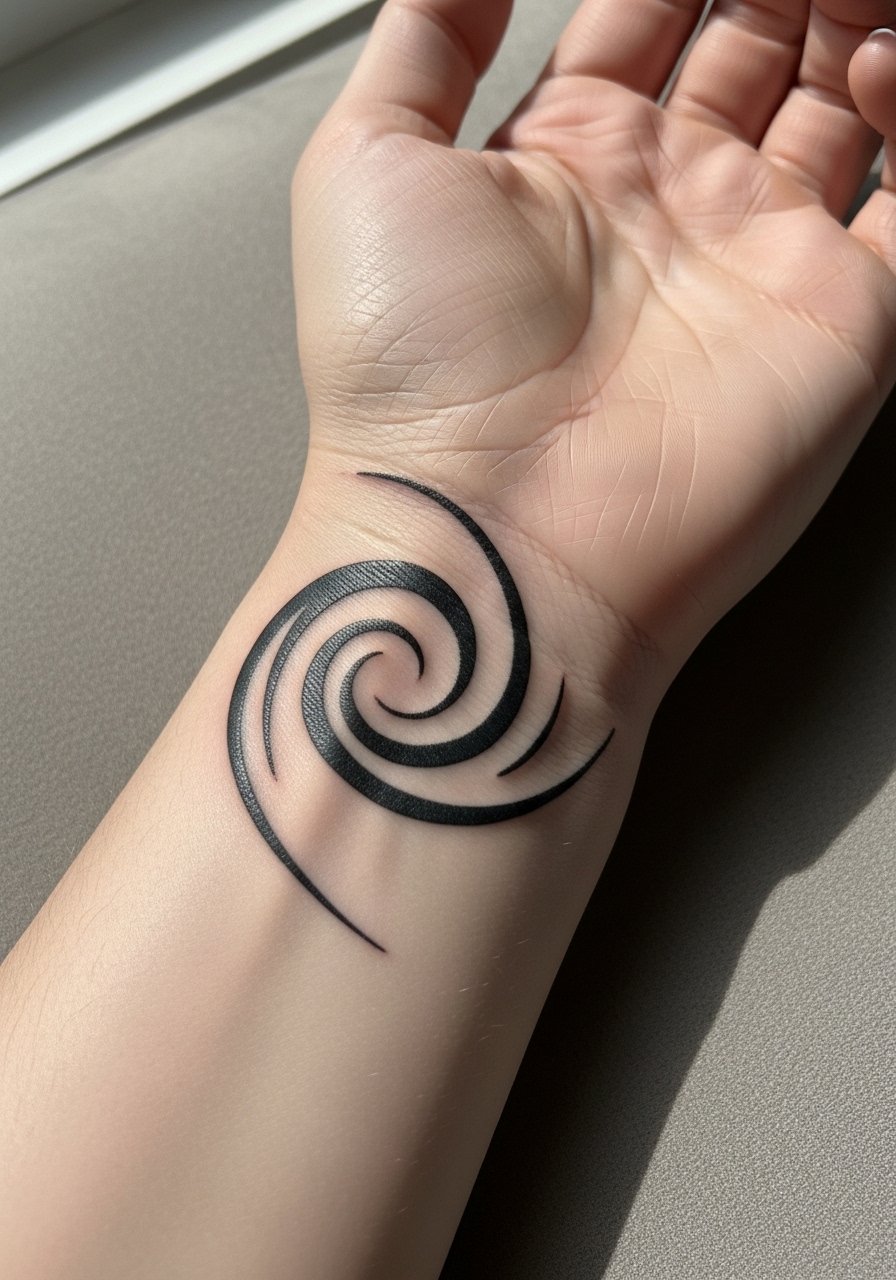
Wrist tattoos feel sharp during sessions due to thin skin and bone proximity. For abstract swirls ask for slightly thicker strokes so curves hold without bleeding. People often ask for ultra-fine spirals on the wrist and then need touch-ups when the lines merge. Expect a short session but higher perceived pain. For showing this off a chunky leather cuff would compete, so go with a wide leather cuff bracelet or a simple watch to frame the design.
6. Ornamental Dotwork Flowers on Inner Forearm

Inner forearm skin takes ink well but fine dotwork can look dense if placed too small. Tell your artist you want petal centers left as skin tone to create highlights. A common mistake is over-detailing the edges which later blur into the fill. Sessions are moderate in discomfort and usually completed in a single sitting for small to medium sizes. For the session wear a loose drawstring linen pant does not apply here, but roll up sleeves or pull on a loose button-down shirt to give the artist clear access.
Pre-Session Essentials
The shoulder, wrist, inner forearm, and blackout forearm items above ask for different prep and first-week choices.
- Stencil transfer paper kit. Lets you preview line placement on skin before the needle hits, handy for the mandala and ornamental designs above.
- Topical numbing cream. Use 45 minutes before the session for wrist and shoulder sensitivity without compromising precision.
- Thin protective film roll. Useful for keeping wrist and hand pieces clean during the first week of frequent washing.
- Fragrance-free body wash. Gentle cleansers help avoid irritation for dotwork and ornamental areas that scab less predictably.
- Aquaphor healing ointment. A thin layer during the earliest days helps keep fine lines from drying into thick crusts that could lift ink.
7. Fractal Geometric Interlocks on Thigh
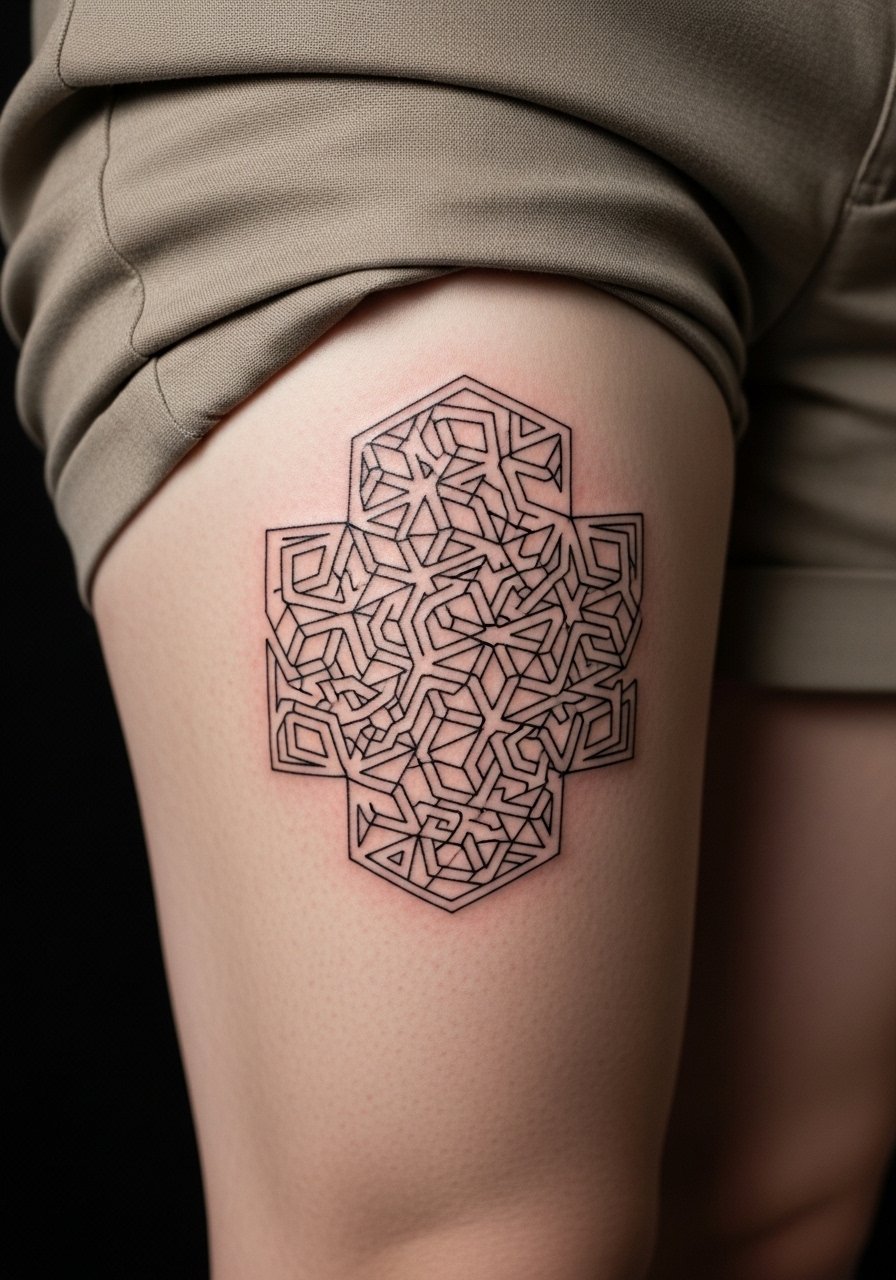
Thigh pieces give space for repeating fractals that read over time. Ask for larger repeat units so the visual rhythm survives stretching and weight changes. A mistake is insisting on tiny nested fractals that merge after a year. Sessions can be long but the thigh tolerates coverage well. For showing it off pick tailored shorts or slim joggers rolled high. Bring loose shorts for the appointment so the artist can work without fabric interference. Touch-ups are realistic at year three if the intersections dull.
8. Maori-Inspired Abstract on Outer Bicep
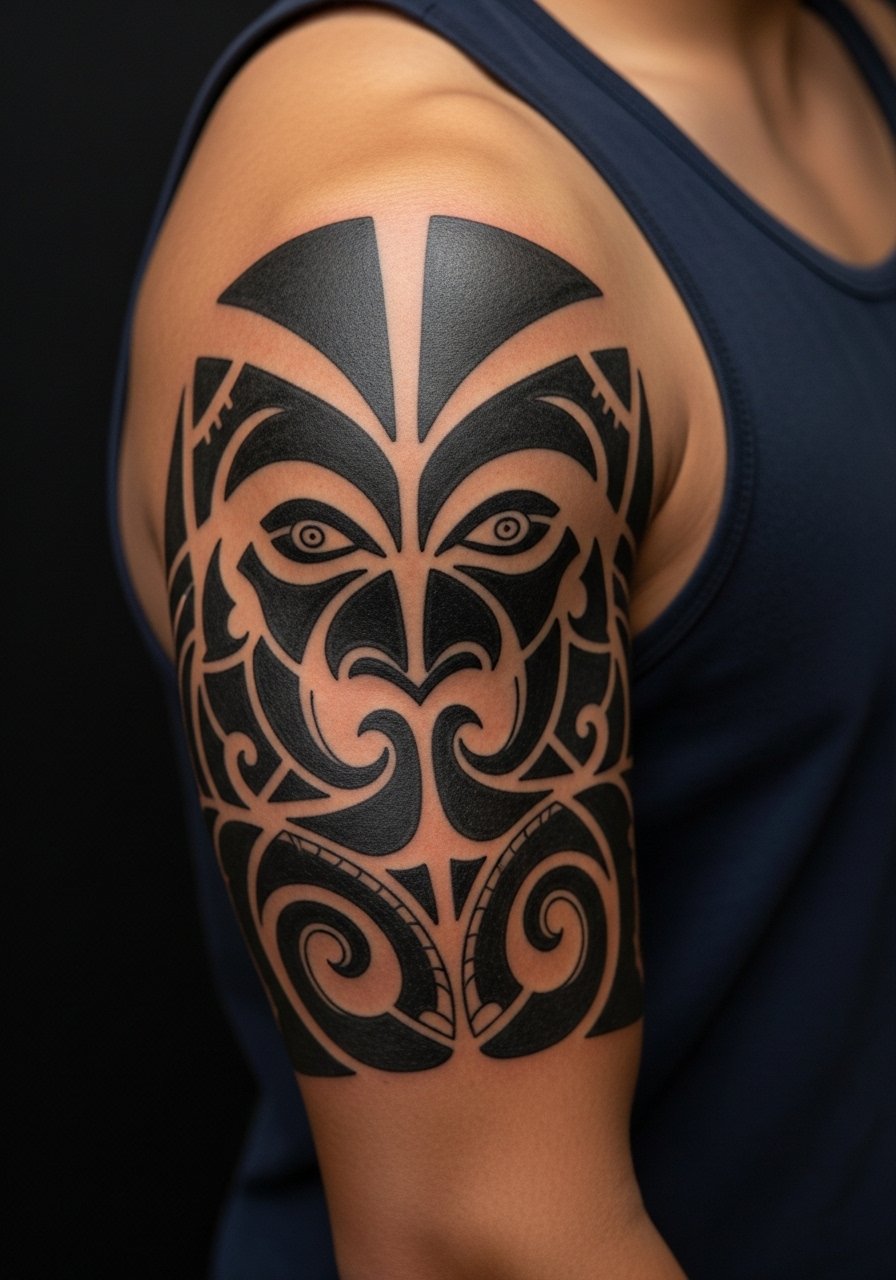
When working with indigenous motifs state that you want adapted shapes rather than direct replicas. That respects origin while keeping the aesthetic. Outer bicep allows strong line weights that stand up over years, but thin filler elements often disappear. Tell the artist to favor broad glyphs and clear negative shapes. Sessions are medium in pain and usually split if the panel is large. For the session a loose fit black tank men gives easy access and the show-off look pairs with sleeveless vests.
9. Solid Black Negative Space Skull on Collarbone

Collarbone ink is thin skinned and can feel sharp. Negative space skulls rely on skin as highlight inside heavy fills, so spacing matters. The common mistake is placing the design too close to the clavicle edge which can blur due to movement. Expect a shorter session with low tolerance for long passes. Pair this piece with V-neck tees or a deep v neck black tee to frame without competing. Also plan a light touch-up at year two if the edges soften.
10. Full Blackwork Sleeve Patchwork, Modular

Sleeve patchwork is a long-term plan that builds over years. Recommend mapping future panels now so each module interlocks with breathing room. The error is booking random flash additions without a compositional plan which causes crowded seams. Expect many sessions over months to years and plan budget per session. For longevity choose bold fills and clear borders. For showing a sleeve, rolled-up sleeves on a charcoal graphic tee or leather outerwear makes the black fields sing.
11. Precision Black Line Waves on Ankle
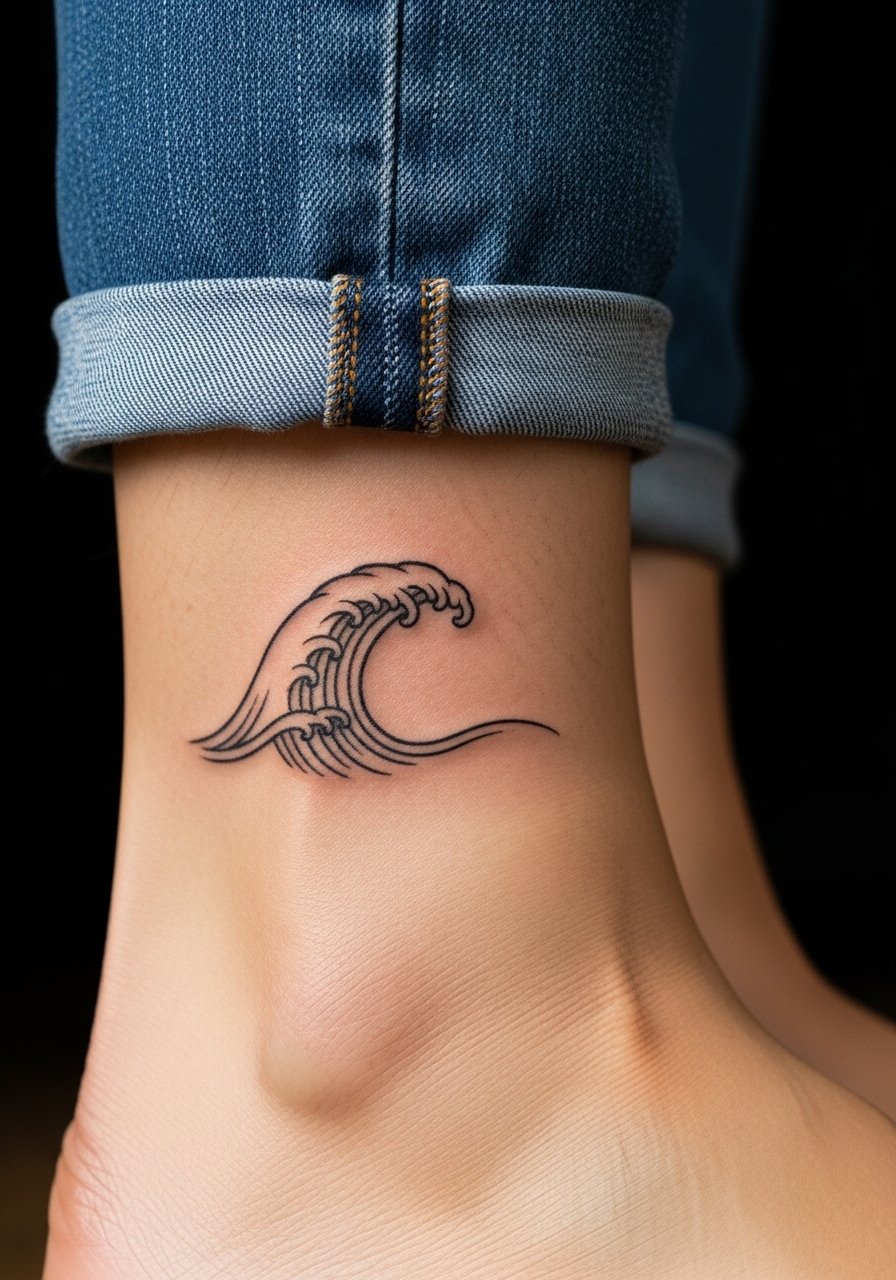
Ankle tattoos are small and the skin movement from footwear can stress healing. Ask for slightly thicker line weights for wave elements so curves hold. People often want hairline strokes on the ankle then end up with blur from friction with socks and shoes. The session is short but expect higher touch-up probability. For showing this design cuffed slim jeans or a sneaker look keeps the vintage vibe intact.
12. Bold Opaque Skull Cover-Up on Calf
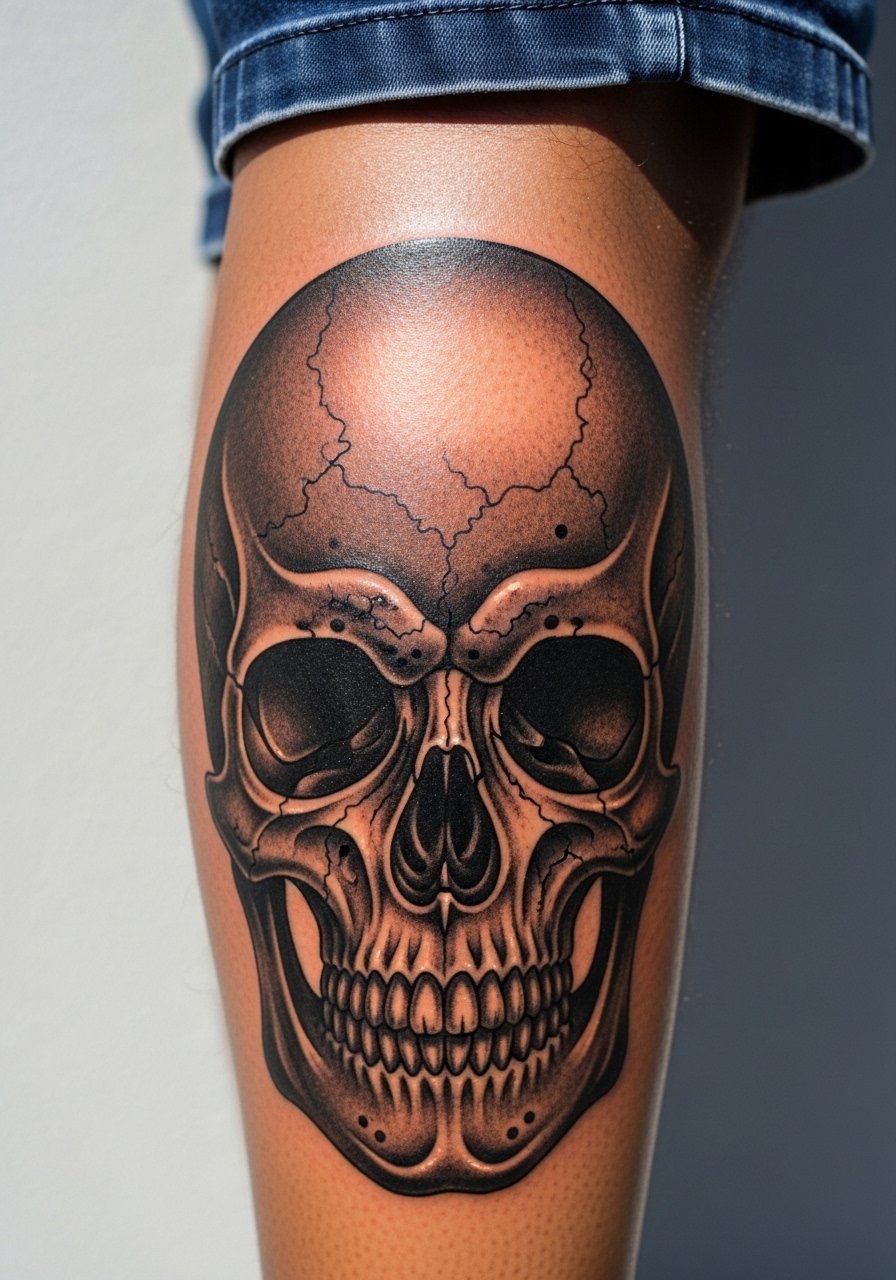
Cover-ups need solid opacity to mask previous pigments. Tell your artist what the old piece looks like and leave design freedom for maximal coverage rather than trying to replicate the old art. Packing this much ink can be intense and will need staged sessions so the skin recovers. Calf tissue handles coverage well but expect soreness. For showing it off pick cuffed bootcut jeans or sandals so the calf reads clearly. Plan for at least one touch-up to even out dense fields.
13. Ornamental Filigree Along Collarbone
Delicate ornamental work on the collarbone looks vintage when scaled to match bone contours. A frequent mistake is centering a symmetrical piece on an asymmetrical collarbone which makes it read off-balance. Ask for asymmetrical tweaks that follow your bone lines. The sternum-adjacent skin can be sensitive so plan shorter passes. For outfit pairing use strapless or V-neck tops like a strapless bralette so the filigree sits unobstructed.
14. Abstract Swirl Anklet Tattoo
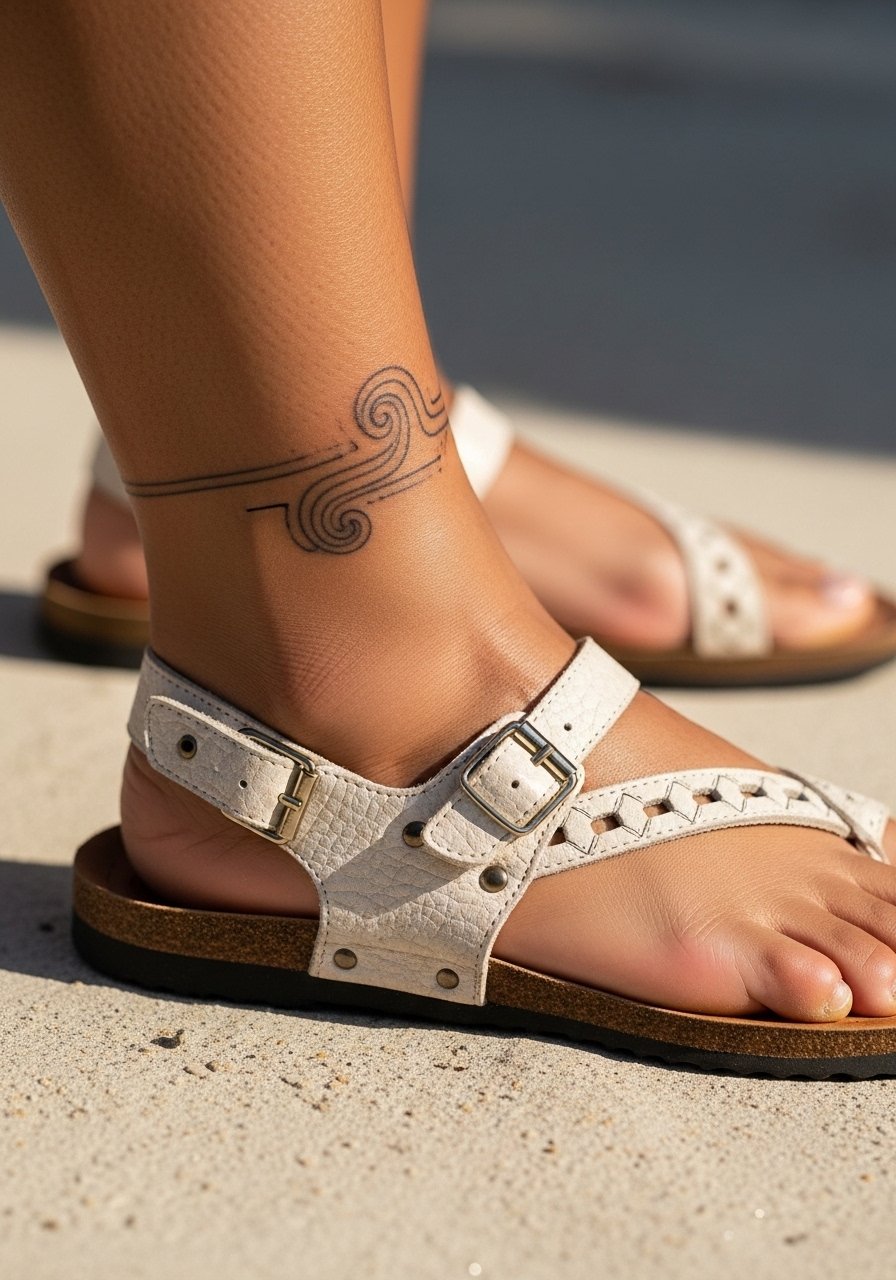
Anklet work is small but exposed to soap and friction, which affects healing. Ask for slightly bolder curves to survive repeated movement and washing. The session is brief and the pain is low compared with ribs, but the chance of early blurring is higher. A common oversight is forgetting to protect the area from tight socks during the first week. For showing it off choose sandals or cropped pants to make the swirl visible.
15. Negative Space Floral Ribcage Band
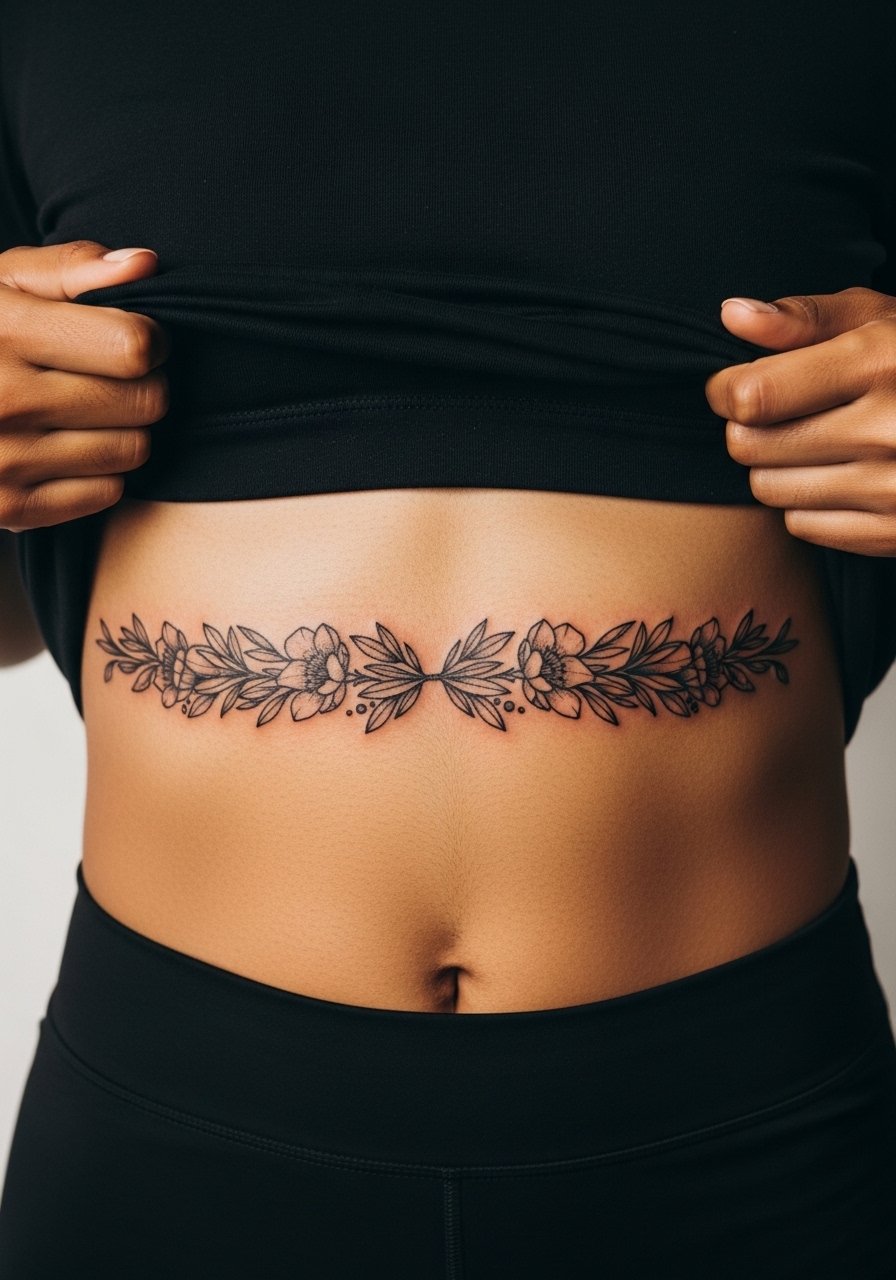
Ribcage work ranks high on pain charts but looks rewarding when done with proper spacing. Artists disagree openly about fine line on ribs. One camp says the skin stretch blurs lines within two years. The other camp says careful depth and spacing can keep lines crisp. Ask your artist to explain which approach they use and why. Sessions are taxing so plan breaks, and avoid very tight bands which trap moisture during healing.
16. Micro-Realism Inner Bicep Portrait
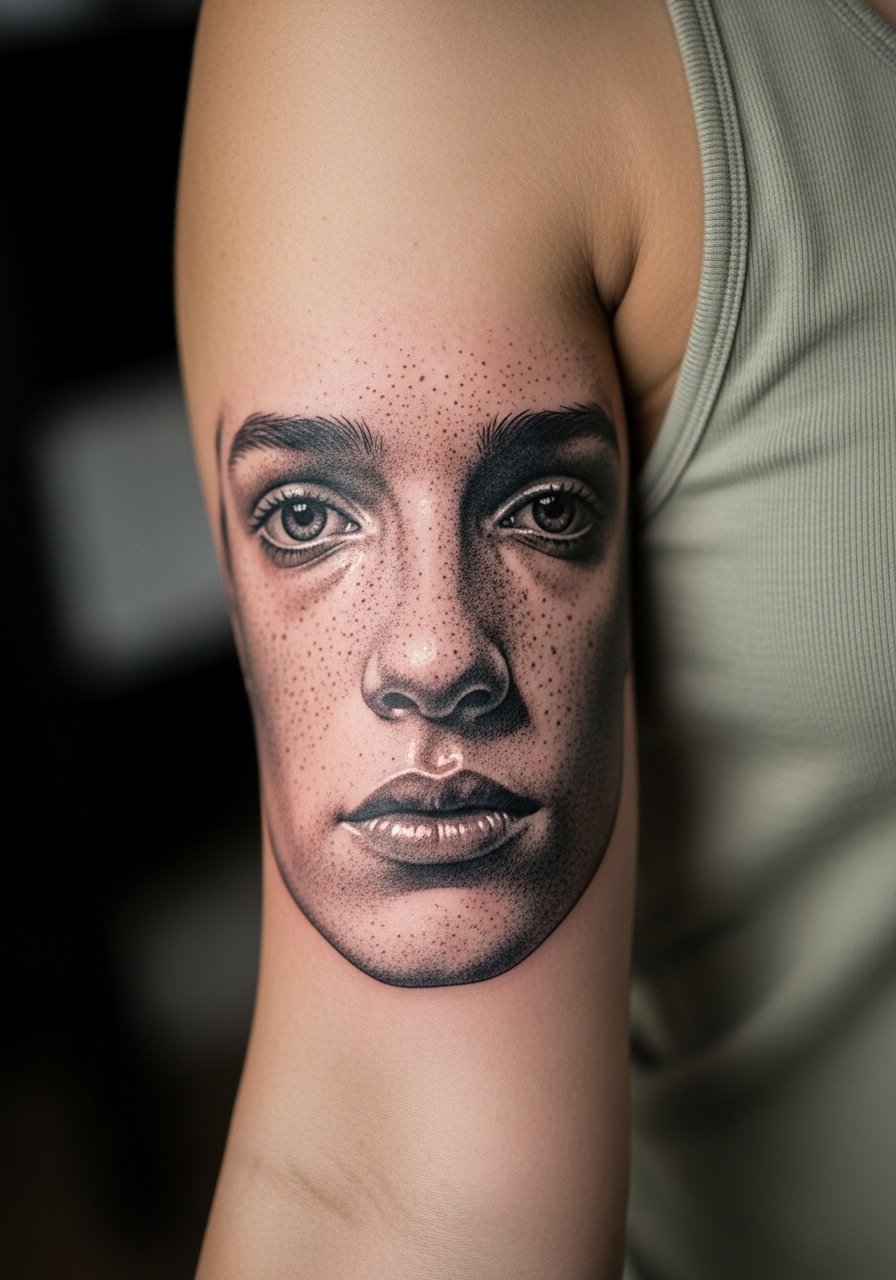
Inner bicep portraits can retain detail if scaled correctly. The error is demanding facial micro-detail at too-small a size which turns into blotches as it heals. Tell your artist the scale you expect and ask to see healed examples on similar skin tones. Sessions may be split due to sensitivity. For the session wear a loose tank top so the artist has clear access and to avoid fabric rubbing during healing.
17. Stippled Ornamental Back Panel
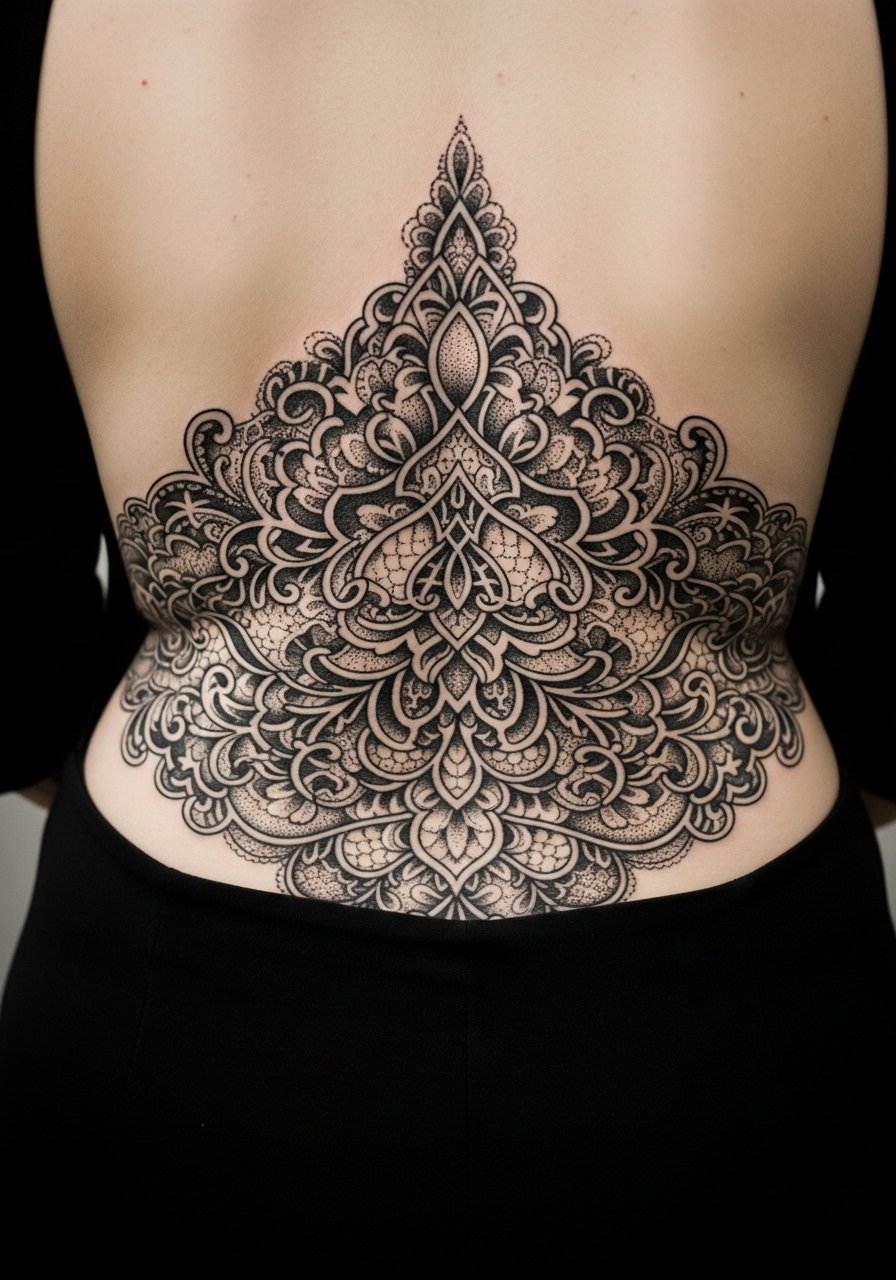
Back panels allow large-scale stippling that reads as texture from afar. Ask the artist to map negative zones that will breathe when you move. The common mistake is filling every inch which makes the piece heavy and hard to balance with clothing. Sessions are long and often require multiple appointments. For showing it off choose low-back tops or backless tanks so the panel is revealed without competition.
18. Minimalist Linework Crown on Finger
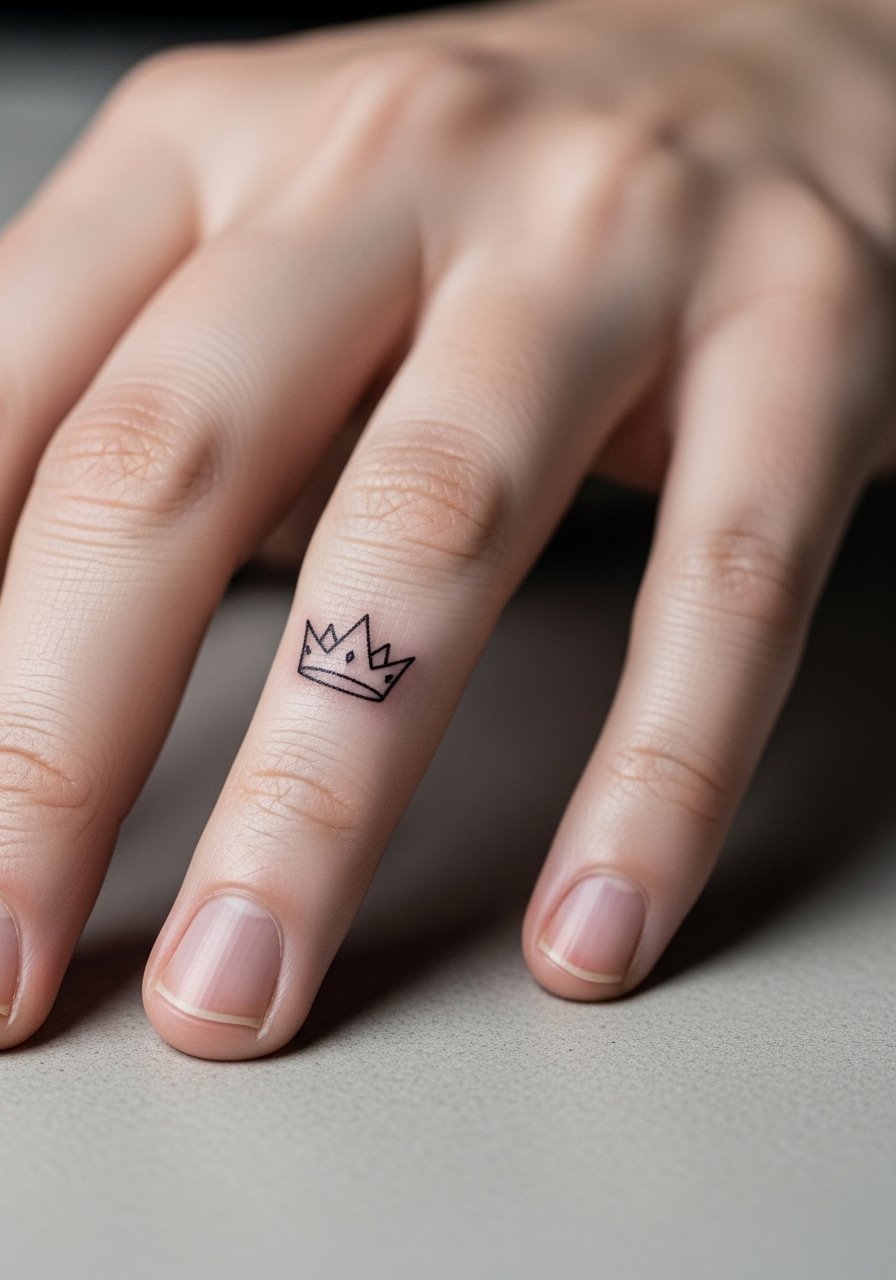
Finger tattoos fade fastest due to washing and use. Ask for thicker lines and accept higher touch-up frequency. A common mistake is treating finger ink like wrist ink where skin moves less. Sessions are quick but expect touch-ups within a year. For care after the session minimize friction and consider jewelry that does not rest on the tattoo while it heals.
19. Vintage Embroidery-Inspired Fractal on Calf
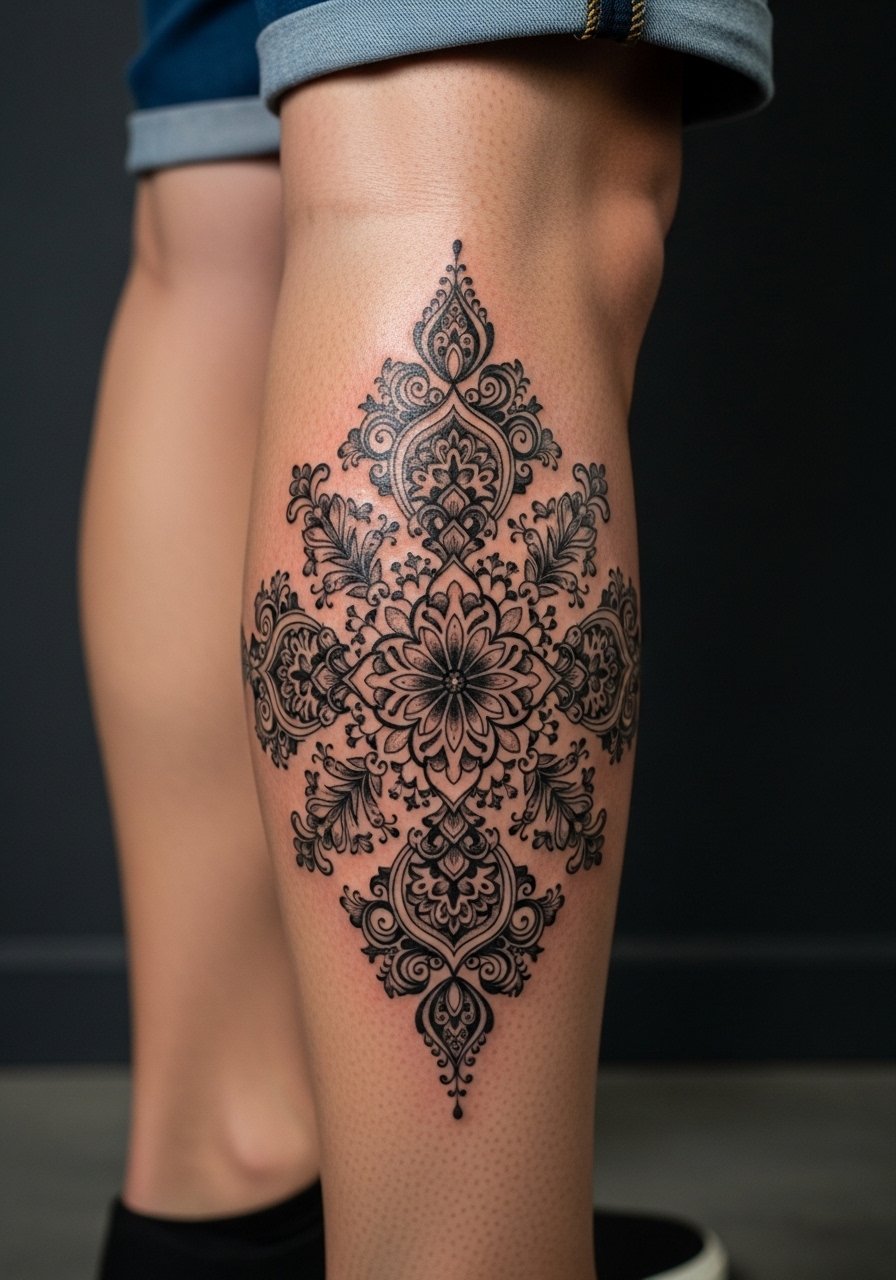
This Spanish textile-inspired fractal plays well on the calf where curves allow the pattern to stretch. Tell your artist you want textile references as a guide but translated into bold fills and clear negative space. Overcrowding tiny repeats leads to early softening. Sessions are moderately long but the calf tends to heal reliably. For showing off choose cuffed slim jeans or pulled-up athletic socks.
20. Solid Black Ribcage Panel with Cutouts

Solid rib panels require heavy packing which increases pain and healing time. Artists again split on pacing. Some favor long single passes for saturation. Others prefer staggered sessions to let the skin recover. Both can succeed if the artist has a history of dense fills. The design needs planned cutouts large enough to avoid closing in. Expect multiple sittings and plan wardrobe that allows simple access, like a sports bra.
21. Ornamental Dotwork Ankle Band
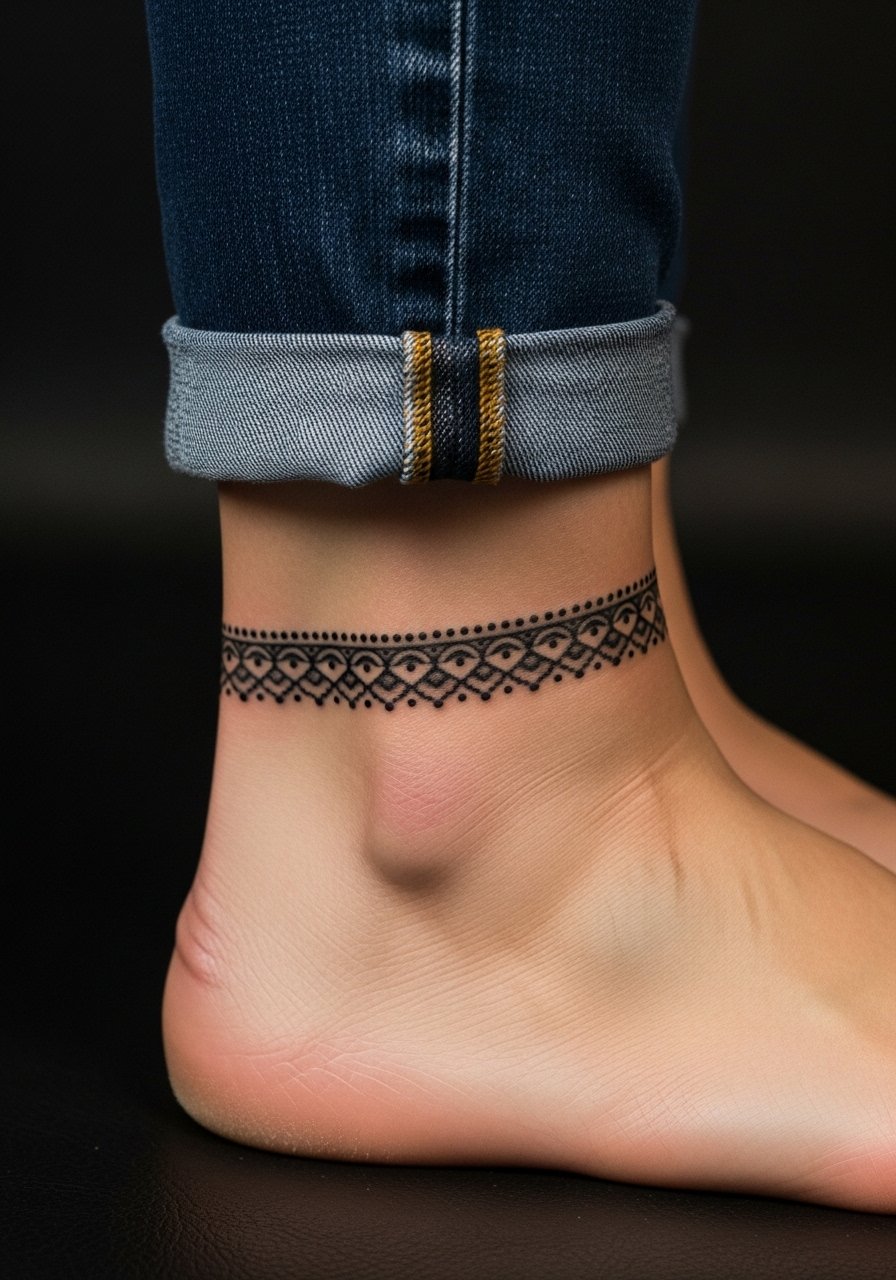
Ankle bands read vintage when spacing is open and dotted shading is restrained. Ask for dot gradients that create lightness rather than solid gray fields. The main mistake is overpacking dots to simulate shading which then heals into a muddled area. Sessions are short and pain is moderate. For showing off cuffed jeans and crew socks work well when you want a retro edge.
22. Geometric Calf Shield
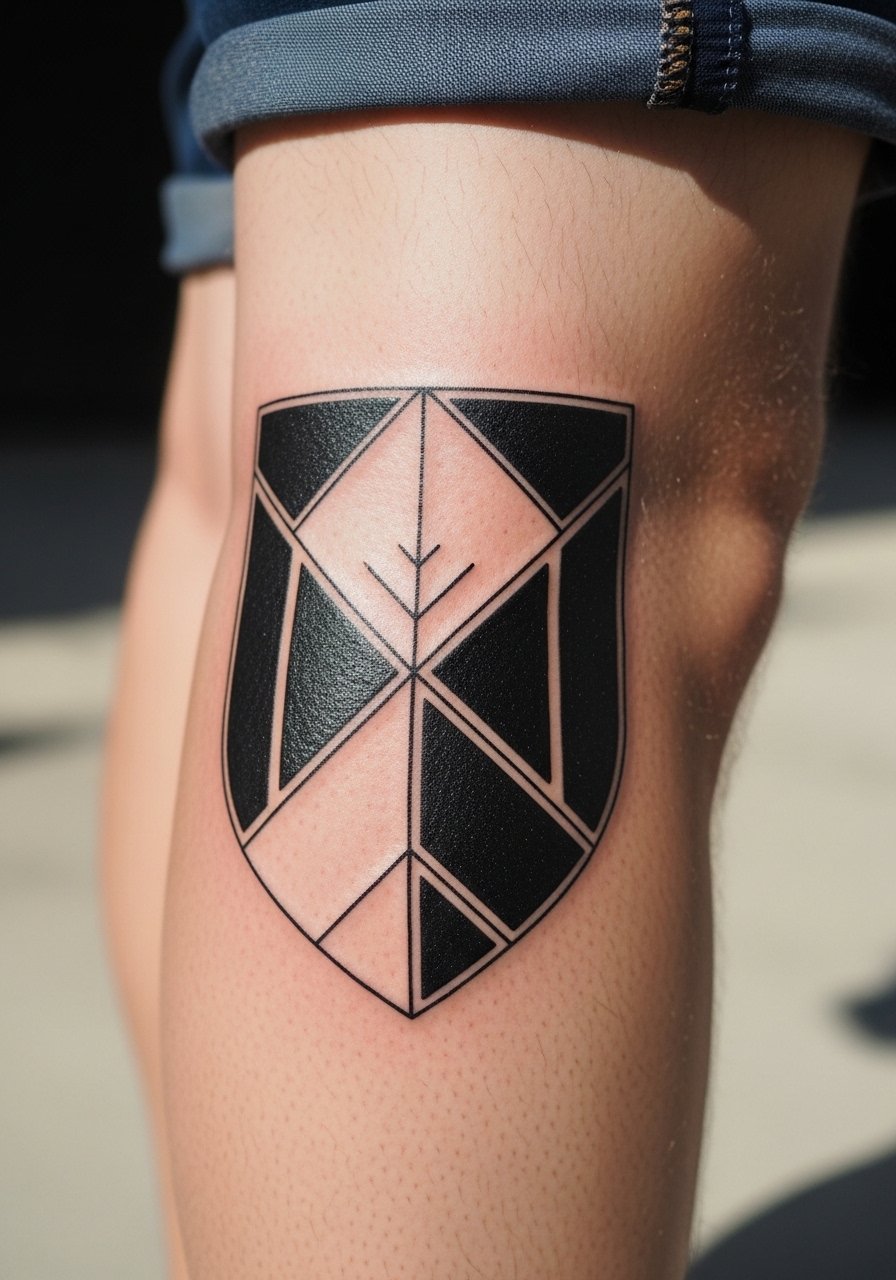
Calf shields let large geometric anchors hold up to time. Specify solid fills and crisp borders with spacing between repeating elements. A common error is stacking too many tiny elements within a shield which collapse visually over time. Sessions are long but calf tissue tolerates multiple passes. For showing off choose slim shorts or sandals to keep the composition obvious.
23. Collarbone Script with Ornamental Wings
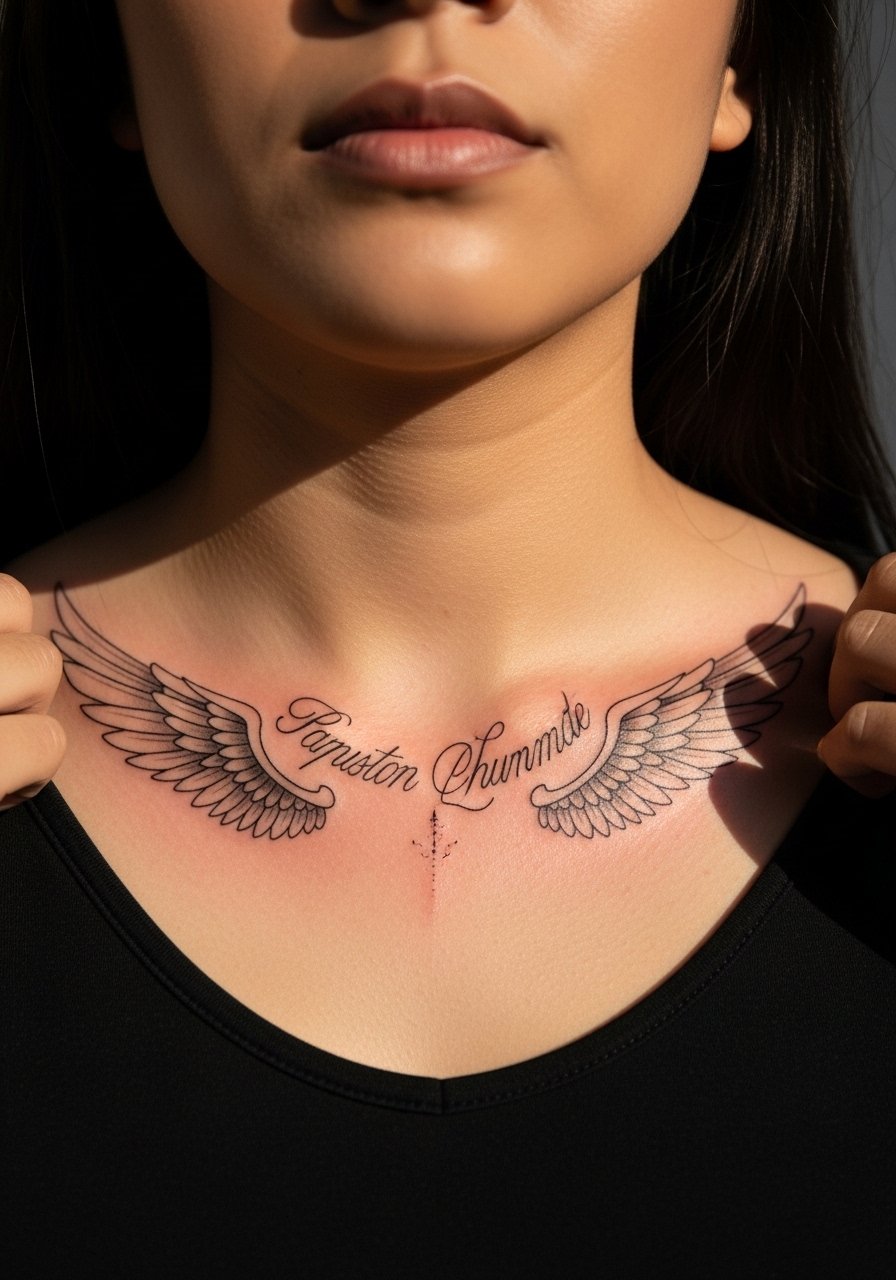
Script across the collarbone must follow the bone curve. Ask the artist to place words slightly off-center to match your anatomy. Small text on this area can stretch and blur so request thicker lettering. Sessions are short but the clavicle region is sensitive to shallow needles. Pair with a matte silver chain necklace that sits below the text when wearing necklines that reveal the work.
24. Patchwork Thigh Sleeve with Negative Space
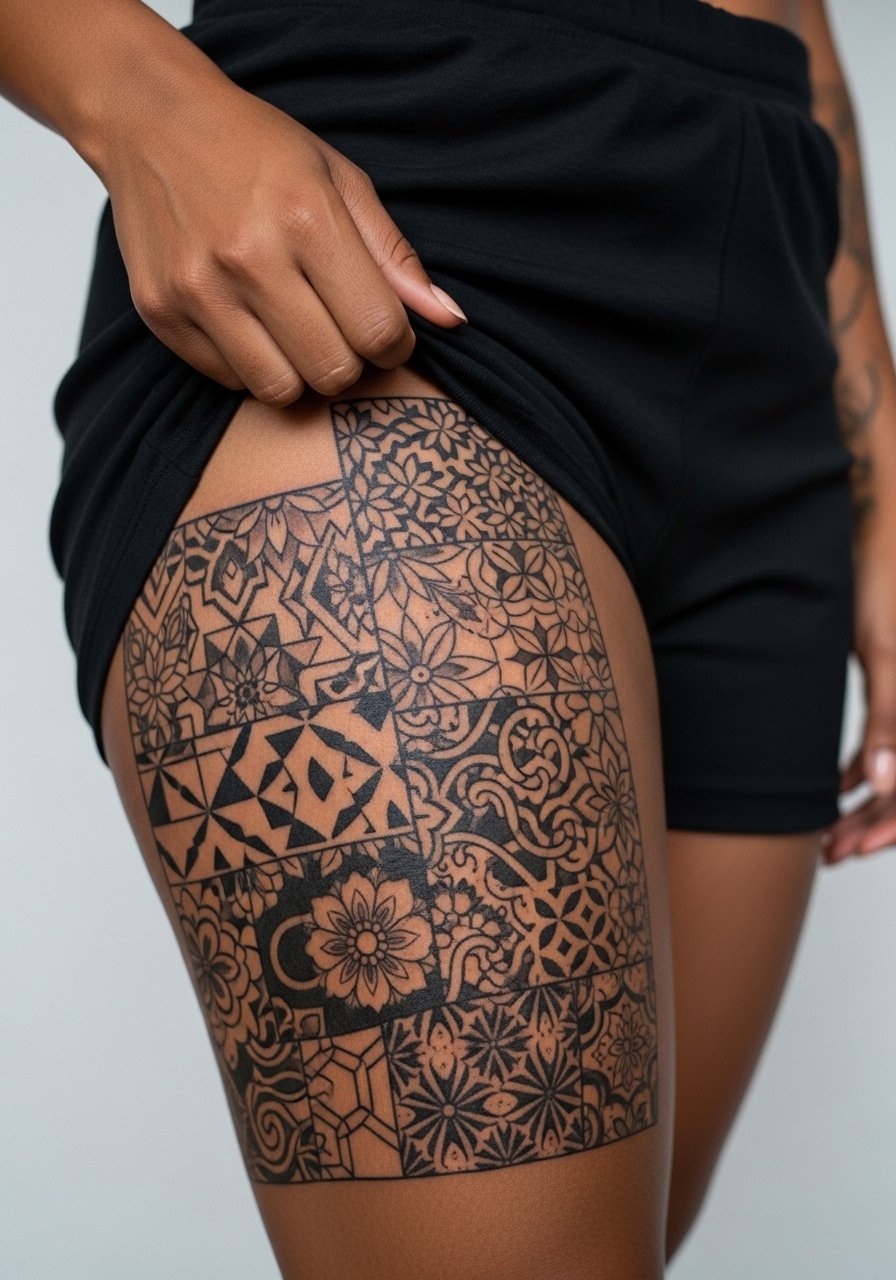
Thigh sleeves let you mix motifs while keeping negative channels between patches. The mistake is filling seams without transitional breathing room which makes future additions awkward. Ask for modular borders now so you can add panels later without visual collisions. Sessions are long and usually staged. For showing off tailored shorts rolled high or slim joggers highlight the patchwork.
25. Solid Neck Band Accent

Neck bands read bold but require caution if workplace visibility matters. The skin here can be tricky for even coverage, so ask about long-term visibility and whether touch-ups will be needed. Sessions are uncomfortable and need an experienced hand. For session wear a wide-neck shirt you can pull aside. Think about career context before committing.
26. Inner Wrist Chain-Link Minimalism
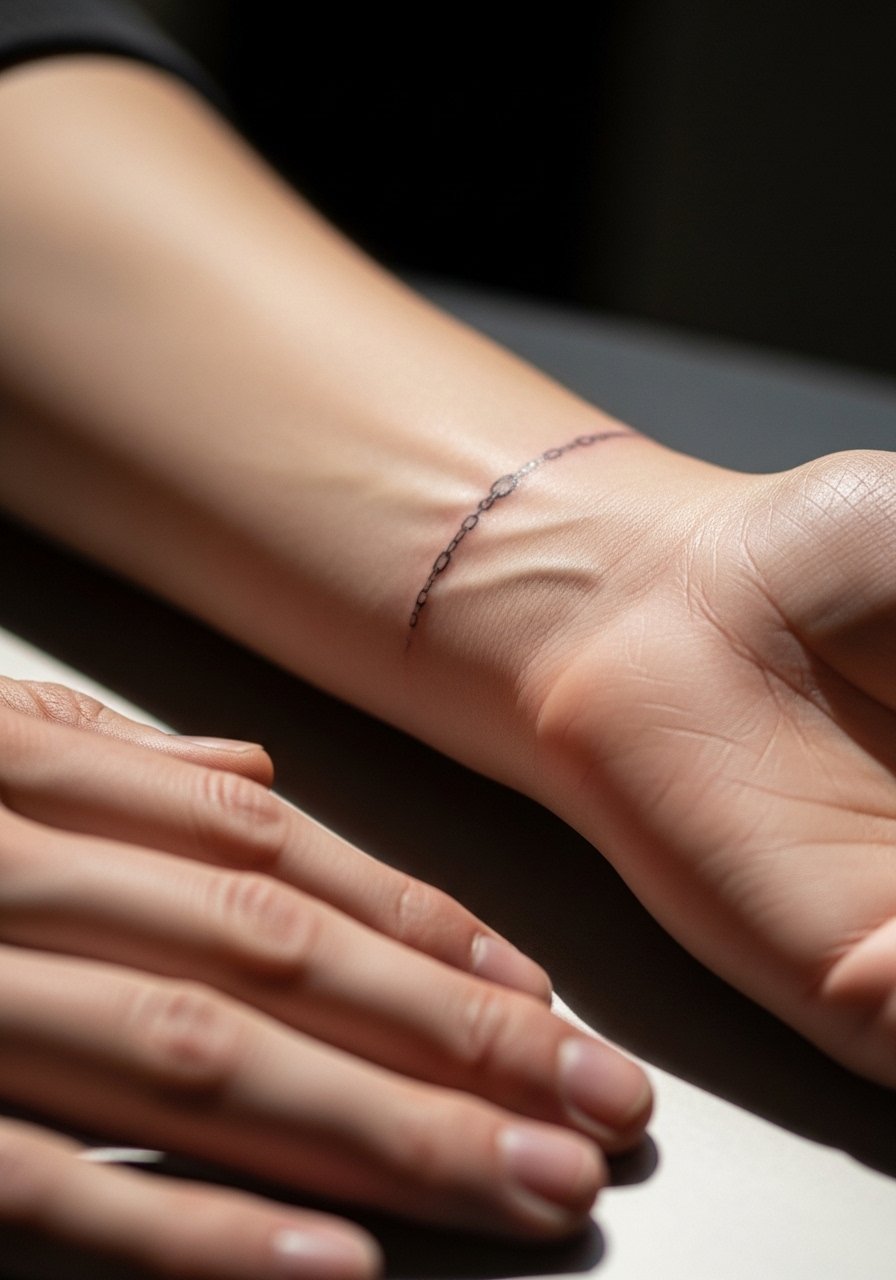
Inner wrist chain-link looks sleek but thin links can blur from frequent wrist motion. Ask for slightly stronger contour lines and ask the artist about spacing. The session is quick with sharp sensation. For showing off a minimalist effect wear dark linen shirt cuffs rolled up or a chunky leather wristband to frame the area when not healing.
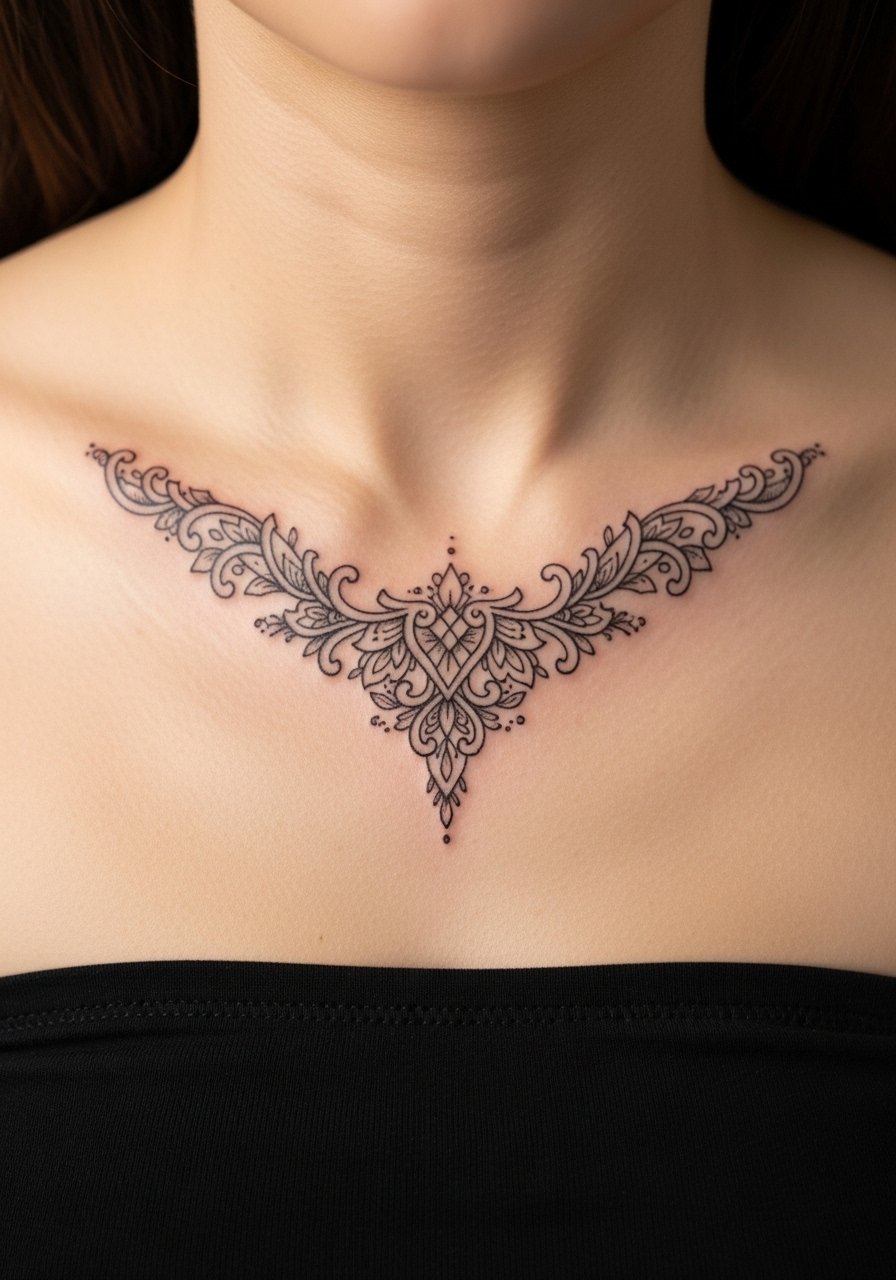
27. Collarbone Ornamental Crescent with Skin Gaps
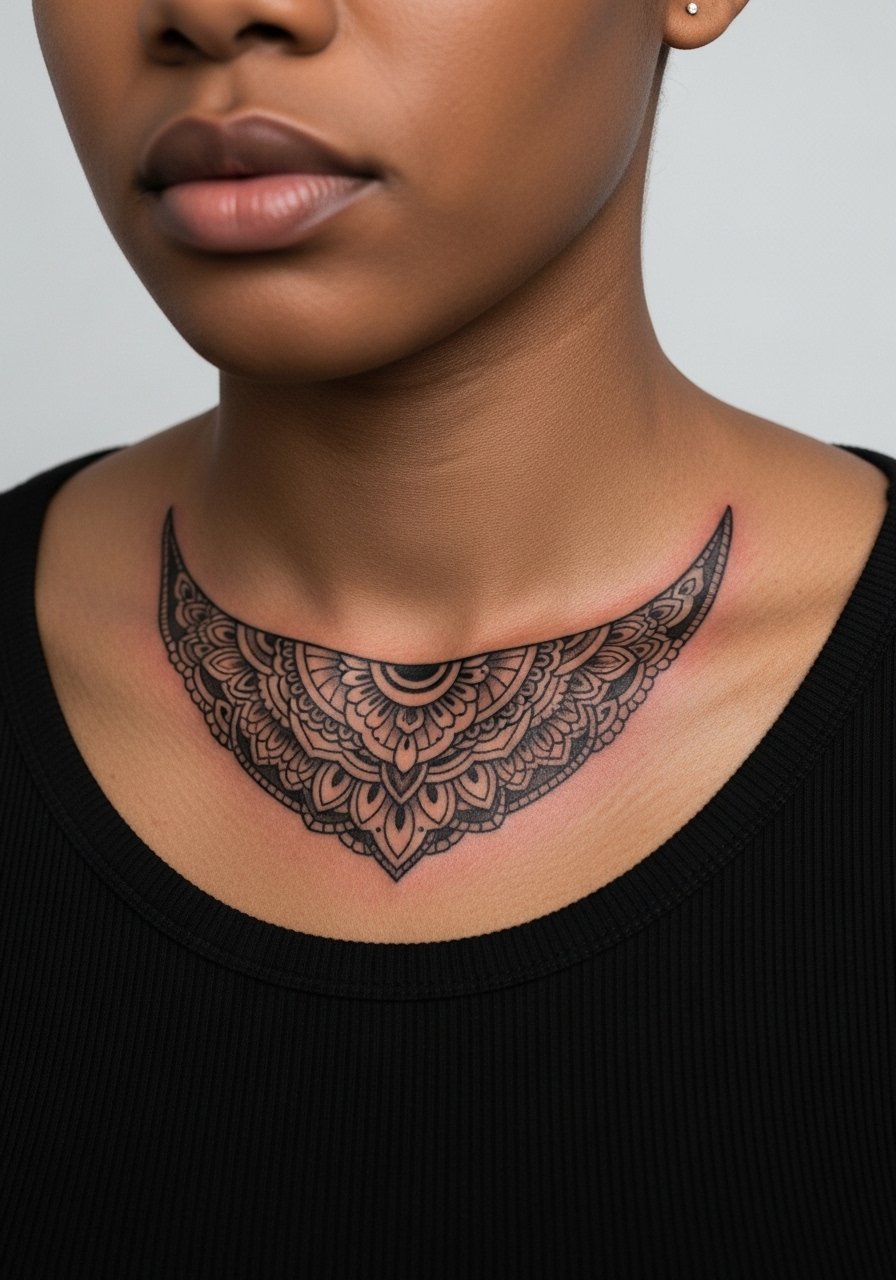
Crescent ornaments that use skin as highlights work on collarbones when the negative shapes are generous. A frequent mistake is cutting the gap too small so it disappears as the ink settles. Ask for a plan that preserves generous gaps and for an artist who shows healed examples on similar skin tones. Sessions are moderate and a light touch-up at year two is normal if edges feather. For show-off pairing choose neutral V-necks that let the curve breathe.
Frequently Asked Questions
Q: How much does vintage black work generally cost per session and by size?
A: Expect session ranges from about 200 to 4,000 per project depending on size and style. Small pieces like wrist bands or ankle dots usually fall at the lower end. Medium forearm or calf work sits in the mid-range. Large blackout sleeves and full back panels often require multiple long sessions, so plan total spend across appointments rather than a single number.
Q: Will blackwork fade unevenly on darker skin tones and how can I avoid that?
A: I have seen uneven fading on darker skin when artists use very fine details rather than bold weights. For darker tones ask for thicker linework, clearer negative spaces, and to see healed examples the artist has done on similar skin. A test patch is a good idea if you are worried about subtle textures.
Q: Does blackout tattooing hurt more and does pacing affect the result?
A: Yes, blackout sessions pack pigment repeatedly which increases discomfort. Artists split on pacing. Some do longer single passes to lock saturation. Others prefer staged passes to give skin time to calm. Either can work if the artist has experience with heavy fills. Budget for multiple sessions and follow pre-session rest and hydration advice.
Q: What should I ask during consultation to avoid a design that blurs or needs early touch-ups?
A: Ask to see healed photos on similar skin tones and ask the artist how they handle spacing and line weight. Ask specifically about touch-up timelines and how they plan sessions. If you want fine detail, ask whether they recommend increasing size or space for longevity.
Q: Which wardrobe choices help vintage blackwork show well after healing?
A: For forearm and wrist pieces rolled sleeves and dark linen shirts highlight linework. For shoulder and collarbone areas off-shoulder tops and wide-neck shirts reveal shapes without competition. For thighs pick tailored shorts or slim joggers. Where appropriate use links like a loose button-down shirt for session ease and to keep fabric away from the tattoo during the appointment.
