
Fine line trends are everywhere, but what lasts is not always what looks best on day one. Blackwork and slightly heavier line weights often outlive the ultra-delicate pieces that get the most saves. If you want designs that read like a vintage band relic in five years, think about spacing, placement, and what will survive summer sweat and daily friction before you book. Below are 17 vintage one direction tattoo ideas that balance era-accurate charm with long-term wear.
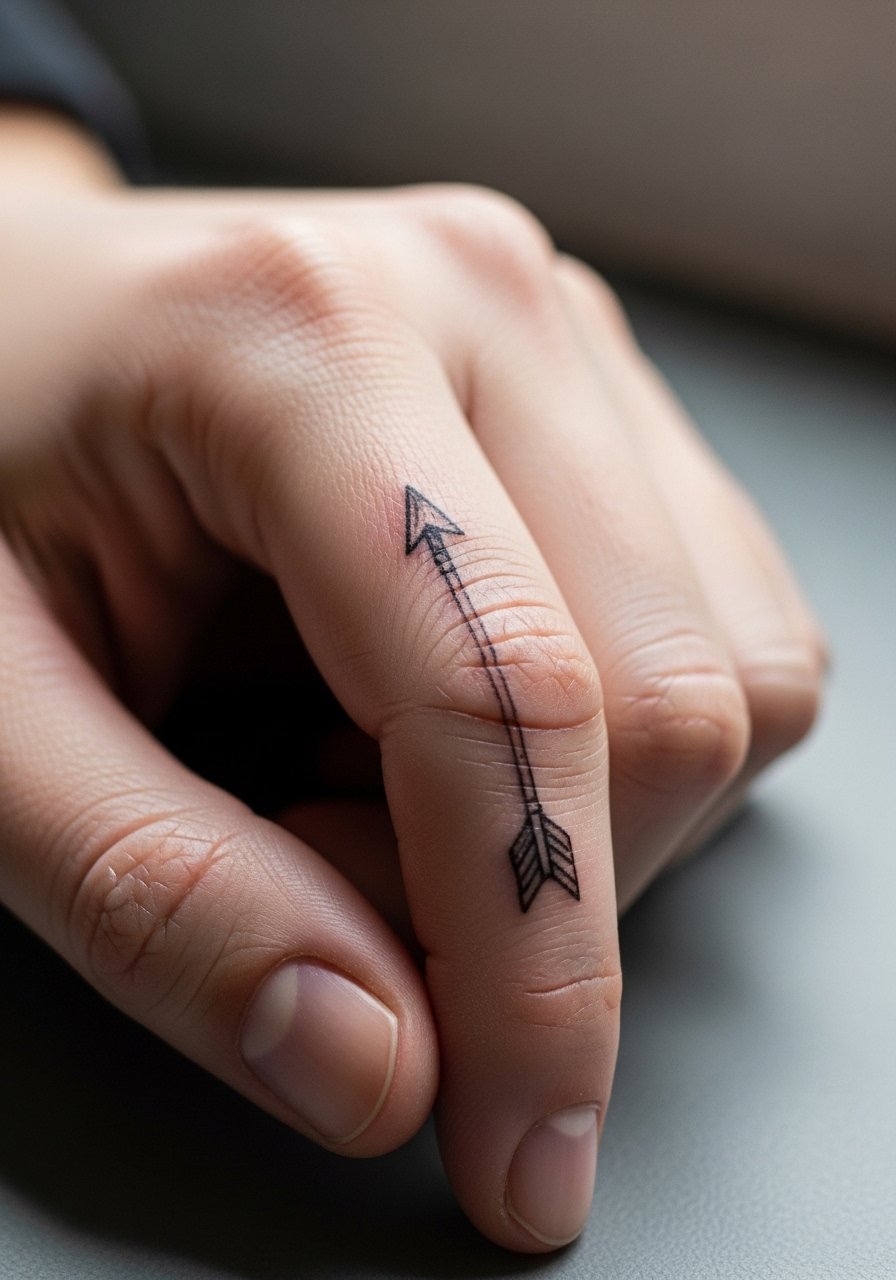
1. Fine Line Arrow on Inner Forearm
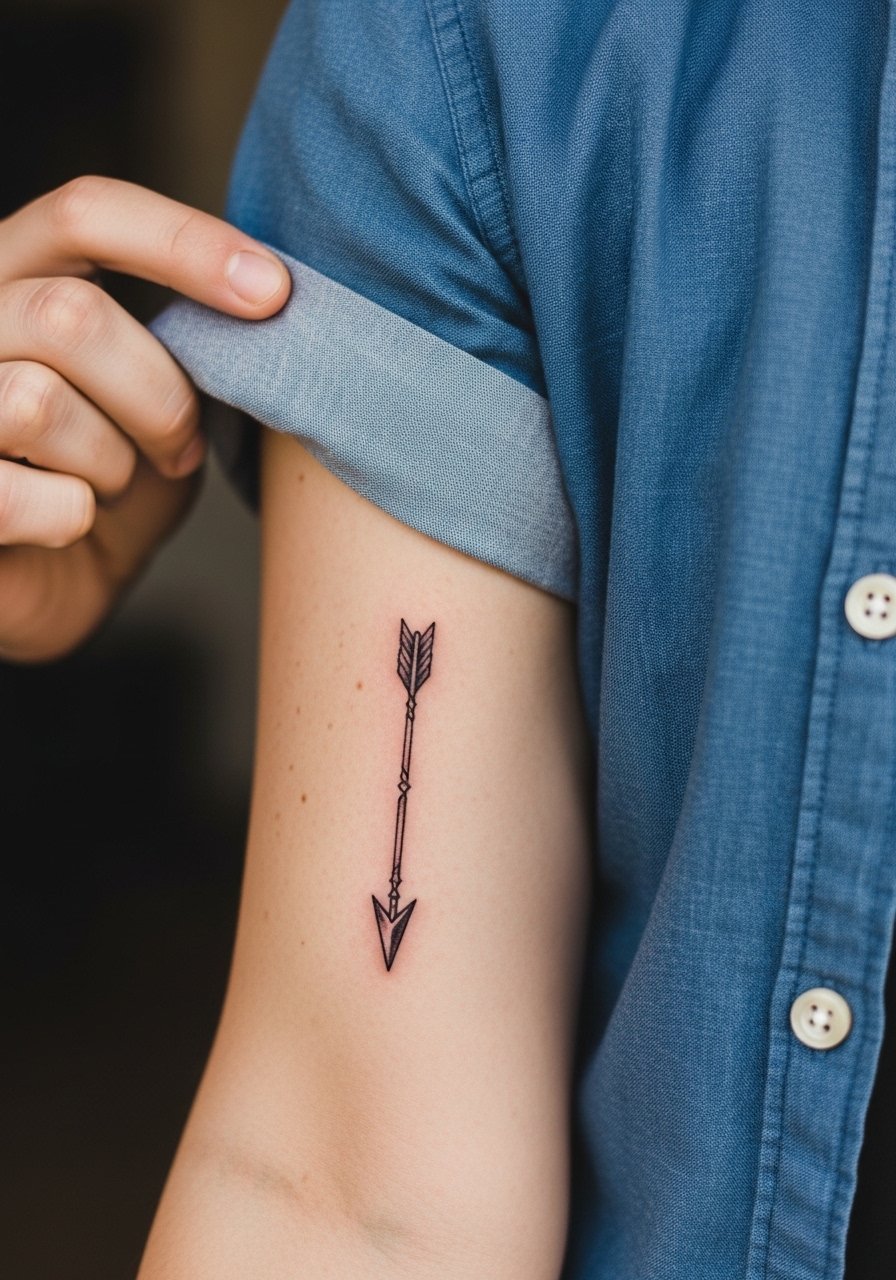
I see this exact arrow on forearms at shows and meetups, and the ones that last are spaced a little wider than the Pinterest versions. Tell your artist you want one-point line weight and a faint distressed texture so it reads vintage without overcrowding. Common mistake is going too small and tight, which causes merging in dense areas by year three. Pain is low for most people, and a single 30 to 60 minute session usually does it. Pairing tip for showing it off works well with a rolled cuff chambray shirt and a thin silver chain bracelet on the opposite wrist.
2. Micro "28/10" Behind the Ear
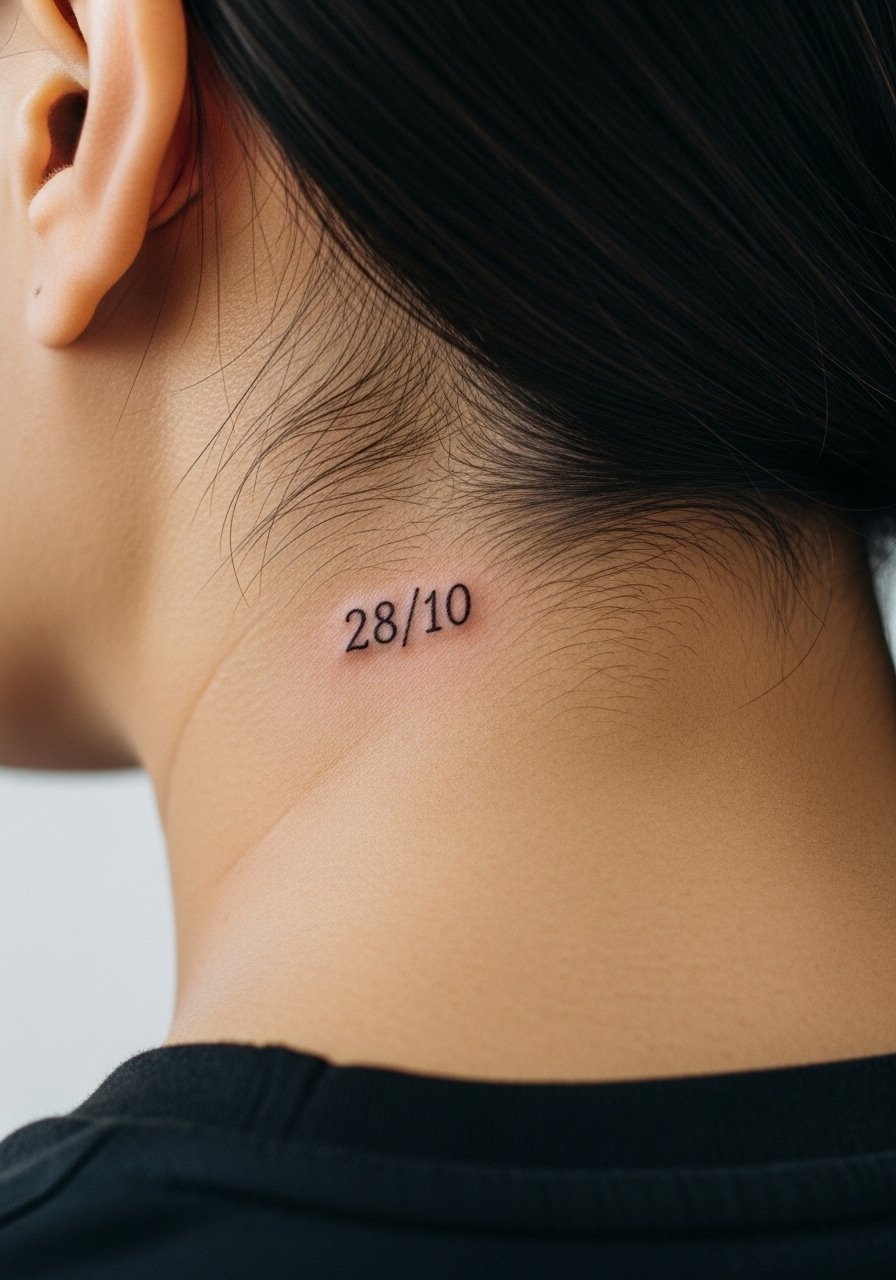
This micro date is a quiet nod to a key concert night. Because the spot is tucked below the hairline it reads private and it ages differently than finger work. Ask for slightly bolder numerals than you think you need so the digits keep form at two years. The session is quick and can feel scratchy because the skin is thin. Expect touch-ups earlier than the collarbone or upper arm. Behind-the-ear tattoos need precise stencils that sit flat on moving skin. If you want it visible at shows, let the stylist tuck short hair behind the ear for photos.
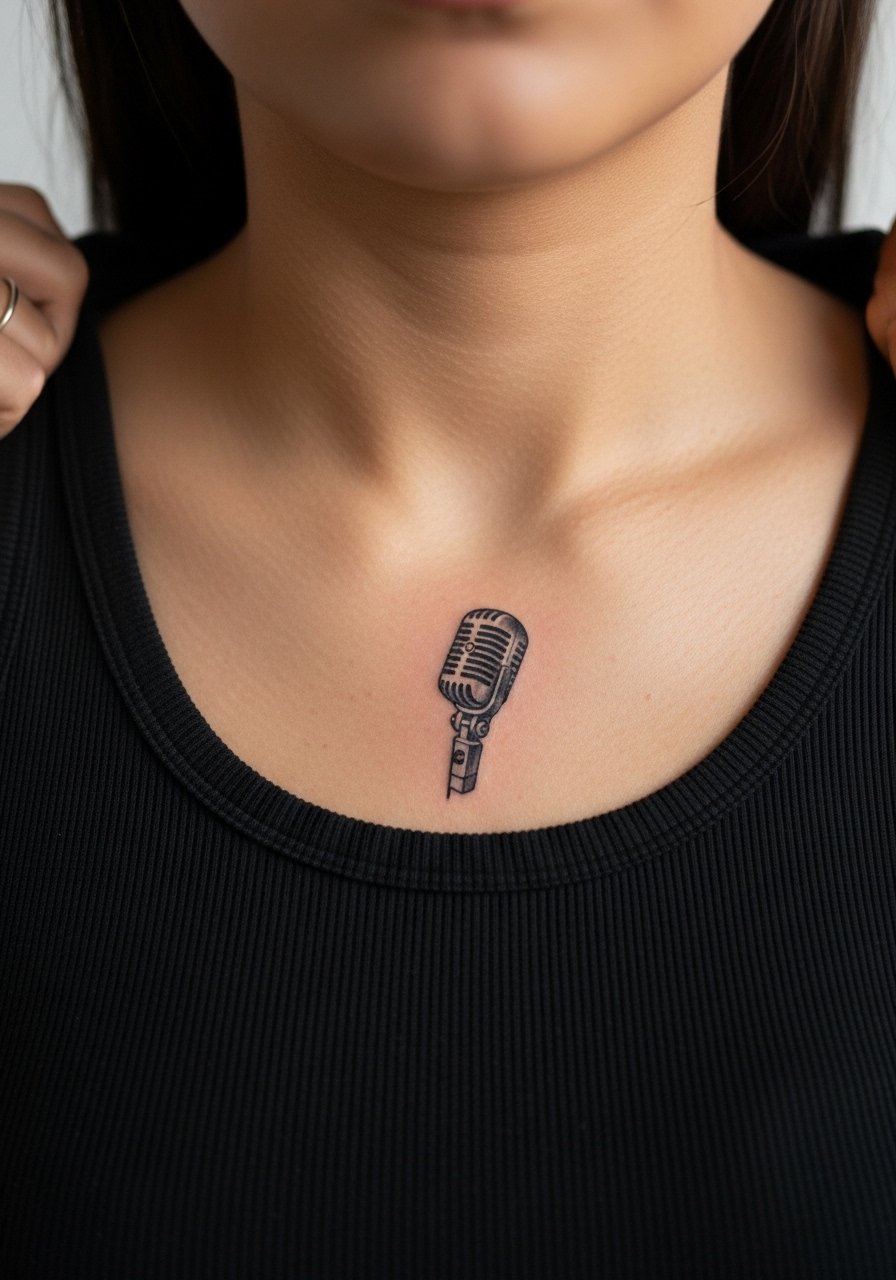
3. Retro Microphone Outline on Collarbone

A collarbone mic is a clean way to reference the band's stage beginnings. The area can stretch with muscle changes, so tell the artist to orient the mic horizontally and keep the width slightly larger than a phone camera frame. Pain is moderate and the session is 45 to 90 minutes depending on shading. For summer show-offs, an off shoulder blouse and a delicate chain necklace frame the mic without covering it. A common error is placing the design too close to the neck where clothing rubs during healing.
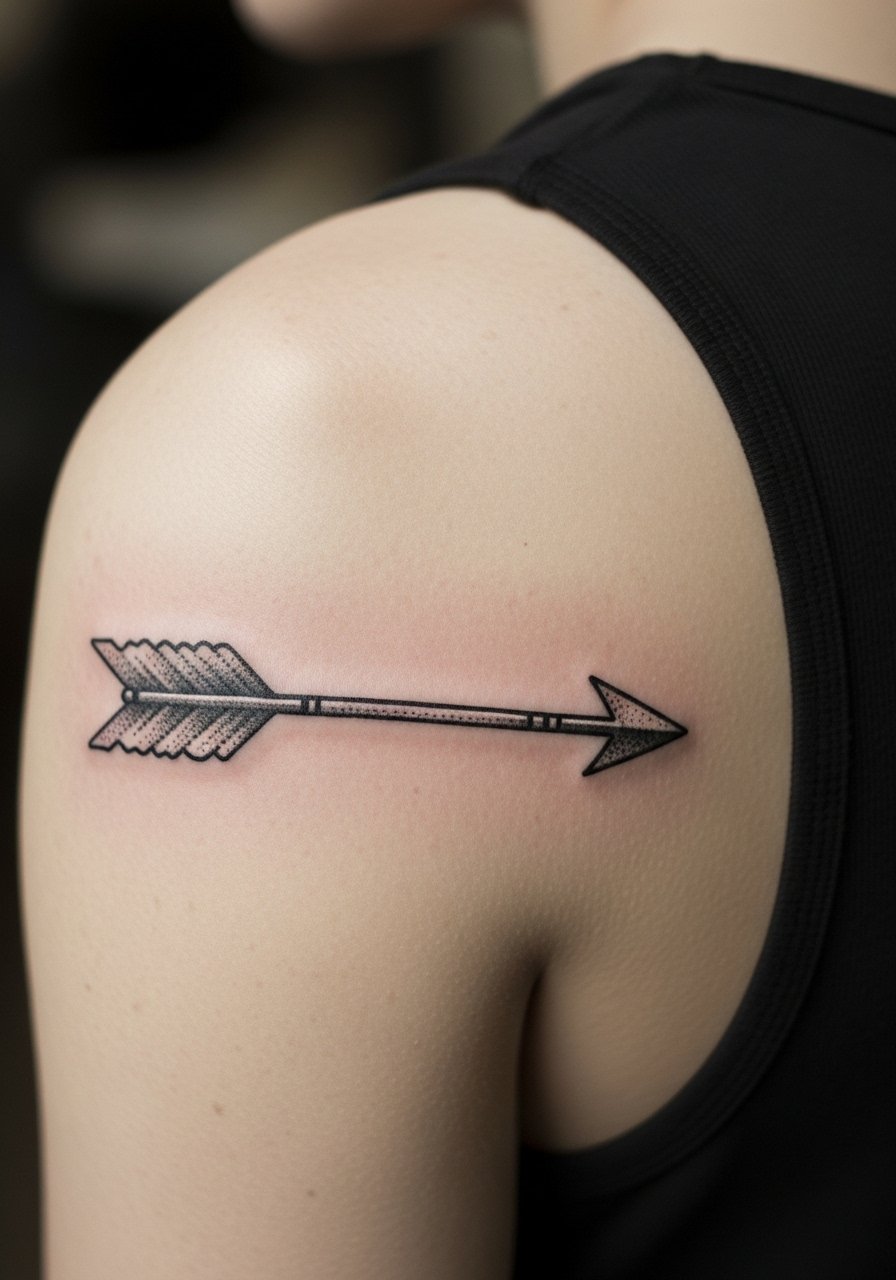
4. Distressed Arrow Wrap on Outer Forearm
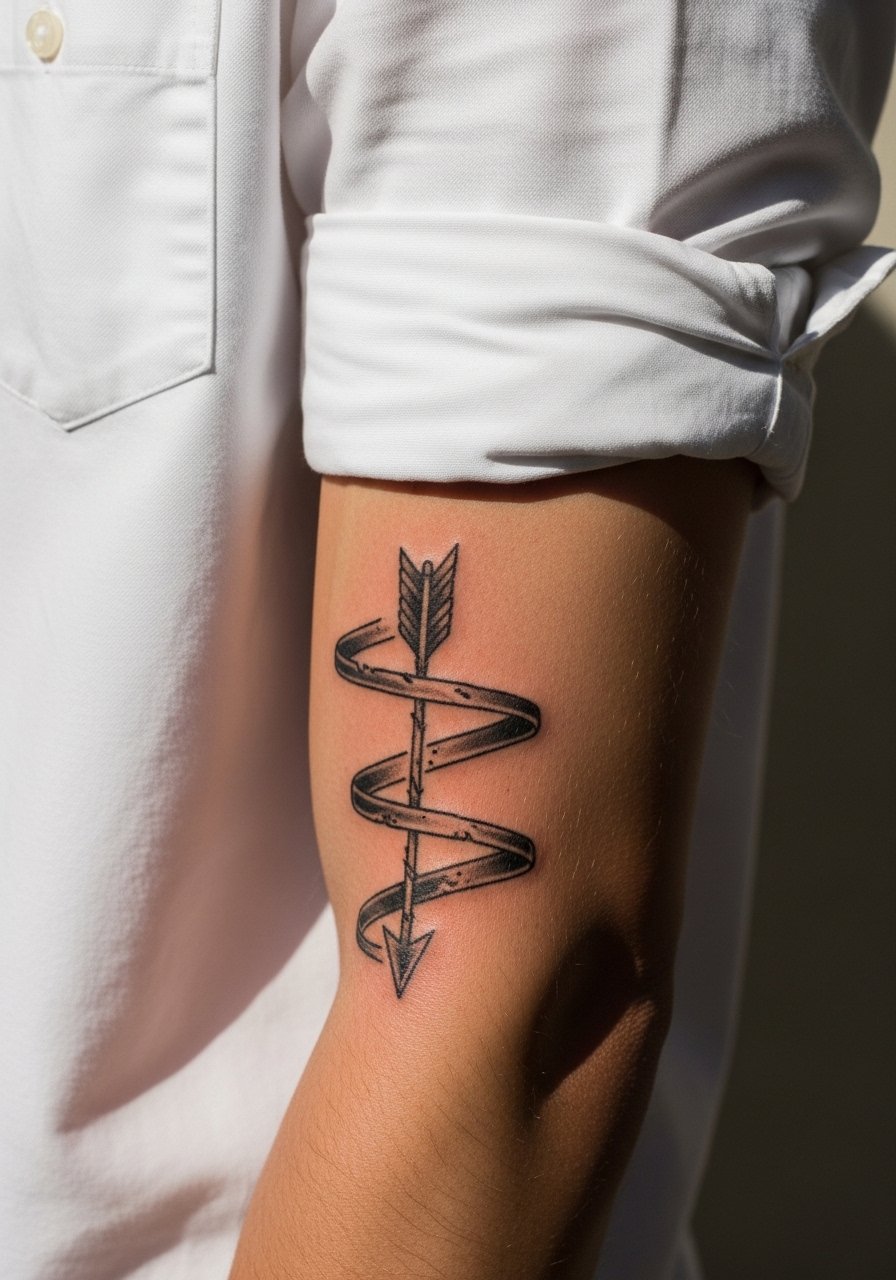
The wrap arrow borrows the band name symbolism and gives it a weathered look. It is better executed slightly thicker than a pure fine line piece because outer forearm skin takes sun and friction. Tell your artist you want solid black anchors with stipple shading for a vintage fade effect. This placement has low to moderate pain and is a one-session piece for most sizes. Wear a oxford button down shirt with sleeves rolled to show it off and avoid tight long sleeves the week after the session.
5. Faded OTRA Tour Banner on Upper Arm

This neo-traditional banner leans into tour nostalgia and looks intentional when color is muted. The upper arm can carry 1-2 sessions for larger banners and color accents. Tell your artist you want washed color rather than saturated fills so the piece reads vintage after healing. Common mistake is overly bright fills that look shiny then age unevenly. Touch-ups are normal at year two for color refresh. Show-off pairing includes a fitted tank under a denim jacket cropped so the banner peeks when the jacket moves.
6. Minimalist Constellation Arrow Combo on Wrist
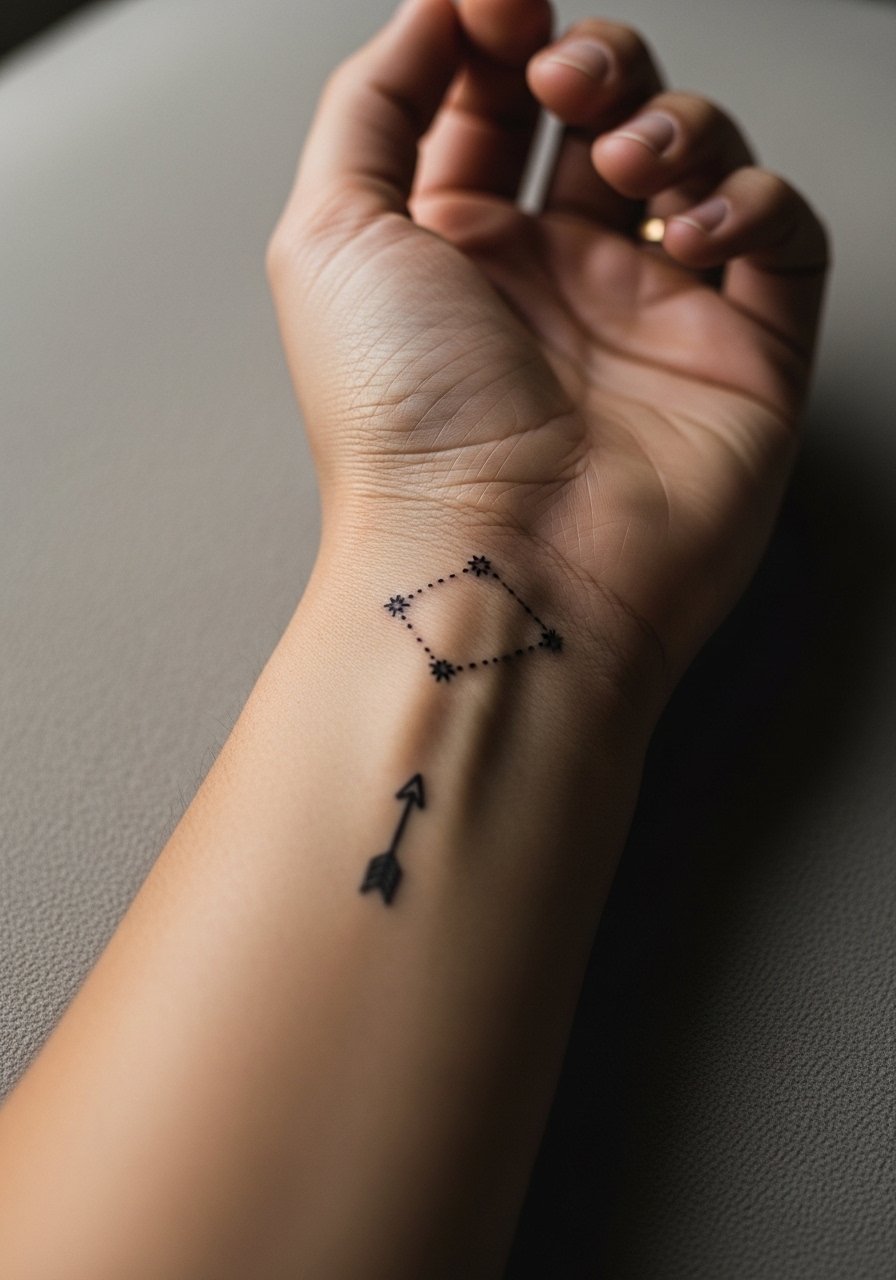
Wrist pieces are charming and fragile. I tell people that the wrist is a high-contact zone and fine line pieces need bolder spacing or scheduled touch-ups. For this constellation-arrow hybrid, ask for slightly thicker connecting stars and a fine black anchor line so the shapes hold after constant washing. Pain is low to moderate. Session time is often under an hour. A frequent mistake is picking ultra-thin dots that blur into a faint shadow by year two. During the appointment wear a sleeveless top or a loose tee to give the artist full access.
Studio Day Picks
The wrist, collarbone, and upper arm ideas above each demand different prep, so pack a few targeted items to make the session and first week easier.
- Tea tree balm, thin consistency. A lighter balm helps with wrist and finger pieces where greasier products can trap bacteria from hand contact.
- Japanese rice paper tattoo patches. Breathable patches work well in humid weather and for ankle or wrist tattoos that rub against socks.
- Aussie quick-dry aftercare spray. Spray formats reduce transfer on clothing for collarbone and upper arm pieces while keeping moisture balanced.
- Indie tattoo linen spray. Light antibacterial spray for pillowcases and shirts is handy when healing small forearm or chest tattoos.
- Aquaphor healing ointment. A thin initial layer helps lock moisture in the first 48 hours for fine line work without overly occluding the area.
7. Micro Finger Arrow with Distressed Fill
Finger tattoos are tempting for their visibility but they fade fast. I warn people that fingers face constant washing and friction. For a vintage look keep the arrow short and use a slightly heavier fill so the core shape survives at two years. The session is quick and pain is higher than a wrist piece. Expect touch-ups every 12 to 24 months. Common error is choosing thin script or micro details that disappear. If you want to show it off, pair with a minimalist ring stack instead of bracelets that can rub the area.
8. Ribcage Script: "Take Me Home" Hidden Line
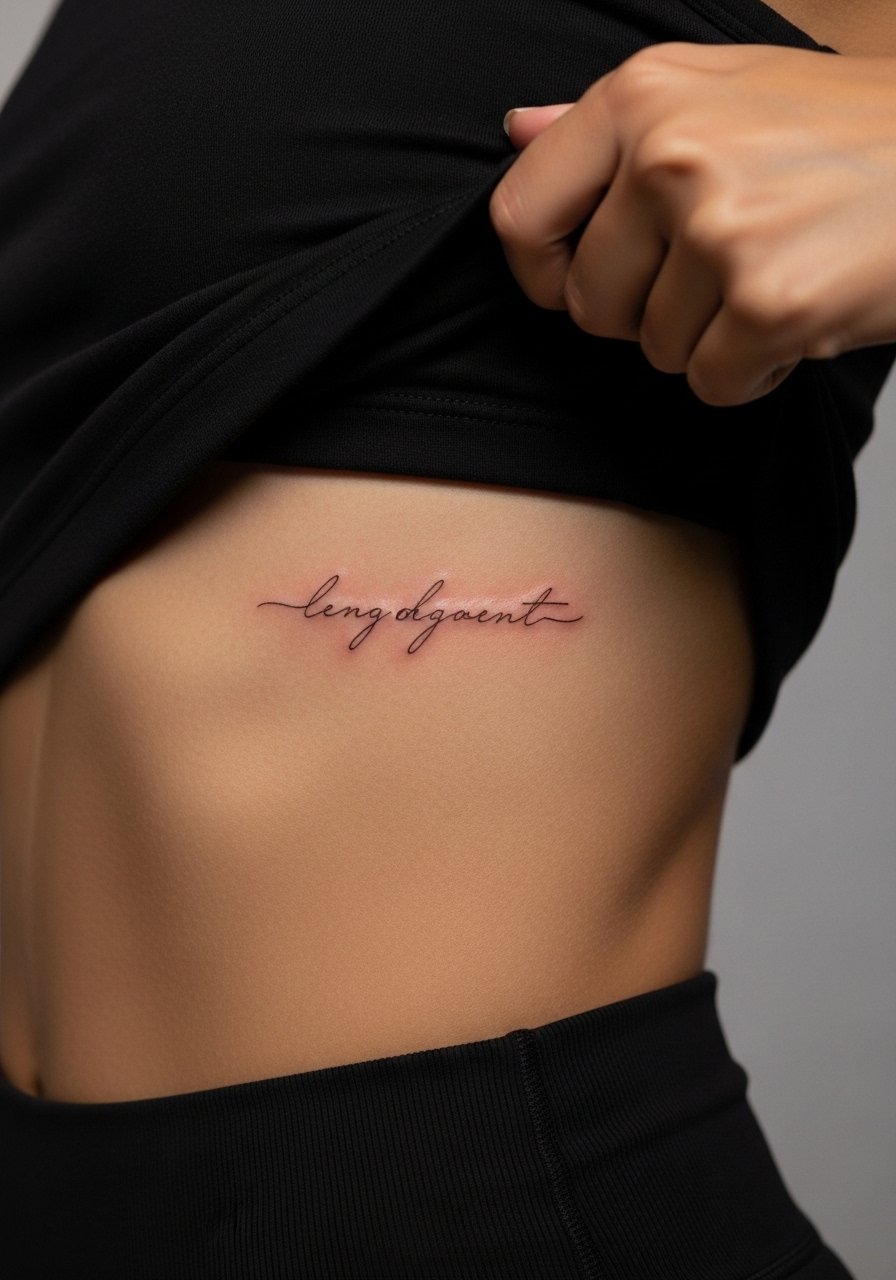
Ribcage work is intimate and drifts with body changes. The rib is high on the pain chart but holds spaced lettering well when the artist increases letter spacing. The unique advantage is concealment for jobs with stricter dress codes. A common problem is choosing tiny script which blurs with breathing and body shifts. If you want to keep the line delicate, plan for touch-ups and choose quotes with durable letterforms. For consults bring a sample of the exact font and spacing so the artist can adapt to the rib's movement.
9. Vintage Tour Date on Ankle
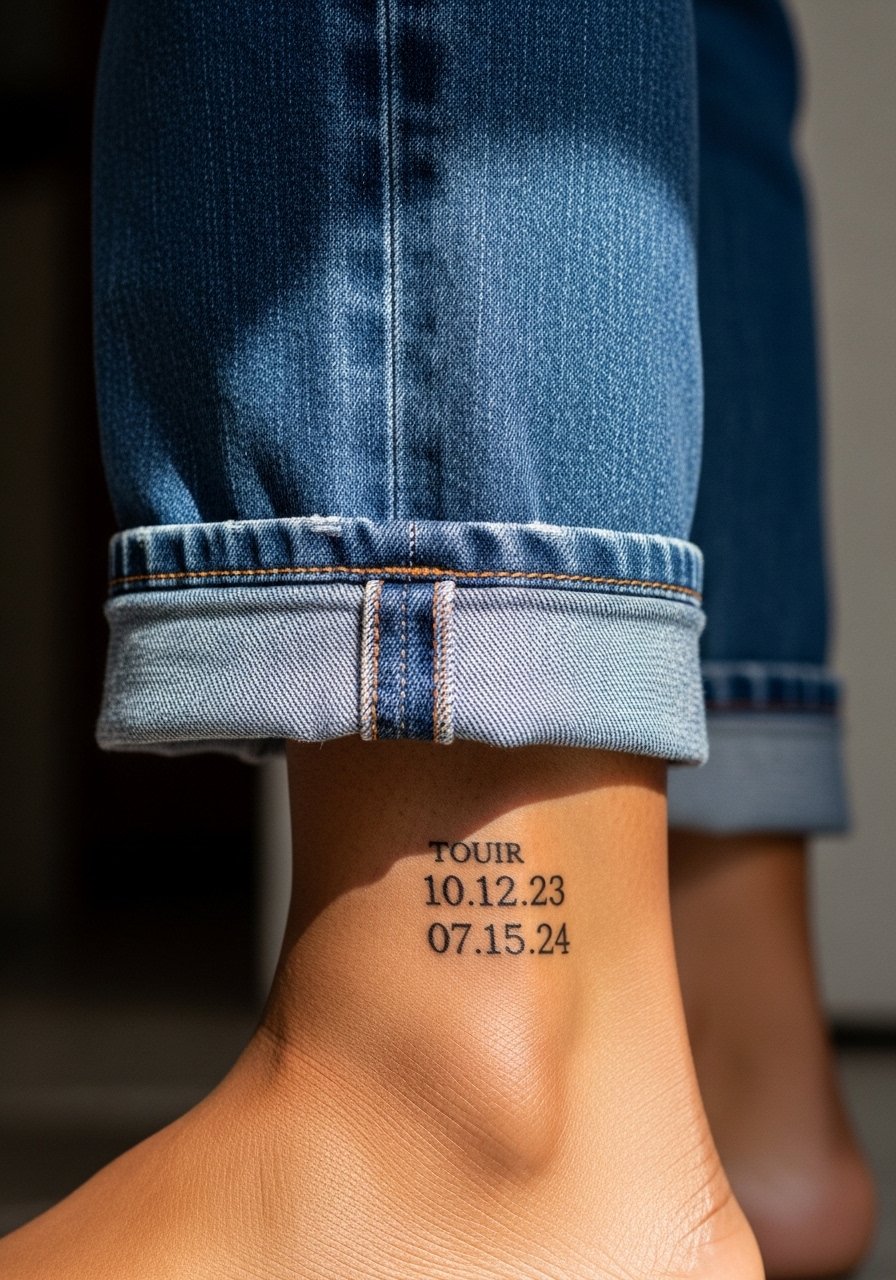
Ankle dates sit nicely with summer shoes and retro denim. The area tolerates linework well but is prone to scabbing from socks and footwear. Ask for slightly bolder numerals in a thin serif to maintain legibility at two years. Healing can be fussy because shoes rub, so plan barefoot or sandal days for the first week. A common mistake is placing the tattoo too close to the bone where ink sits shallow. Show-off pairings include cuffed jeans and a thin ankle chain for a retro vibe.
10. Blackwork Distressed Arrow on Calf

Calf placements handle solid blackwork beautifully and age into a classic look. If you want a vintage feel, ask for slightly uneven edges and stipple shading around the shaft. Pain is low to moderate and session time is often 45 to 90 minutes. One error I see is too-small details that either heal patchy or require heavy touch-ups. For shows pair this with a midi skirt cotton or cuffed shorts so the design gets air and attention.
11. Neo-Traditional Microphone with Washed Color
Color can read vintage if it is desaturated. For this mic, request muted palette fills and a thin black outline that anchors the design as color softens. Upper chest pieces sit across a variety of skin types and often need a single follow-up for color settling. Artists disagree about color on darker tones but the fix is a bolder outline and contrast adjustments during the consult. A common mistake is expecting saturated pastels to look vintage after healing. A fitted tank during the session keeps straps from shifting on the area.
12. Constellation Arrow Pairing on Inner Bicep
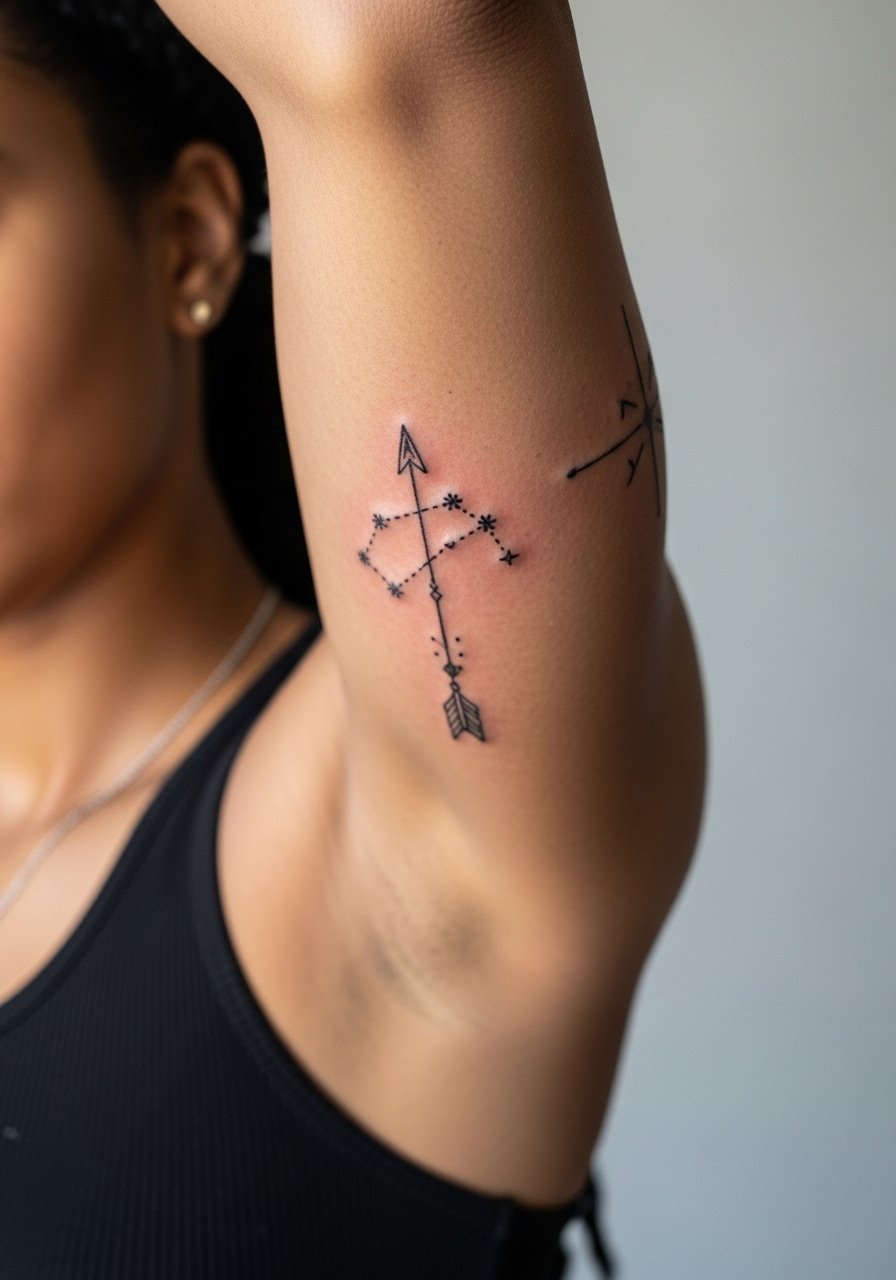
The inner bicep is soft and can show gentle detail if the design has breathing room. Expect a moderate pain level when the arm is raised. Tell your artist to space stars and lines to avoid merging in dense clusters after two years. A frequent error is placing dense dot work too close together. For the session wear a loose tank so the arm can be positioned comfortably. This placement pairs nicely with a minimal leather cuff on the opposite arm to balance the look.
13. Stipple-Shaded Arrow Over the Shoulder Blade
Shoulder blade pieces heal well because they avoid constant friction from clothing when the right garments are chosen. Ask for stipple shading instead of solid fill to get a true vintage texture that softens with time. The area is one of the least painful spots for many people and can be done in a single session. Common mistakes include extending the piece into areas that crease during sleep. Wear a strapless or loose tank to the appointment so the artist can access the blade with minimal shifting.
14. Retro Lyric Ribbon on Lower Ribcage
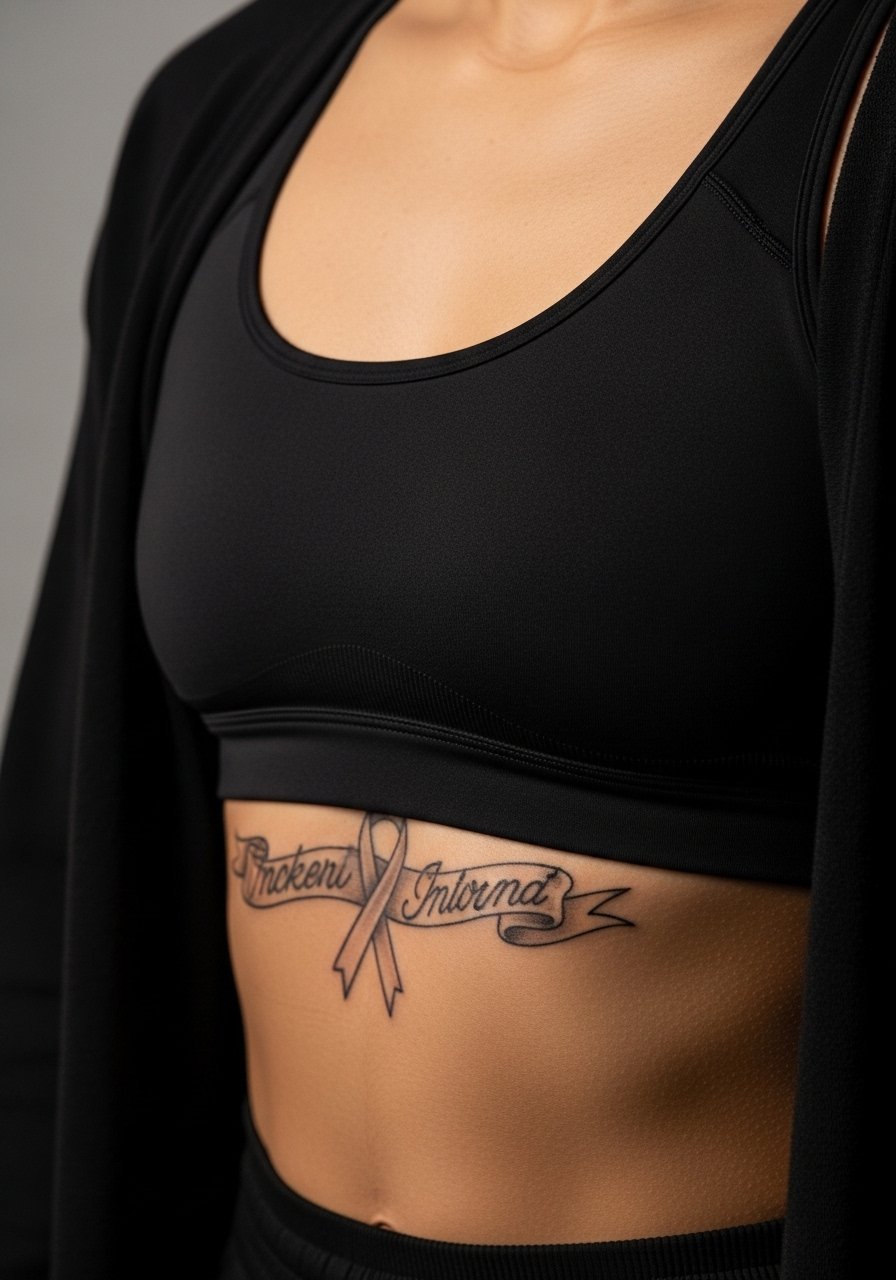
Lower rib script can be a discreet lyric placement but it sits on skin that moves a lot. Artists split on whether fine line holds up on the ribs. One camp says the constant stretch blurs thin lines within two years. The other camp says good spacing and proper needle depth keep the script readable. Ask your artist where they stand and show the exact font so they can recommend spacing. Pain is high and sessions might need breaks. For showing it off after healing try a fitted sports bra or off-shoulder top.
15. Dark-Skin Friendly Bold Black Logo on Inner Forearm
For darker skin tones, bold blackwork holds contrast far better than pale color fills. If you have a faded older logo that needs reworking, ask for thicker outlines and denser saturation to restore shape without overworking the skin. Common mistake is trying to reproduce light pastels that vanish against deeper tones. Expect a moderate session and plan a single touch-up if saturation needs balancing after healing. Wear a short-sleeve button-down to the appointment and have the sleeve rolled up when you enter the chair.
16. Pairing Arrow with Constellation Map on Hip
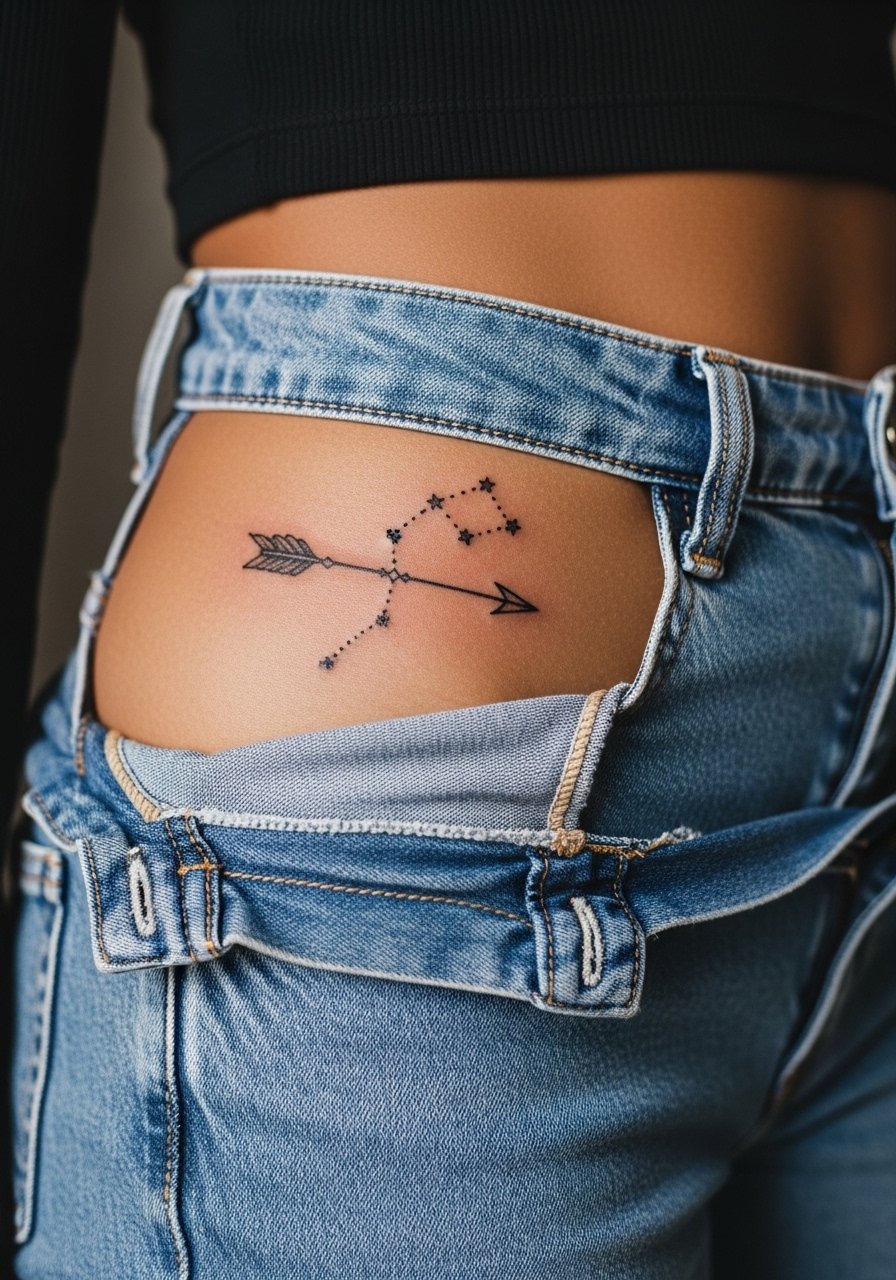
Hip placements hide well and age predictably when the design is scaled correctly. The skin there is stable compared with the ribs, but weight fluctuations can change proportion, so talk about sizing in consultation. The session is moderate and often done in one sitting. A mistake is choosing dense detail that the hip's curve then distorts. For the appointment choose high-waisted bottoms you can slightly lower so the artist has clean access without exposing other areas.
17. Vintage Microphone Flash on Ankle
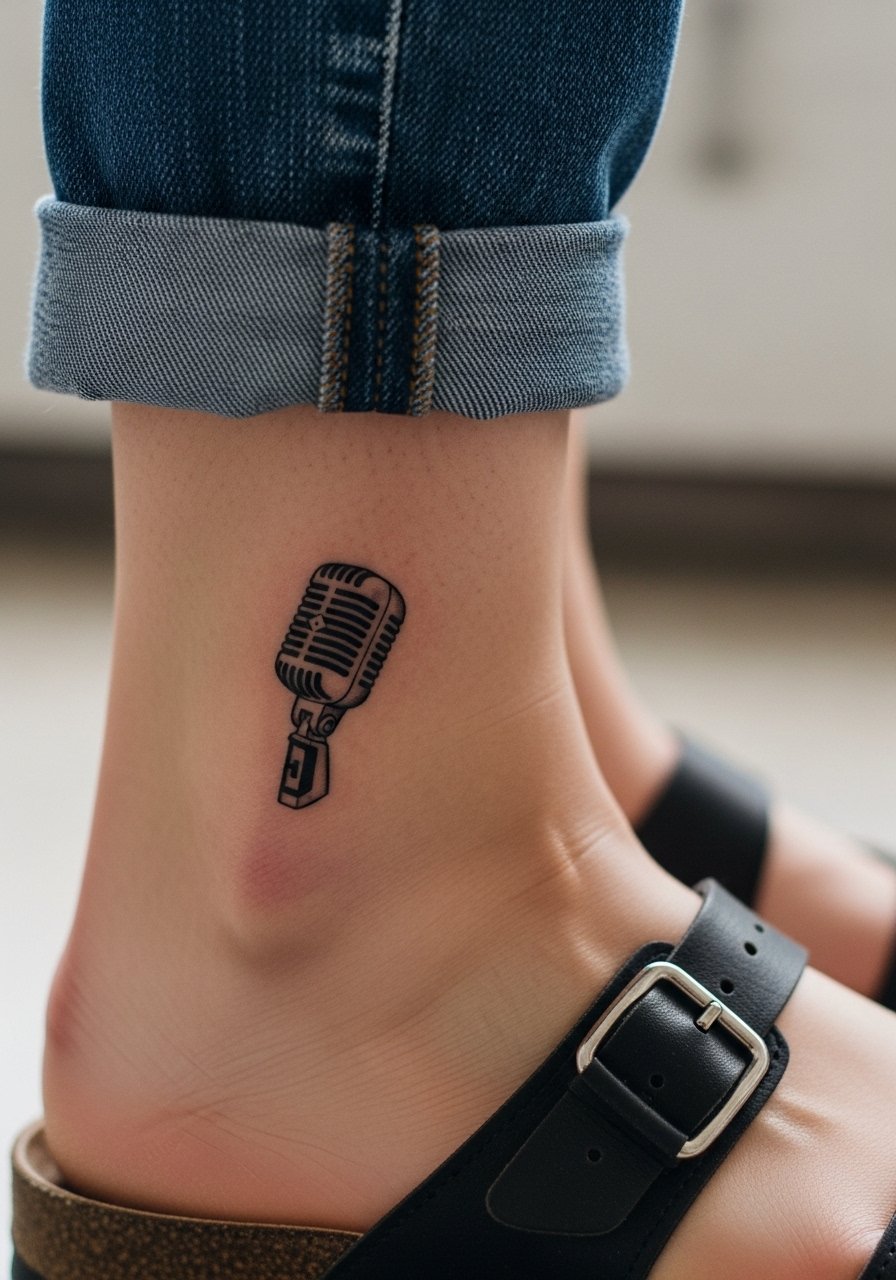
Ankle flash pieces photograph well and pair with festival outfits. Because ankles rub against footwear, ask for slightly bolder outlines and spaced internal detail to reduce scabbing lines. Healing can be tricky if you must wear closed shoes right away, so schedule lighter footwear for the first week. One common error is placing the design on bone where ink runs shallow. A short session usually covers this size, and touch-ups at year two are common for high-contact sites.
Frequently Asked Questions
Q: Will fine line vintage 1D logos on the wrist blur faster than blackwork versions?
A: From what I've seen, fine line logos on wrists often need touch-ups sooner because the wrist is a high-friction area. A blackwork adaptation with slightly heavier line weight usually holds cleaner at the two to five year mark.
Q: How should I prepare clothing-wise for a collarbone mic session?
A: Wear a wide-neck shirt or a strapless top so the area is accessible without tugging. For showing the healed piece later consider an off shoulder blouse that frames the collarbone without rubbing.
Q: Are there safe ways to get vintage-style shading on darker skin tones?
A: Yes. The common approach is to use denser black outlines with stipple or whip shading instead of pale colors. That keeps contrast and avoids patchy fading as the color settles.
Q: Should I expect a touch-up for micro dates behind the ear or on fingers?
A: Yes. Those tiny placements face more wear and often need a touch-up within 12 to 24 months. Plan for a short follow-up when budgeting time, not just money.
Q: Is Saniderm or dry healing better for fine line wrist tattoos?
A: Artists and healers split into two camps. One group prefers film dressings for the first few days because they reduce mess and protect against rubbing. The other group favors dry healing to encourage natural scab formation and avoid trapping moisture. Your choice depends on your daily activities and how your skin reacts to occlusion.
