
Fine line is everywhere on inspiration boards right now, and the reality is a lot of those delicate Van Gogh riffs need a touch-up sooner than people expect. The best choices balance the painting's energy with line weight and placement that actually age well. Below are 27 vintage Van Gogh tattoo ideas that consider longevity, session feel, and how to show them off so the design still looks intentional years from now.
1. Starry Night Swirling Sky on Outer Forearm

I recommend this as a forearm piece if you want the swirls readable at arm distance. Ask your artist for bold outer linework and layered whip shading inside the swirls so the movement holds as saturation softens. Common mistake is copying watercolor soft edges at small scale, which tends to blur after a year. Expect moderate session pain and one to two sittings for a 4-6 inch piece. For showing it off, roll up a chambray rolled sleeve shirt to echo the indigo tones and protect the area from sun when out.
2. Sunflower Cluster on Inner Wrist
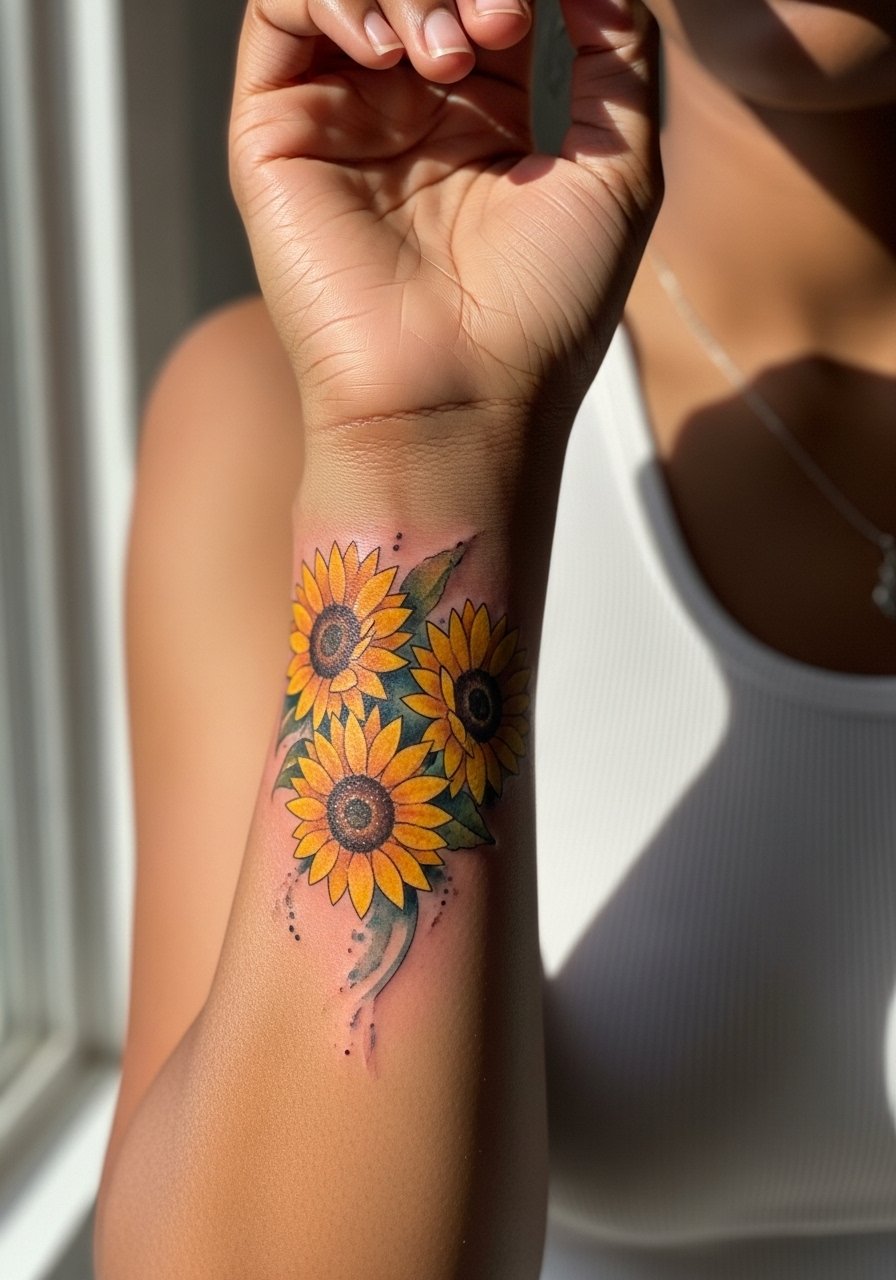
Fine watercolor petals read beautifully on the inner wrist at about 2-3 inches, but be honest about longevity. One camp argues that watercolor on wrists fades fast and needs early touch-ups. The other camp says careful saturation and a thin black anchor line can extend life. Tell your artist you want a thin black outline around key petals and heavy pigment in the yellow centers. Session-wise the wrist stings but heals quickly. Pair the finished piece with a thin silver chain bracelet on the opposite wrist to balance the look.
3. Café Terrace at Night Street Scene on Outer Calf
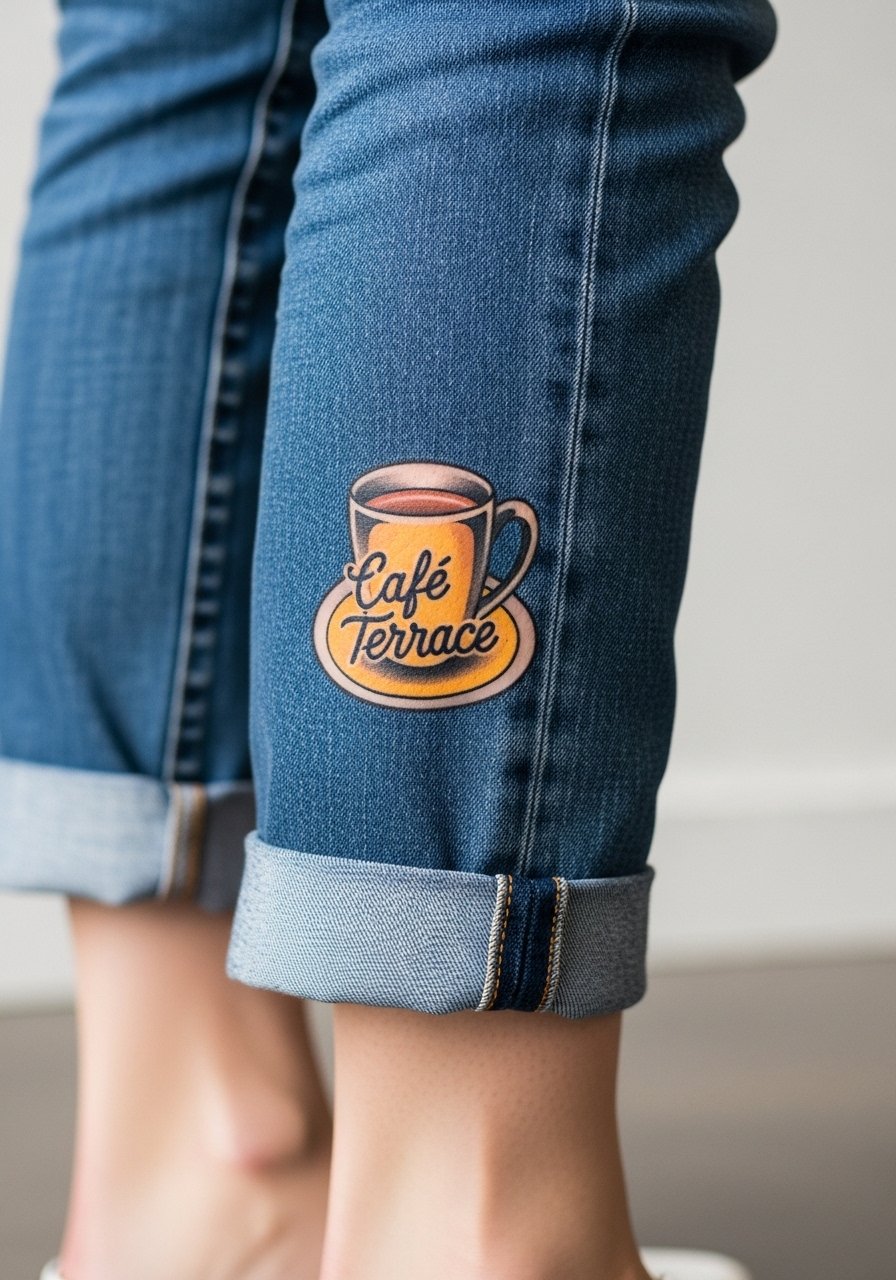
The calf is forgiving for a 5-inch street scene and reads well at a distance. If you want that warm glow without muddiness, ask for crisp linework around lights and heavier saturation in the yellow highlights. A common mistake is compressing too many interior details into a small width, which flattens as the piece heals. Calf sessions are lower on the pain chart and allow longer sittings. For summer shows, cuffed straight-leg jeans or cropped ankle pants make the scene peek through without competing.
4. Irises Fine Line on the Ankle Bone
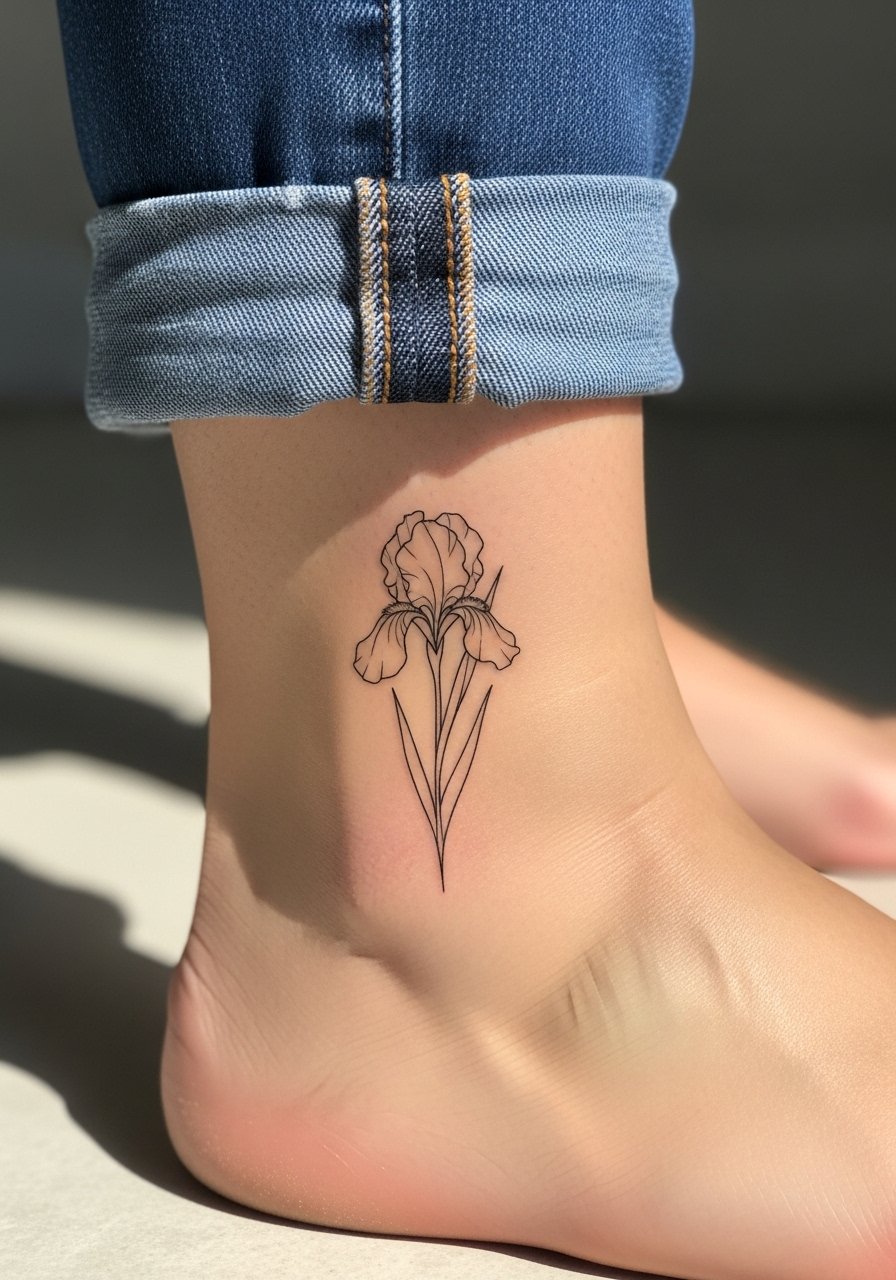
Ankle bones suit delicate botanical work but size matters. Keep the design at least two inches so petals do not bleed together after healing. The biggest mistake is asking for hairline strokes with no supporting outline. Ask the artist for slightly heavier main contours and fine internal stipple shading. Ankle tattoos see friction from socks and shoes, so plan on gentle initial care and a possible touch-up at 12 months. For sessions, wear loose joggers or shorts so the leg can be positioned comfortably.
5. Self-Portrait Bandana Head Blackwork on Upper Arm
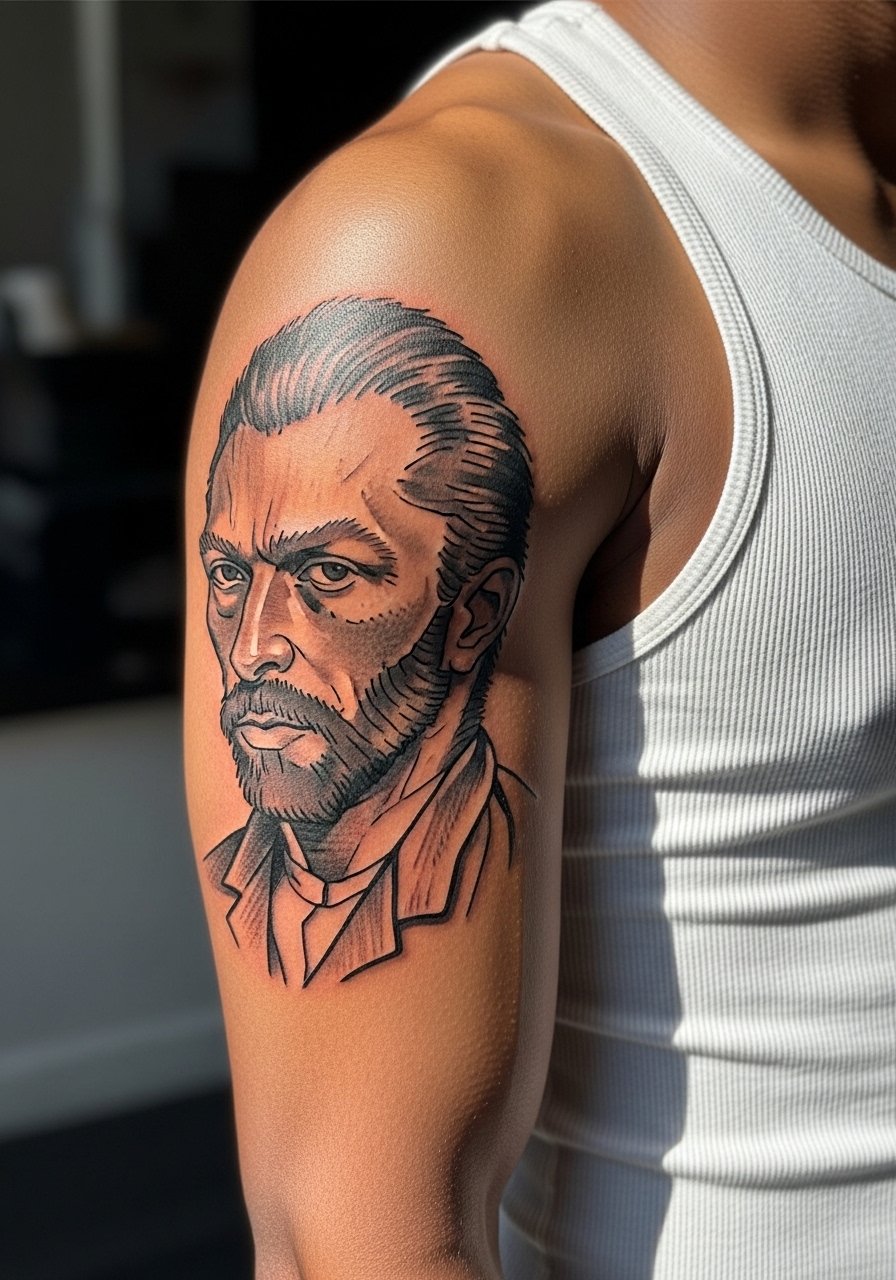
This blackwork bicep piece reads like an old print and holds up because solid black ages into a graphic shape. In consultation, request strong contrast between negative space and solid fills so the facial expression keeps definition as saturation softens. A common error is over-detailing the face at a small scale, which becomes muddy. Upper arm sessions are moderate pain and allow multiple passes. Show it off with a fitted tank under an open denim jacket for a vintage silhouette and add bold hoop earrings to balance the look.
6. Wheat Field with Crows Micro-Realism on Outer Thigh
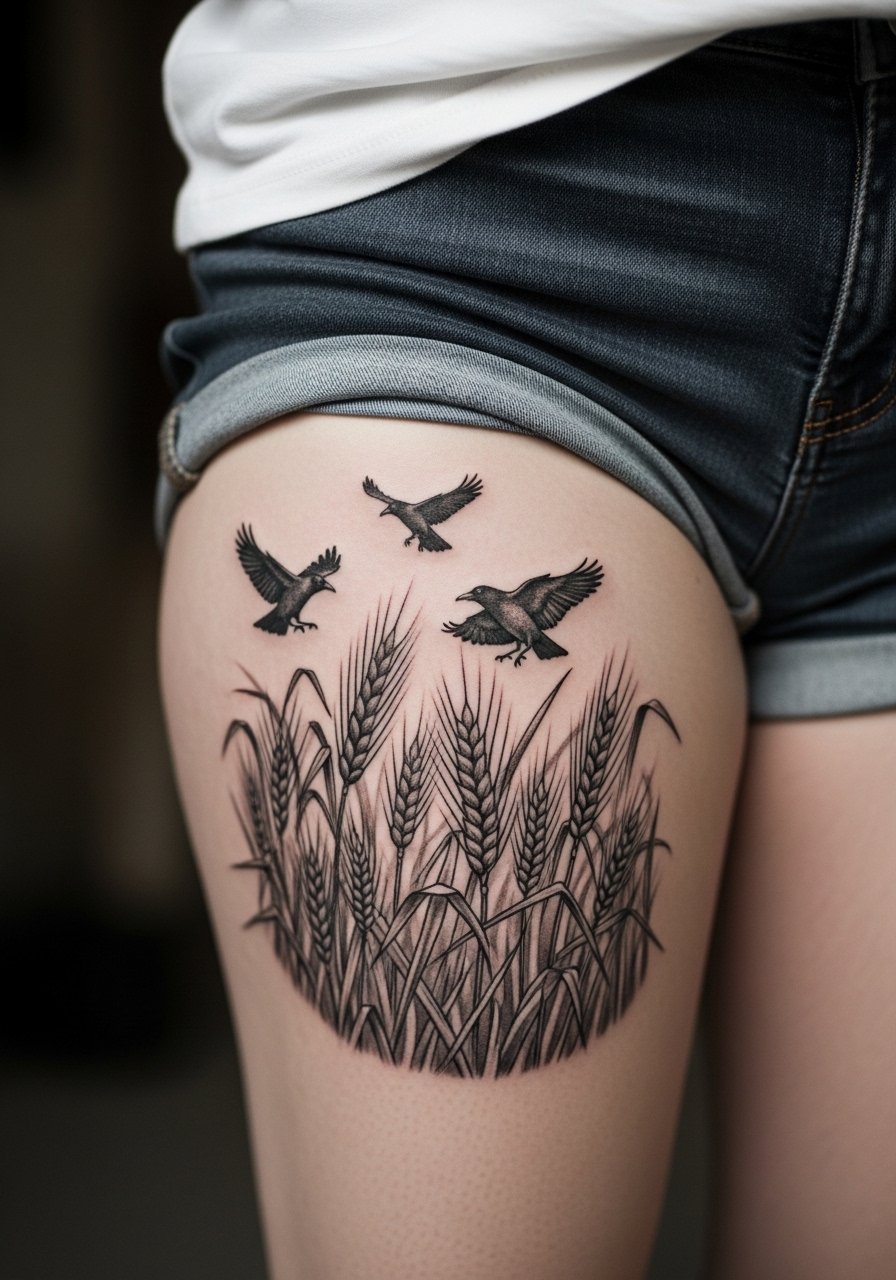
Thigh canvases suit micro-realism because the area lets the artist render atmosphere without shrinking detail. Expect three to four sessions for a 6-8 inch piece and higher pain where the skin is thin near the hip. The design works well in black and gray if longevity matters. One real mistake is insisting on watercolor skies here without planning for touch-ups. For showing it off, high-waisted shorts or a slit skirt keeps attention on the upper thigh. If you plan heavy realism, ask about staged sessions to let saturation settle between passes.
Studio Day Picks
The forearm, wrist, and calf pieces above need different prep than thigh and rib work, so pack items that make the session smoother and protect fine line areas during the first week.
-
Stencil transfer paper kit. Lets you audition the placement on skin before the needle hits, which is useful for forearm and collarbone layouts.
-
Topical numbing cream. Applied per product instructions it takes some sting off wrist and rib sessions without interfering with linework.
-
Thin protective film roll. Keeps ankle and finger pieces clean during the first days of frequent washing and friction.
-
Fragrance-free gentle body wash. Mild cleansing matters for delicate watercolor blends and fine line limbs.
-
Aquaphor healing ointment. A thin layer in the very first days helps retain moisture on fine line work without clogging when used sparingly.
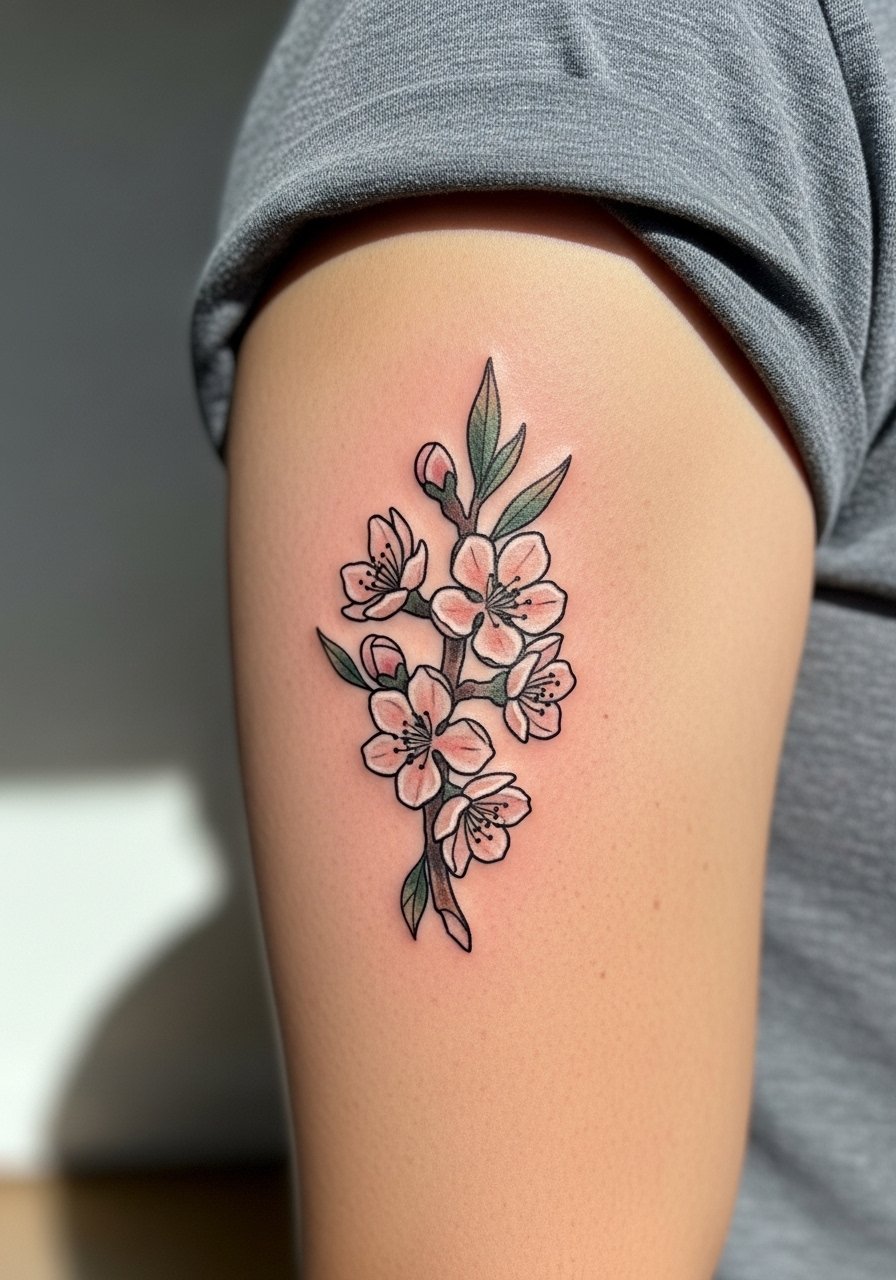
7. Almond Blossom Branch Curve on Collarbone
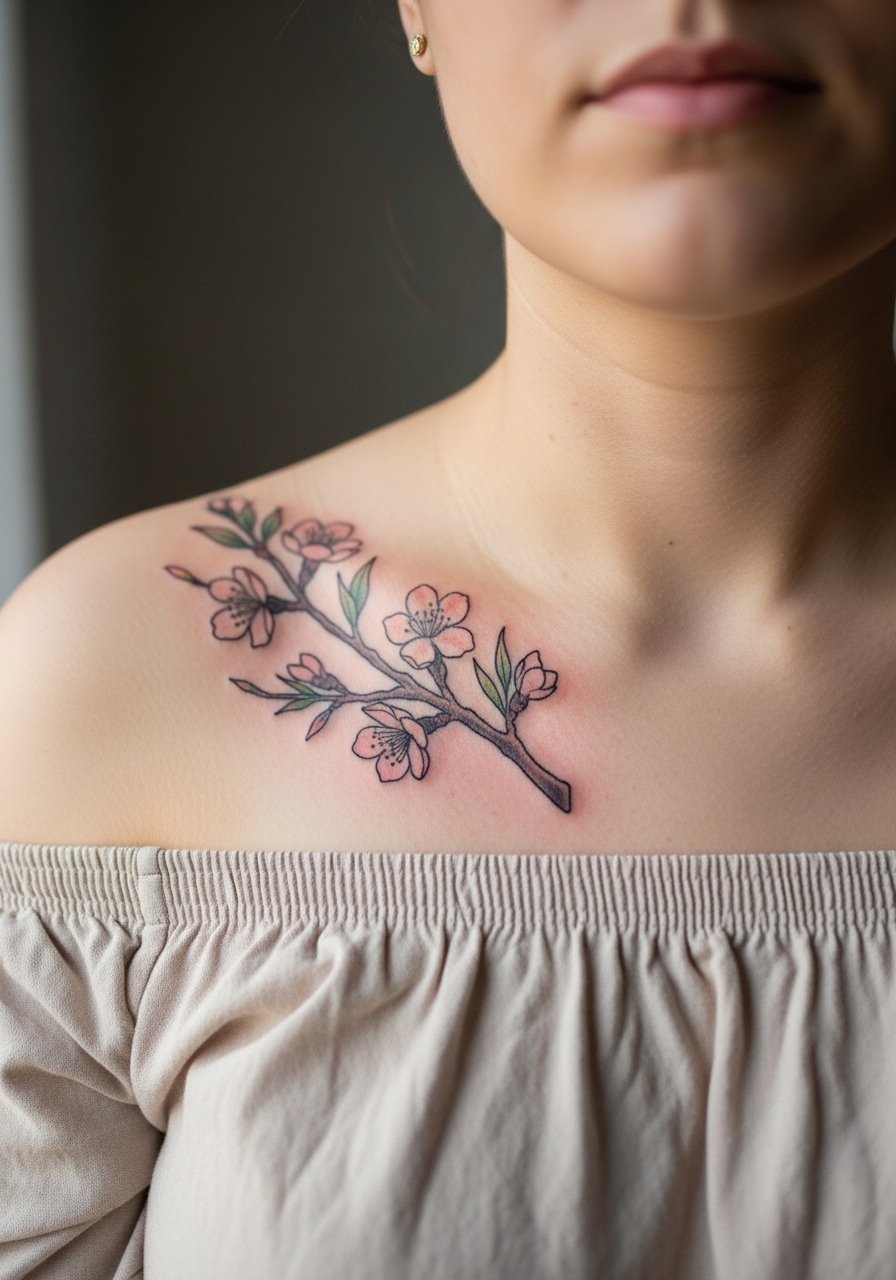
Collarbones are great for flowing branches because the curve of the bone complements the composition. Ask for soft color fills with clear outlines so the pastels stay readable on photos and in person. Mistakes include overloading the branch with tiny buds that merge as the skin moves. Sessions are short and stinging is mild. Style choices matter here. Pair the tattoo with off shoulder blouse pastel looks for evenings when you want the branch to sit just above fabric lines.
8. Starry Night Cypress Vertical on Inner Forearm
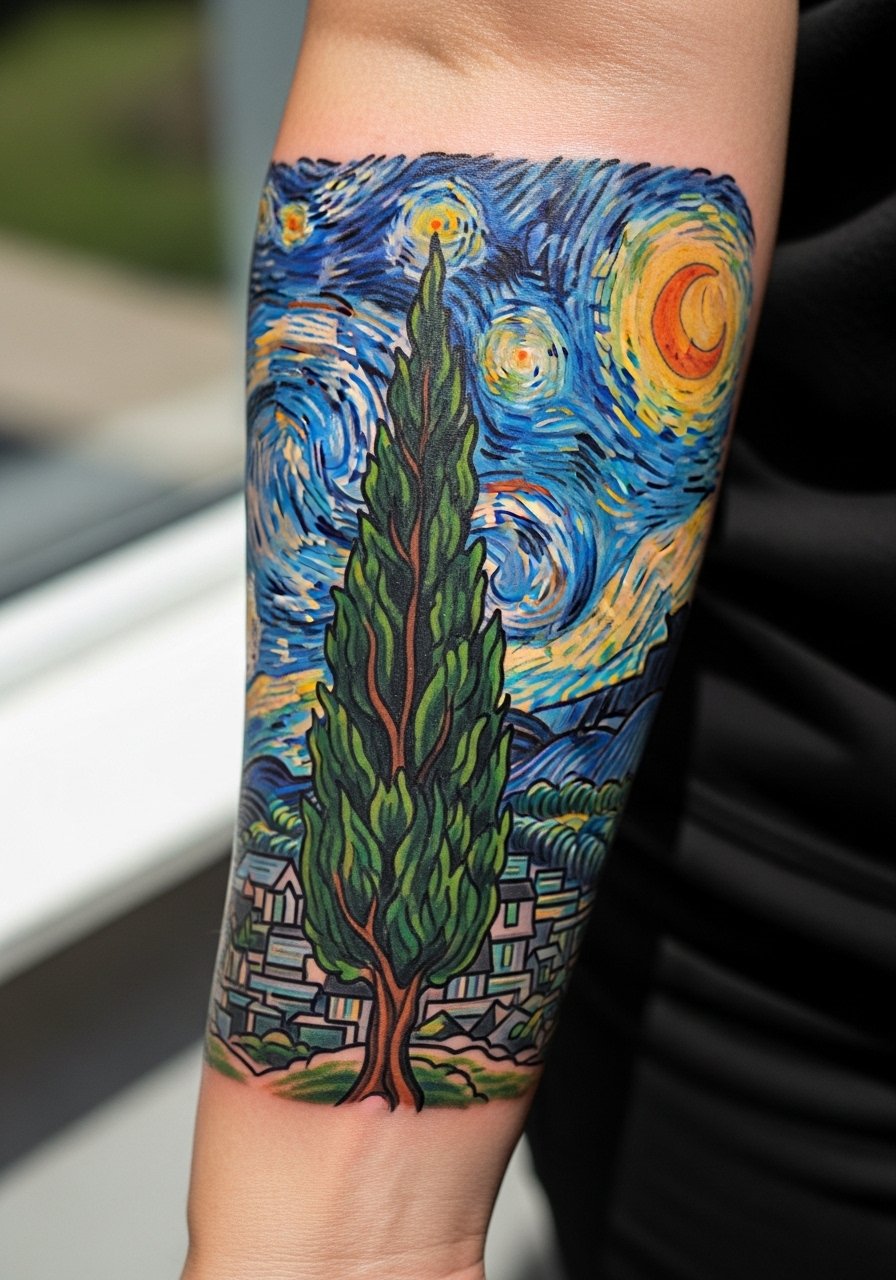
The inner forearm is a sleeve starter for vertical motifs. For longevity choose bold outlines around the cypress and denser pigment in the darkest swirls. Many artists prefer neo-traditional approaches here because the thicker linework preserves the dynamic sky longer than a loose watercolor. In consultation, ask for spacing between dense swirl areas to avoid early merging. The inner forearm is relatively low pain and easy to protect during healing. For session wear bring a loose short-sleeve tee so the artist has clear access.
9. Sunflowers in a Vase on Side Ribcage
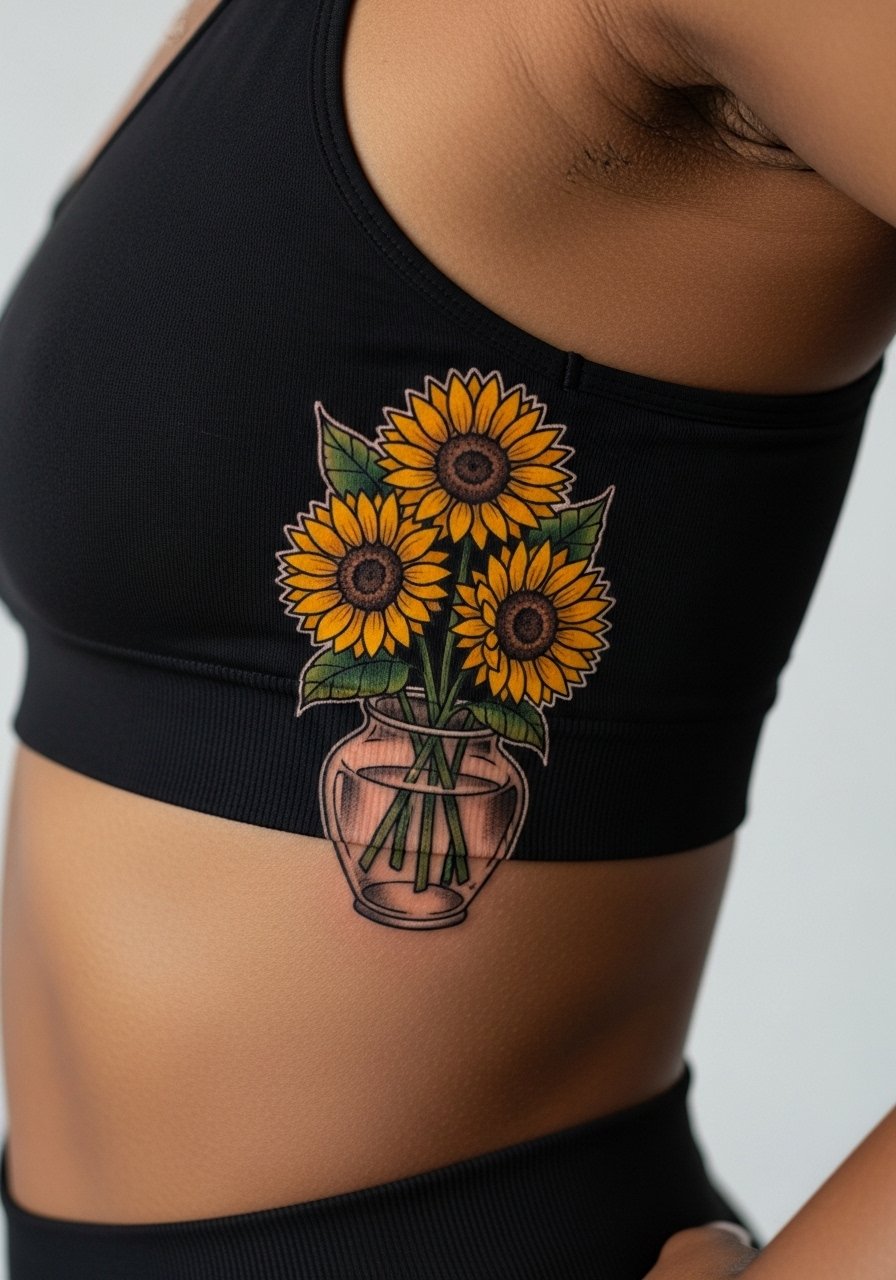
Ribcage pieces hurt more than limbs and most people underprepare for that. Break the vase composition into two sittings if you want detail without long pain bouts. The common error is compressing too many large flowers into a narrow side panel which crowds the stems. For resilience against fading, keep stronger black outlines and limit faint pastels. Ask whether the artist recommends lidocaine for your session. Plan a touch-up at 12 to 18 months if you choose pale yellow fills.
10. Bedroom in Arles Perspective on Shoulder Blade

Shoulder blade pieces are easy to hide and easy to show. Use muted palettes so the perspective reads like a vintage print rather than a punch of color. The frequent mistake is shrinking the scene below 4 inches wide, which loses depth. Conversations in consultation should include the exact angle you want and whether the artist will keep key furniture outlines bold for longevity. Session wear is a loose tank or button-down so you can mirror placement. For evenings out, pair with a backless halter top to reveal the scene.
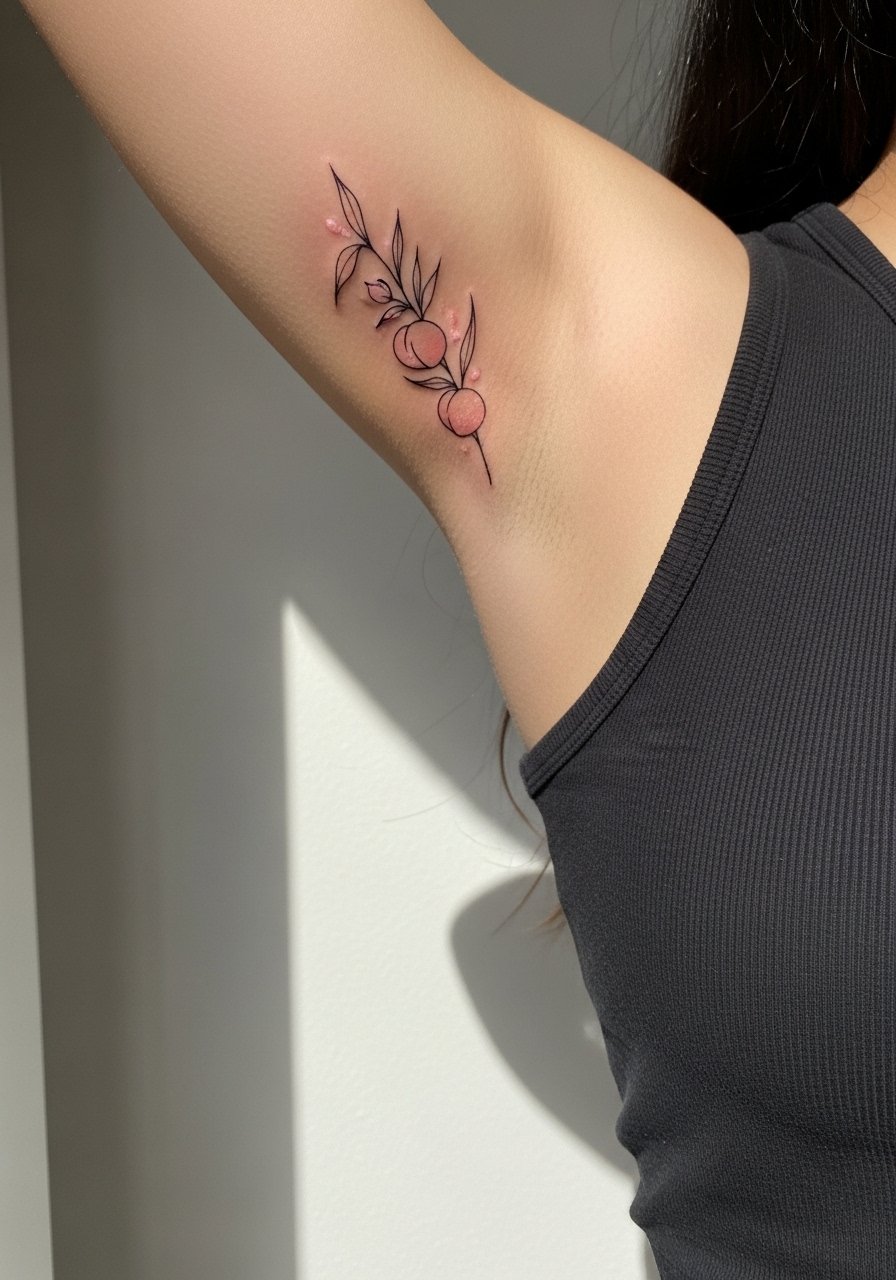
11. Pink Peach Tree Minimalist Along the Spine
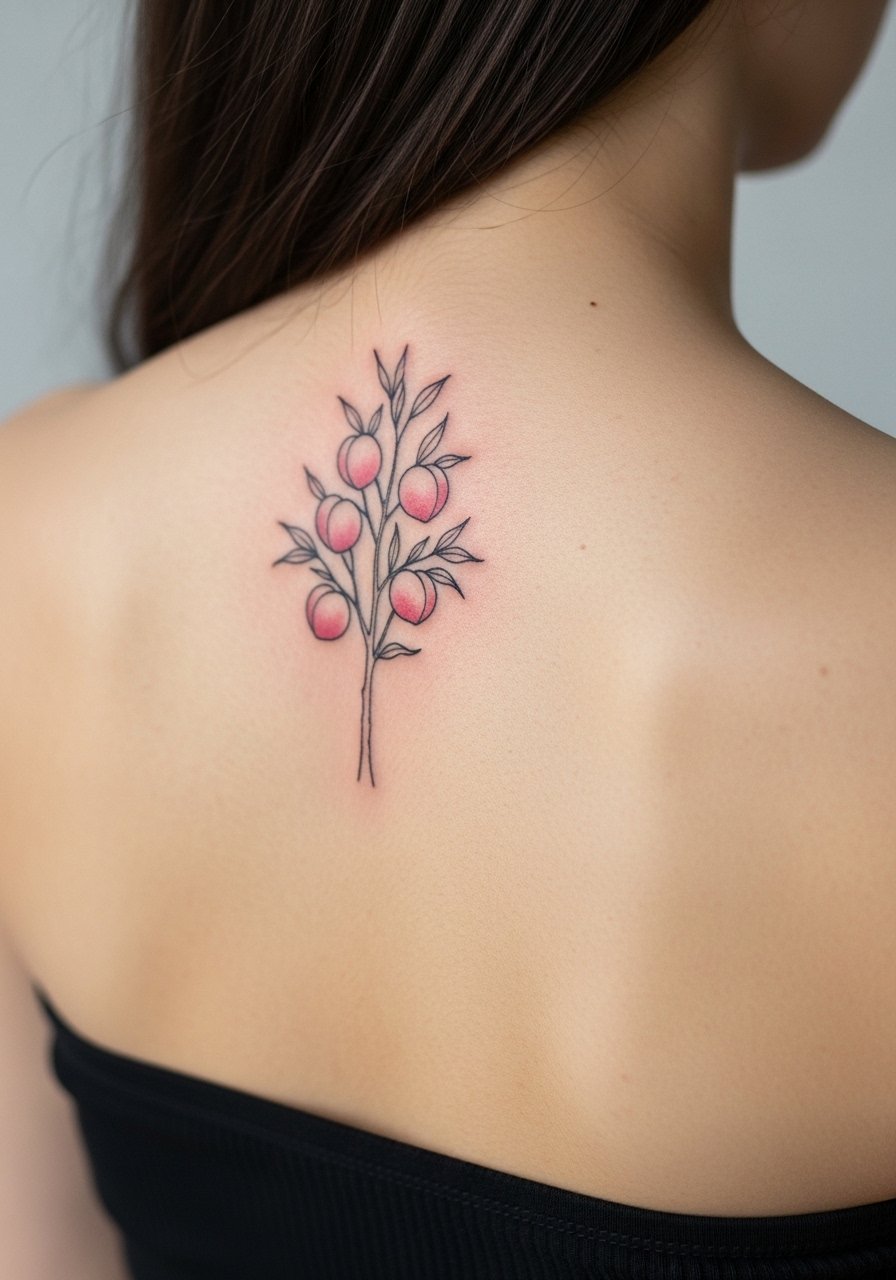
Spine pieces need careful spacing or the lines can merge as the back moves. Minimalist branches do well because negative space keeps the motif legible. Tell the artist you want slightly bolder primary branches and airy secondary lines. The rib-end of the spine is more painful than the upper back, so plan short sittings. The common mistake is asking for ultrafine clustered details near the spine. For sessions wear a strapless or button-down you can pull aside easily.
12. Starry Night Heart Silhouette on Upper Chest
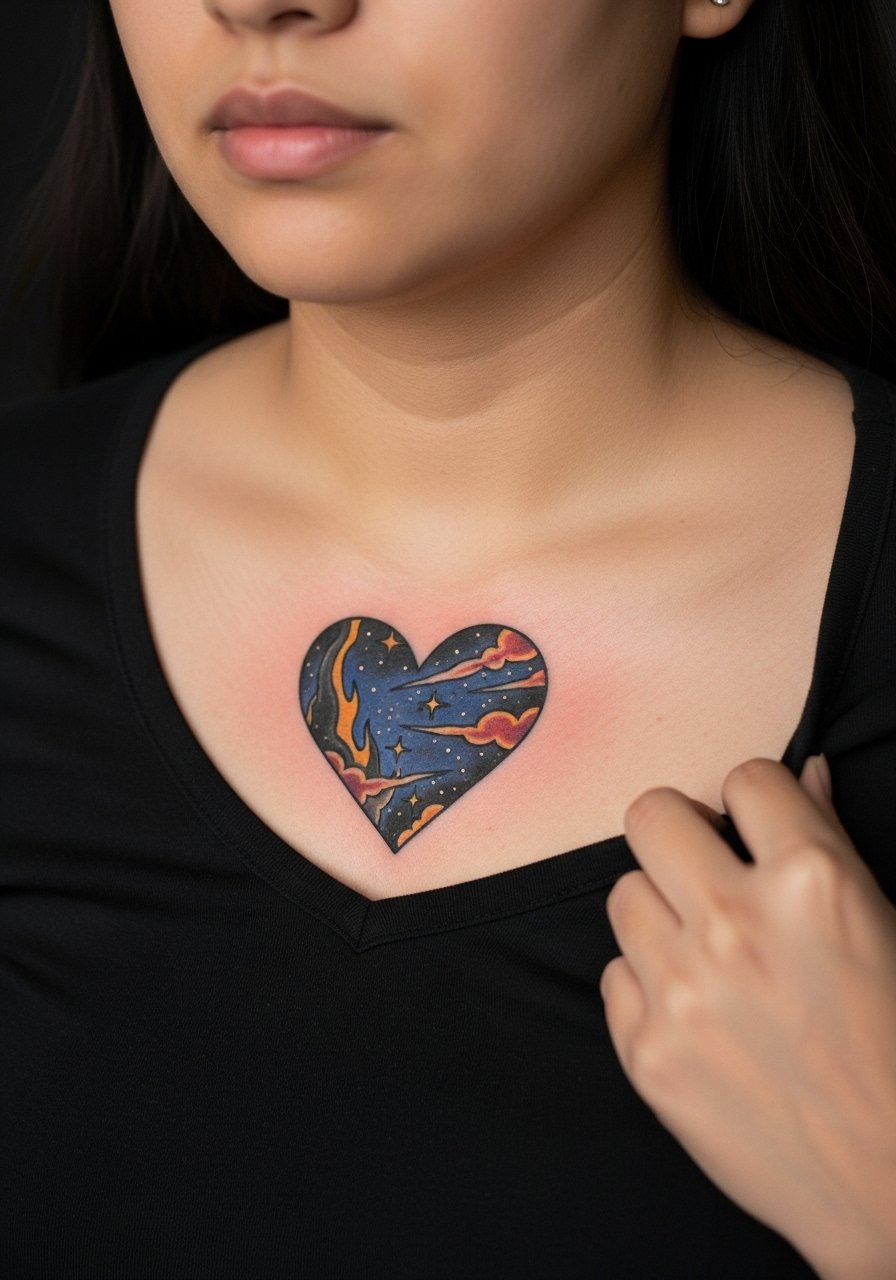
Chest hearts combine symbolism with readable composition if kept around 3 inches. The chest moves a lot so ask for an outer anchor line and internal stippling to let the sky settle naturally. One controversy here is healing method. Some artists push Saniderm for chest color work. Others prefer dry healing. Name both camps and ask which approach your shop follows. Sternum and upper chest sessions can be sensitive, so expect shorter passes. For outfits, a wide-neck shirt pulled aside shows the piece without full exposure.
13. Olive Trees Landscape Calf Wrap
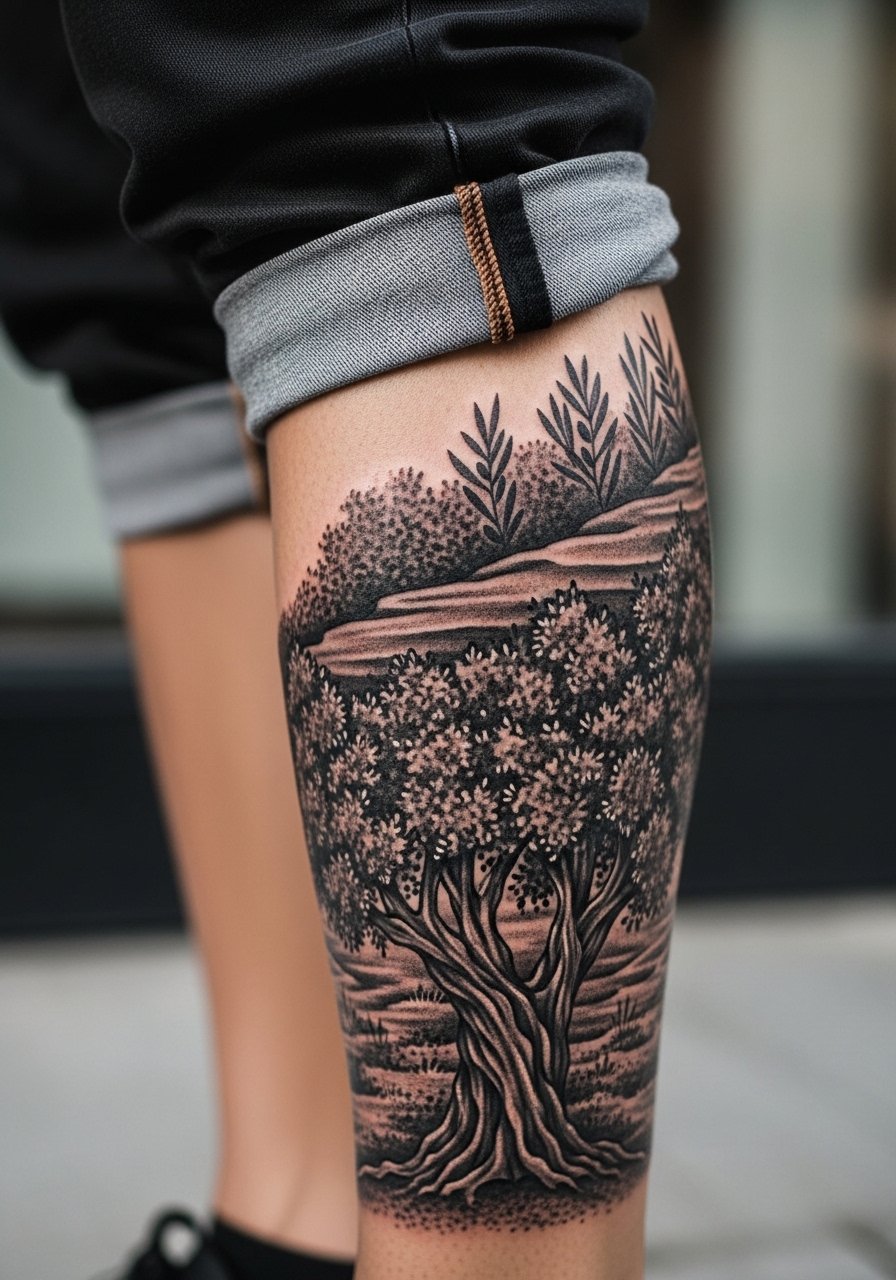
Calf wraps let you use the limb's circumference to build movement. For textured trees, gray washes and stipple shading read better long term than thin patchy strokes. A common mistake is tight detail on the inner wrap that disappears when the leg is relaxed. Ask your artist to preview how the piece looks when you stand and when you flex. Calf work tolerates longer sessions. Pair with cuffed straight-leg jeans or ankle boots for a peek that feels curated.
14. Sunflowers Outline on the Rib Edge
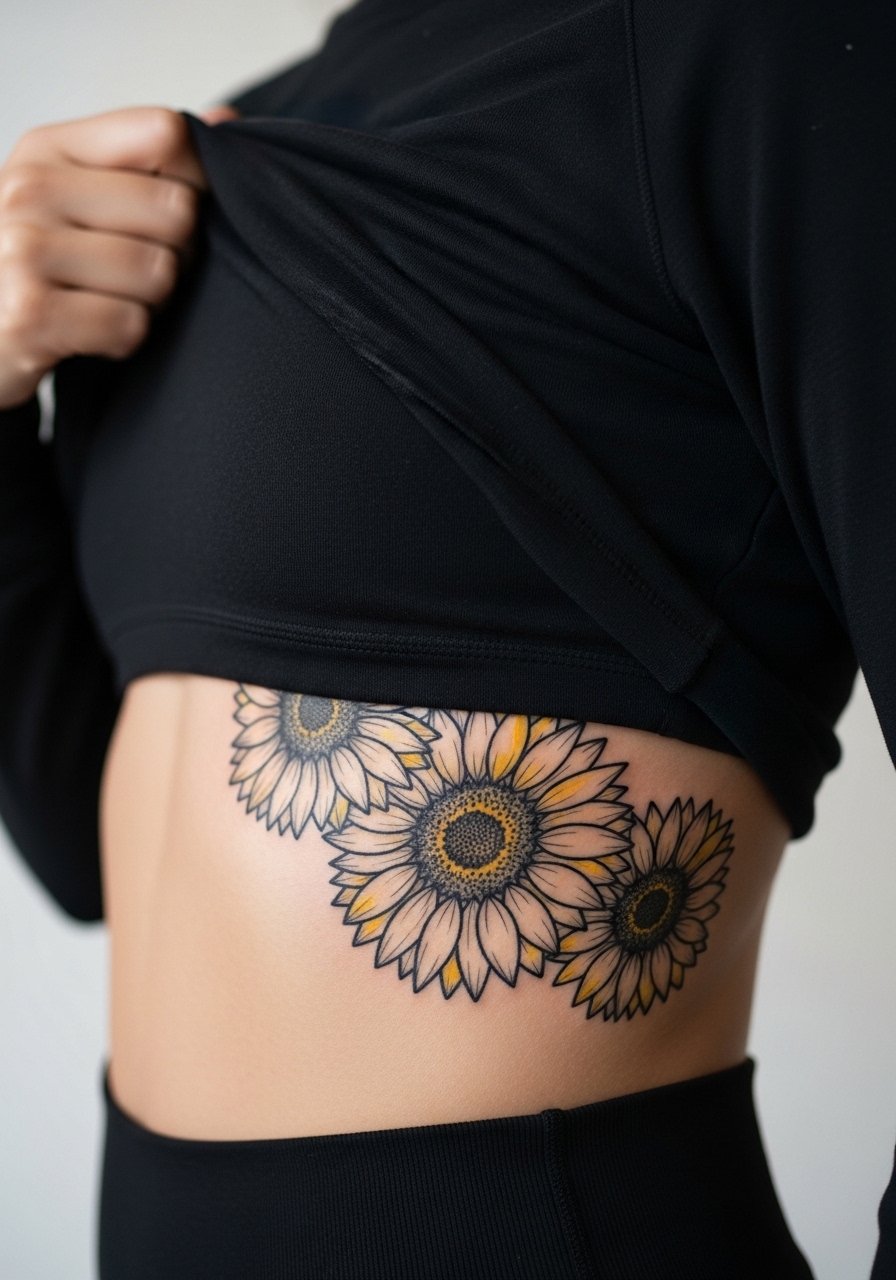
Rib edges are high on the pain map, so plan for brief sessions if you are sensitive. The outline approach works because heavy black holds up better under movement than soft color blends. Tell your artist you want thicker petal anchors and reserve pale fills for touch-up later. One error is insisting on extensive watercolor there. That style often fades unevenly due to friction from clothing. Wear a strapless or cropped top for the appointment and expect soreness for a few days.
15. Almond Blossom Sleeve Accent on Outer Arm
Use the outer arm for a sleeve starter that blooms into surrounding pieces. Ask for predictable outlines around blossoms so adjacent work can layer in without visual conflict. A common mistake is matching too many pastel tones without a unifying outline, which makes the sleeve read soft and indistinct after healing. For the session wear, a loose short-sleeve or button-up is perfect. Pair the finished accent with a leather wrap cuff bracelet to add vintage contrast.
16. Small Starry Night Patch Behind the Ear
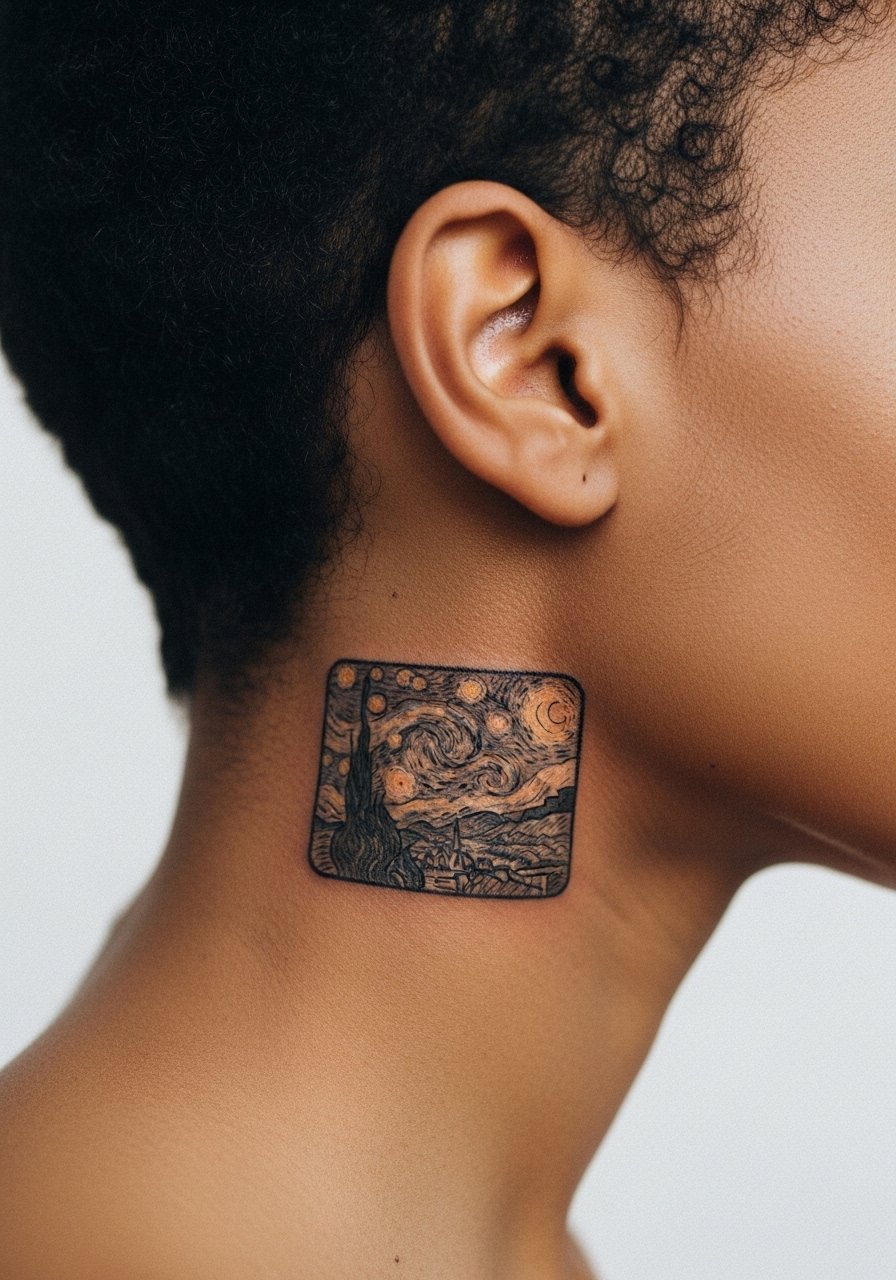
Behind-the-ear tattoos require precise placement because of hairline movement and limited canvas. Keep the patch small, two centimeters or so, and ask for thicker primary lines with subtle interior motion so the motif stays readable. Artists debate whether the area should be fine line only. One camp says it blurs quickly. The other says careful depth and spacing settle well. Because the placement is discreet, think about how it shows with your hair. This area needs an artist comfortable with close quarters.
17. Starry Night Sleeve Patchwork for Half-Sleeve Flow
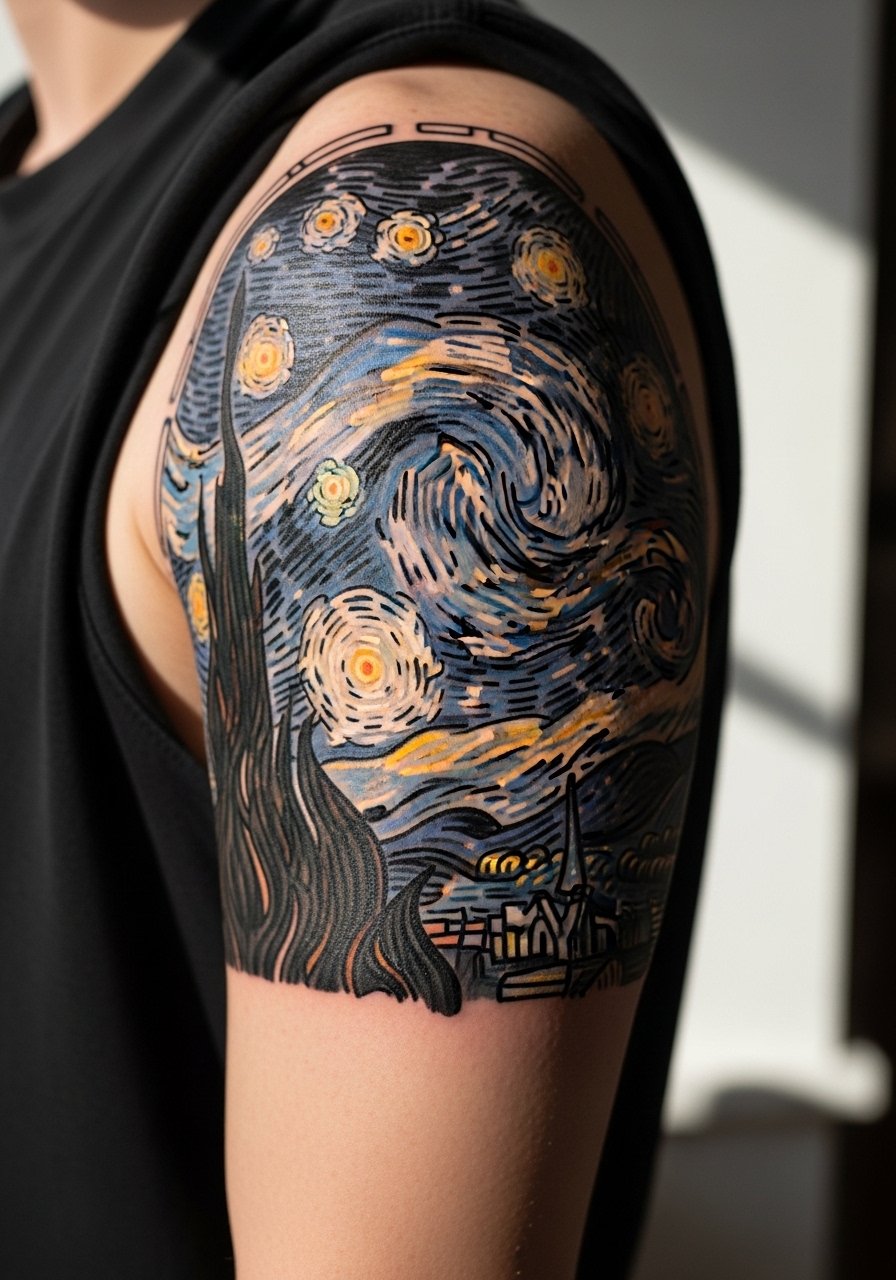
If you want a sleeve built from Van Gogh elements, plan for patchwork that links with negative space. Tell your artist to design connecting lines and shared palette nodes so the swirls knit together over multiple sessions. A common mistake is collecting disjointed references without a unifying plan, which forces heavy rework later. For showing off in warmer months, roll sleeves or wear a fitted tank. Trust your artist on composition, but ask to see mockups that show how new pieces will meet old ones.
18. Minimalist Single Iris on the Wrist Edge
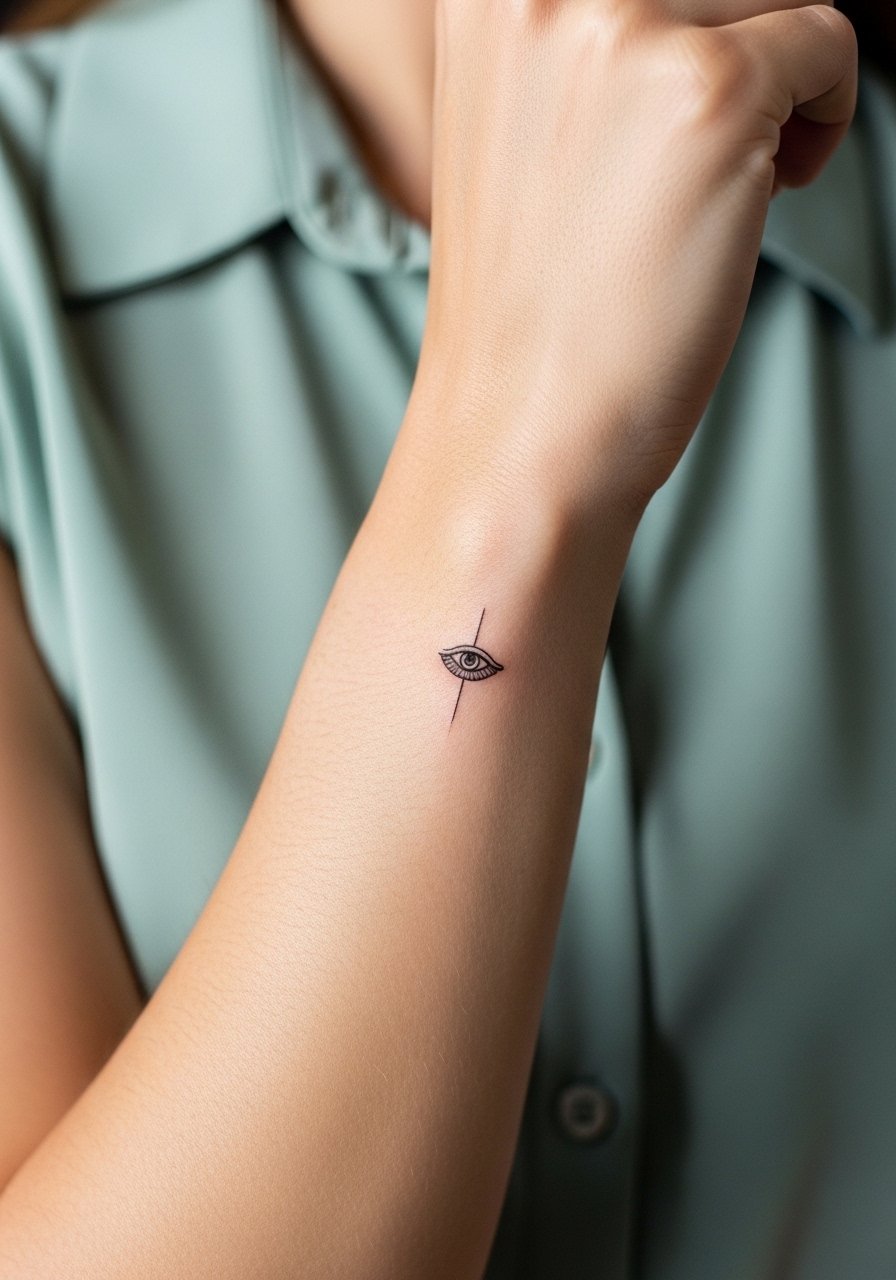
Minimalist irises are low-commitment first tattoos if you want a nod to Van Gogh without a large piece. Keep it at least three centimeters to avoid early loss of petal detail. The usual mistake is choosing hairline-only strokes. Request a slightly bolder stem line and light stipple inside petals. Wrist sensations are noticeable but brief. For sessions, wear a sleeveless top and remove wrist jewelry. Pair it with stacked dainty bracelets, and link a look with a thin chain pendant necklace if you want a cohesive jewelry story.
19. Sunflowers Cluster Ankle Wrap

Ankle wraps are a pleasant compromise between visibility and discretion. Use bold petal outlines and heavier pigment in the centers so the yellows remain present in photos. The mistake is scattering tiny blooms that fall victim to shoe friction. Tell your artist to leave negative space under the arch of the ankle so the design breathes. For sessions wear loose shorts or pants you can roll up and bring sandals for aftercare comfort.
20. Wheat Field Panorama Across the Back of the Knee
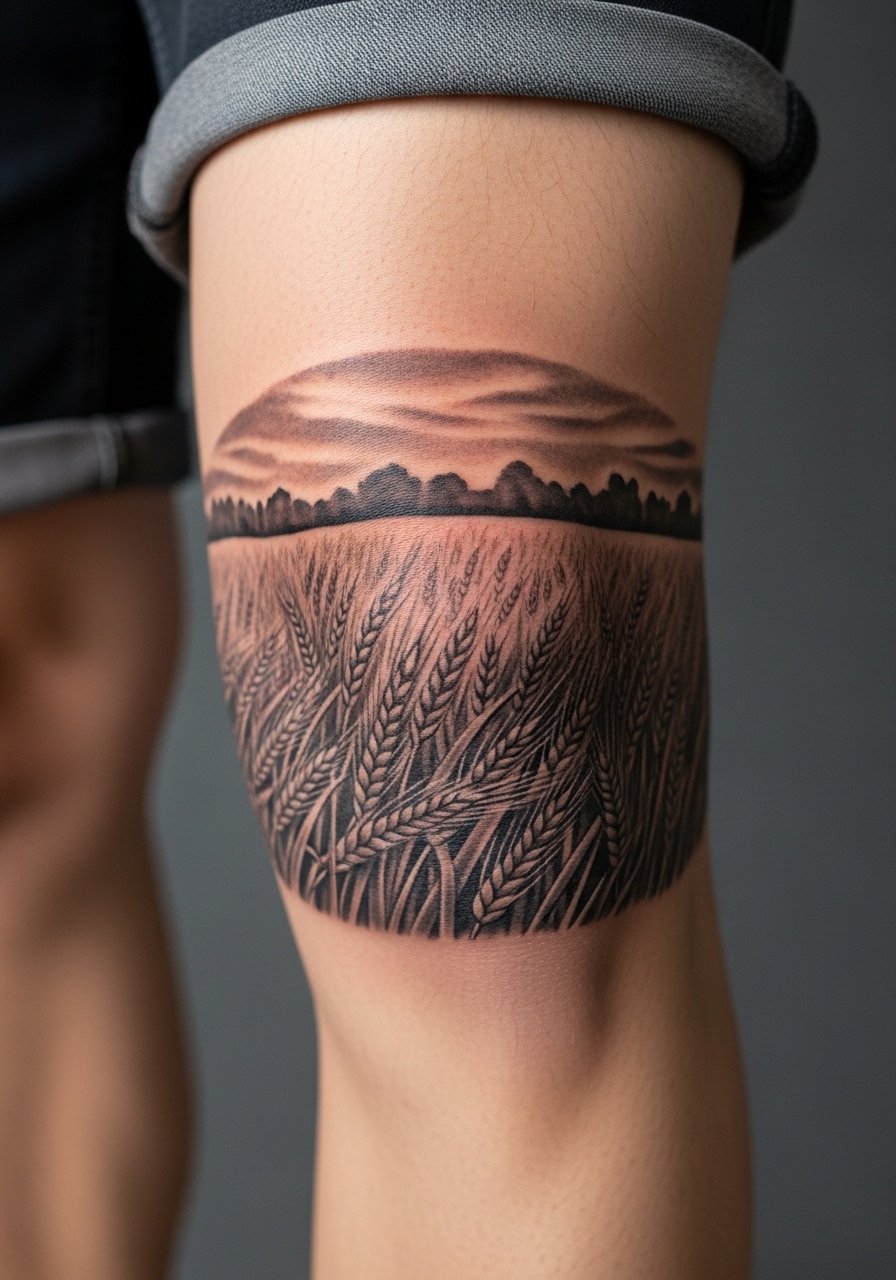
Behind-the-knee pieces need flex testing before finalizing composition. Skin there folds and stretches when walking, so ask the artist to keep major contrast near the central axis and lighter texture towards movement zones. A common problem is placing dense detail right on fold lines. Pain is moderate and healing can be tricky due to bending. For the appointment wear loose drawstring linen pants you can slip down slightly so the artist has clear access without pressure.
21. Micro Star Snippet on a Finger Joint
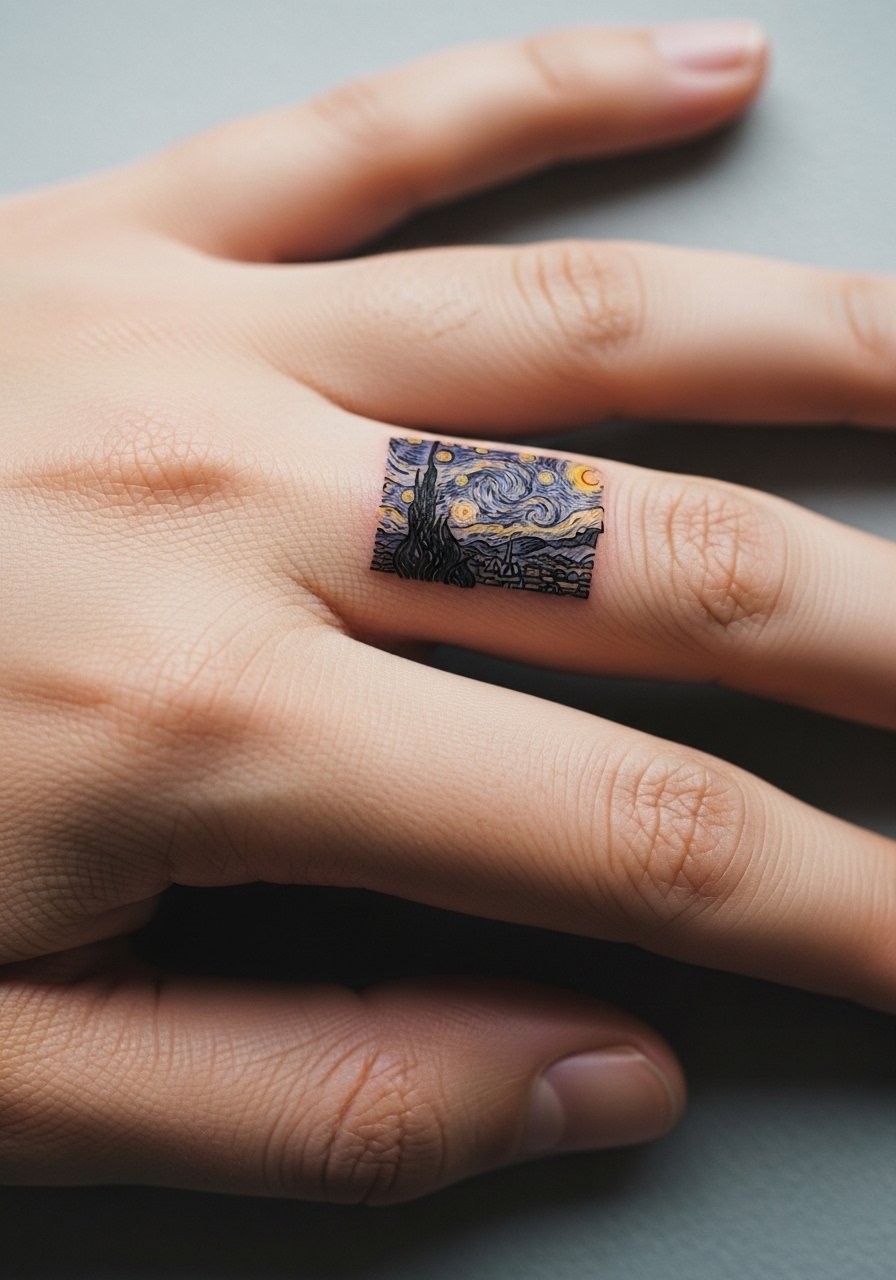
Finger tattoos are high-friction and often need touch-ups. If you want a micro star element, use a bold tiny anchor dot with surrounding thicker micro lines rather than hairline strokes. Tell your artist you accept an anticipated touch-up at 6 to 12 months. The mistake is expecting permanence on knuckles without rework. Keep the design minimal so it survives washing and typing. For sessions, have an unadorned hand and consider job implications since some workplaces still restrict visible hand tattoos.
22. Café Terrace in Grayscale for a Vintage Look on the Thigh
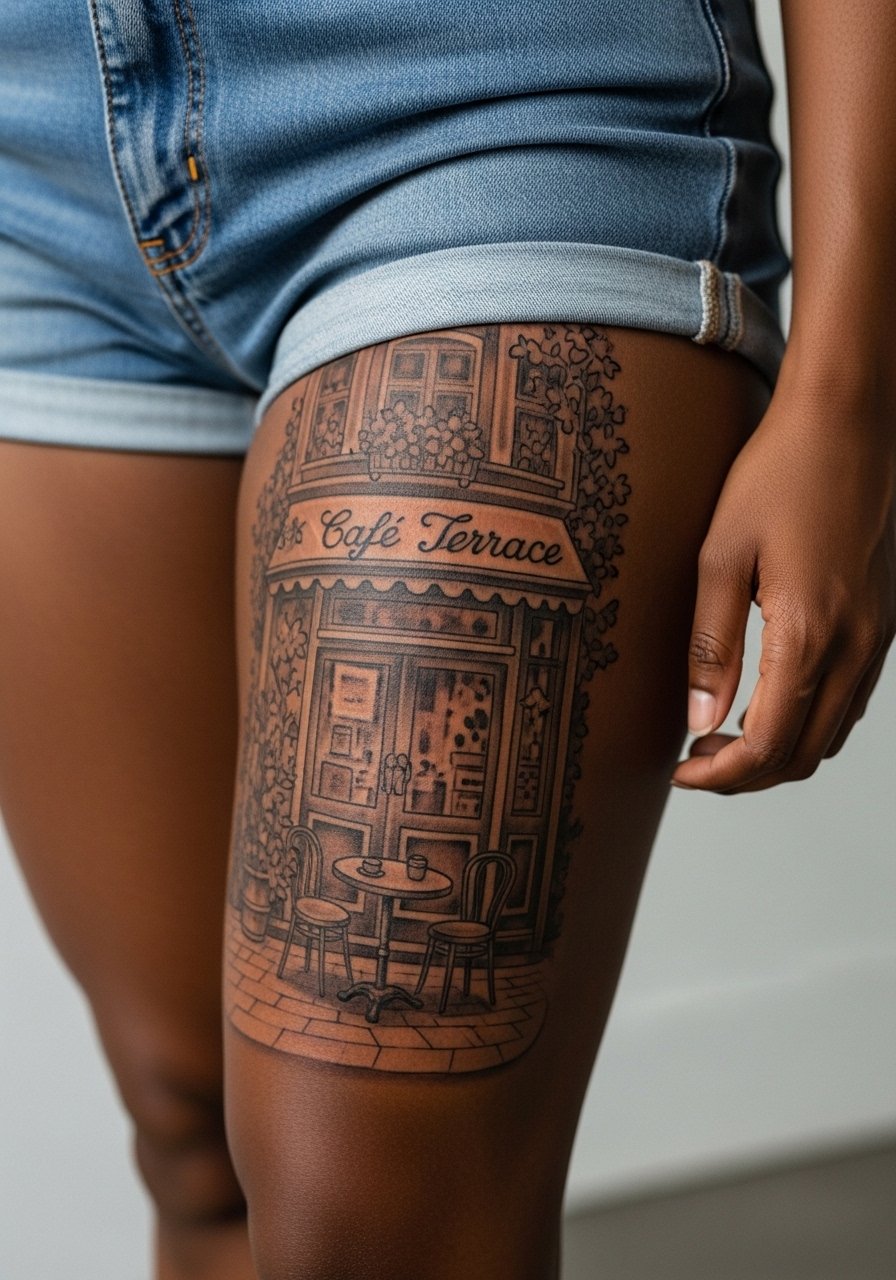
Grayscale versions of colorful scenes age predictably and photograph with a vintage vibe. On the thigh you can keep detail while reducing color maintenance work. Tell the artist you want contrast prioritized in the lamplight areas to keep that glow without yellow pigment. A common error is undercutting shadow areas that later vanish. Thigh sessions allow long passes, but expect soreness. For after-sessions, wear loose athletic shorts or skirts with a slit.
23. Almond Blossom Wrist Cuff
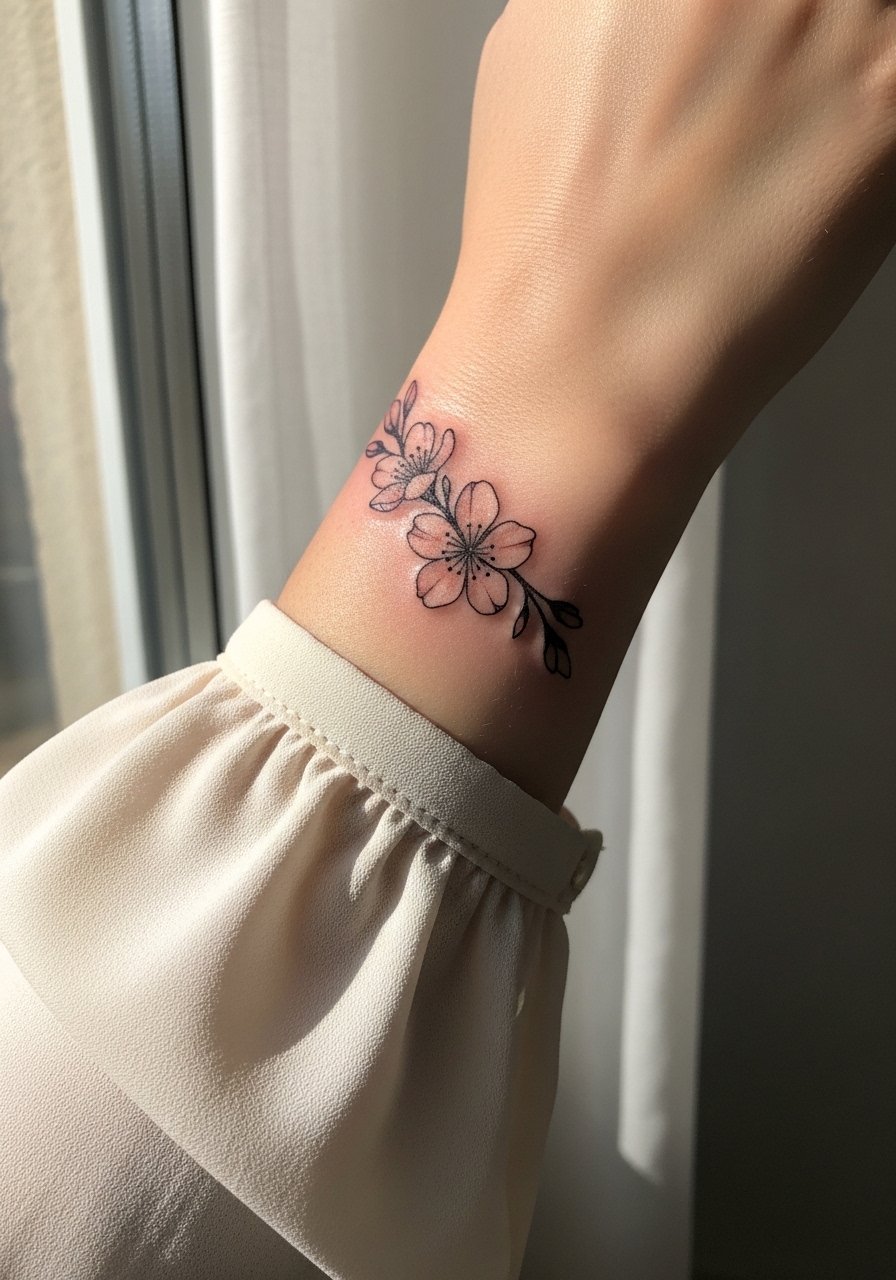
Wrist cuffs are jewelry replacements and should be treated like accessories. Ask for clear repetition with small gaps so the cuff does not blur into a continuous band over time. The mistake is filling the cuff entirely with pale color. Keep stronger outlines on repeating elements. For sessions, wear a sleeveless tank so the artist can rotate your arm easily. Style with a thin silver chain bracelet on the opposite wrist for balance.
24. Pink Peach Tree Sprig on the Inner Bicep
Inner biceps are tender and benefit from simple compositions. Choose slightly bolder primary stems to counteract the area’s softer healing. Artists debate if fine line holds on inner arms. One camp warns of blur from stretching. The other says proper needle depth and spacing settle fine. Plan short sittings and consider lidocaine if you expect long passes. For the session wear a tank top and bring a friend if mobility will be limited afterward.
25. Bedroom Window Scene on the Shoulder Cap

Shoulder caps are ideal for small interior scenes because the curvature lends perspective automatically. Ask for strong outer frames around windows so the perspective remains clear in photos. The frequent mistake is packing too much furniture detail into the small panel. Sessions are quick and low to moderate pain. For sessions wear a loose button-down you can easily pull to one side. For evenings out a racerback tank compliments the placement.
26. Olive Tree Single Trunk on the Upper Arm

Upper arm trunks age well because of thicker tissue and less daily abrasion. Ask for stipple shading for bark texture and slightly heavier canopy outlines to avoid early softening. A common mistake is adding too many tiny branchlets that fade into a blot. Sessions are comfortable and allow good saturation. Pair with a fitted tank and open denim jacket for a vintage casual vibe. Mention to the artist how it should look in both relaxed and flexed positions.
27. Patchwork Sleeve Element: Sunflower Meets Starry Night
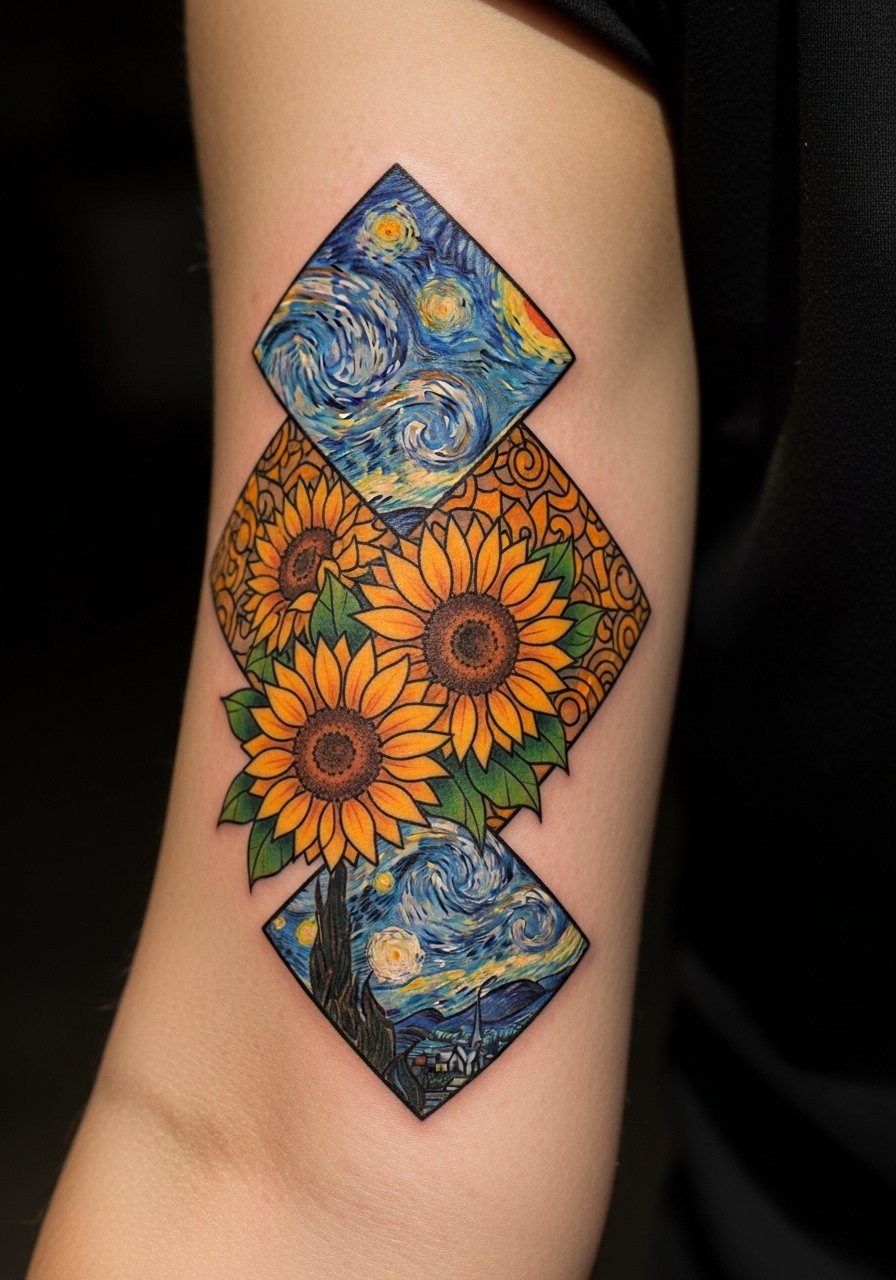
For sleeves made from Van Gogh motifs, plan composition goals so elements can be connected over time. Tell your artist which part you want visually dominant so the sunflowers do not compete with the sky. The mistake is trying to graft three full paintings into one panel without a bridging motif. Expect staged sessions and a touch-up at one year to unify tone. For sessions wear a loose short-sleeve or button-up so the arm is easy to rotate. If you are hunting for portfolios, search hashtags like #neotraditionalvangogh or use apps such as Tattoodo and Booksy to find traveling specialists.
Frequently Asked Questions
Q: Will fine line Van Gogh tattoos blur faster than neo-traditional versions on the forearm?
A: Fine line does tend to require more touch-ups because thin strokes have less pigment volume. Neo-traditional pieces with stronger outer lines and denser internal saturation usually age more predictably on forearms. If you want a delicate look with longer life, ask for slightly heavier primary contours and plan a touch-up at 12 to 24 months.
Q: Do watercolor sunflowers need different healing than blackwork Wheat Fields?
A: Yes, watercolor-style fills often need gentler moisturization and sun protection because pale pigments can wash out faster. Black and gray realism relies on dense shading that tolerates standard protective film and a straightforward cleanse routine. Discuss aftercare methods with the studio since some favor protective film while others recommend dry healing.
Q: How painful is ribcage work for a Sunflowers in Vase piece and are there artist camps about numbing?
A: Rib sessions are commonly reported as one of the more painful spots, mainly because bone sits close to the needle. There is a split on numbing cream. One group uses topical lidocaine to make long passes manageable. The other worries it masks feedback and affects how the needle is controlled. Ask the shop about their policy and whether staged sessions are a better fit for you.
Q: How should I dress for a calf Café Terrace session and what shows it off afterward?
A: For the appointment wear loose joggers or shorts so the leg can be elevated and the artist can access the outer calf without constriction. After healing, cuffed straight-leg jeans or cuffed straight leg jeans create a casual reveal that frames the piece nicely.
Q: If I have darker skin, will Starry Night blues wash out in photos and what should I ask my artist?
A: On darker skin tones, lighter blues can read less vividly in photos. Ask the artist to use higher-contrast outlines and richer pigment anchors in key areas rather than relying only on pale fills. Request healed photos of their previous work on similar skin tones so you can set realistic expectations.
Q: Are finger and ankle Van Gogh snippets worth it given the friction and touch-up likelihood?
A: They can be worth it if you accept periodic touch-ups. Keep designs minimal, use bold anchor points, and expect the need for maintenance sooner than limb pieces. Prioritize simpler motifs and ask your artist about expected touch-up timelines.
Q: Where can I find artists who combine vintage Van Gogh elements without making them look cartoonish?
A: Search discovery pathways like #vangoghtattoo, #neotraditionalvangogh, and "Van Gogh tattoo time lapse" on TikTok. Use Tattoodo and Booksy filters for style and location. In consults, ask for healed photos of similar compositions so you can tell whether the artist's healed aesthetic matches what you want.
