
Fine line watercolor keeps dominating saved boards, and the trade-off is clearer than most people expect: bright blends often fade faster, delicate linework can blur where skin stretches, and small placements ask for touch-ups sooner than larger panels. Pick placement with aging in mind, plan for a realistic touch-up timeline, and pack the right clothes for your session. The first idea below shows a watercolor option that forgives imperfection and ages more gracefully.
1. Celestial Forearm Band That Softens With Time

I've seen forearm watercolor that looks like a painting for months and then loses contrast by year three. Pick slightly bolder outer contours and ask your artist for controlled saturation rather than a single wash. During consultation, say you want visible edges that let the color sit next to the skin rather than bleed into it. Pain on the inner forearm is moderate. Expect a one to two hour session and a likely touch-up at year three for color refresh. For showing it off, pair with a rolled sleeve and a loose button-down shirt that frames the band without covering it.
2. Tiny Watercolor Constellation on the Wrist
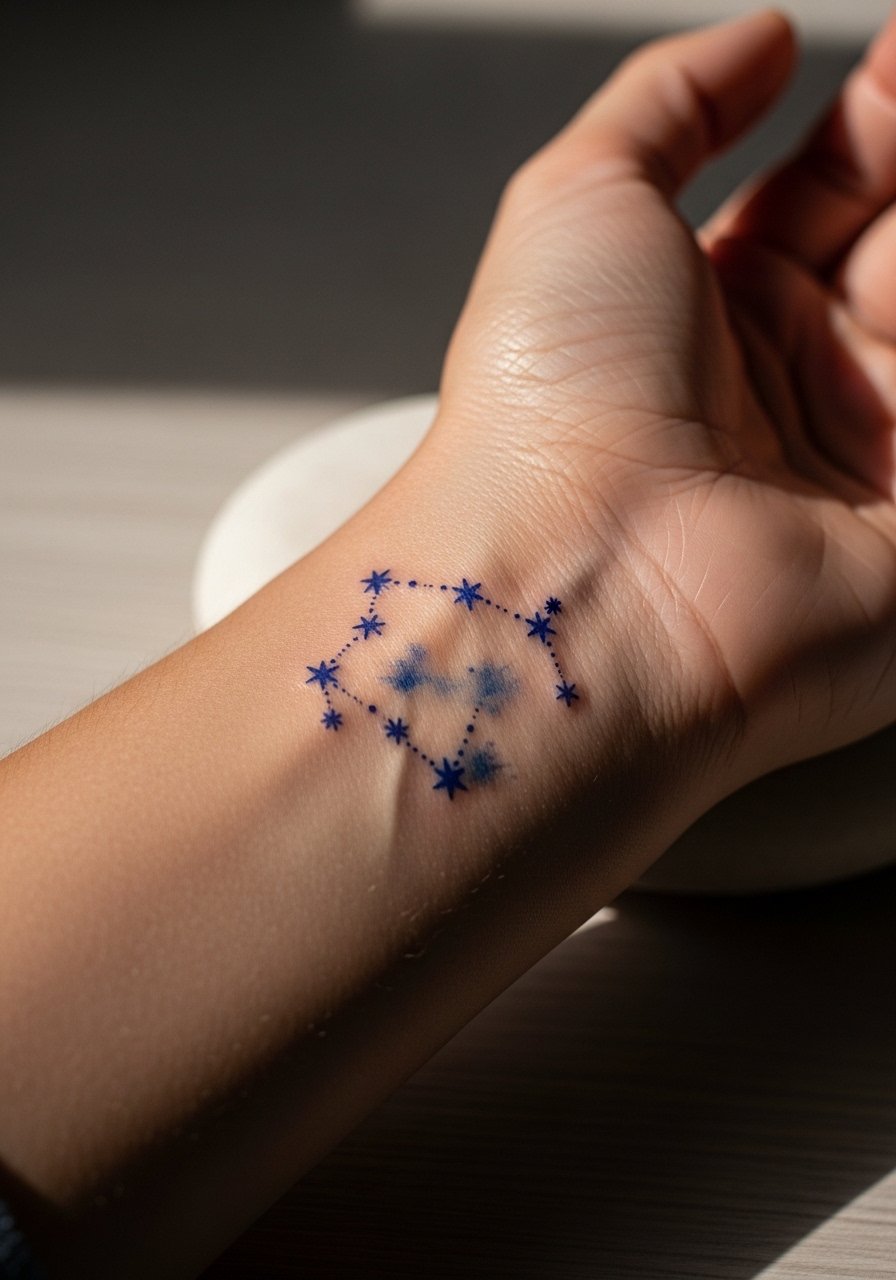
Fair warning: the wrist takes abuse from washing and jewelry friction, so watercolor there must be deliberate. I recommend compact color islands rather than full-bleed washes to avoid early fading. Tell your artist you want crisp star points with separate color nodes and ask for a light touch near the bones to reduce blowout risk. Session time is short, twenty to forty minutes, but healing needs care. Pair this with a thin chain bracelet so the jewelry complements rather than rubs the piece.
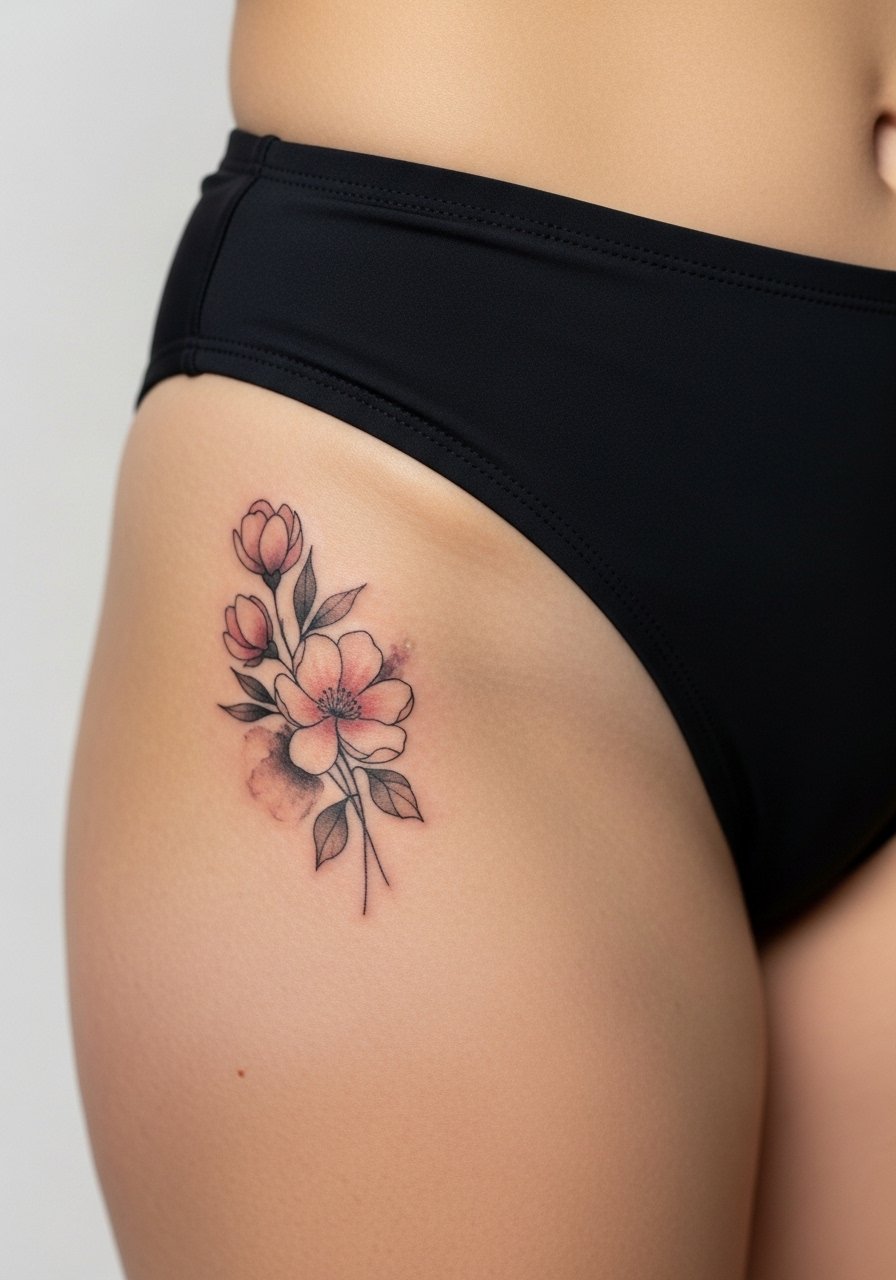
3. Watercolor Collarbone Splash for Open-Neck Looks

This placement reads well from across the room, which makes spacing important. If it is too centralized, it will compete with clothing necklines. I advise bringing photos of the shirts you plan to wear so the artist can scale the piece accordingly. The collarbone can be sharp during the session, a 6 to 7 on most pain scales for brief moments. Expect a one to two hour appointment. For evenings out try an open-back midi dress that leaves the collarbone unobstructed so the watercolor shows through.
4. Ankle Watercolor Sprig That Ages Well With Touch-Ups

Ankle pieces face constant rubbing from socks and shoes. The trick is to keep pigment slightly concentrated in key nodes and add open skin gaps so the wash reads rather than blurs. Tell your artist to avoid heavy stipple near thin skin and to expect a two-visit plan if you want denser color without blowout. The session is short but the first week needs gentle care to limit friction. Show it off with cropped pants or a pair of sandals that keep the ankle visible without rubbing the area.
5. Watercolor Ribcage Panel for Dramatic Flow

Fair warning: ribs are a high-pain area and watercolor pockets there risk early fading if the artist packs too shallow. There is a real debate in the community about fine line and ribs. One camp says the skin stretches and blurs lines within two years. The other camp insists that with correct depth and spacing it settles fine. Ask your artist which camp they follow and how they plan touch-ups. Sessions are longer and may need breaks. Plan for two or more sittings and a touch-up window at year two to three.
6. Tiny Watercolor Finger Accent for Subtle Color
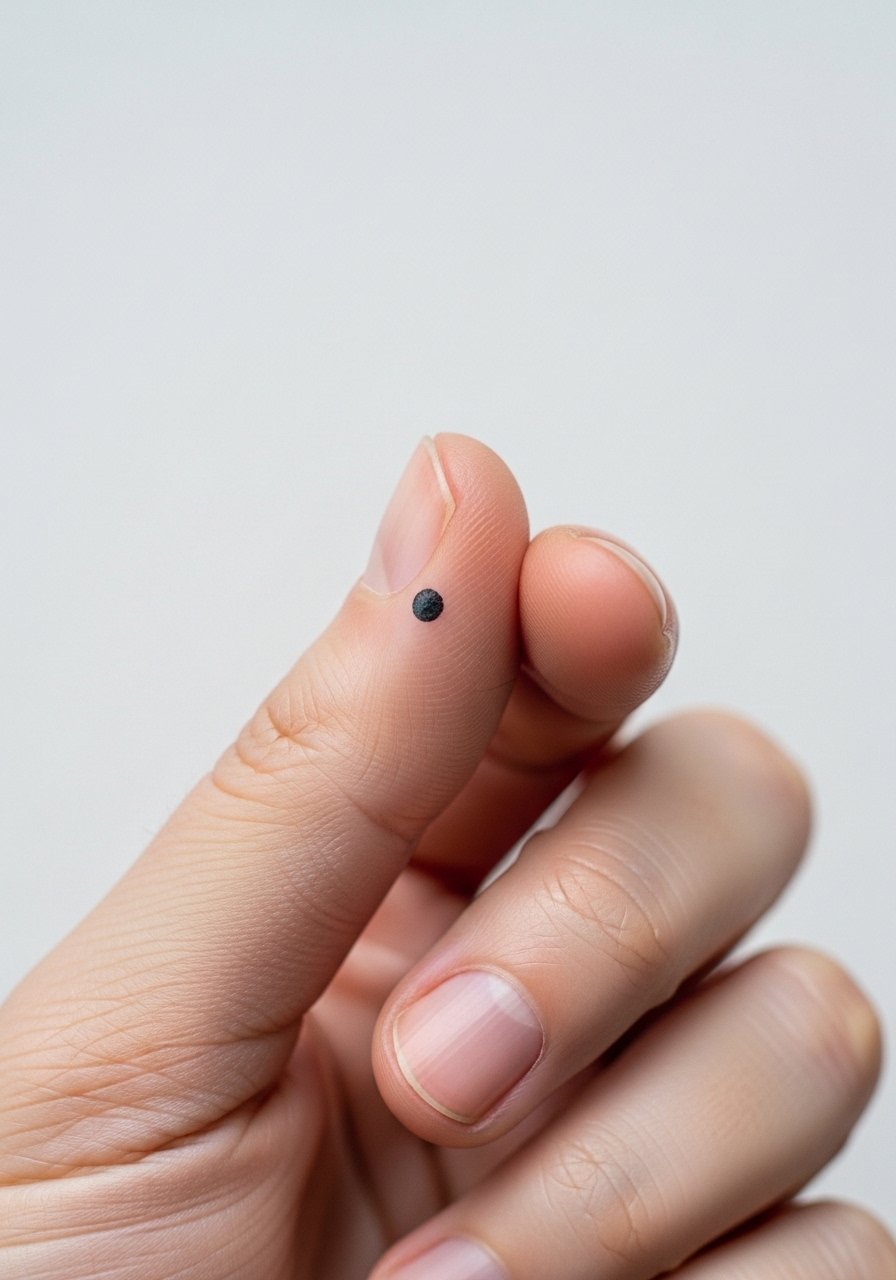
Hand and finger tattoos are controversial because of frequent friction and skin turnover. The debate divides artists into two camps. One side avoids minute watercolor on fingers and predicts fading within a year. The other side uses bolder pigment placement with a willingness to retouch often. If you want this, accept a realistic touch-up schedule and request slightly saturated color nodes rather than a full wash. Sessions are quick but expect yearly refreshes. For the appointment, wear a loose long-sleeve shirt you can roll up so the artist can work cleanly.
Pre-Session Essentials
The shoulders, wrists, and ribcage pieces above demand different prep and aftercare approaches, so these items smooth the session and the first healing window.
- Stencil transfer paper kit. Lets you and your artist check placement on the exact clothing or skin zone you plan to show off, which matters for collarbone and forearm pieces.
- Topical numbing cream. Applied per instructions about 45 minutes before can ease the ribcage and sternum experience without changing how the ink sits.
- Thin protective film roll. Useful for ankle and finger tattoos that face friction from footwear and daily hand use during the first week.
- Fragrance-free gentle body wash. Cleanses healing watercolor areas without stripping pigment, which helps delicate wrist and forearm washes.
- Aquaphor healing ointment. A thin layer in the first few days keeps the skin supple and reduces scabbing risk for fine blended color.
7. Watercolor Spine Wash for Open-Back Dresses

Vertical spine pieces need flow and rhythm so each color field meets the next without muddying. Ask for deliberate gaps between pigments and for stronger anchor marks where the spine curves. Pain varies along the spine but expect sections to be more sensitive near bone. Sessions can be split to maintain saturation control. For show-off outfits, an open-back slip dress highlights the vertical line and keeps fabric off the ink while it heals.
8. Watercolor Sternum Bloom That Works Under Tops

Sternum spots need careful scaling so the colors sit above the chest without getting lost against garments. Tell your artist what bras or tops you usually wear so the piece does not disappear under fabric lines. The sternum can be a seven out of ten on the pain scale, and sessions often break into shorter bursts. Consider a touch-up at year two for color lift. If you plan to wear strapless outfits, test one during consultation to see how the tattoo aligns with the neckline.
9. Watercolor Calf Panel With Lasting Saturation

The calf is a forgiving canvas because the skin moves less and abrasion is lower than ankles. Go for richer saturation if you want longevity. I recommend a session long enough to build depth in layers rather than a single blast of pigment. Tell your artist you prefer gradual layering so color keeps tonal variation over time. Sessions can run two to three hours. Wear loose drawstring linen pants to the studio so you can roll the leg up without pinching the fresh ink.
10. Watercolor Back Shoulder Splash for Asymmetry

Upper back pieces allow bold washes because clothing rarely rubs the area. Ask for a clear focal zone with surrounding softer fades so the piece keeps structure as it ages. Pain is moderate and sessions are comfortable when you bring breaks and a pillow. If you want asymmetry, show photos of off-center garments so the artist can align to seams. For studio ease wear a button-down shirt you can pull aside rather than a sweater.
11. Watercolor Thigh Cluster That Hides or Shows

Thigh pieces age well because sun exposure is lower. The common mistake is compressing too much detail into a small patch. I tell people to choose three to five main color nodes and let the rest breathe. Session time varies from one to three hours. For the appointment wear high-waisted shorts you can shift slightly to expose only the work area without tugging the skin.
12. Watercolor Back of Hand Accent That Requires Touch-Ups

Back-of-hand tattoos face constant washing and sun, which eats color faster than other zones. The realistic plan is to treat this as a piece needing periodic refreshes. Ask the artist about pigment choice and accept seasonal touch-ups. Sessions are quick but healing is high maintenance. For the visit wear a sleeve you can roll up easily and avoid bracelets for the first two weeks so the area is not irritated.
13. Watercolor Neck Accent for Visible Subtlety
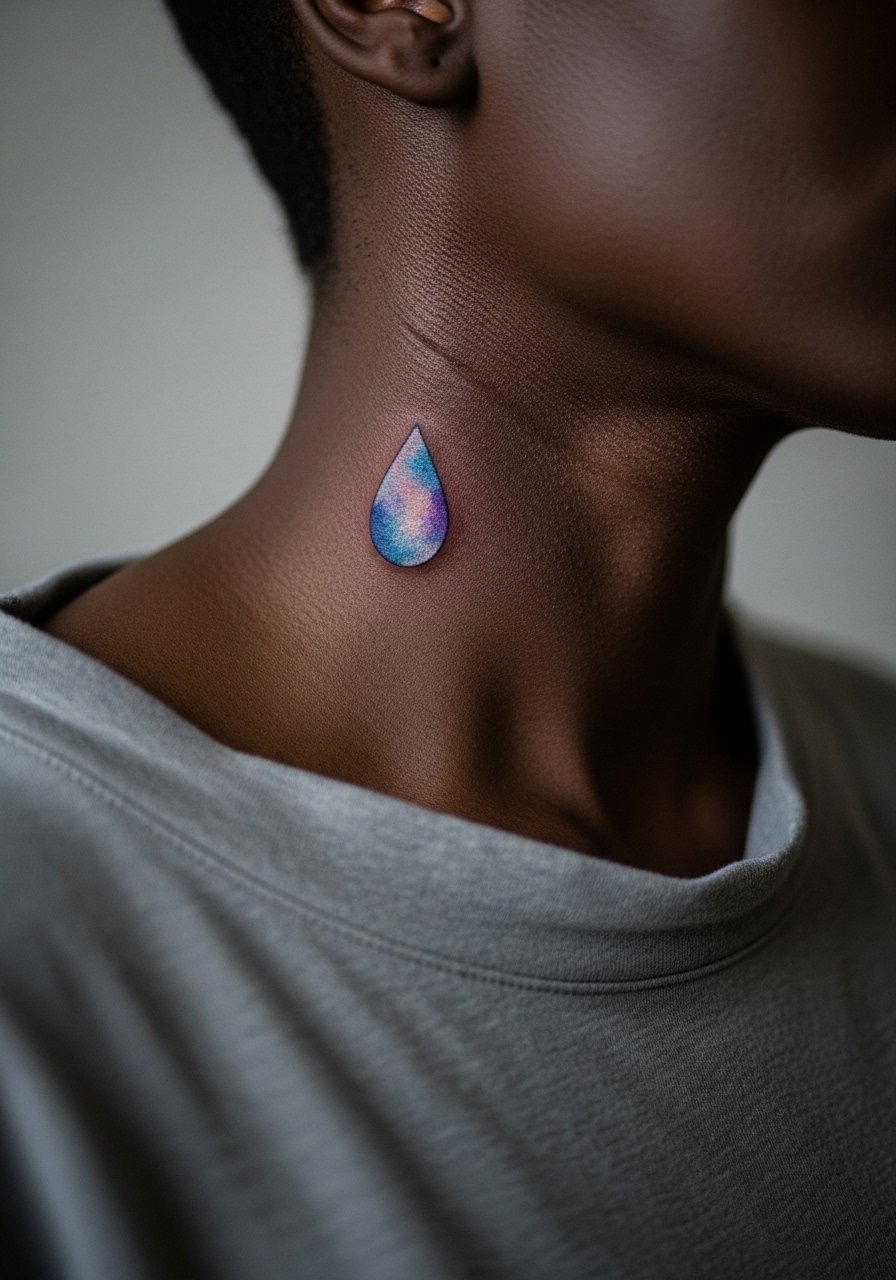
Neck placements are visible and sometimes affect perceptions in workplaces. If you want visibility with subtlety, choose a small color node rather than a sprawling wash. During consult mention any job considerations so the piece can be scaled or placed slightly lower. The neck can be sensitive and healing may feel odd due to clothing friction. For sessions pick a day you can wear loose collars like a wide-neck pullover afterwards.
14. Watercolor Upper Arm Portrait Accent That Keeps Shape
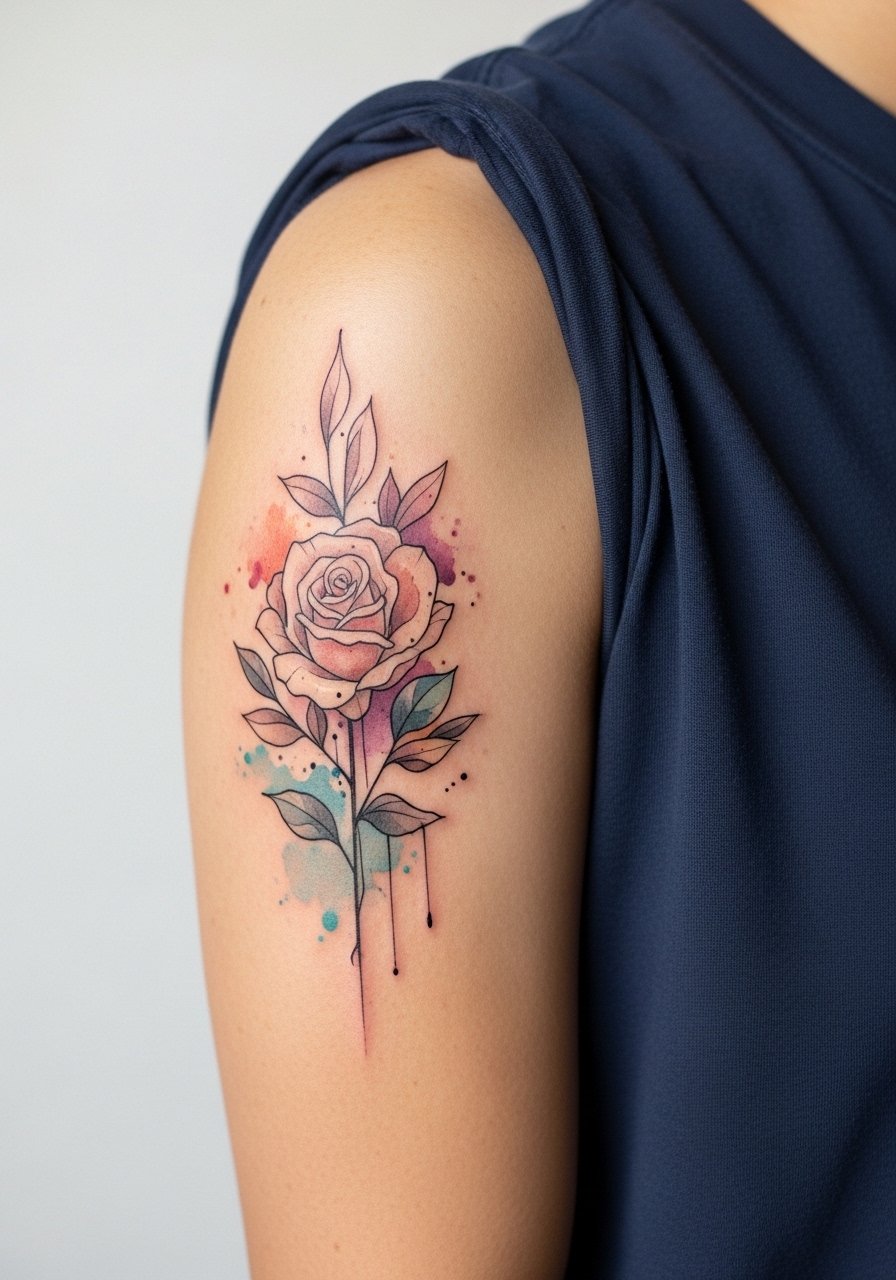
Portrait elements in watercolor need stronger anchor lines to keep facial features readable as the washes fade. The common mistake is letting the wash swallow the form. Request darker micro-line anchors and stipple shading under the wash for longevity. Upper arm sessions are comfortable and allow multi-hour sittings. For showing it off roll sleeves and wear a sleeveless linen top that complements the portrait without crowding the color.
15. Watercolor Hip Bloom That Plays With Swimwear
Hip tattoos sit at the junction of skin that stretches and tight clothing seams. The fix is to ask for composition that avoids relying on tiny color gradients near the waistband. Tell the artist what swimsuits you wear so the piece can be placed where fabric edges will not obscure it. The session is moderate pain and healing needs gentle wearing of softer fabrics. For beach season pick a high-waisted swimsuit that frames rather than compresses the bloom.
16. Watercolor Sleeve Accent Panel for Layering
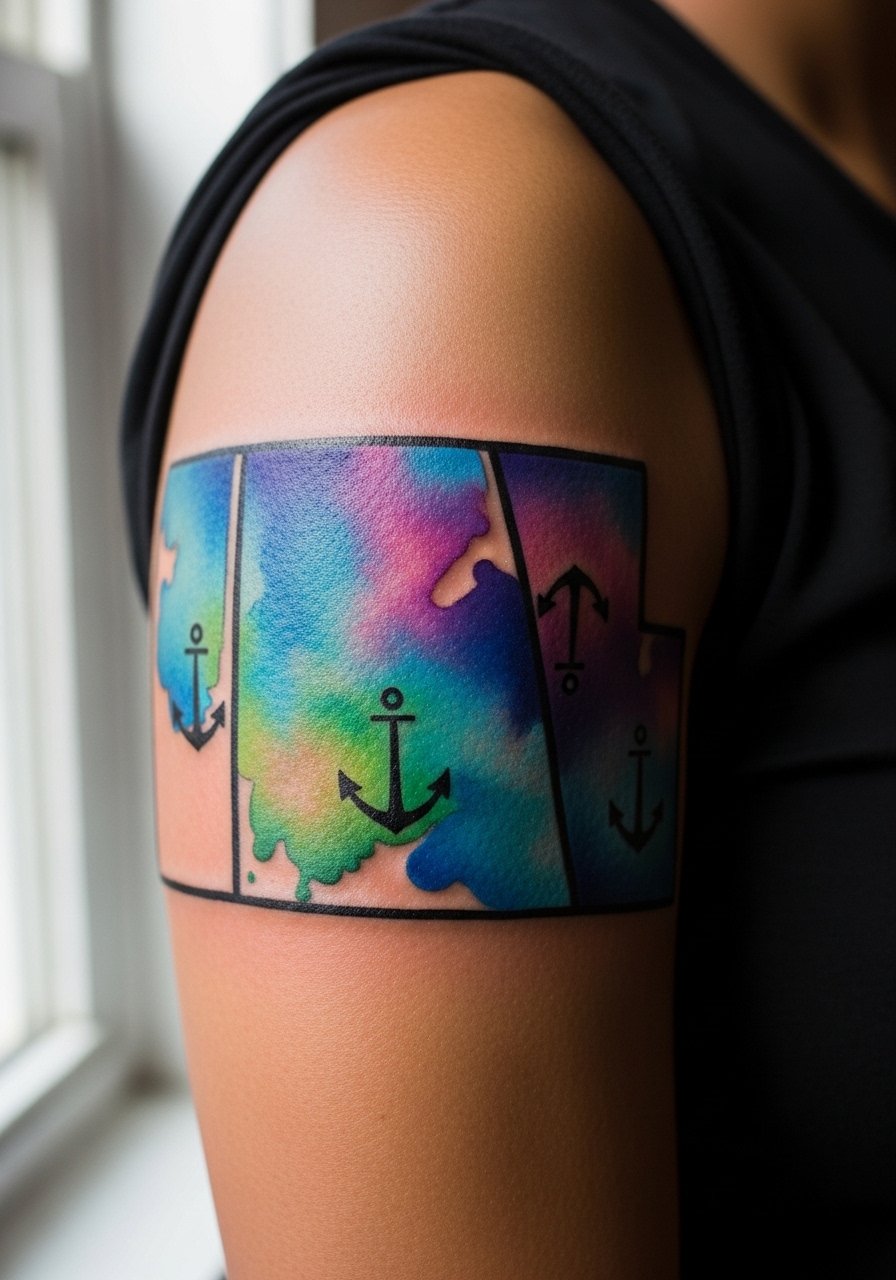
Integrating watercolor into an existing sleeve requires planning so pigments do not collide with prior blackwork. The recommendation is to schedule a mapping session where the artist previews how new washes will sit against existing saturation. Sessions vary based on coverage and can span multiple visits. Expect touch-ups where colors meet old ink. Wear a loose tank top to the studio so the artist can access the full sleeve without tugging.
17. Watercolor Chest Piece Framed by Jewelry

Chest pieces are visible and versatile, but the common error is placing the focal point under necklace chains. Bring any jewelry you frequently wear to the consult so the artist can position the composition accordingly. The chest can be tender in spots and sessions often break for comfort. If you plan necklaces, pick a thin chain pendant necklace that sits above the wash rather than across the center to avoid constant rubbing.
Frequently Asked Questions
Q: How long do watercolor-made-in-heaven style tattoos keep their vibrancy on wrists and hands?
A: From what I have seen, wrists and hands lose vibrancy faster than covered areas because of washing and sun exposure. Expect noticeable softening by year one to two and plan on touch-ups if you want to keep saturation bright. Choosing concentrated color nodes rather than full washes helps extend visual life.
Q: Should I get a ribcage watercolor if I worry about pain and longevity?
A: You can, but ribs are high on the pain scale and the skin there shifts with movement. Artists split into two camps on fine line and ribs. One camp says it blurs quickly. The other camp says correct depth and spacing make it hold. Ask your artist which approach they use and schedule a staged session with a follow-up touch-up window.
Q: Do watercolor tattoos require different session prep than traditional blackwork?
A: Yes. Watercolor relies on layered pigment and subtle blending, so you want loose clothing that gives the artist access without compressing the area. Bring reference clothes or jewelry that show how you plan to wear the piece. A short mapping appointment is often useful before the full session.
Q: Can I wear my usual jewelry with a new watercolor wrist or hand piece during healing?
A: Avoid tight bracelets or rings on the area for at least two weeks. Lightweight pieces like a thin chain or a minimalist ring can work after the initial scab phase, but I suggest waiting until the skin is no longer tender to limit rubbing and pigment loss.
Q: How do I find an artist who understands watercolor techniques without cleaning up portfolios myself?
A: Use discovery pathways like tattoo directories, hashtag searches, and convention guest lists to find artists who show healed photos rather than fresh snaps. Look for studio portfolios with healed images and ask for mapping photos that show placement on real bodies during consultation.
