
Whale shark tattoos look great on feeds, but the pieces that still read clean after years are rarely the ultra-fine full-color portraits people save. Size, placement, and skin type change how dots, stipple shading, and saturation settle. Pain and touch-up needs vary too, so think beyond the snapshot. Below are 27 whale shark drawings that balance visual impact and longevity, with notes on placement, aging, and what to tell your artist.
1. Micro-Realism Forearm Wrap
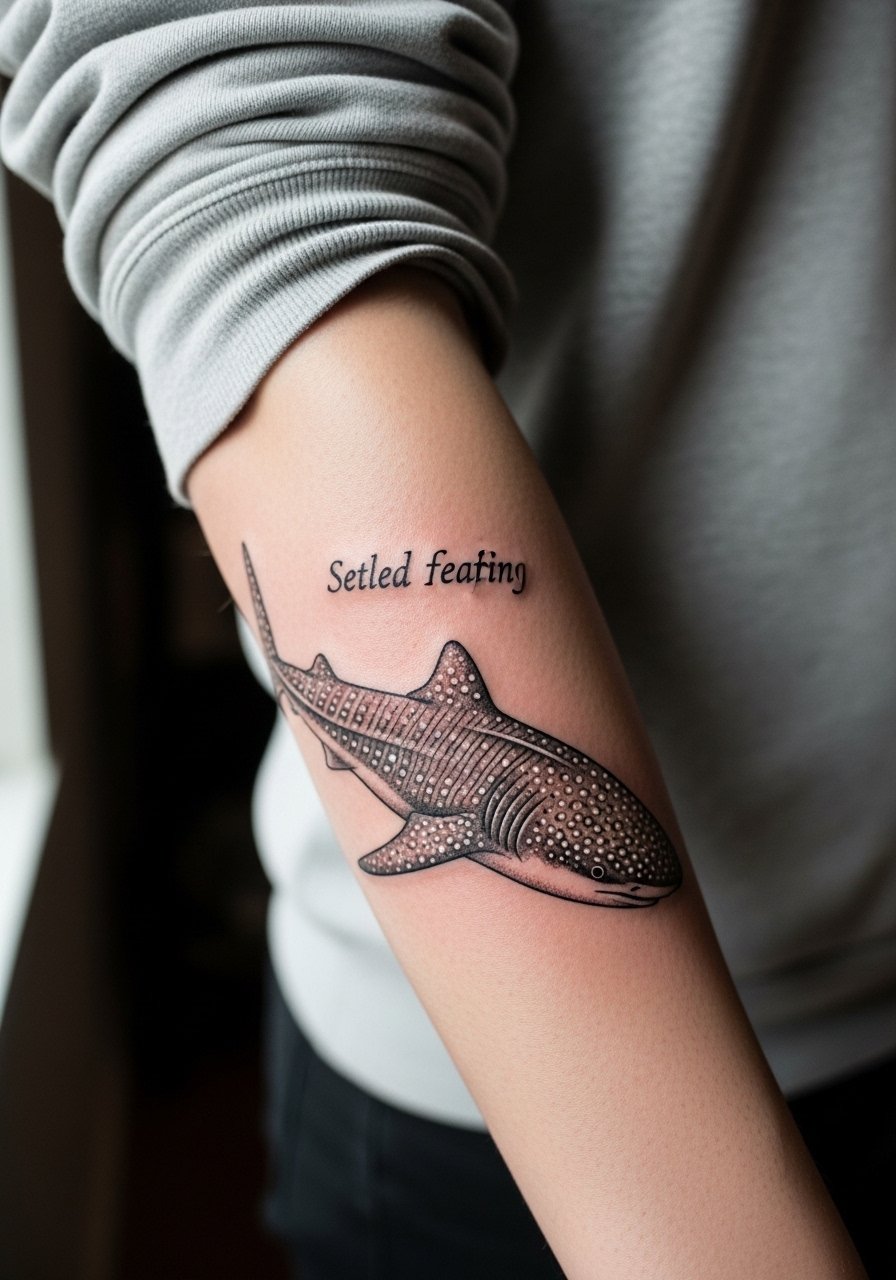
I’ve seen micro-realism forearm wraps hold up best when artists use slightly bolder stipple and avoid ultra-thin contour lines. Fair warning, the forearm is a low to moderate pain area, and sessions usually run one to three hours depending on size. Tell your artist you want preservation of contrast rather than hyper-detail across the whole body. A common mistake is packing tiny dots into the belly pattern; that blurs into gray after a few years. For showing it off, roll sleeves and try a linen button-down that frames the forearm without hiding the wrap.
2. Delicate Inner Wrist Spot
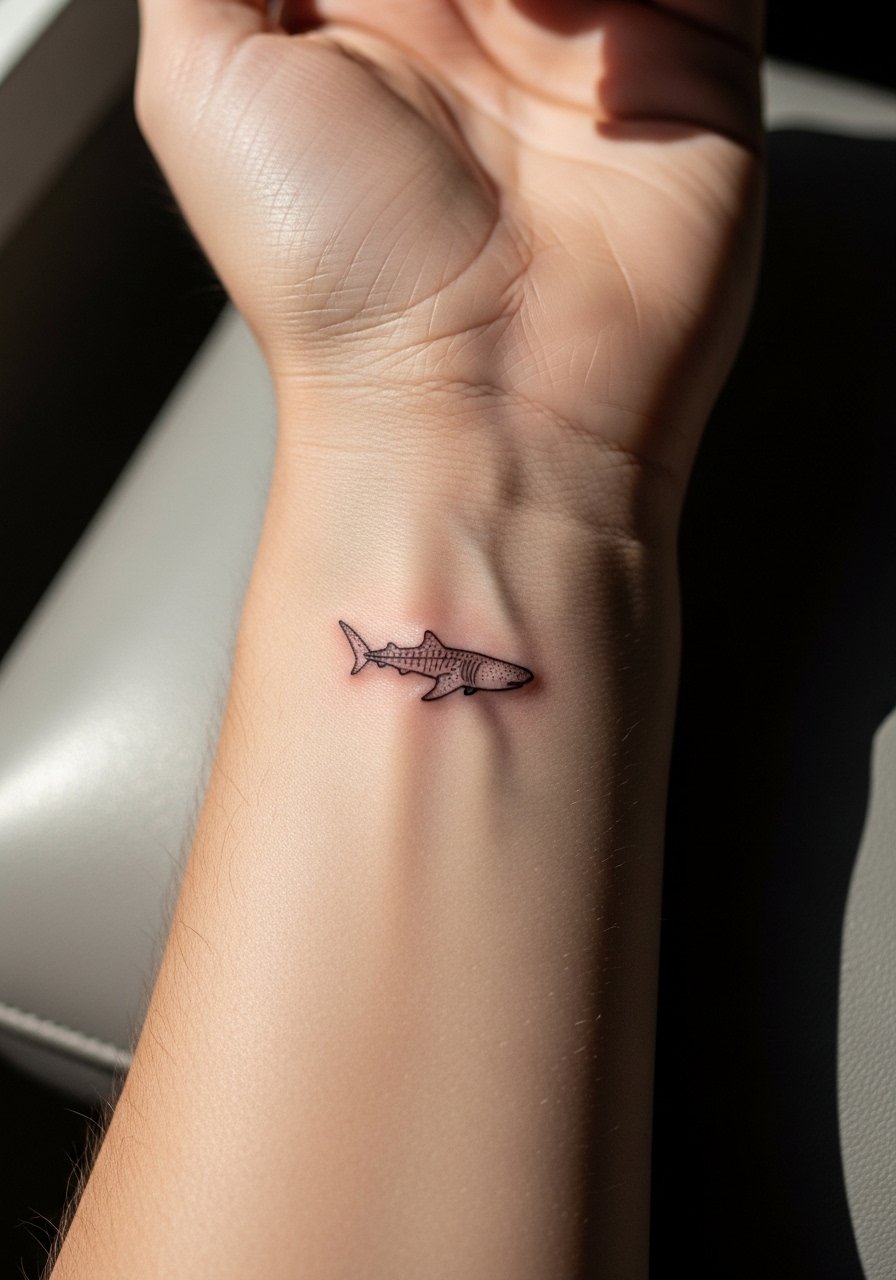
Most people underestimate wrist movement. The inner wrist is a high-motion zone that speeds fading, so expect touch-ups earlier than on the forearm. Pain is low to moderate for a small spot and a session is typically under an hour. The trick is to ask for slightly heavier linework and minimal internal patterning to avoid blowout. A real mistake is asking for micro-dot spots in the pattern; those vanish. Pair this placement with a thin chain pendant that sits above the wrist for a balanced look.
3. Ankle Constellation Composition
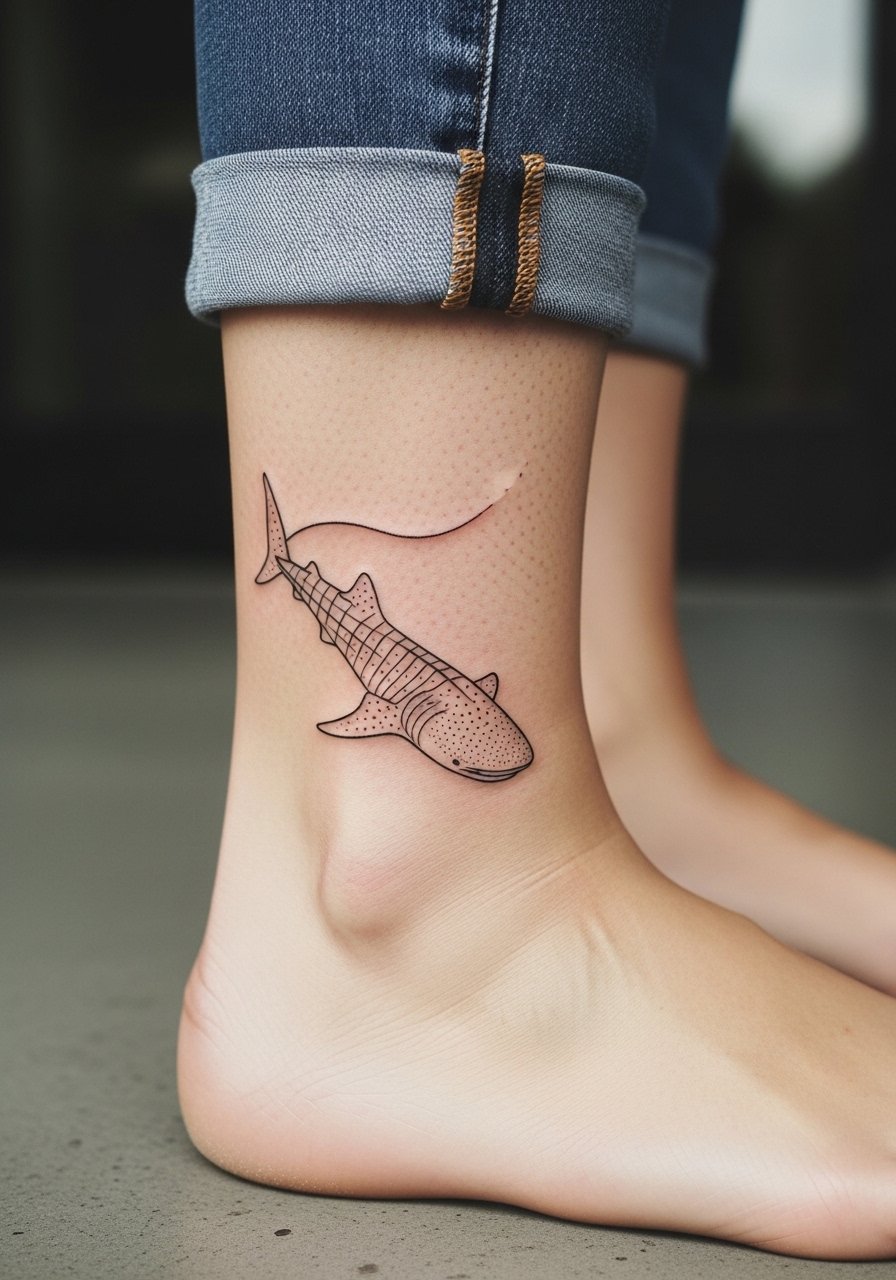
There’s something about ankle tattoos that reads delicate from across the room. The ankle is boney and can be painfully sharp for some, and sessions are short, often under an hour for a small composition. Ask for clean single pass linework and avoid dense shading near the malleolus. The usual mistake is cramming too much detail into a tiny footprint, which leads to smudged spots by year two. For footwear choices, low-cut sneakers or sandals show this piece best. Consider a pair like minimal leather sandals that keep attention on the ankle.
4. Stylized Collarbone Accent
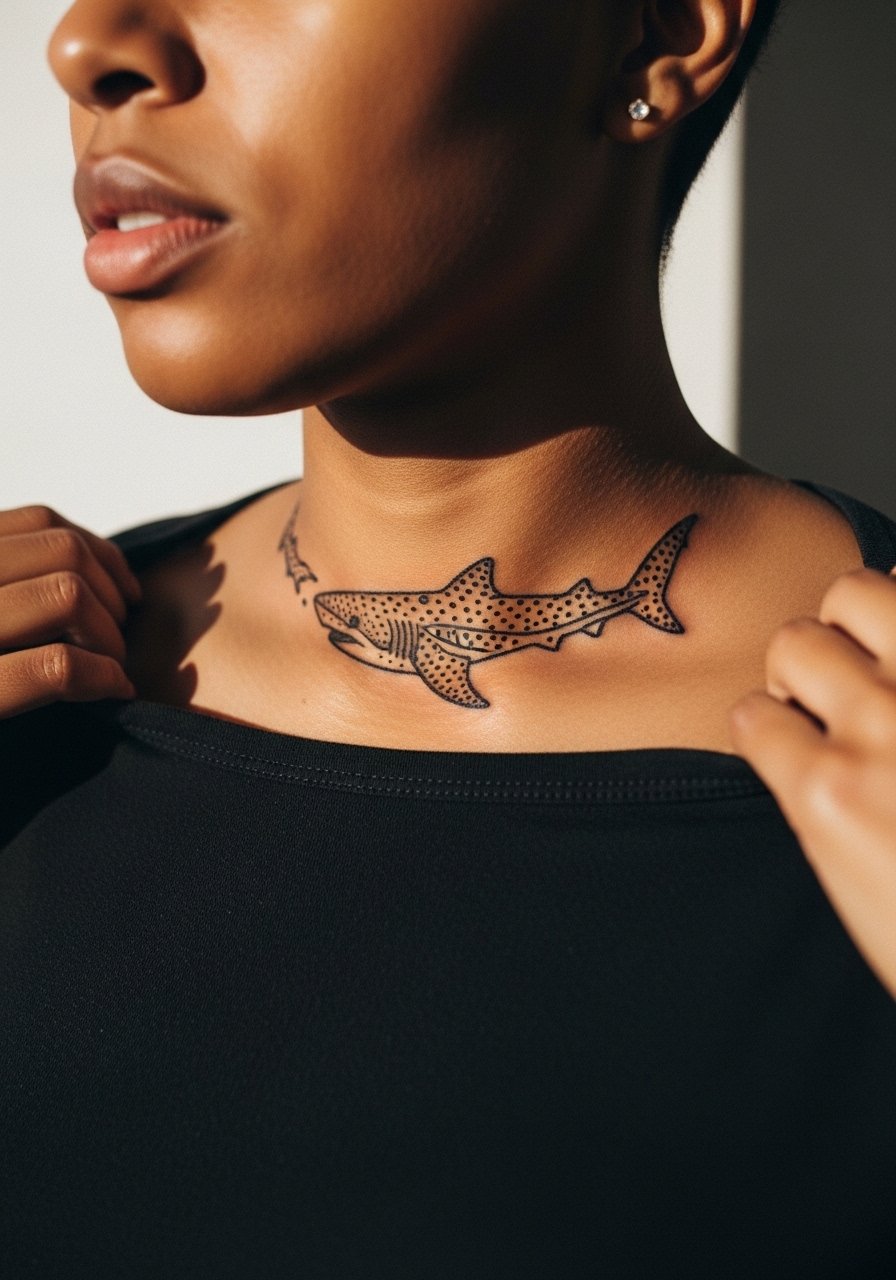
Most collarbone work looks bold when the linework has breathing room. Pain here skews moderate for many people because the bone is close to the skin. Sessions vary from forty-five minutes to two hours. During consultation, ask the artist to test the spacing of the whale shark spots on the stencil before inking. A common mistake is running dense dot work too close to the clavicle, which fades into blotches. For evening wear, an open-neck blouse frames the collarbone without competing with the linework.
5. Chest Plate Micro-Realism
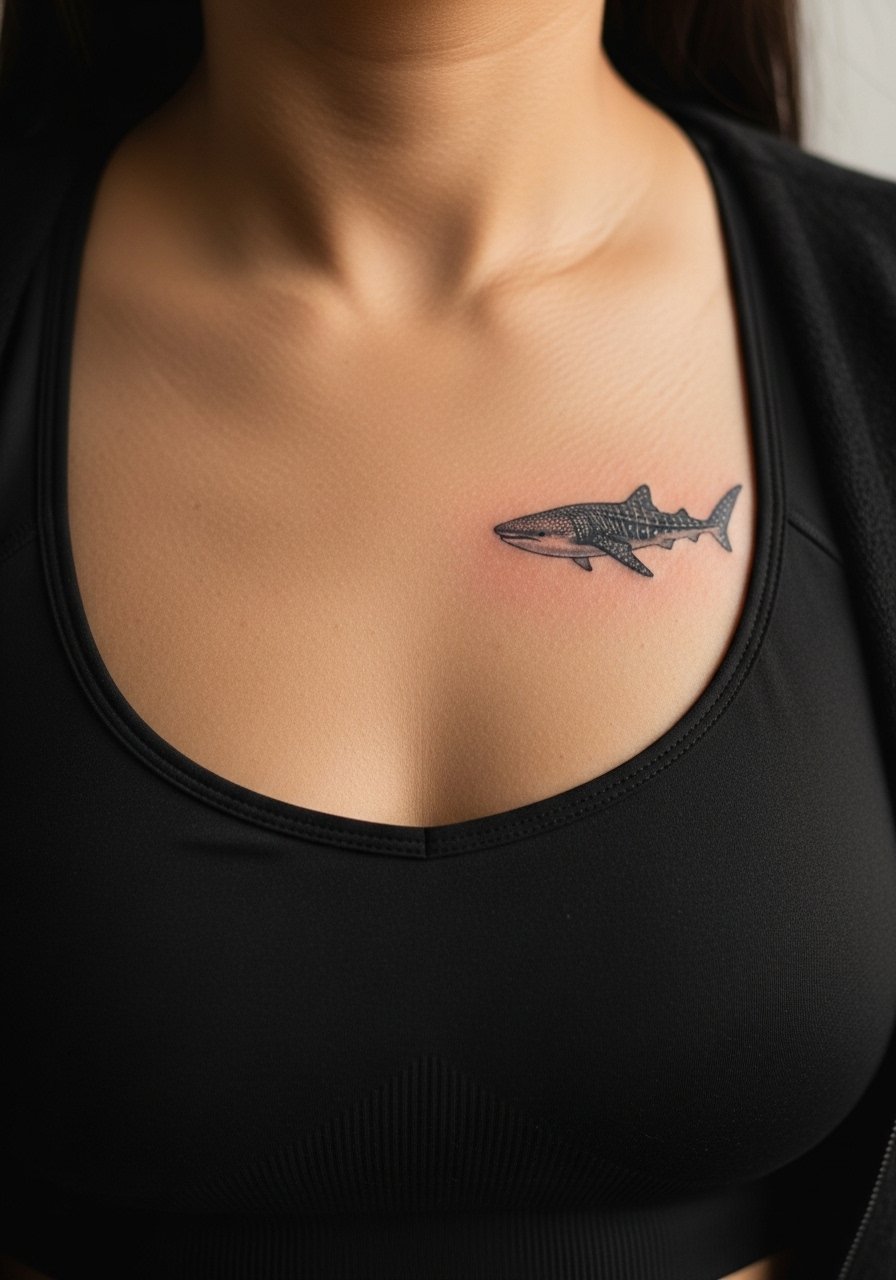
Most chest placements age based on sun exposure and movement. Chest sessions can be slightly more painful than the arm and often require two short sittings for detail. Ask your artist to prioritize contrast in the pattern and avoid tiny, dense stippling across the whole belly. A mistake is requesting full-color shading in a very small chest piece; it can end up muddy. For studio arrivals, wear a sports bra that gives the artist access while staying modest.
6. Ribcage Large-Scale Scene
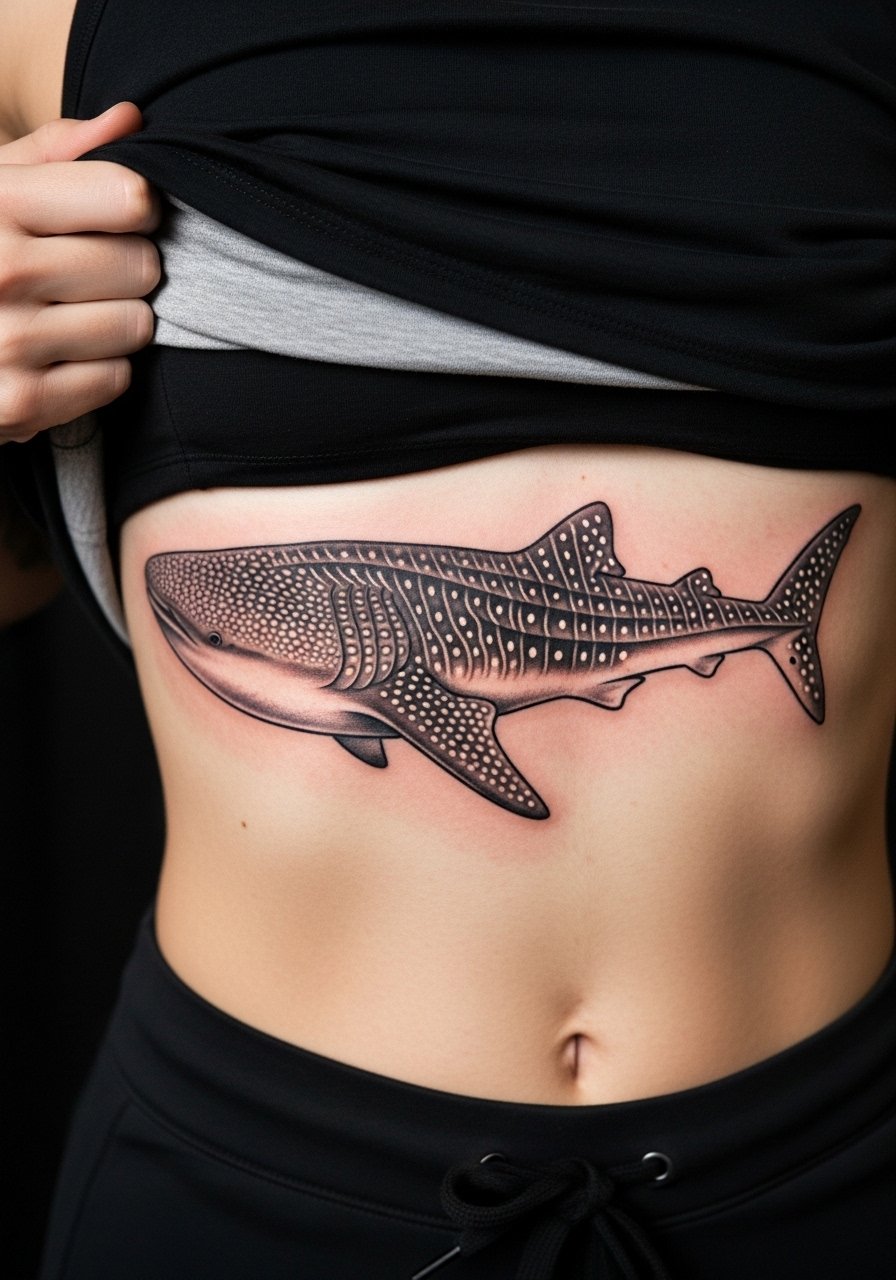
Artists split on ribs in two camps. One group says fine line on the ribs blurs quickly because of shifting skin and breathing motion. The other group argues that deeper line depth and spacing make fine work settle well. I recommend sizing up the design and spacing patterns more than you think. Rib sessions are painful, often multiple sittings, and touch-ups are common by year three. For the session wear, a loose crop top that lifts easily is ideal. This placement pairs with an open-back jumpsuit for nights out, but keep sun protection in mind.
Studio Day Picks
The chest, ribcage, and forearm pieces above ask for different prep and healing approaches, so these essentials smooth the studio day and the first week of wear.
-
Stencil transfer paper kit. Lets you preview placement on curved areas like the ribcage and chest before the needle starts, which is crucial for wrap and large-scale pieces.
-
Topical numbing cream. Applied per instructions before rib or chest sessions it can lower the sting without affecting how the ink sits.
-
Thin protective film roll. Keeps ankle and wrist pieces cleaner during the first week of friction from shoes and washing.
-
Fragrance-free gentle body wash. Cleans healing skin without stripping pigments on delicate forearm and chest work.
-
Aquaphor healing ointment. A thin layer in the first days helps locked-in moisture for fine line and micro-realism areas without clogging.
7. Back Shoulder Cape
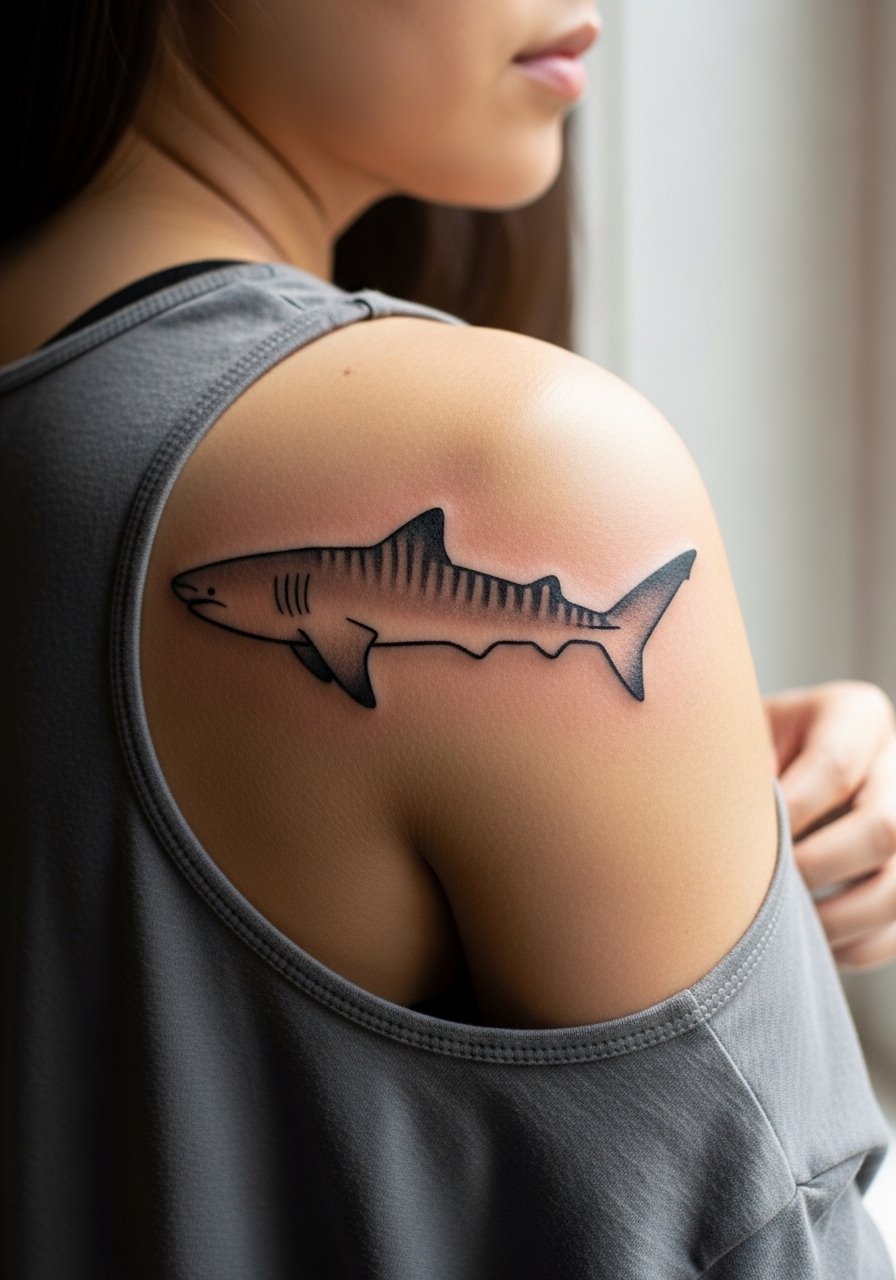
When you sit down for a shoulder blade cape, bring references that show how the shark will flow with your muscle. The shoulder blade is forgiving for detail and ages well with saturation, and sessions usually fall in the one- to three-hour range. A common mistake is placing the head too close to the spine where movement distorts detail. For wardrobe, a loose tank top makes access easy on studio day and lets you try open-back tops afterward.
8. Minimalist Side Rib Silhouette
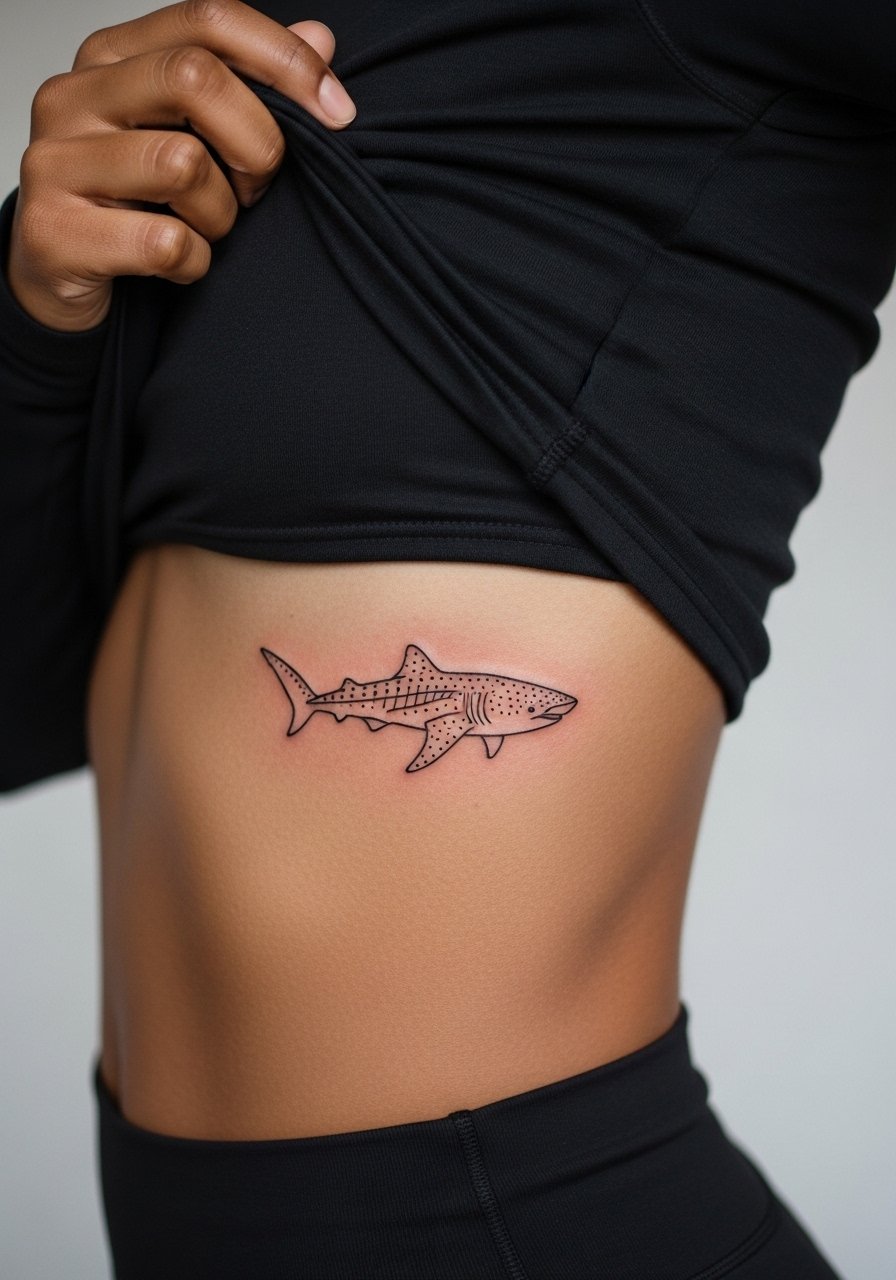
The ribs are one of the higher pain placements. Sessions for a simple silhouette are short, but breathing and movement lengthen the process. For longevity, ask for a slightly thicker outline and minimal internal detail. The mistake is asking for very thin internal lines that merge within a few years. If you want to keep it private while healing, bring a button-down you can pull aside. Many people later pair this with a high-waisted skirt that reveals only a hint of the design.
9. Watercolor Wash Backpiece
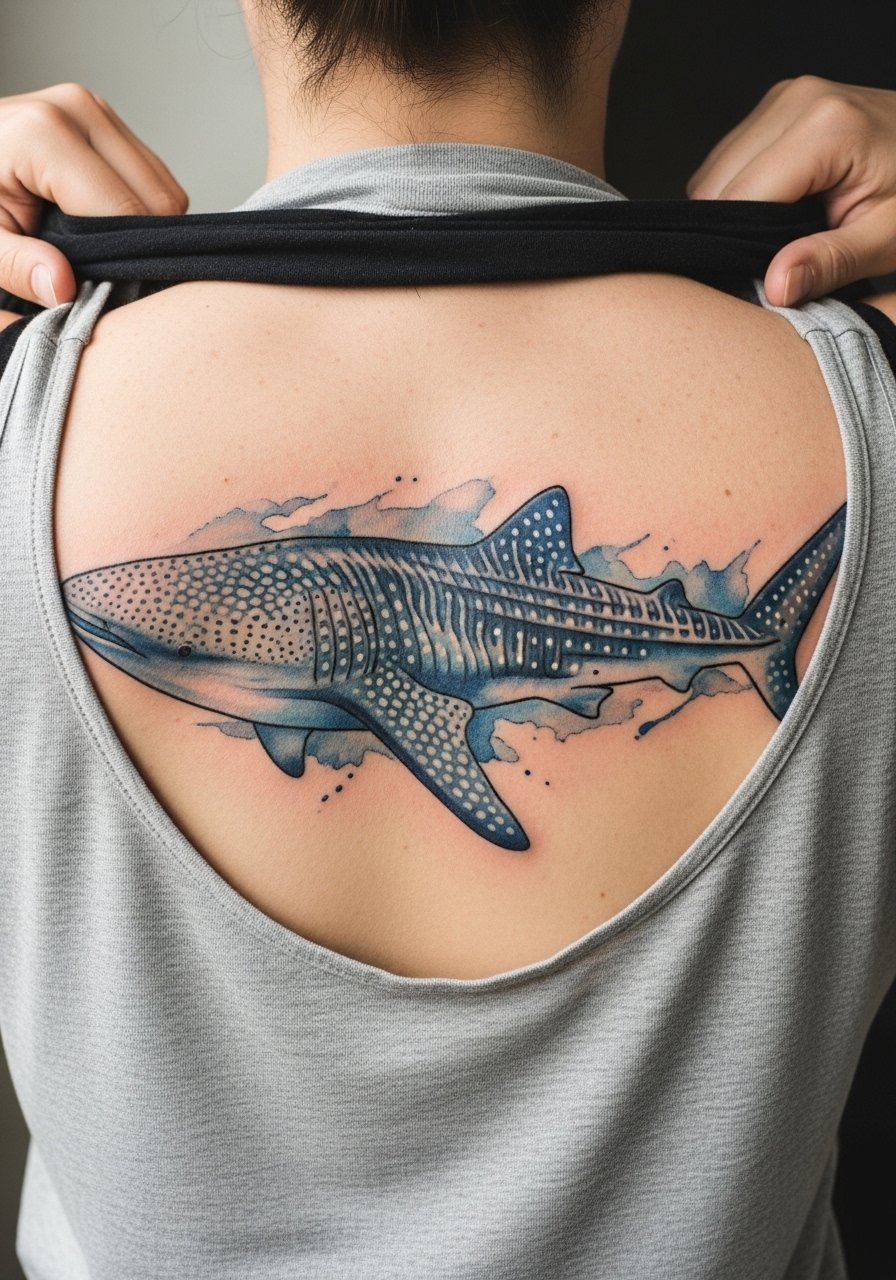
Watercolor effects look spectacular fresh but can fade unevenly. My observation is that bold anchors like a dark contour or stipple belly pattern keep the watercolor readable as it ages. Backpieces take multiple sessions and are moderate pain over large areas. The common error is skipping a dark underlayer, which lets the watercolor wash flatten. For show-off looks, open-back dresses balance coverage and reveal without stressing the healed ink.
10. Thigh Panel with Dot Work
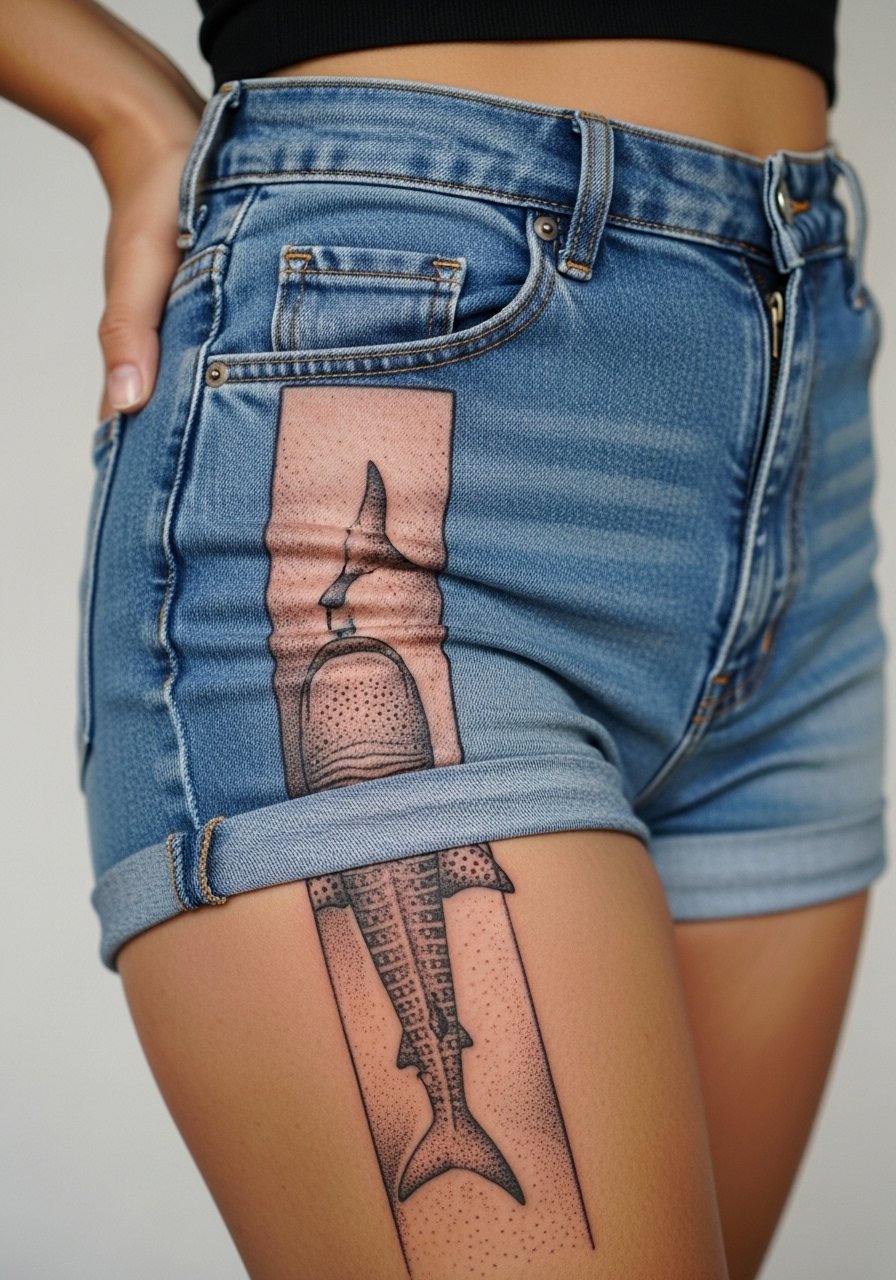
Thigh panels are one of the most forgiving canvases for stipple shading and dot work. Pain is low to moderate, sessions can be long, and the area tolerates heavy saturation well. Tell your artist to space dots to account for slight skin stretching over time. The mistake is compressing dots too densely; they blend into gray by year four. For session comfort, wear loose drawstring shorts so the artist can roll the leg up without pressure. A loose linen drawstring pant works well for the ride home.
11. Small Hand Accent
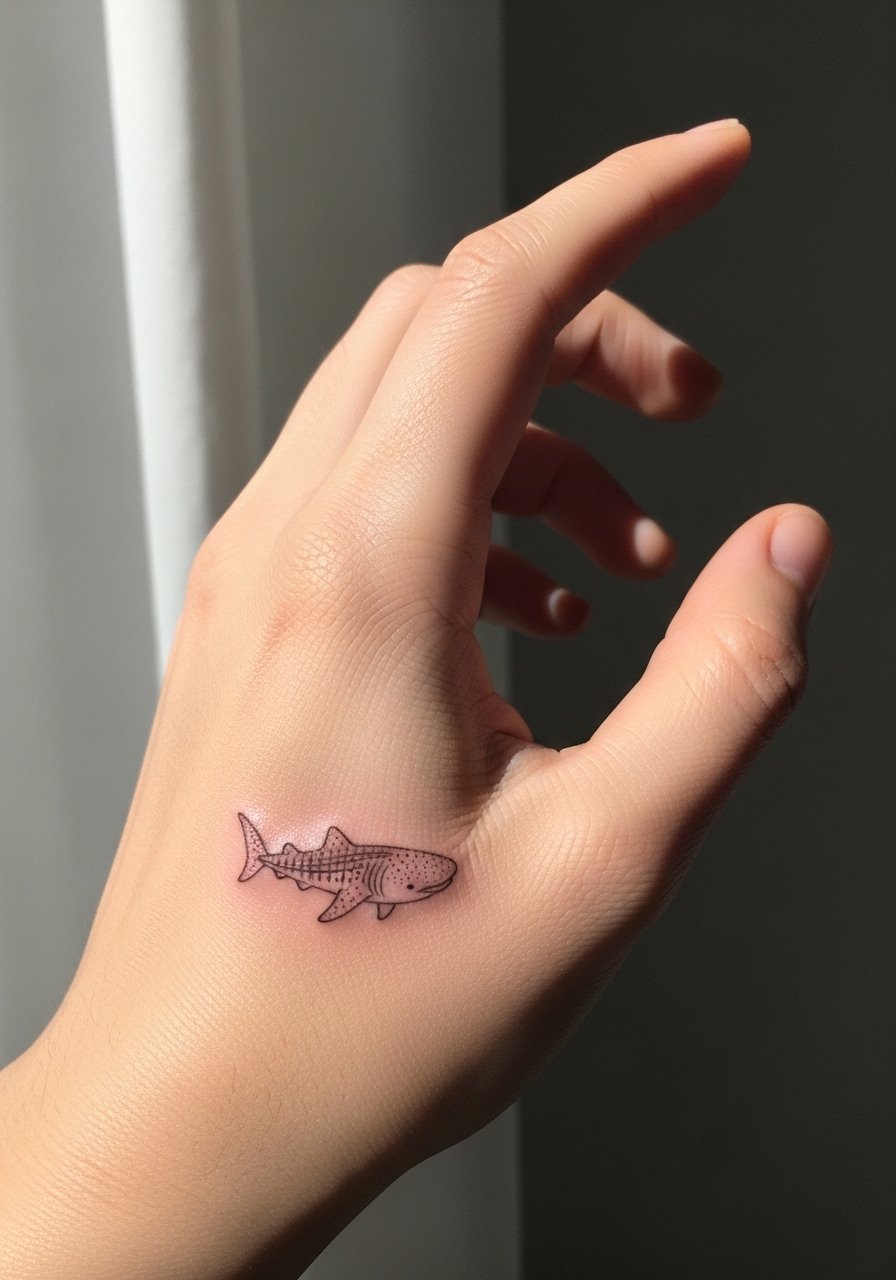
Hand tattoos age differently because of constant washing and sun exposure. The side of the hand is visible and high-friction, so expect faster fading and more frequent touch-ups. Sessions are short but painful and ink can soften within a year. The common mistake is wanting detailed shading on such a small, exposed spot. If your work requires discretion, think twice about this placement. For jewelry balance, slim rings or a delicate bracelet keep the hand from feeling crowded.
12. Calf Portrait with Saturation
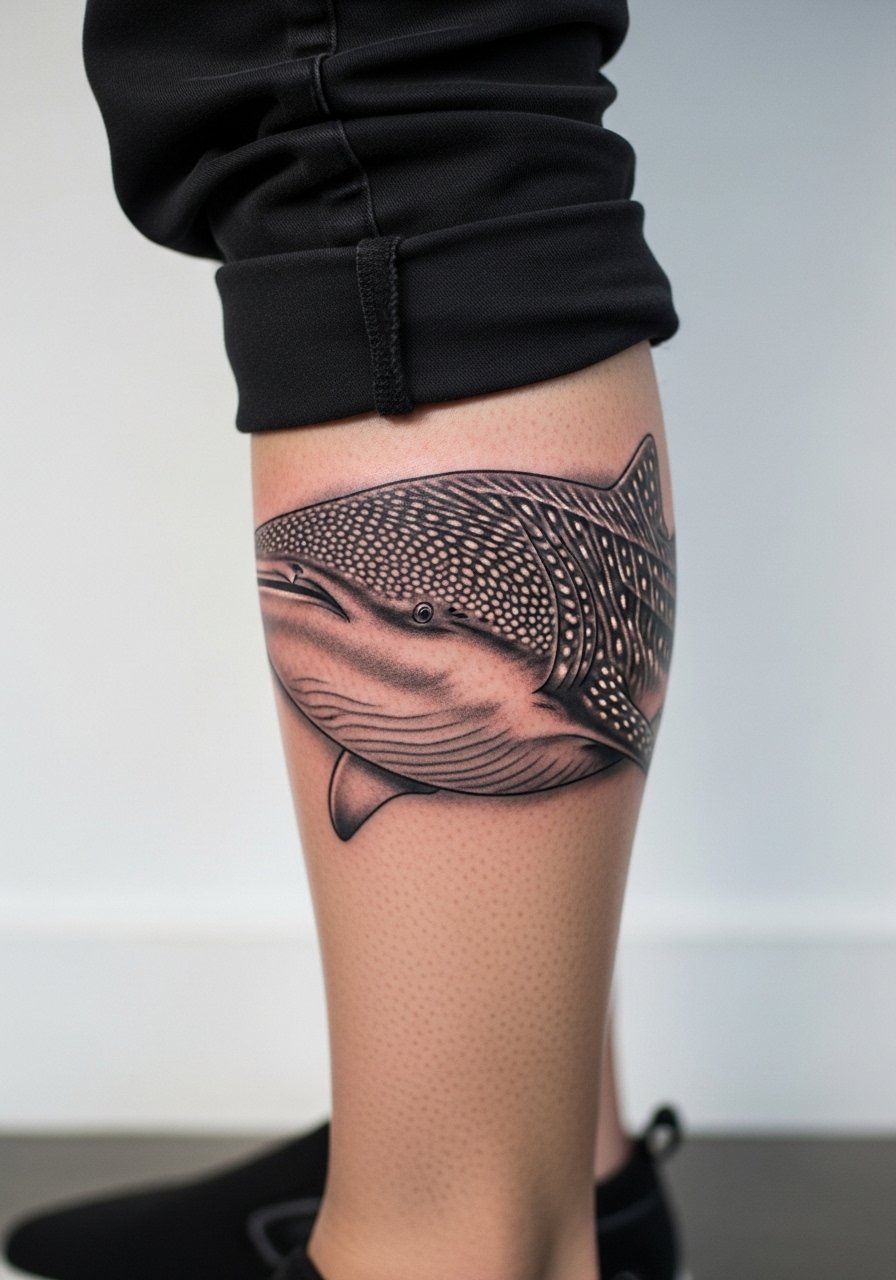
Calf pieces wear well because they get moderate sun exposure and less stretching than the thigh. Sessions range from one to three hours for portrait-scale saturation. Ask your artist to prioritize locked-in saturation in darker areas rather than tiny highlight dots across the belly. A frequent error is over-blending mid-tones which then flatten. For daytime showing, mid-calf pairs with rolled-up denim shorts without competing with the artwork.
13. Finger Chain of Minimals
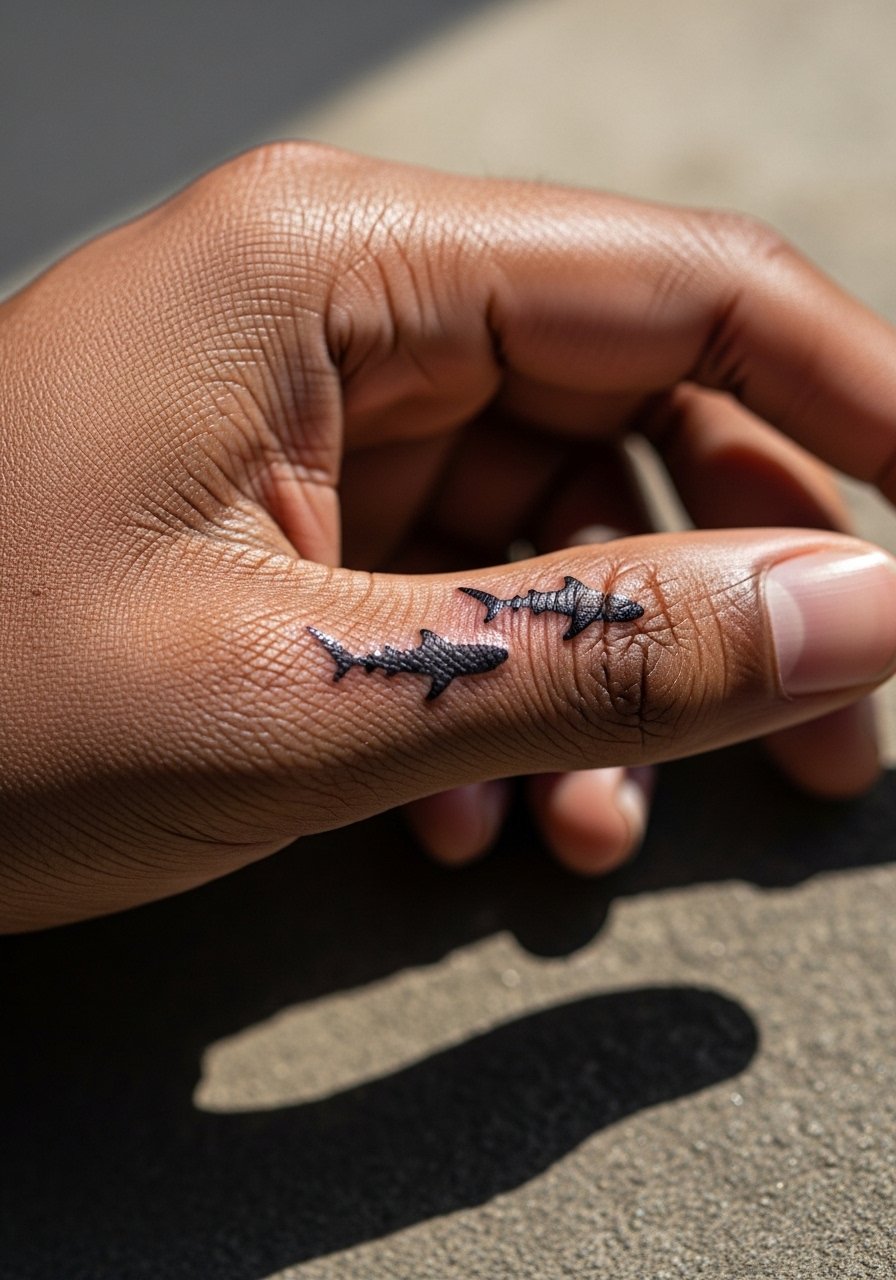
Finger tattoos are notoriously high-maintenance. The skin there sheds more, and details fade quickly. Sessions are brief but painful on the bone. For a chain of minimals, request thicker contours for each icon and avoid micro-patterning inside each shape. The common mistake is wanting tattoo-level detail in a size meant for simple icons. When styling, stack a thin midi ring that sits near the icons rather than directly over them to reduce friction.
14. Sternum Centerpiece
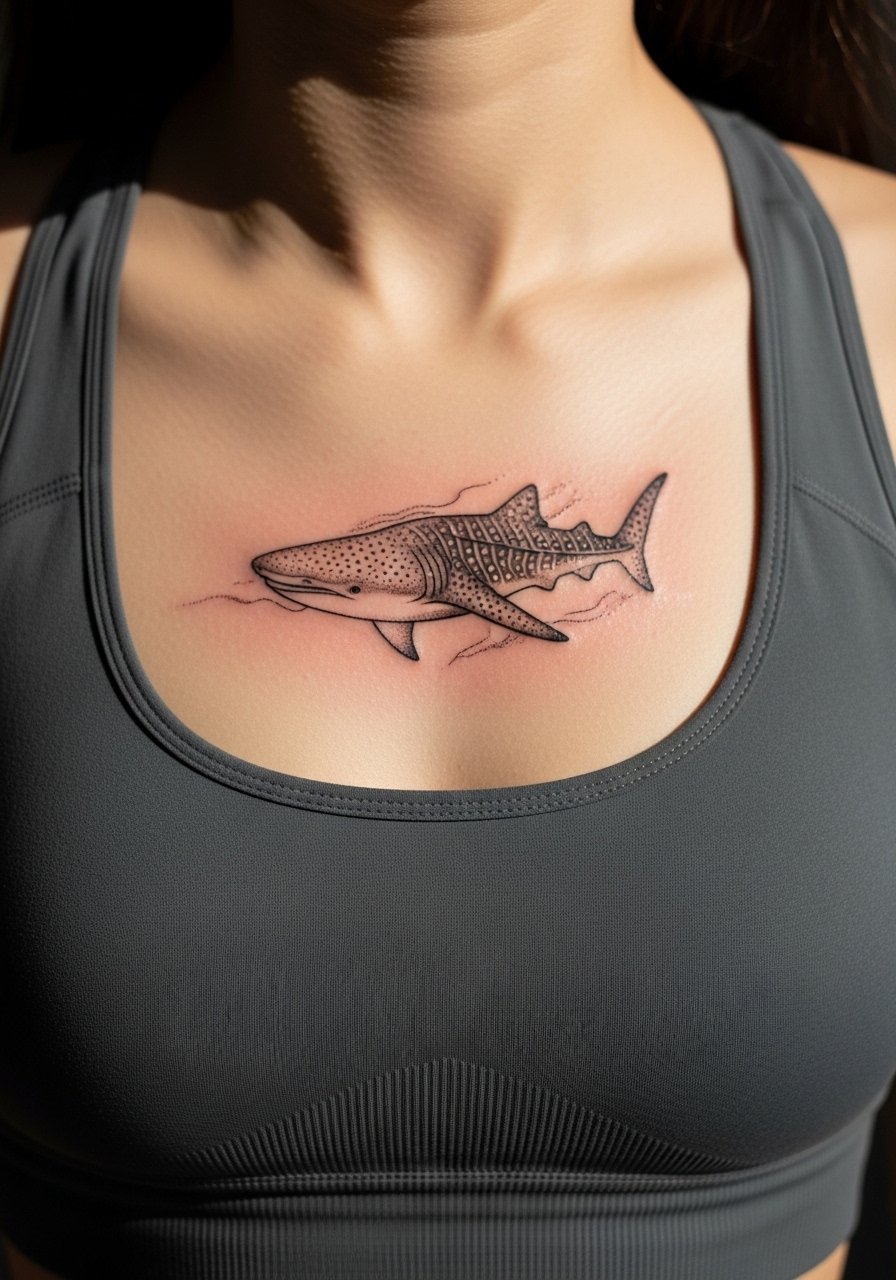
Sternum work needs an experienced hand because the area breathes and moves a lot. Sessions can be painful and often need breaks. One camp argues delicate fine line here blurs fast because of stretch and sweat. The other camp says with proper depth and spacing, fine line can last. My guidance is to lean into slightly bolder linework and plan a touch-up at year two. For studio logistics, wear a strapless or zip-front top to keep access easy.
15. Minimal Behind-the-Ear Accent
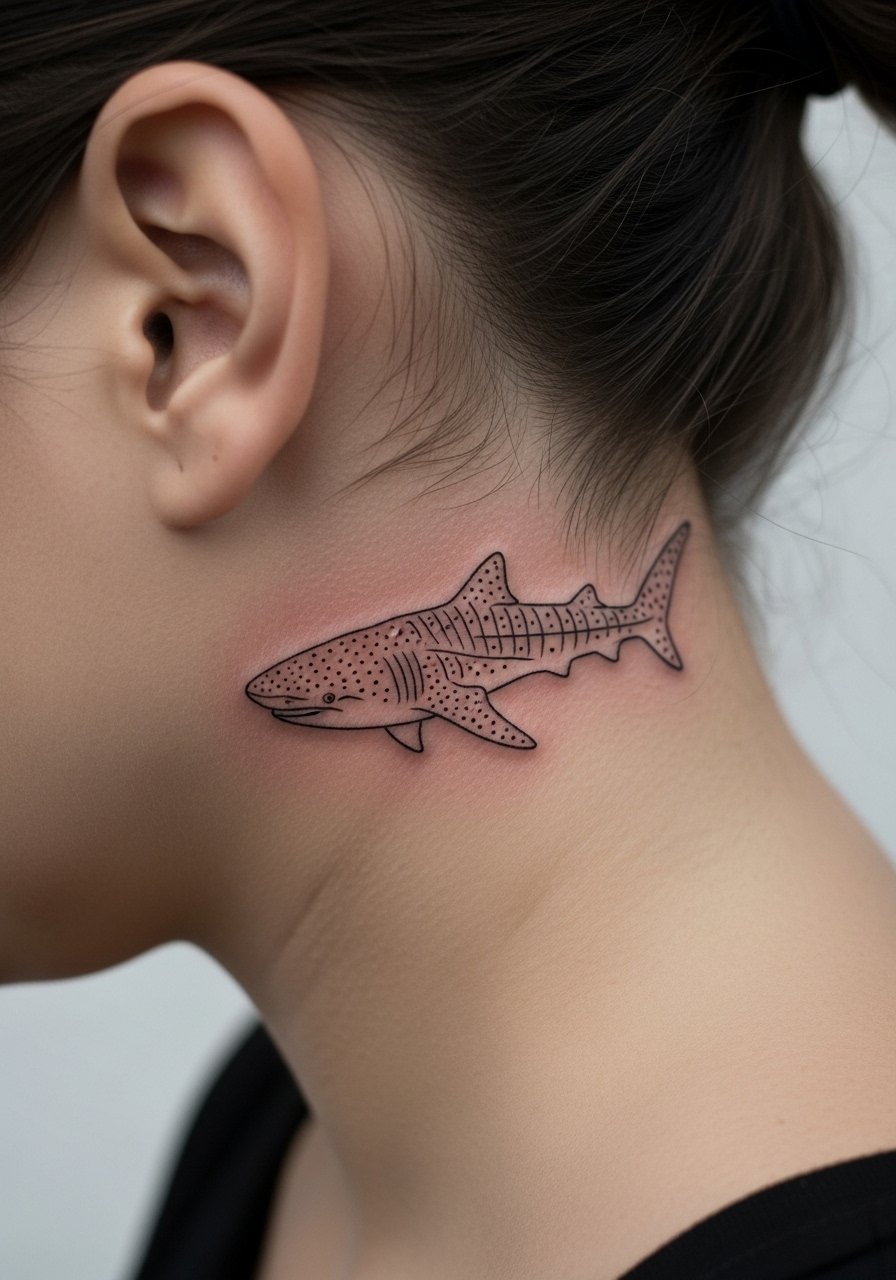
Behind-the-ear accents are discreet and surprisingly visible when your hair is up. Pain is low to moderate and sessions are brief. The main mistake is asking for too much internal detail in a micro spot. Because hair can irritate healing skin, plan for gentle aftercare and keep hairpins away while the area settles. For showing it off in warm months, a raised bun or a silk scrunchie keeps hair tidy without rubbing the spot.
16. Sleeve Element with Flow Lines
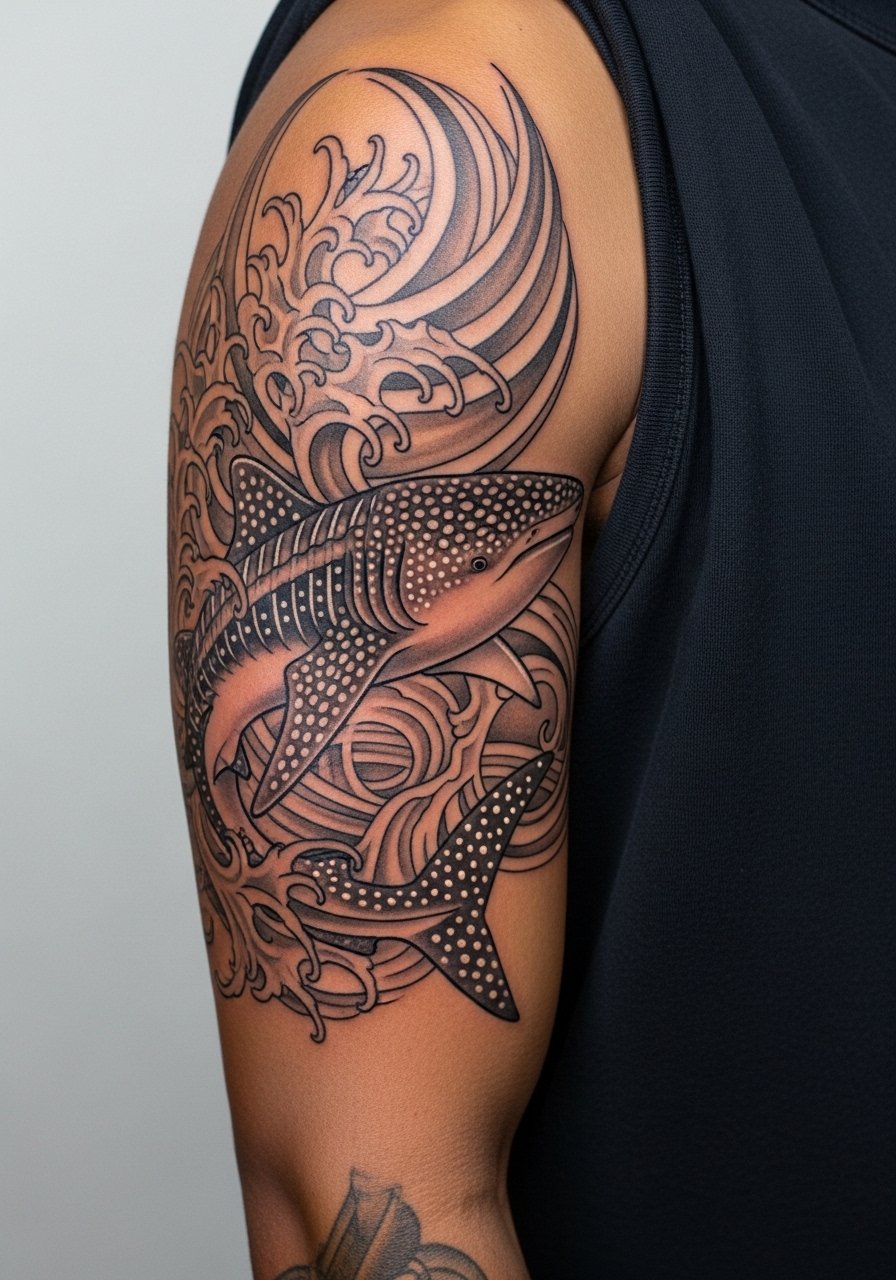
A sleeve demands planning for how one element reads with others. If you want the whale shark to feel embedded rather than pasted on, ask for flow lines that follow your arm contours. Sessions are multiple and pain varies by spot. A common mistake is forcing the shark into an awkward angle that looks good flat but bad on the curved arm. Roll sleeves or wear a loose button-down during appointments for access and comfort.
17. Geometric Negative Space Design
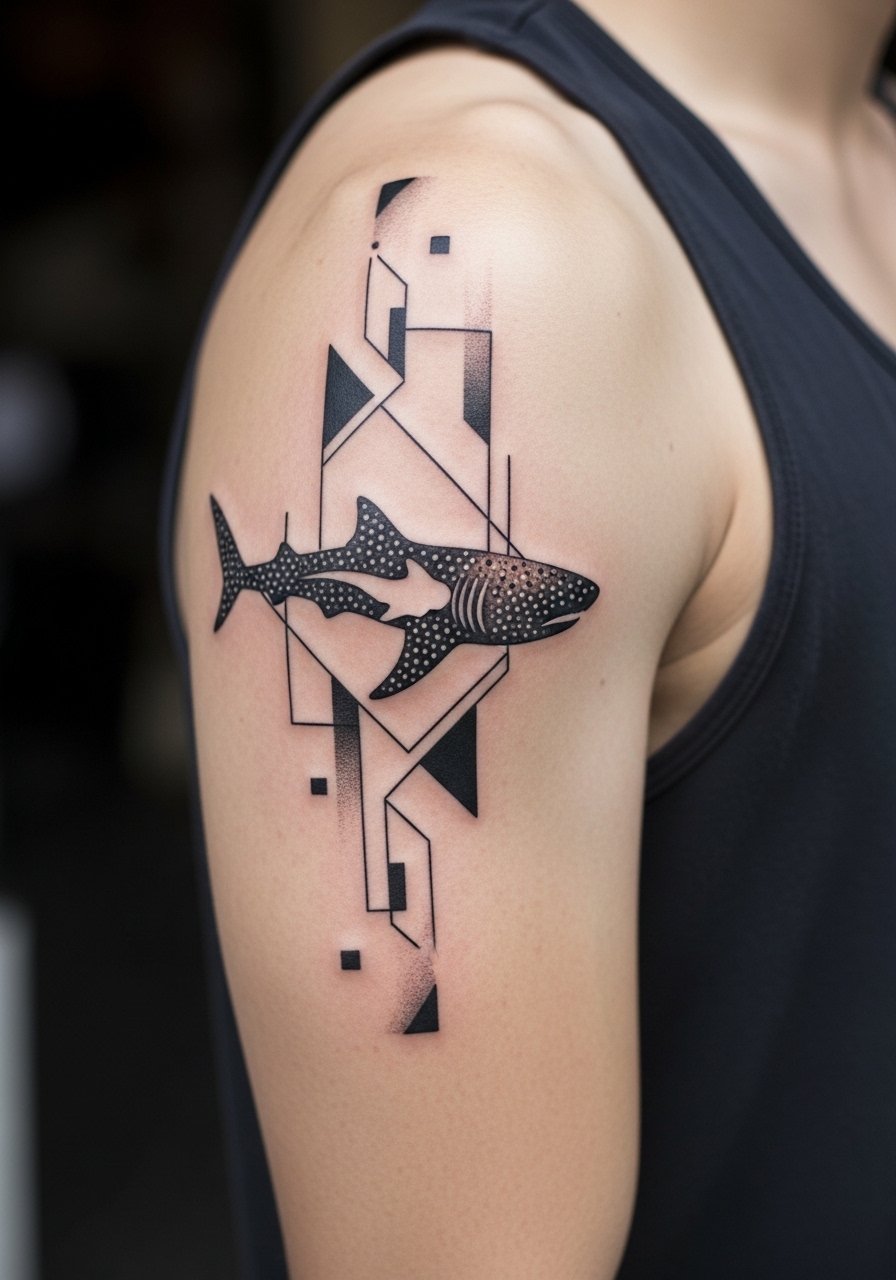
Geometry and negative space can keep a whale shark readable while minimizing fine dot work. The upper arm is forgiving and ages well, with moderate pain. Tell your artist to map the negative spaces on the stencil so you can see read distance before inking. A mistake is making the geometric elements too fine; they blur together over time. For casual show-off, a rolled-up sleeve or a racerback tank frames the upper arm nicely.
18. Tiny Nape Script and Icon
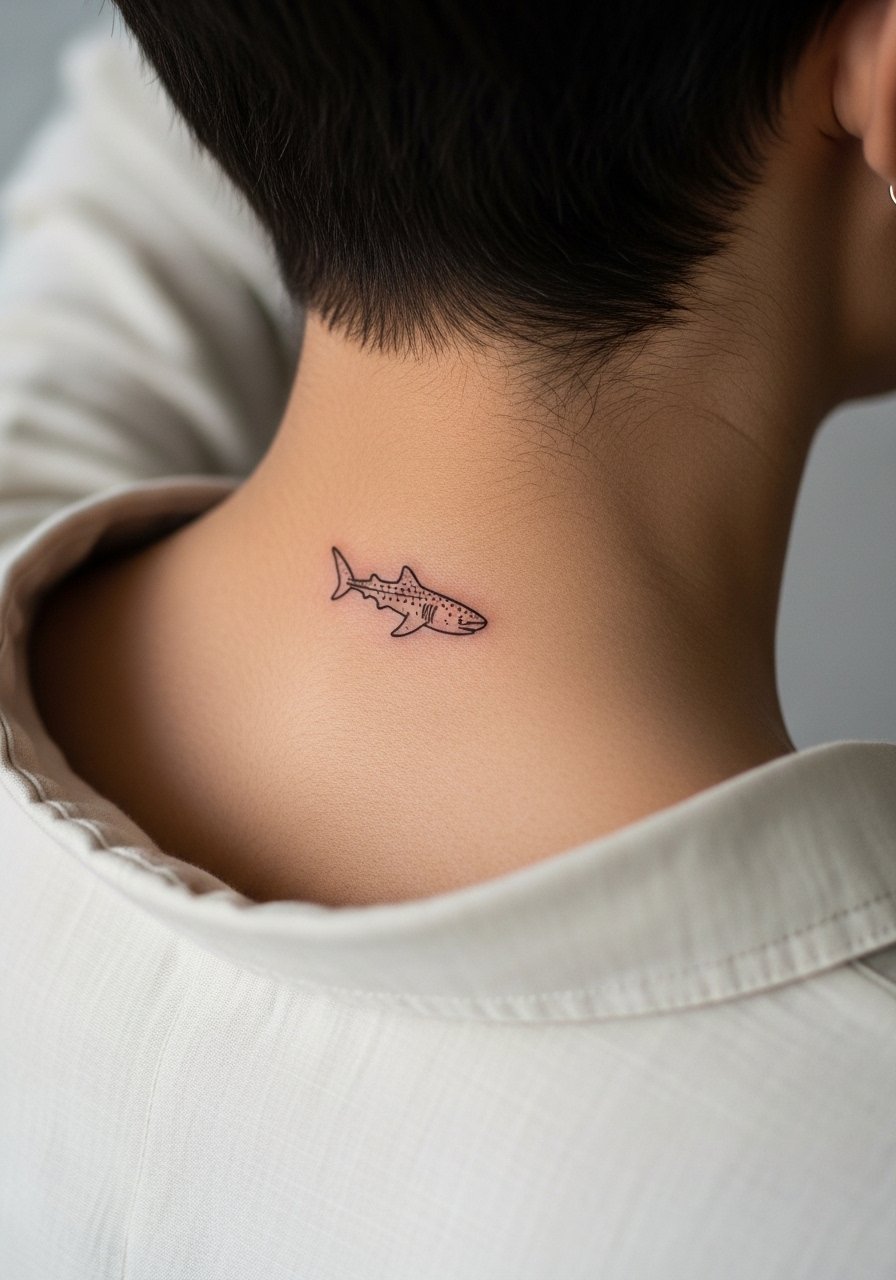
Neck placements are visible and can affect professional contexts. The nape is less exposed than the side neck and tolerates small icons well. Pain is moderate and sessions quick. The usual mistake is underestimating sun on the back of the neck. For appointments, choose a wide-neck shirt you can shift aside easily. A minimalist pendant necklace can balance the area when hair is up.
19. Realistic Black-and-Gray Throat Accent
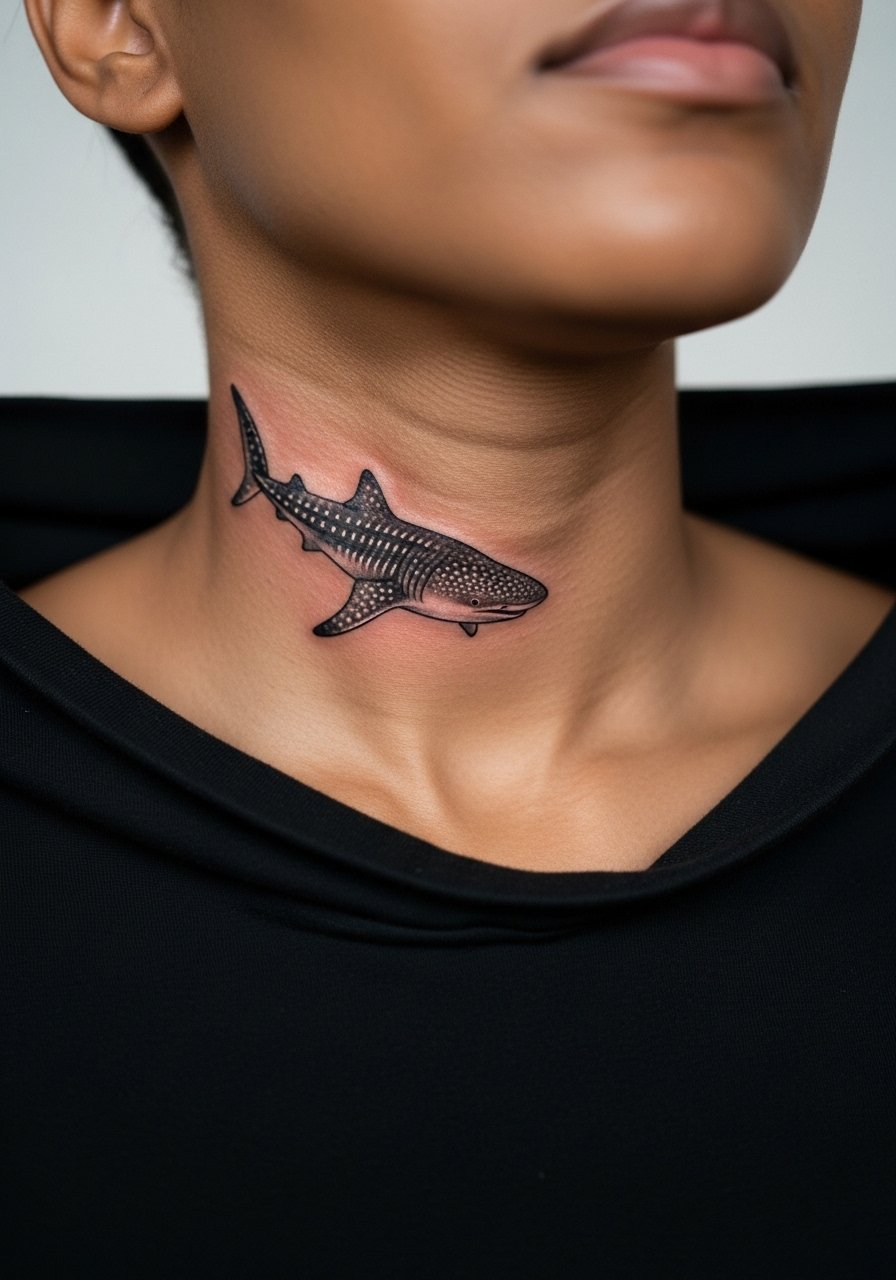
Neck work splits opinions. One camp warns visible neck tattoos still matter for some employers. The other camp says discreet, well-placed pieces can be hidden with shirts and hair. Realistic shading on the throat needs a confident hand and touch-ups are not uncommon. The mistake is choosing a large or highly detailed design for a tiny, visible area. For a softer reveal, wear a wide-neck sweater that keeps the piece subtle when needed.
20. Geometric Ocean Scene Calf Band
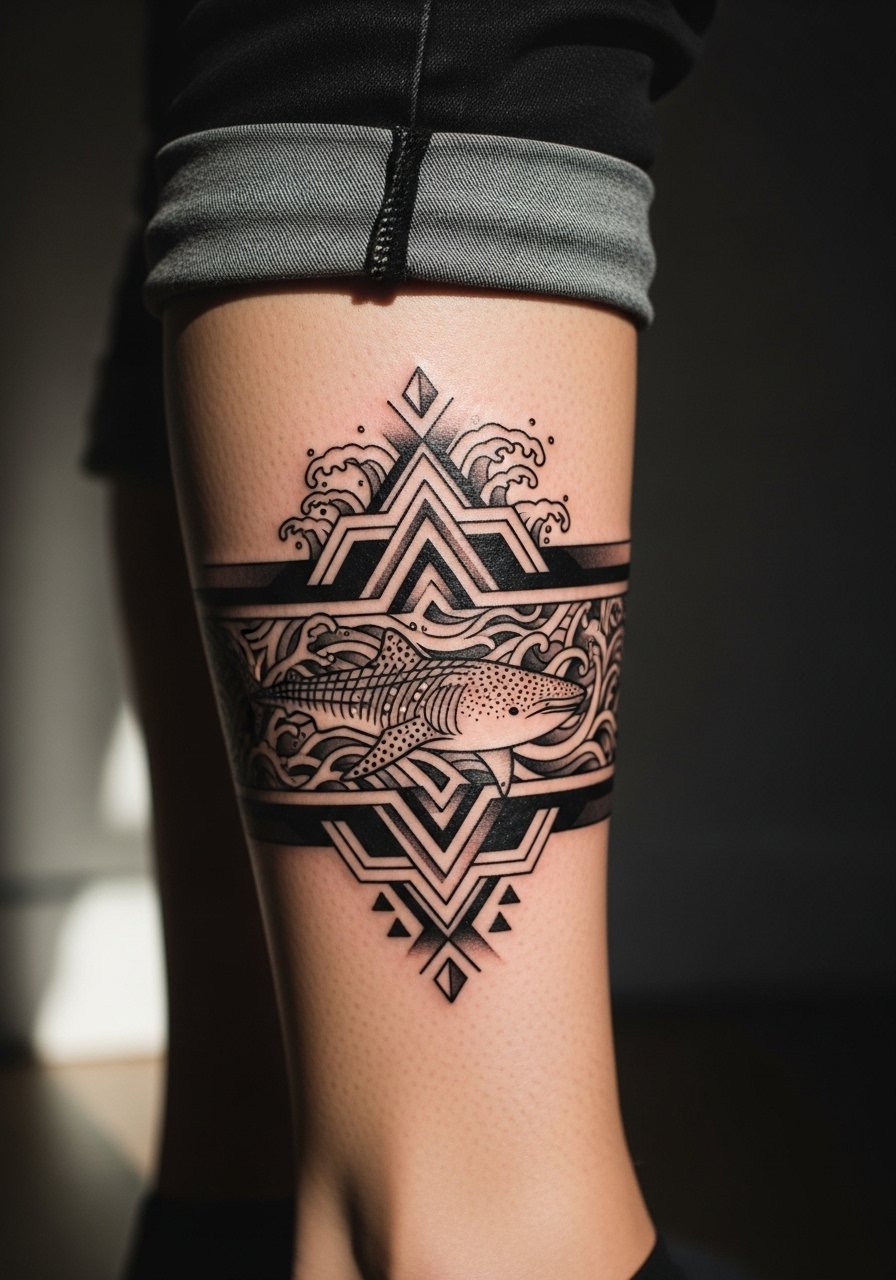
Calf bands are durable and show well on movement. Sessions can be moderate length depending on band width. For readability, ask for negative space between the shark silhouette and the geometric elements. A common mistake is compressing patterns so the band reads muddy at a distance. Pair this with ankle-baring footwear or classic leather loafers to show off the wrap.
21. Neo-Traditional Chest Pairing
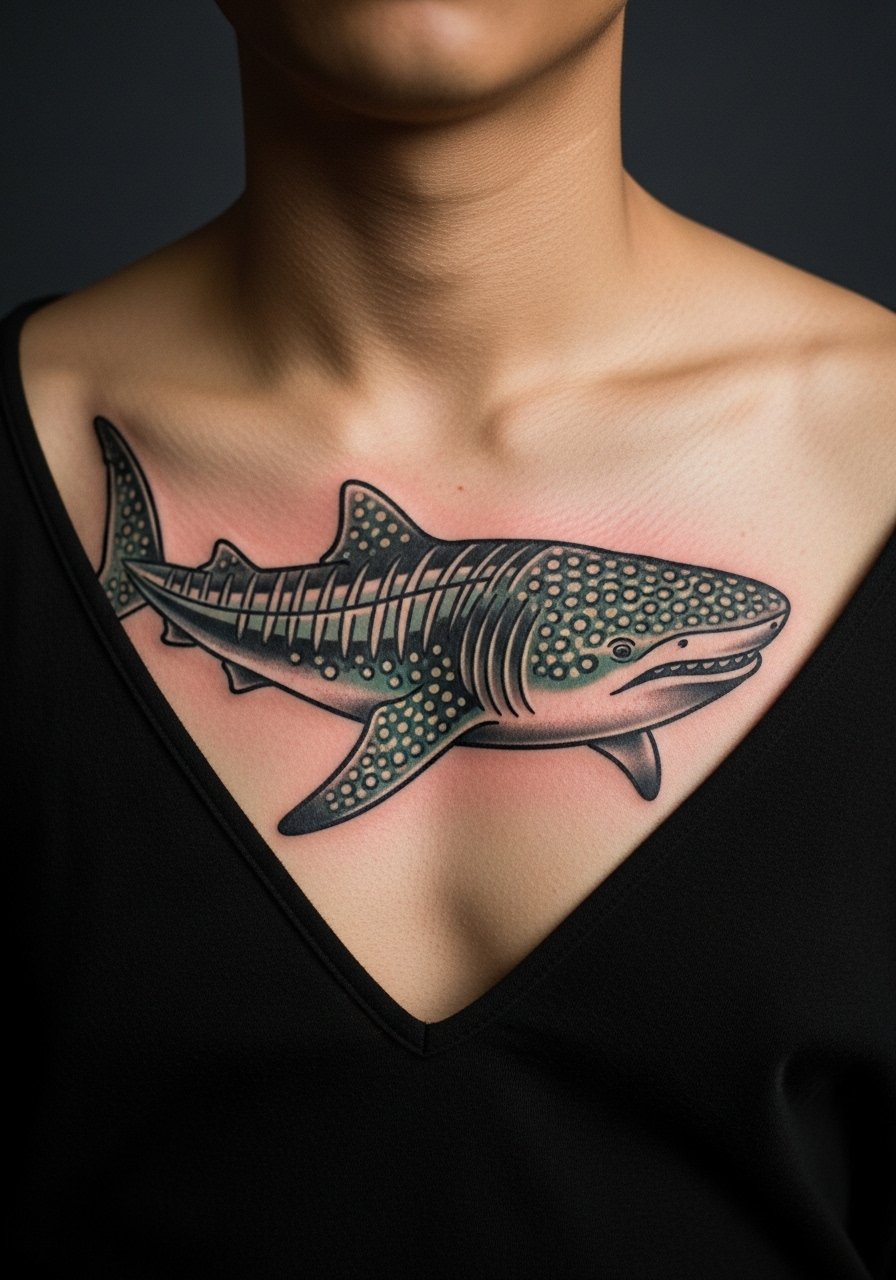
Neo-traditional styles rely on bold linework and selective saturation, which usually age well. Chest placements see sun and stretch from movement, so anchor lines are important. Sessions can be one to two hours for medium pieces. The mistake is asking for tiny ornamental details that lose crispness. For after-session comfort, wear a zip-front hoodie you can open without tugging at the chest.
22. Minimal Spine Runner
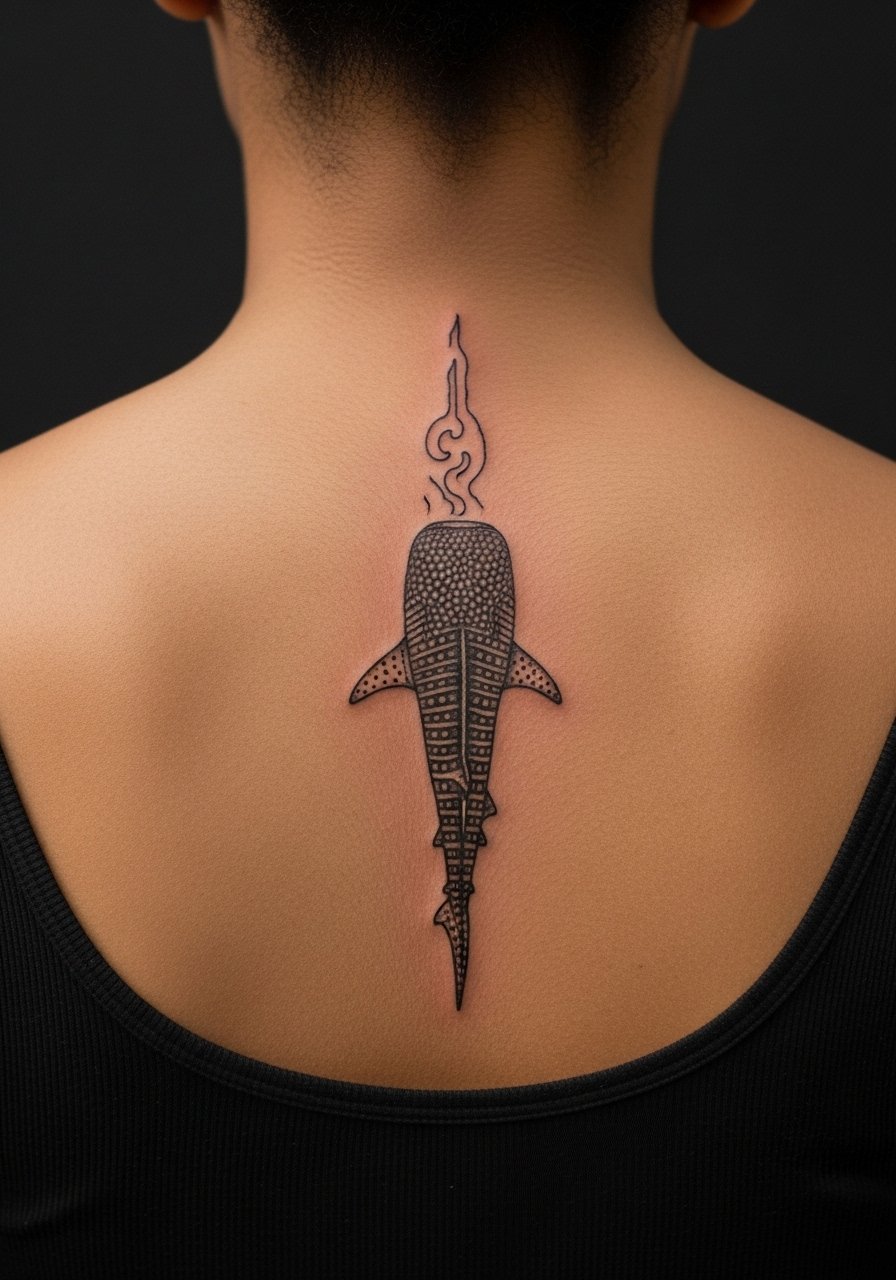
Spine runners read dramatic and elongate the back visually. The upper spine is moderate pain and sessions are often done in small passes. The key is spacing spots and dots to account for natural curvature. A common mistake is crowding the central back with too much dot work; over time that compresses. For evenings out, open-back tops reveal the runner without excessive exposure.
23. Large Hip Curve Composition
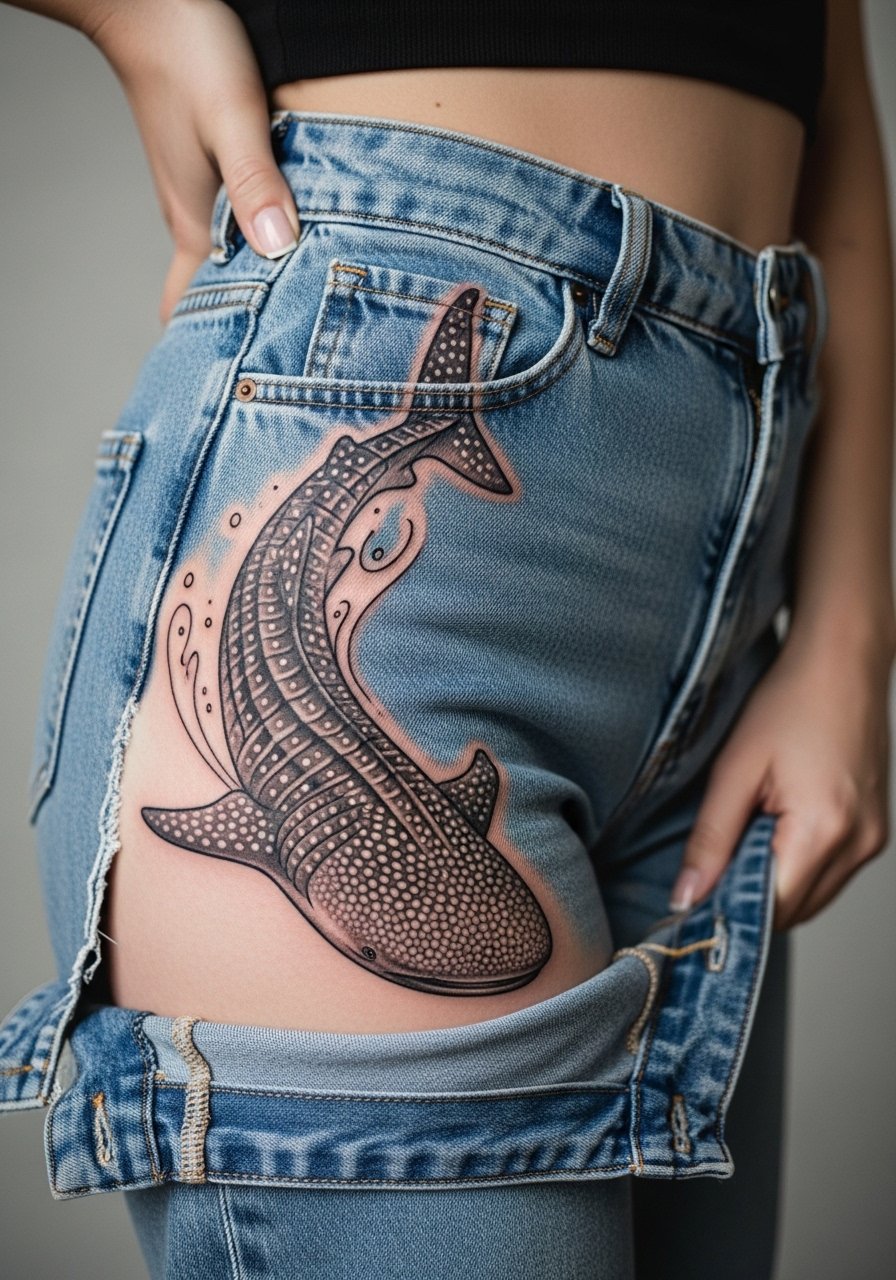
Hips allow large curves that look organic with the body. Pain ranges moderate to high depending on proximity to bone. Sessions for an extended hip piece often need multiple sittings. The mistake is forcing a circular composition that fights the hip line; instead have the shark follow your curve. For the studio trip, high-waisted bottoms that shift easily are ideal, and for nights out a high-cut swimsuit bottom frames the curve.
24. Tiny Foot Outline
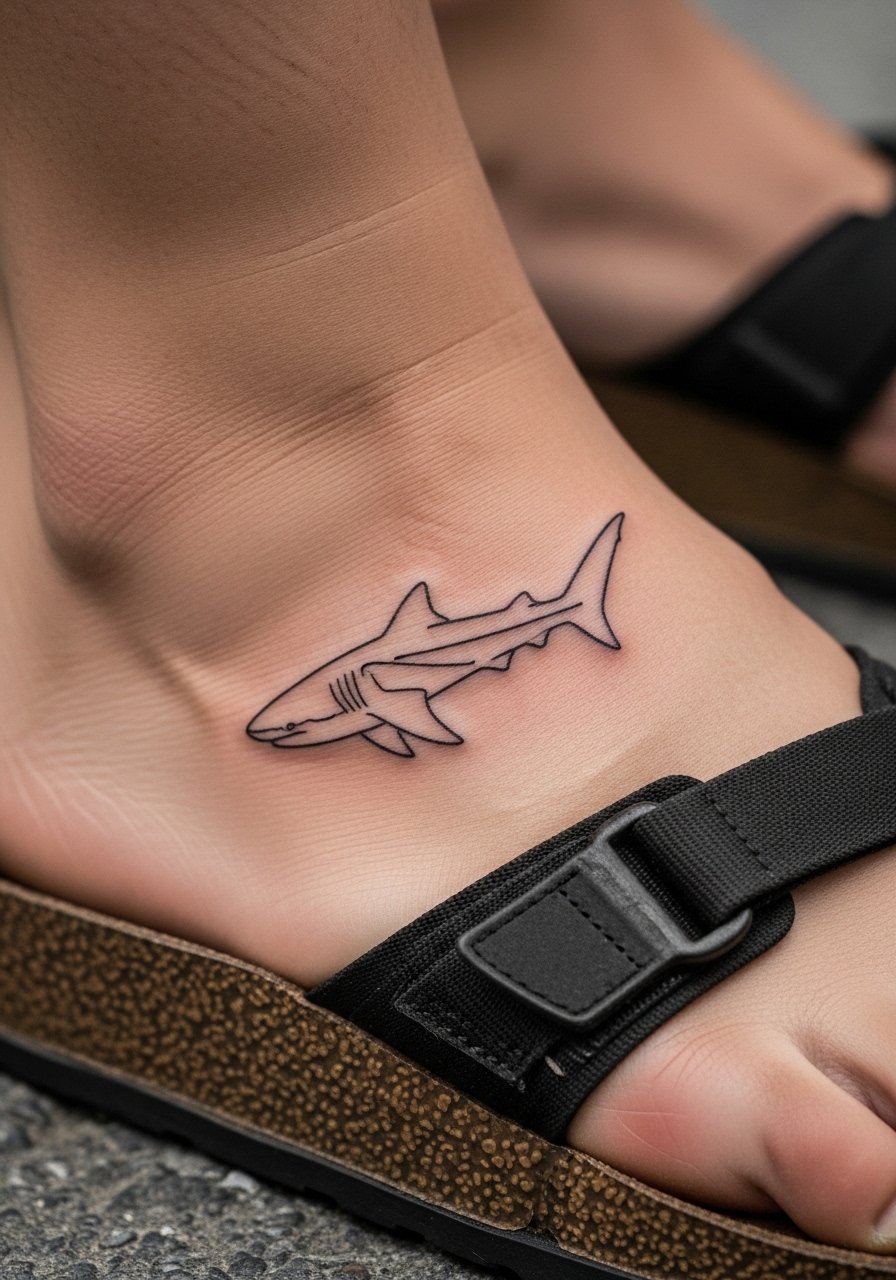
Top-of-foot tattoos fade faster due to shoe friction and walking. Pain is high for many because of thin skin. Expect short sessions but faster fading and possible touch-ups. A common mistake is expecting crisp tiny details to survive heavy footwear wear. For show-off season, low-sling sandals or slide-on shoes highlight the area without rubbing. Consider packing soft shoes for the healing week.
25. Dot-Work Sleeve Accent Near Elbow
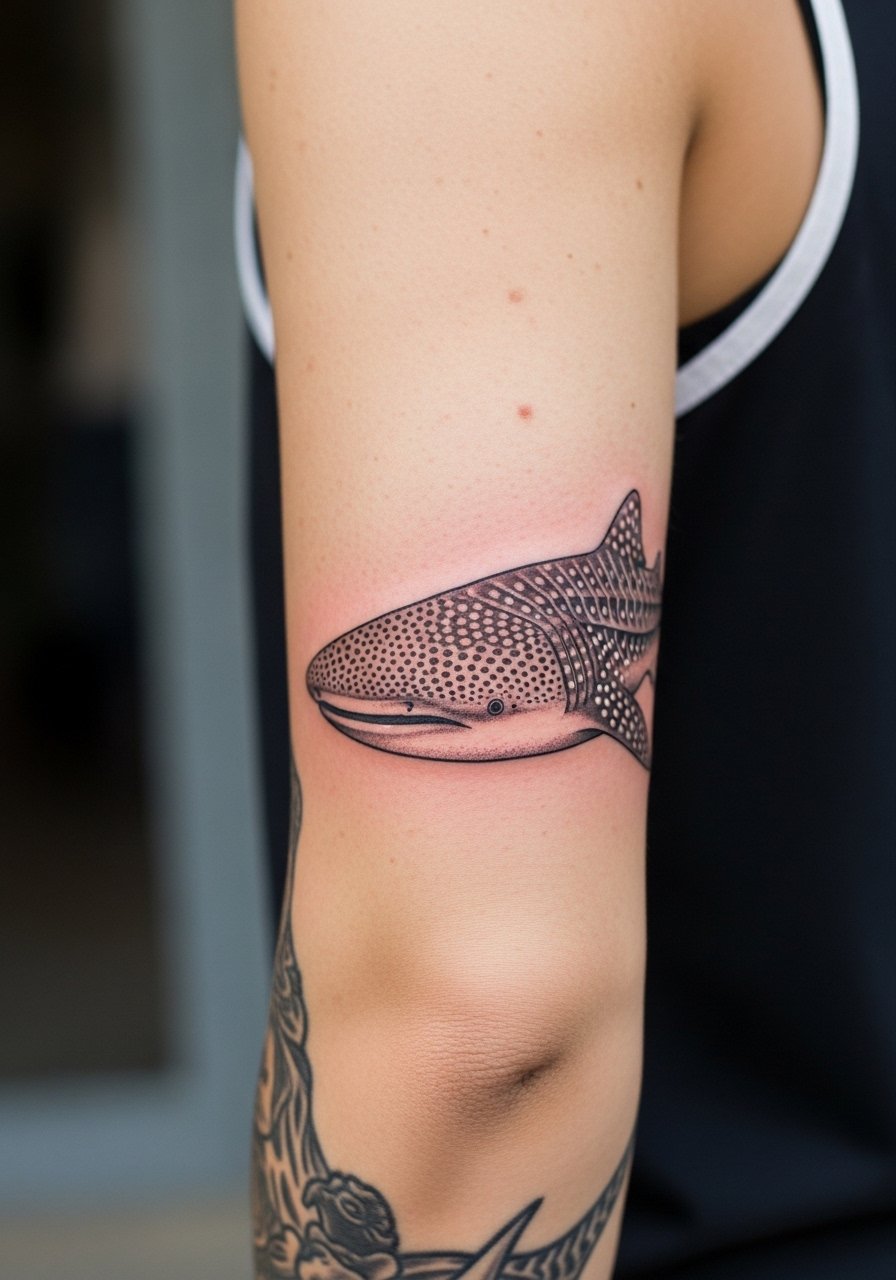
The elbow is rough on ink because it flexes and endures friction. Dot work here needs generous spacing. Sessions can be short for a single accent but take longer across the sleeve. The mistake is insisting on dense dot clusters near the joint; those merge. For comfort and access, a sleeveless top and a loose tank help the artist work the elbow without pulling at the fabric.
26. Negative-Space Pocket-Sized Sternum Icon
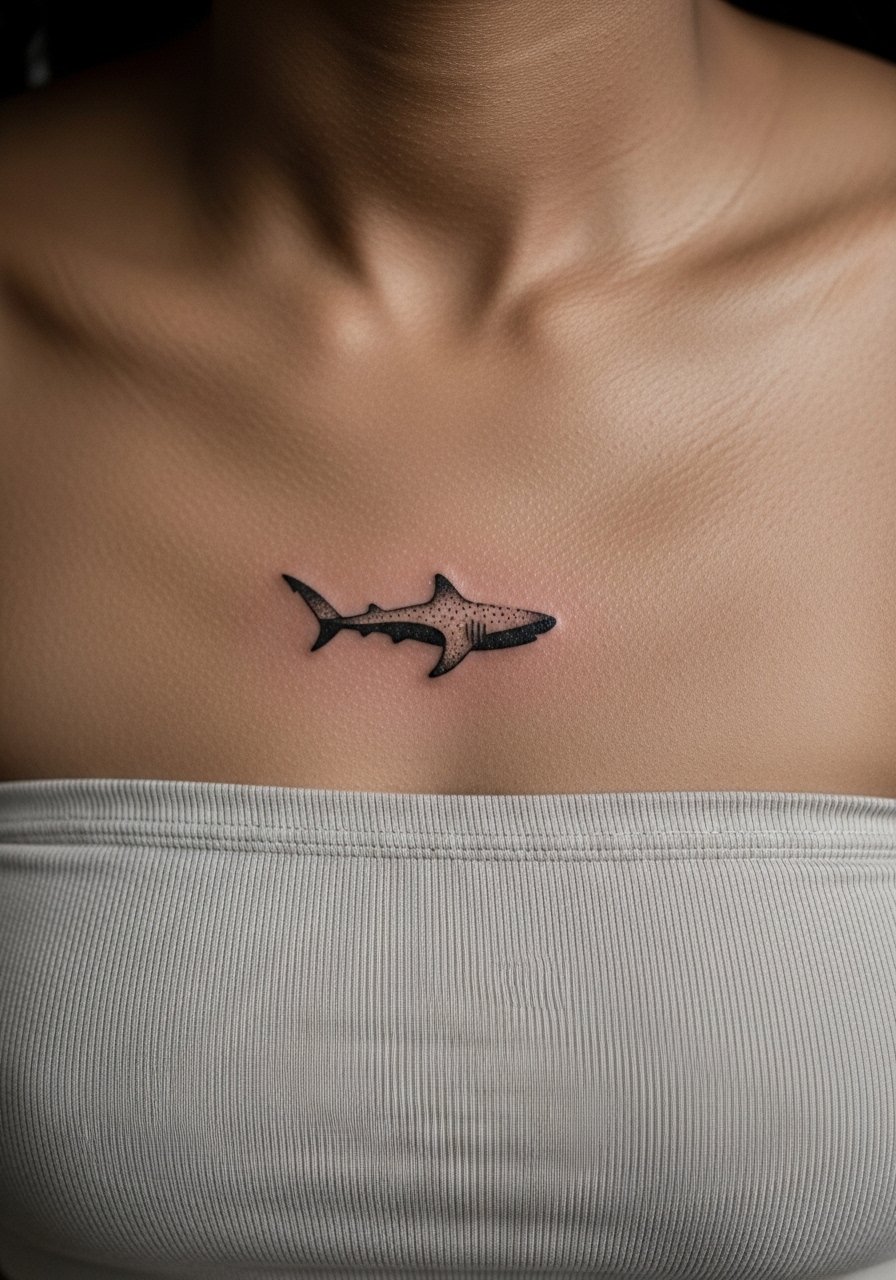
Sternum icons can be intimate and require a precise stencil. Pain is high near the sternum and sessions are short but intense. One camp worries about fine line packing in this zone because sweat and movement can soften detail. The other camp uses deeper, spaced lines to avoid that. I favor slight boldening and planning a touch-up in the second year. For studio arrival, a bandeau or fitted sports bra keeps the area accessible and discreet.
27. Linear Minimal Around the Wrist Cuff
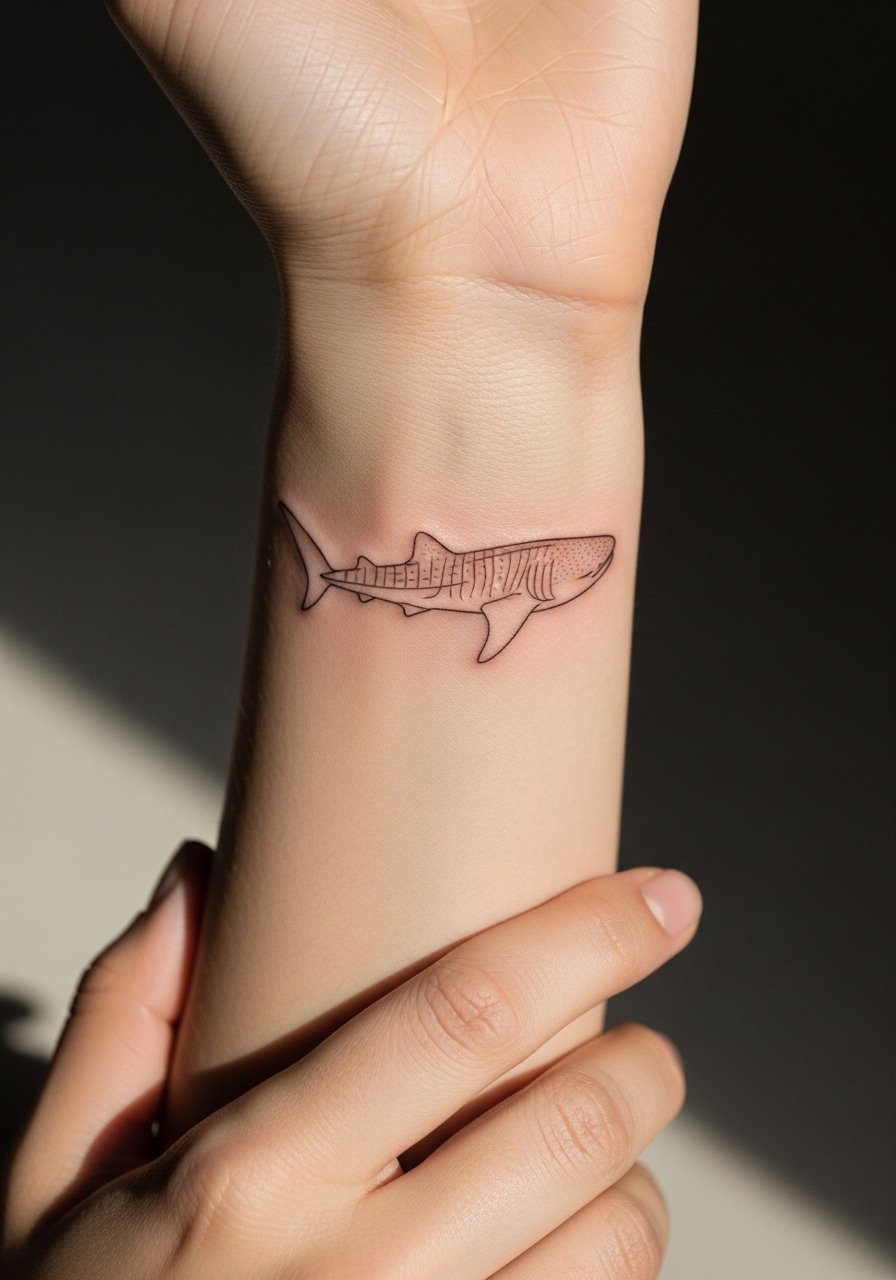
Wrist cuffs are an elegant place for a repeating motif. Movement and handwashing speed fading, so thicker contour beats intricate interior lines here. Sessions are short with low to moderate pain. The common error is cramming texture into a cuff width designed for simple repetition. For jewelry, pair with a slim bracelet that sits opposite the cuff rather than over it.
Frequently Asked Questions
Q: Will micro-realism whale shark forearm wraps need touch-ups sooner than blackwork pieces?
A: In my experience, micro-realism often needs touch-ups earlier because tiny stipple and subtle gradients can lose contrast. Blackwork and slightly bolder stippling lock in better on the forearm. Ask your artist about touch-up timing during the consult and plan for a possible refresh at year three depending on sun exposure.
Q: Are ribs or sternum better for a detailed whale shark scene if I want longevity?
A: Both areas can hold detail, but ribs see more motion and sternum more sweat and friction. One camp prefers ribs with extra spacing and deeper passes. The other camp favors sternum for central compositions if you accept possible touch-ups. If longevity is your priority, choose bigger shapes, more negative space, and discuss spacing on the stencil.
Q: How should I dress on studio day for a hip or thigh whale shark panel?
A: Wear loose drawstring shorts or high-waisted bottoms you can shift without tugging so the artist has access while you stay comfortable. A loose linen drawstring pant or soft shorts are both practical choices.
Q: Do hand or finger whale shark icons affect job prospects long term?
A: Hand and finger work remain visible and can influence first impressions in some industries. If that concerns you, consider placements that are easy to cover like the forearm inner side or the upper thigh. Hands demand more frequent touch-ups because of exposure.
Q: Can watercolor-style whale shark tattoos be made to last?
A: Watercolor looks great but fades unevenly without a dark anchor. Pair a watercolor wash with dark stipple or a thin black contour to give the piece definition over time. Expect to plan for color refreshes earlier than with heavy blackwork.
Q: How do I find an artist who specializes in whale shark realism without naming specific accounts?
A: Search studio directories and local convention lineups, check hashtag collections like #microrealism and #sealinetattoos for recent healed photos, and spend time in community forums where people post healed portfolios. Bring healed photo references to consultations and ask the artist about similar pieces they have healed.
