
Fine line Hannya work looks fragile on social feeds but often tells a different story once healed. The trick is choosing the right placement and scale so the mask's sharp eyes and teeth do not blur into a single shadow over time. Below are 17 edgy ways to reinterpret the Hannya mask, with what to ask for in consultation and wardrobe tips that actually show the piece off.
1. Fine Line Hannya on the Inner Forearm
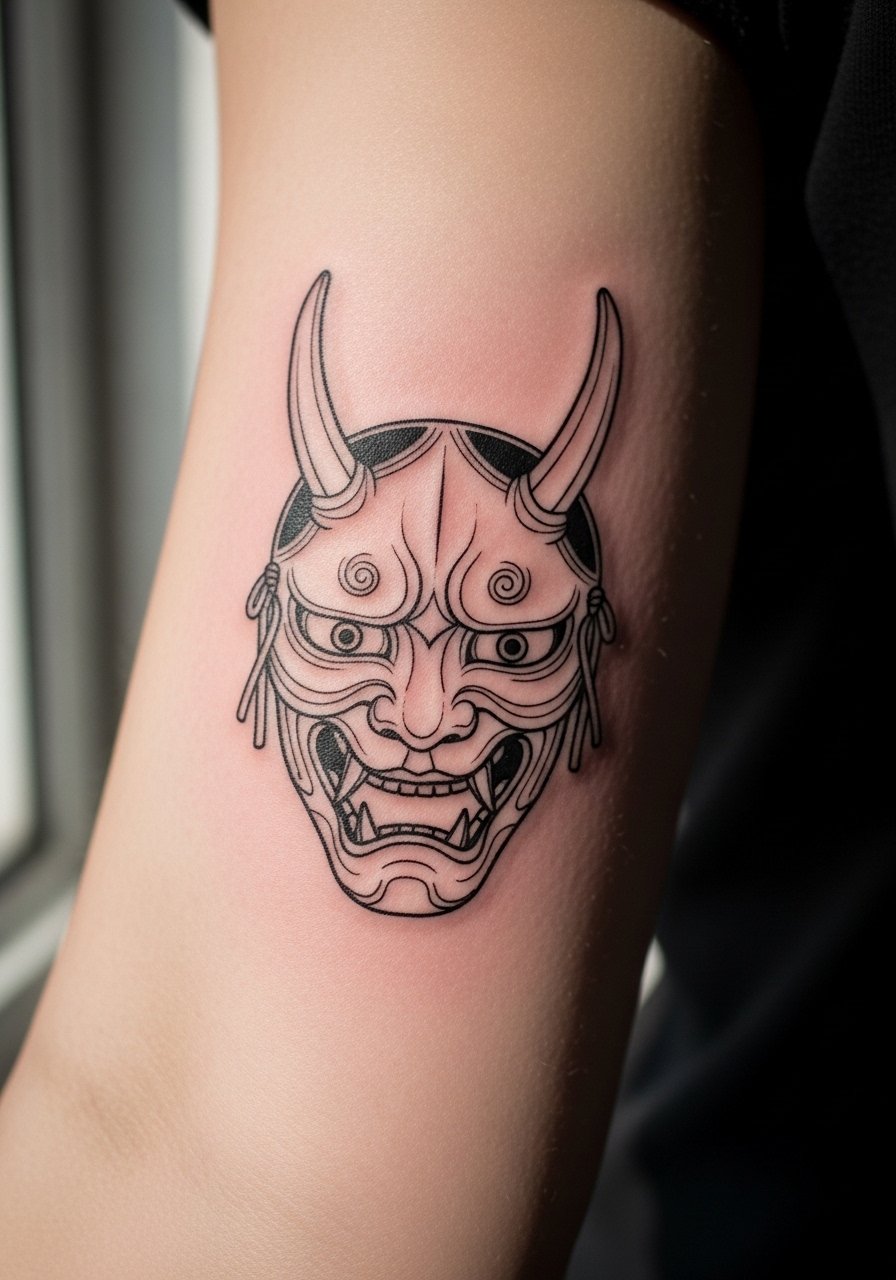
I recommend this when you want detail that reads both up close and at arm’s length. Ask your artist for slightly thicker outer lines and stipple shading inside the horns so detail survives sun and abrasion. Fair warning, the forearm sees a lot of sun and friction. The common mistake is requesting ultra-thin lines that look delicate at first and then blur by year three. Expect a one to two hour session with moderate discomfort, and a likely touch-up around year three for crispness. This placement shows well with rolled-up sleeves and a loose button-down shirt that frames the forearm without covering it.
2. Traditional Bold Blackwork Hannya on the Upper Arm
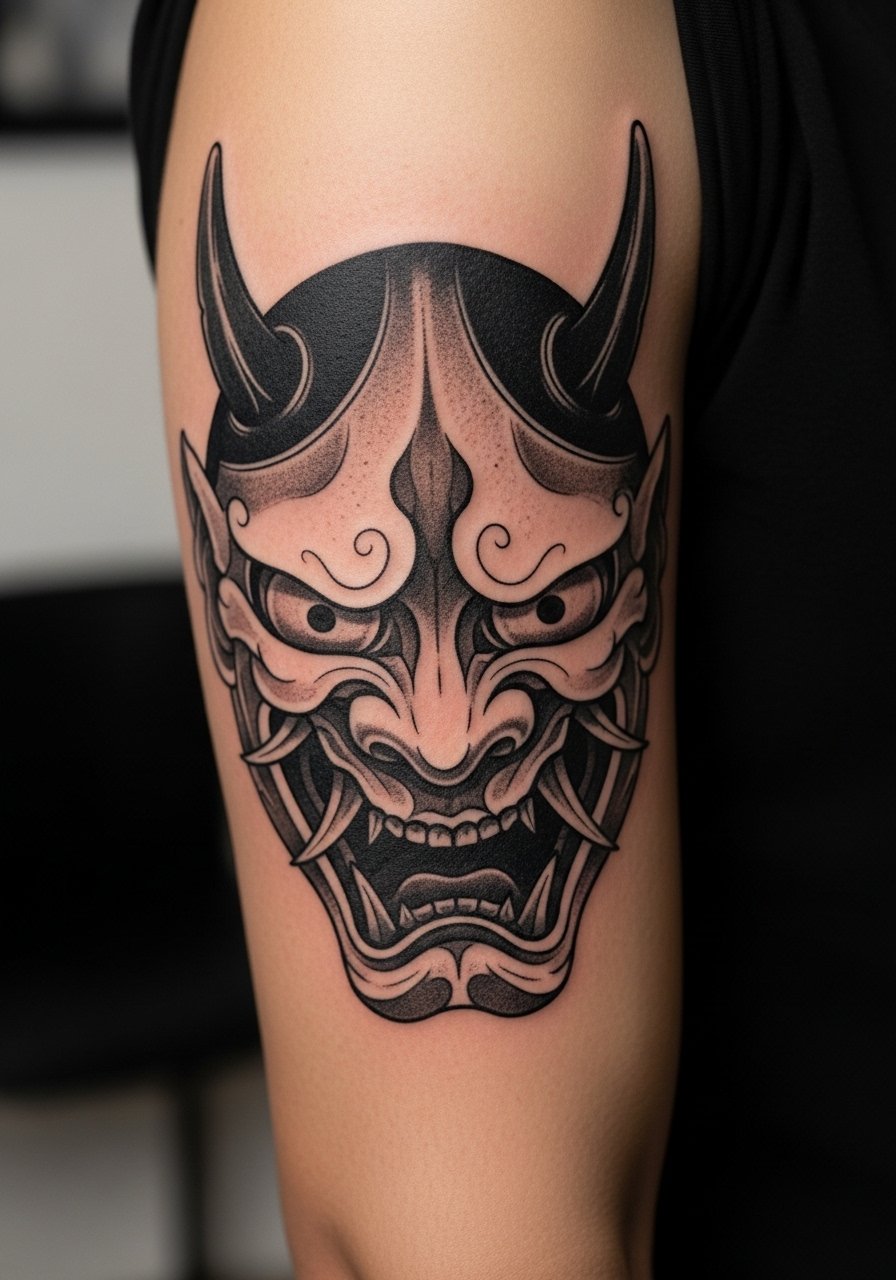
This is for anyone who wants the Hannya to read from across a room. Ask for saturated black fills and clear negative-space highlights to keep the face readable after healing. There is a cultural conversation here. One camp argues Hannya masks are deeply tied to Japanese theater and should be used only with clear respect or personal connection. The other camp says personal expression and reinterpretation are valid if done respectfully. If you choose this route, mention intent in consultation and consider a composition that nods to historical forms rather than copying sacred artifacts. The session is medium pain and usually one long appointment. Pair with sleeveless tops and a racerback tank when you want the piece on display.
3. Micro-Realism Hannya Peeking from the Collarbone
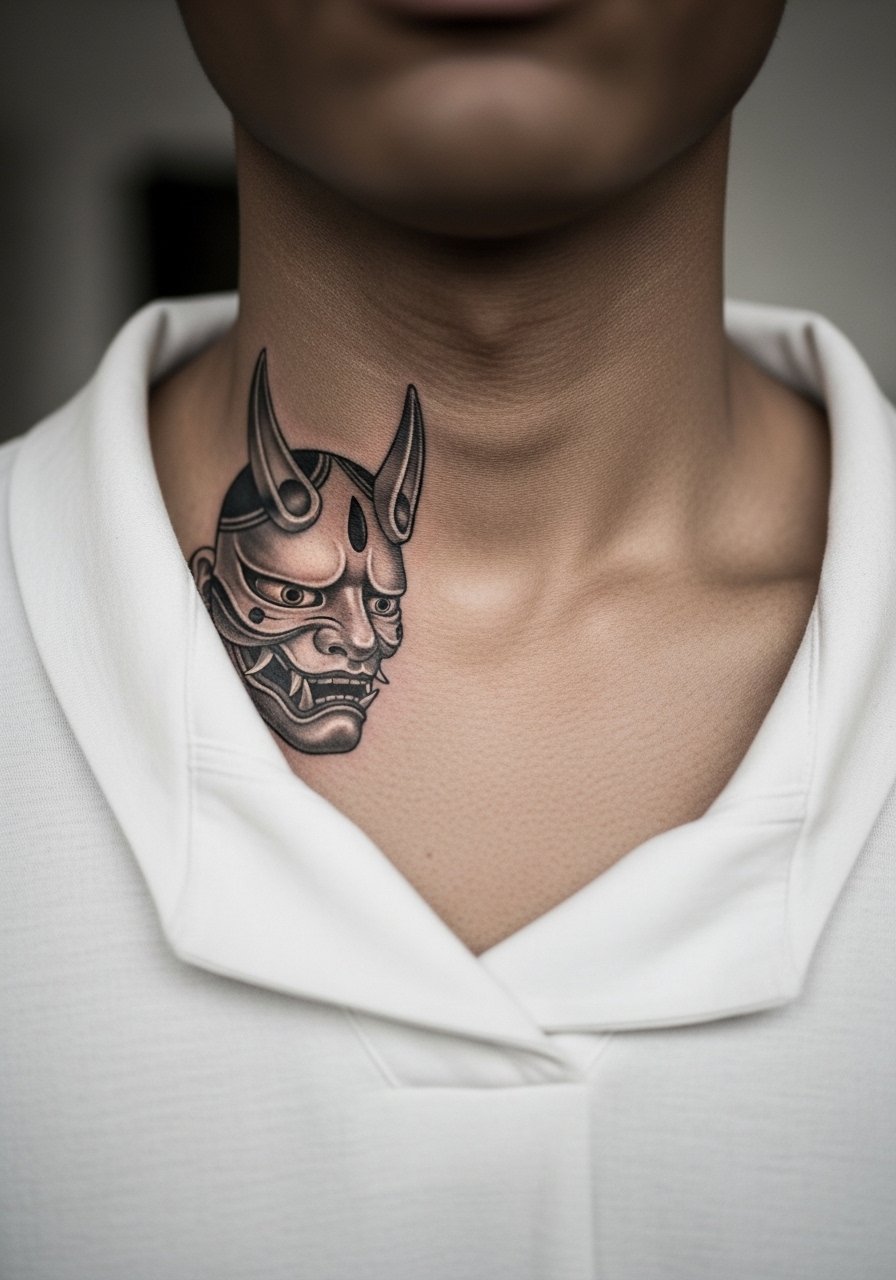
The collarbone gives a dramatic reveal when a mask peeks out from a neckline. Tell the artist you want tiny texture in the horns and deliberate spacing around facial lines so the piece does not become a dark smudge over time. Chest skin moves differently than arm skin so blowout risk is lower but touch-up needs can vary. A common mistake is compressing too much detail into a small collarbone piece. Expect moderate pain and a session under two hours. For evenings, an open-back midi dress or wide-neck top lets the mask appear without competing jewelry.
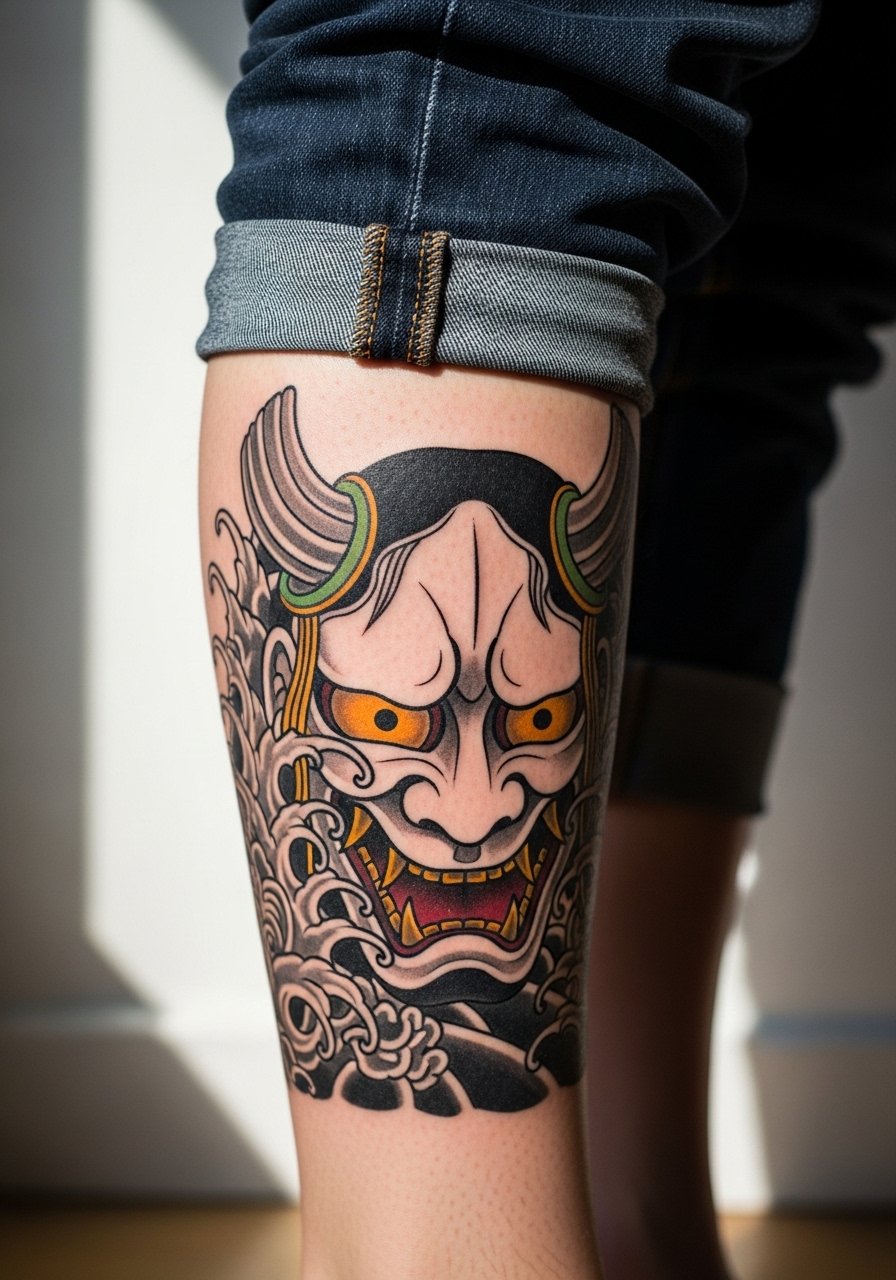
4. Neo-Traditional Hannya on the Outer Thigh

Thigh placement lets you go larger and add floral or wave motifs that frame the mask. Recommend medium lineweight and saturated color to prevent early fading inside the dense areas. The biggest mistake is over-detailing tiny facial features when the piece is planned to be large. Thigh flesh handles saturation well and pain is usually lower than ribs. Mention during consultation whether you want the mask to read when seated or standing since curvature changes the view. Wear loose shorts or a loose drawstring linen pant to the session so the artist can access the area without pinching fabric against fresh ink.
5. Black and Red Hannya Sleeve Fragment on the Forearm

This design works when you want a piece that can expand into a sleeve later. Ask for composition that leaves negative space for future elements. The mistake people make is packing the entire forearm and leaving no breathing room for future cohesion. Expect a two to three hour session for the fragment, with moderate pain. Over time the red will soften faster than black so plan color refreshes at different intervals. Pair with rolled-up linen shirts or a thin chain bracelet to balance the saturated forearm without covering the work.
6. Small Hannya on the Side of the Ribcage
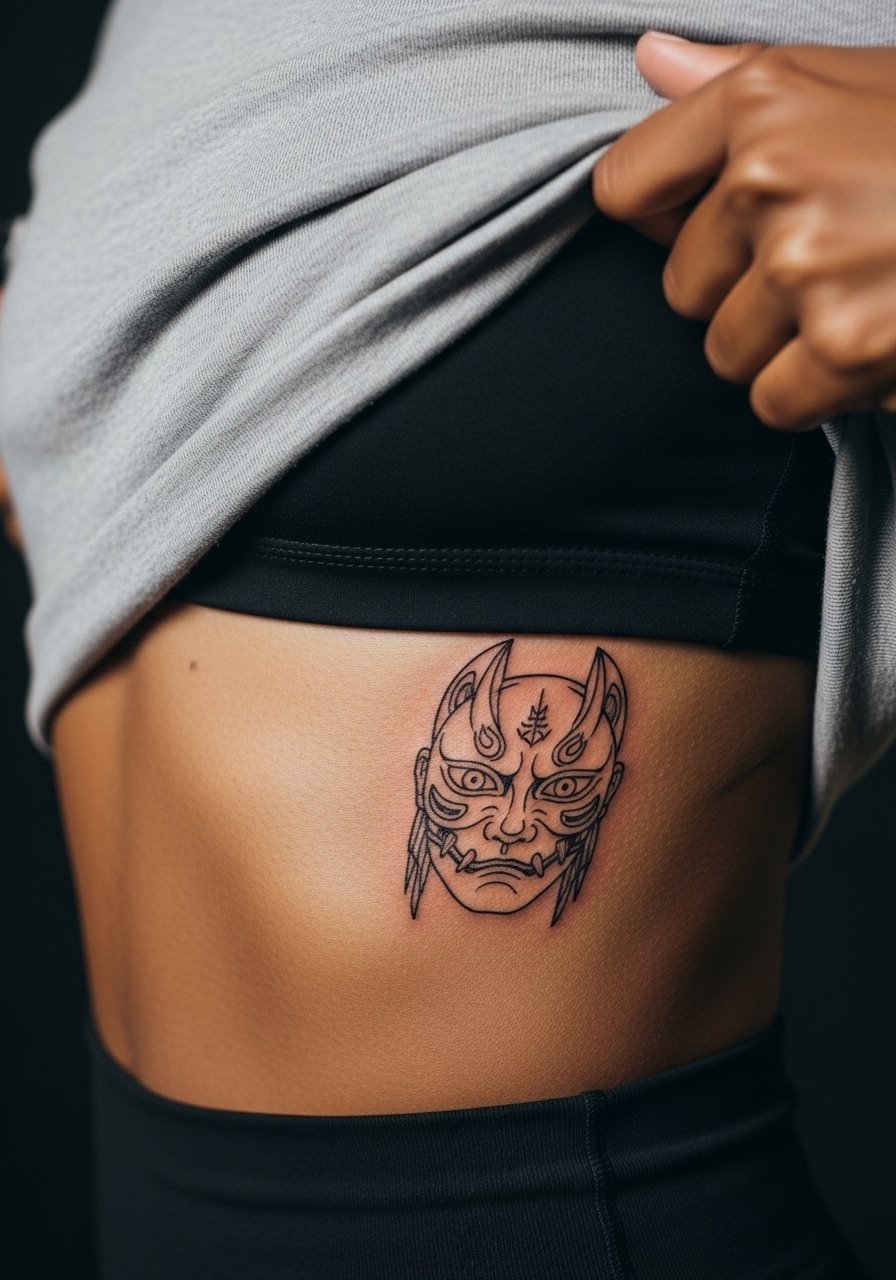
Fair warning: the ribs are a high pain zone. People pick this area for intimacy and concealability. Artists split on whether fine line holds well on ribs. One camp says skin stretch and constant movement blur thin lines soon. The other camp insists that with correct needle depth and spacing fine line can settle nicely. Ask your artist which side they are on before booking. The common mistake is insisting on micro detail at a tiny scale. Sessions tend to be longer and slower here, and the healing window can feel stiff. For the session wear a sports bra or zip-up hoodie so you can reveal just the area without getting chilled.
Pre-Session Essentials
The forearm, thigh, and chest pieces above require different prep and a few small items make the appointment easier.
-
Stencil transfer paper kit. Lets you preview line placement on skin, which is especially useful for the collarbone and forearm placements above.
-
Topical numbing cream. Apply as directed before higher pain sessions like ribs so the first hour is more comfortable.
-
Thin protective film roll. Useful for wrist areas and forearm fragments that face frequent friction from clothing.
-
Fragrance-free body wash. Cleanses the healing area without stripping saturation, handy for chest and thigh pieces.
-
Aquaphor healing ointment. A thin layer in the first few days helps hold moisture for linework that relies on crisp edges.
7. Hannya Mask as a Minimal Wrist Wrap
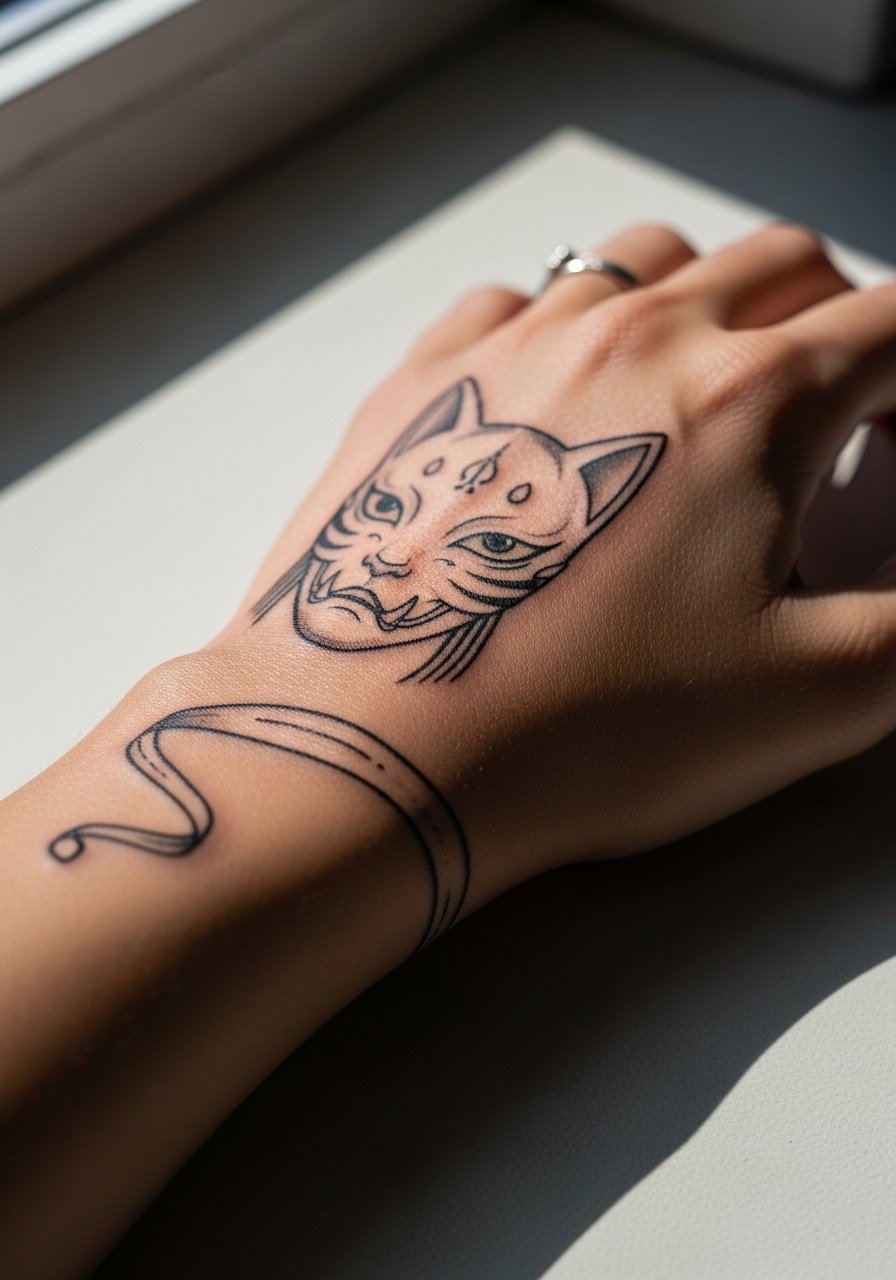
Tiny Hannya work on the wrist must be planned with scale in mind. Tell your artist you want the key facial features larger and the surrounding ornament simplified. The wrist experiences constant washing and movement so blowout and fading are real risks. A common mistake is insisting on a tiny, highly detailed mask that cannot be maintained. Session time is short and pain is mild to moderate. For showing off a wrist piece, stack with a minimalist watch or thin bracelets so the tattoo reads as an intentional design element rather than a random mark.
8. Sleeve-Ready Hannya with Geometric Background
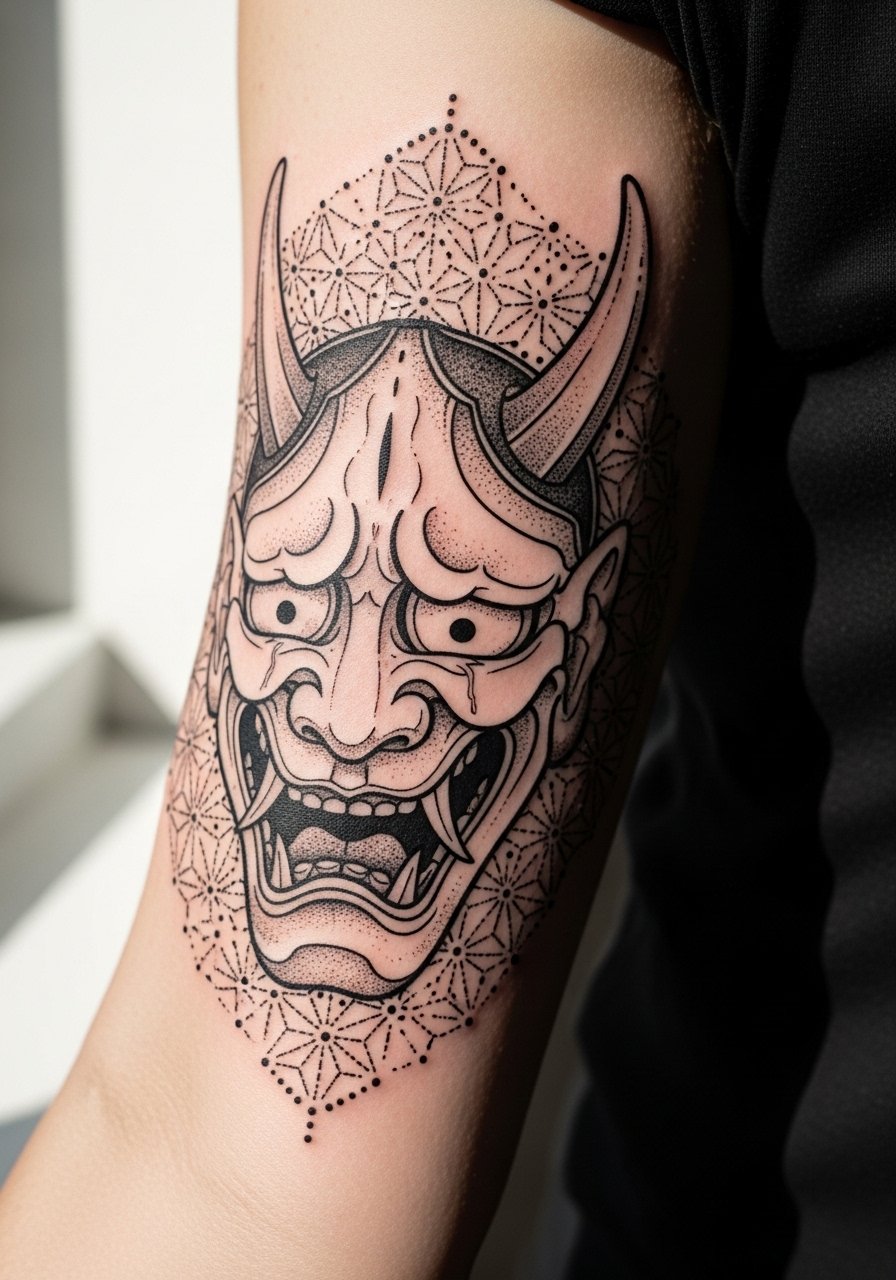
Combine a bold mask with geometric dot work to transition into a full sleeve later. During consultation mention you want consistent spacing in dot work so the background does not muddy adjacent tattoo elements. The mistake is mixing two very different spacing systems without planning, which leads to visual clash as the piece ages. Expect longer sessions and multiple visits when expanding the design. For the session wear a loose button-down shirt that can be pulled aside and keeps you comfortable between passes.
9. Hidden Hannya Behind the Ear, Below Hairline
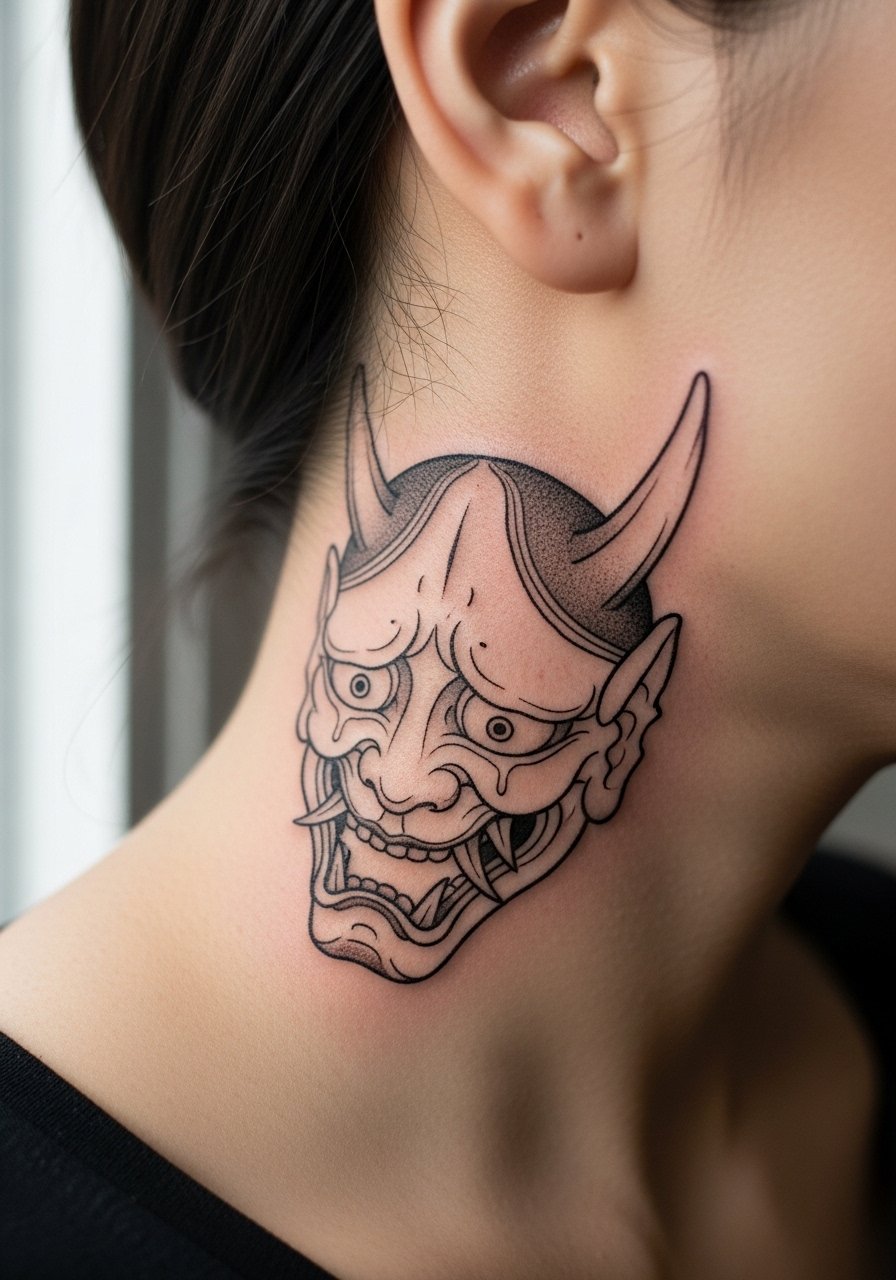
Behind-the-ear work reads as a small, private statement. This exact placement requires phrasing in the stencil so the mask sits on the skin below the hairline rather than on the ear itself. The mistake is asking for too much facial detail in such a tiny spot. Pain is low to moderate but visibility is limited. Because of the cultural origins of Hannya, consider simplifying motifs rather than a literal mask if you do not have a personal connection to the tradition. Wear hair up the day of the session so the artist has clear access.
10. Hannya Peeking from an Open-Back Piece
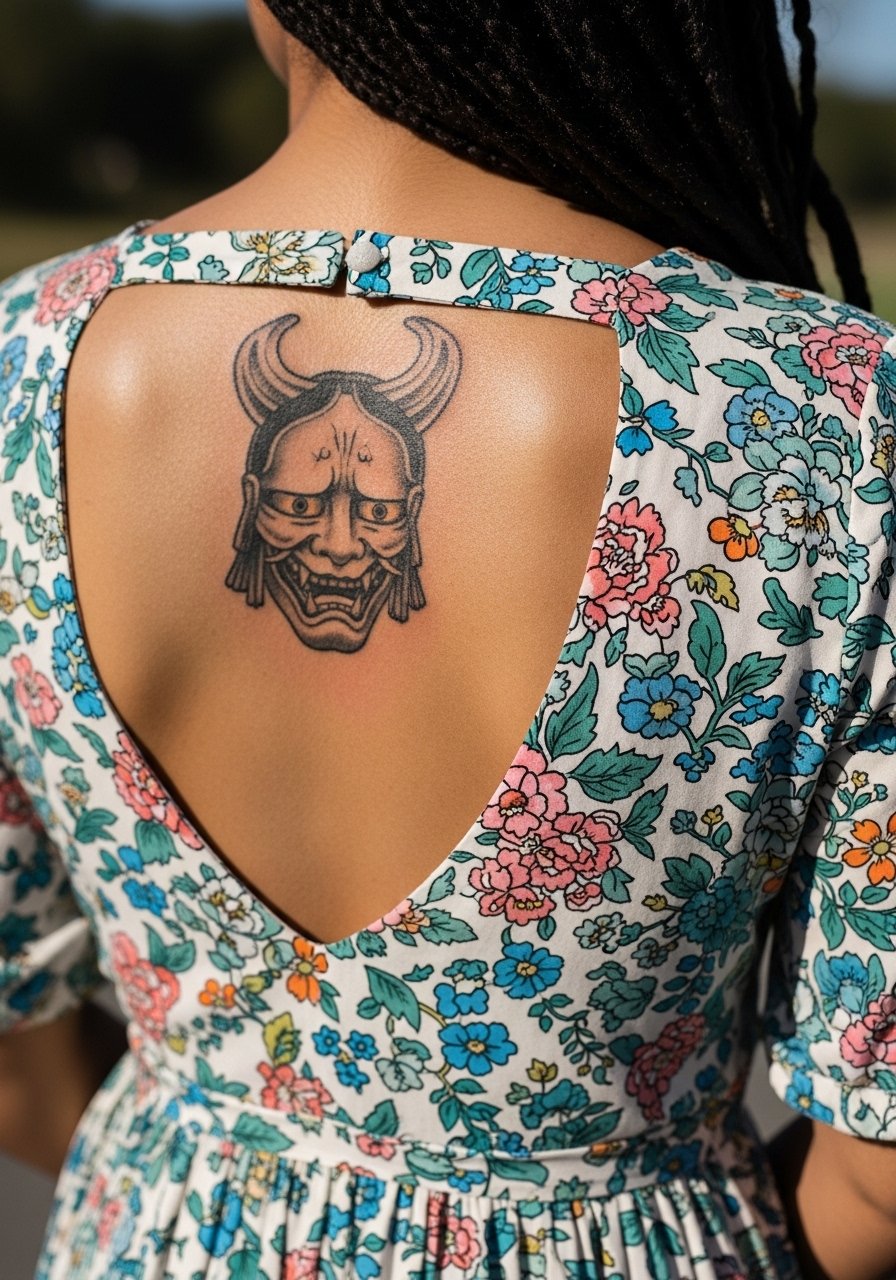
An open-back placement lets the mask be revealed selectively. Ask for composition that complements the natural spine curve and leaves negative space for future elements. A common error is centering the mask without considering how clothing will interrupt the composition. Expect moderate pain and longer healing because of clothing friction. Pair this with an open-back midi dress or a halter top to frame the reveal at events.
11. Neo-Japanese Hannya with Wave Elements on the Calf
Calf placements accept larger compositions and bold shading. Specify to your artist that the waves should have space between strokes so they keep texture after healing. The biggest mistake is asking for dense, tiny stippling across the entire calf which can compress with time. Pain is mild to moderate and sessions are comfortable sitting. For casual show-off wear jeans rolled up or mid-calf boots that do not rub directly on the fresh ink.
12. Micro-Hannya on a Finger Side Panel
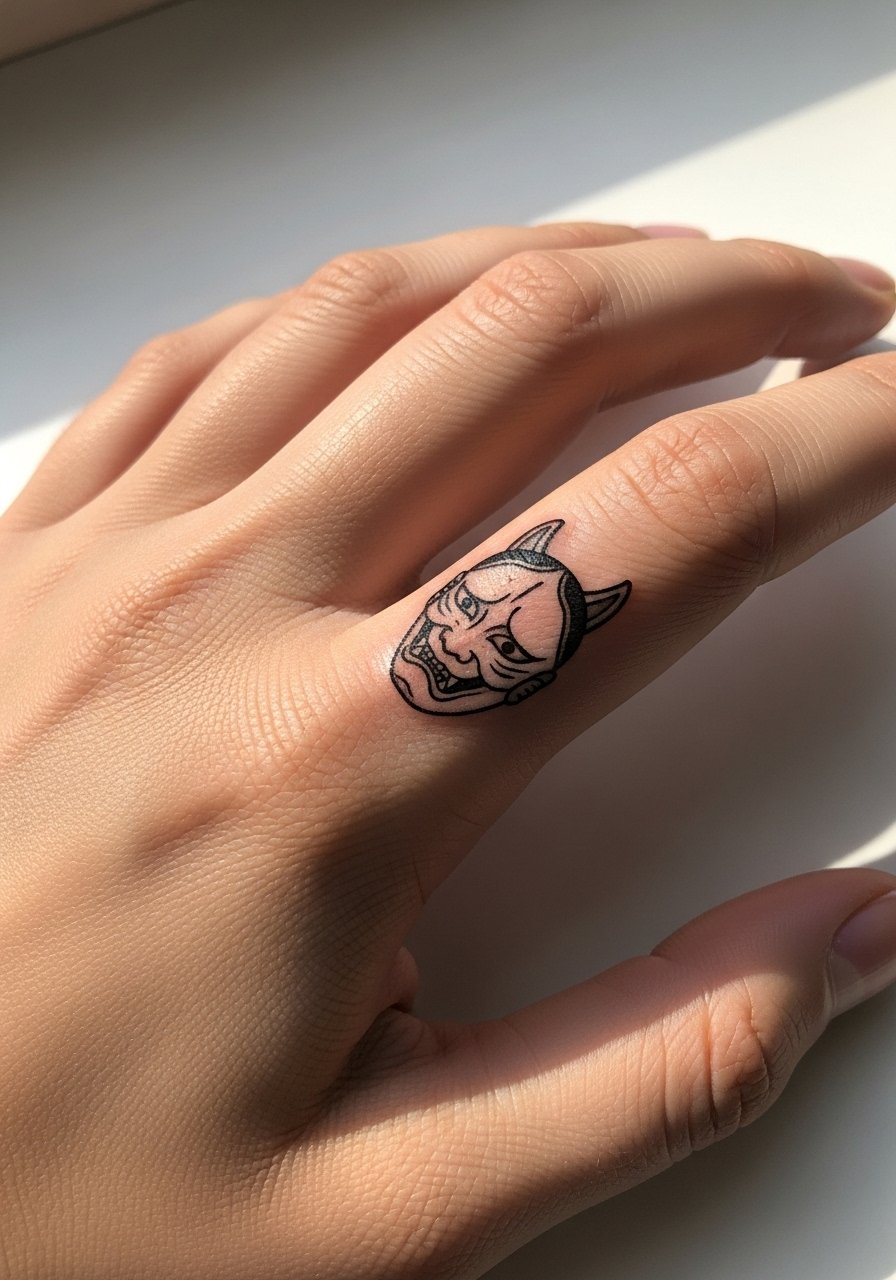
Finger tattoos are notorious for fast fading and higher touch-up frequency. The side-of-finger option hides some wear but still needs bold simplified lines. Tell your artist you want thicker line weight and minimal interior detail. The common mistake is insisting on ultra-fine features that vanish within months. Expect short sessions but plan touch-ups within a year or two. Wear simple rings and keep the hand moisturized after the first week. For showing a finger piece without overexposure, opt for a thin stacking ring set that complements the tattoo instead of hiding it.
13. Hannya Integrated into a Floral Backpiece

When combined with florals, the mask can soften visually or create contrast depending on palette. Tell the artist whether you want the flowers to lead the eye or frame the mask. A common error is shrinking the mask too much in favor of excess floral detail which reduces the face’s impact. Sessions are longer and may span multiple visits. For the healing period wear a loose tank top so straps do not rub the backpiece.
14. Geometric Hannya Over the Sternum
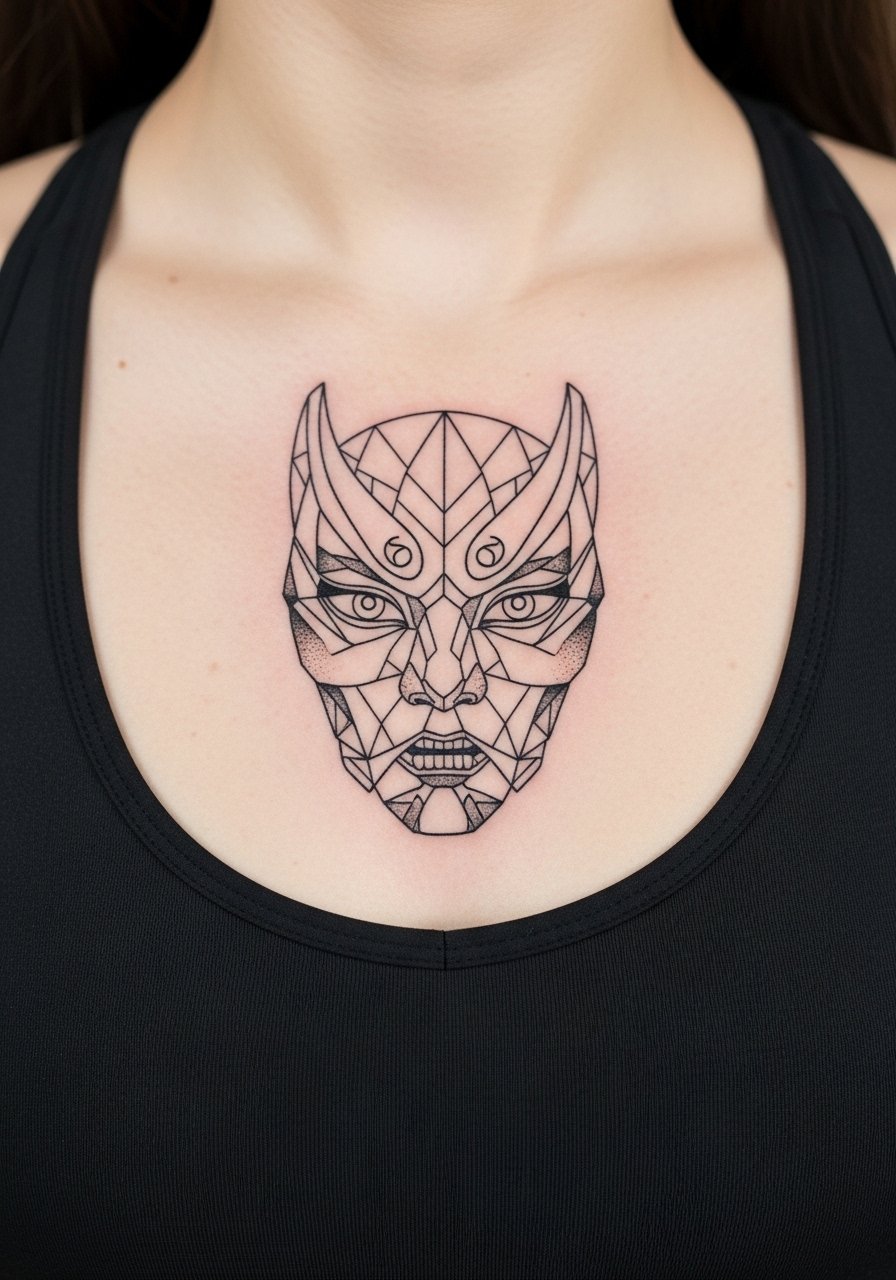
Sternum work needs careful spacing to avoid bleeding lines. Request bold anchor lines and less micro detail within the mask face. The mistake is compressing ornate geometry into a narrow sternum zone. Pain is higher and healing can be tricky because clothing sits near the area. For the appointment wear a fitted sports bra so the artist can access the sternum without causing draft or exposure issues. Think about symmetry with necklines when planning how the piece will sit under clothing.
15. Hannya as a Small Neck Nape Accent
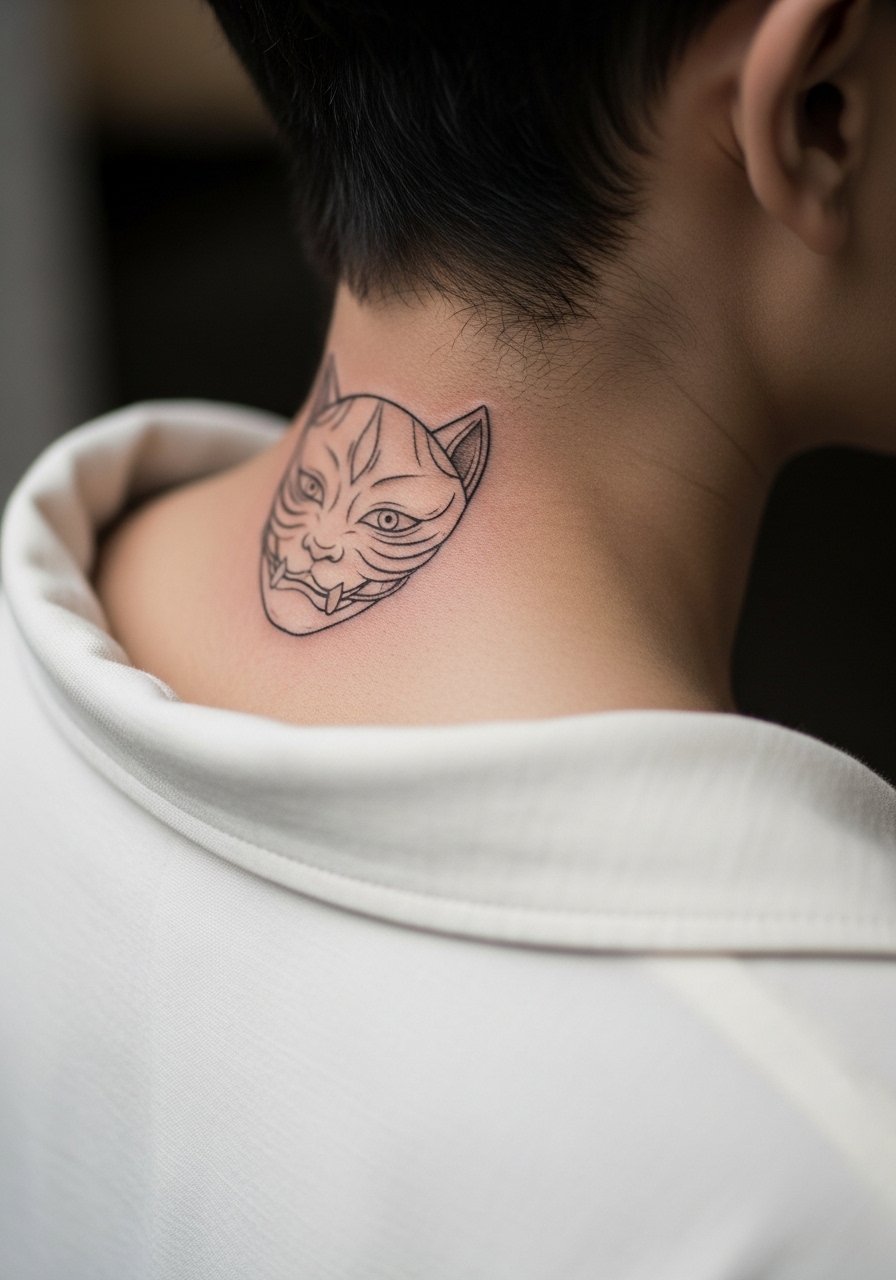
Neck nape pieces are small but visible with certain hairstyles and collars. Ask for the mask to be slightly elongated vertically so it sits with the neck’s natural line. The common error is crowding competing motifs too close and losing the mask’s expression. Pain is moderate and aftercare must account for hair products near the area. For the session pull hair up and wear a wide-neck shirt so the artist can work cleanly.
16. Hannya Mask with White Ink Highlights on the Shoulder Blade
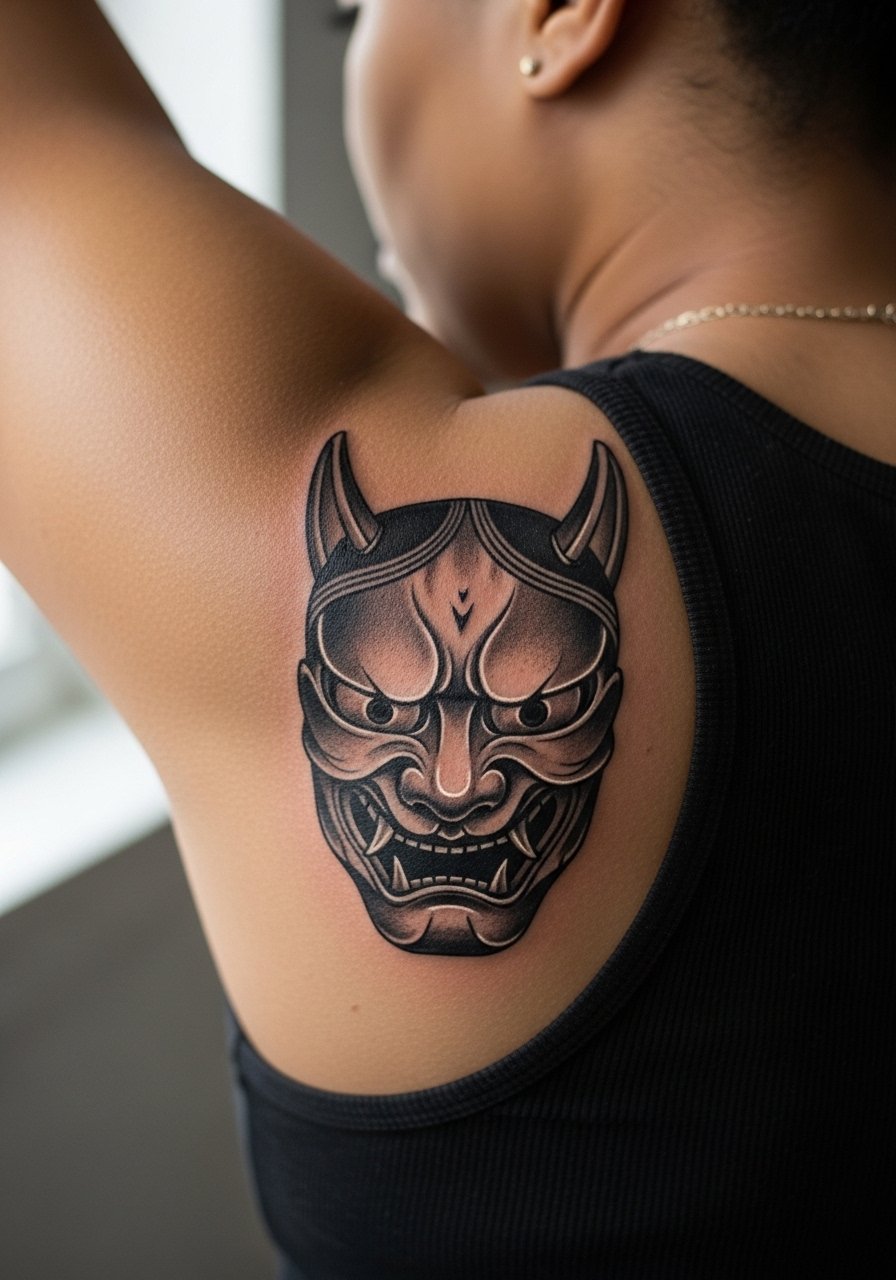
White ink can add pop but it fades faster than black and color. Seek an artist experienced with white highlights and ask for them to be used sparingly as accents. The mistake is relying on white as a base contrast across the whole design. Shoulder blade skin takes color well and pain is moderate. For the session wear a loose tank top or button-down you can pull aside. For show off, open-back tops or halter silhouettes let the shoulder blade catch light without rubbing.
17. Watery Hannya Emerging from Wave Sleeve Edge
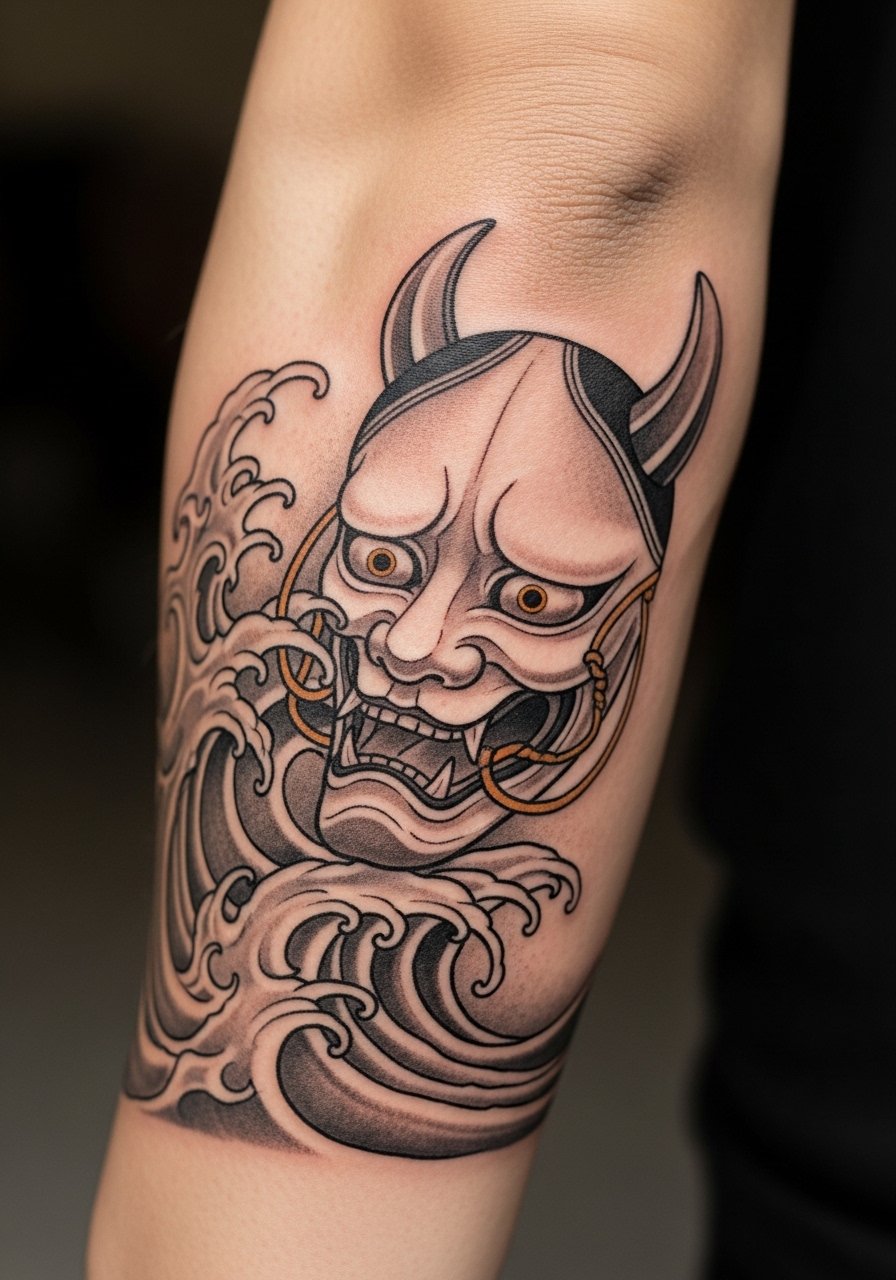
A wave-emergent Hannya creates motion and lets you anchor the mask into an existing sleeve. Tell the artist you want dynamic flow that reads even when the arm moves. The mistake is blocking the mask in a static frame so it loses impact in different poses. Expect multiple sessions to blend the mask into wave shading. For the appointment wear a short-sleeve shirt you can roll up comfortably so the artist has full access without fabric bunching.
Frequently Asked Questions
Q: Are Hannya mask tattoos considered cultural appropriation?
A: There is a clear divide. One group says Hannya masks come from Noh theater and carry cultural and spiritual weight, so using them without understanding can be disrespectful. The other group believes personal reinterpretation is part of tattoo culture as long as the work is respectful and not a direct copy of sacred items. My advice is to state your intent to the artist and opt for a design that references the aesthetic rather than replicating ceremonial artifacts.
Q: How does fine line Hannya on the ribs age compared with bold blackwork on the arm?
A: From what I have seen, fine line on ribs often softens faster due to skin movement, while bold blackwork on the arm tends to maintain presence longer. That means fine line pieces on ribs usually need touch-ups sooner. If you want longevity choose slightly heavier line weight or reserve fine detail for less mobile skin.
Q: Will white ink highlights show up on darker skin tones?
A: White ink can add subtle highlights but its visibility varies by skin tone and placement. On darker skin it reads as sheen more than full opacity, so plan highlights as accents and discuss realistic expectations with the artist who has experience across skin tones.
Q: How often do Hannya pieces need touch-ups if they include red or other colors?
A: Color fades at different rates. Red typically softens faster than black, so expect color refreshes more often than your black outlines. Scheduling a check at year one then a touch-up at year three is a reasonable pattern depending on sun exposure and placement.
Q: Can I get a Hannya masked combined with personal iconography without losing cultural respect?
A: Yes. A common approach is to incorporate personal motifs alongside stylized Hannya elements rather than copying a traditional mask. Explain your personal symbols during consultation and ask the artist to adapt the mask’s features into an original composition.
Q: What should I wear to a ribcage or sternum session to be comfortable and make the process easier?
A: For sternum and rib sessions wear a fitted sports bra or a cropped top you can lift slightly without exposing too much. That keeps you warm and gives the artist access without fuss. A fitted sports bra is a simple, practical choice for these appointments.
