
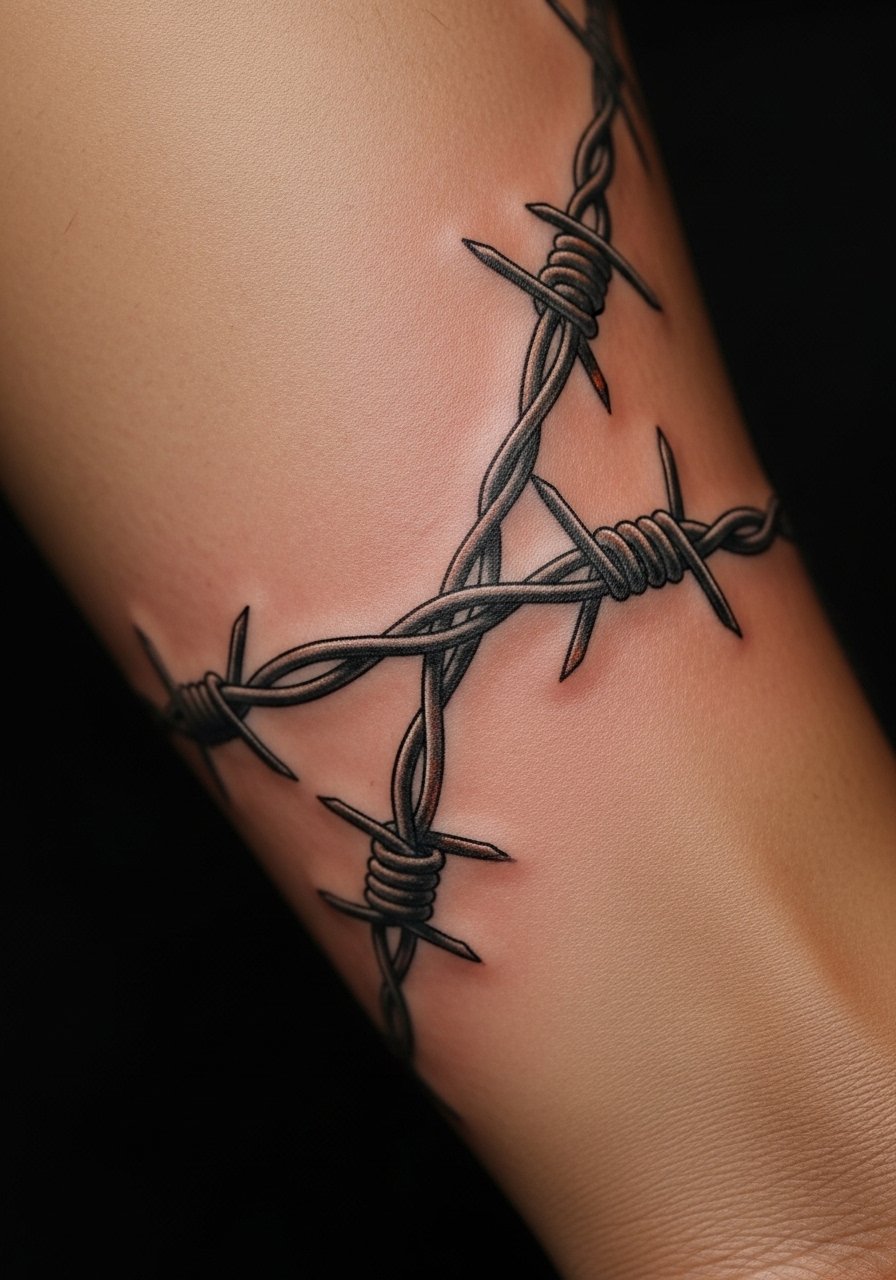
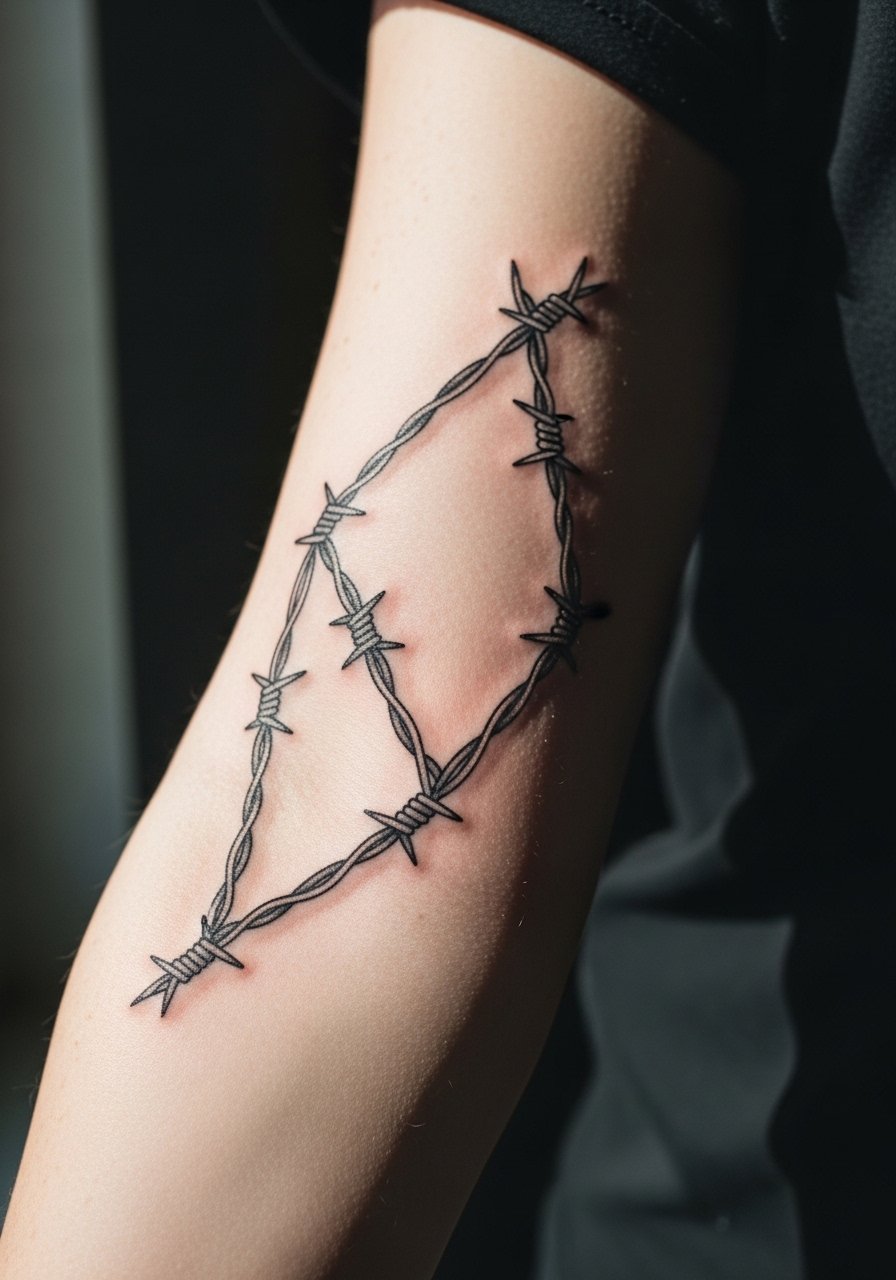
Fine line barbed wire looks fragile in photos but often needs more room to age well. Heavy black strands that read bold at year one can migrate into a muddy line by year four if placed over thin, high-motion skin. Start with a slightly lofted line weight and clear spacing between the knots, and the piece holds its identity longer. The first idea below shows a forearm approach that balances delicacy with real-world longevity.
1. Fine Line Barbed Wire on Inner Forearm
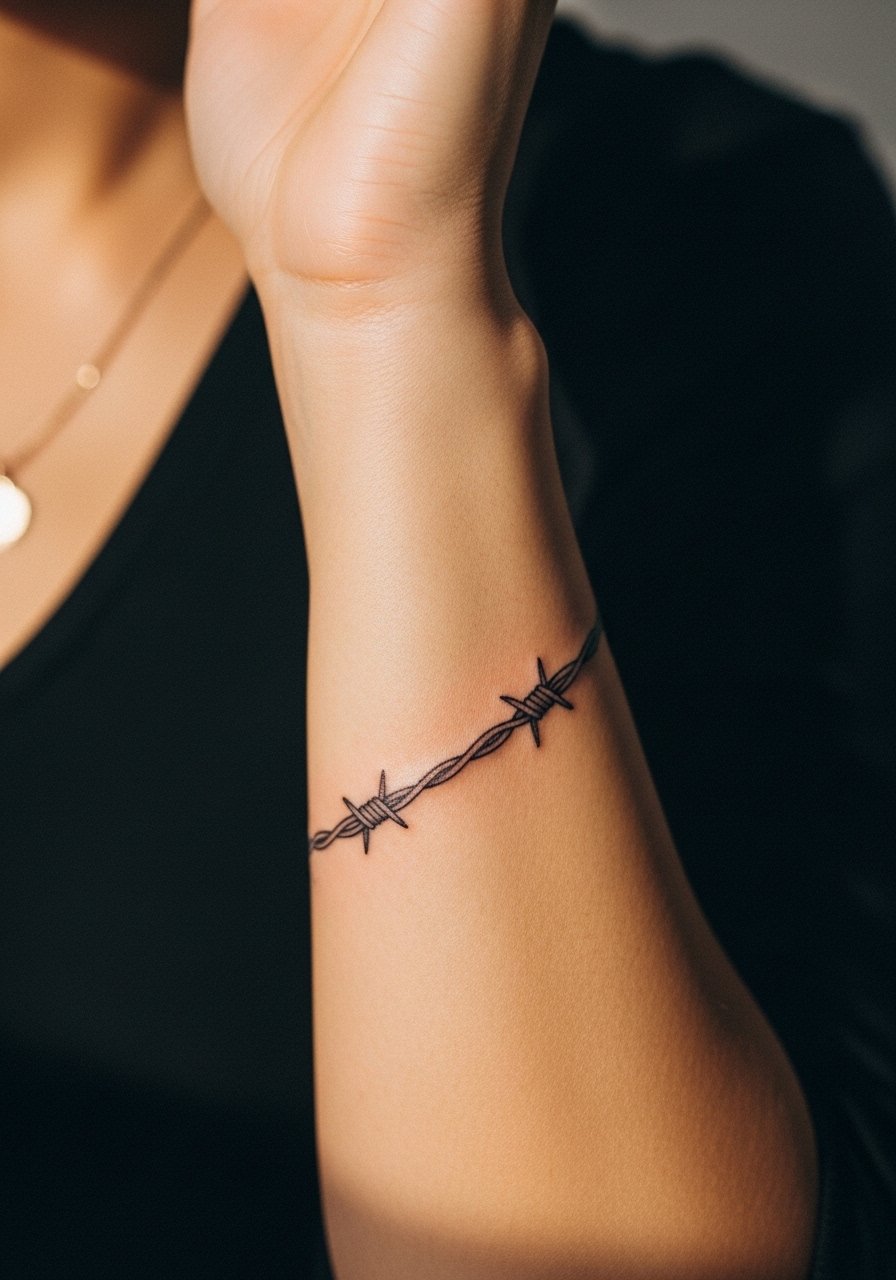
I've seen this layout last best when spaced like jewelry, not like micron-thin string. Ask your artist for slightly heavier knot points and single-needle linework that avoids overly tight spirals. Fair warning, the inner forearm moves a lot so anticipate a light touch-up at year three rather than year one. Session feels moderate, around an hour depending on wrap length. For showing it off, roll up sleeves or wear a loose button-down shirt that frames the area without crowding the linework.
2. Barbed Wire Wrist Bracelet
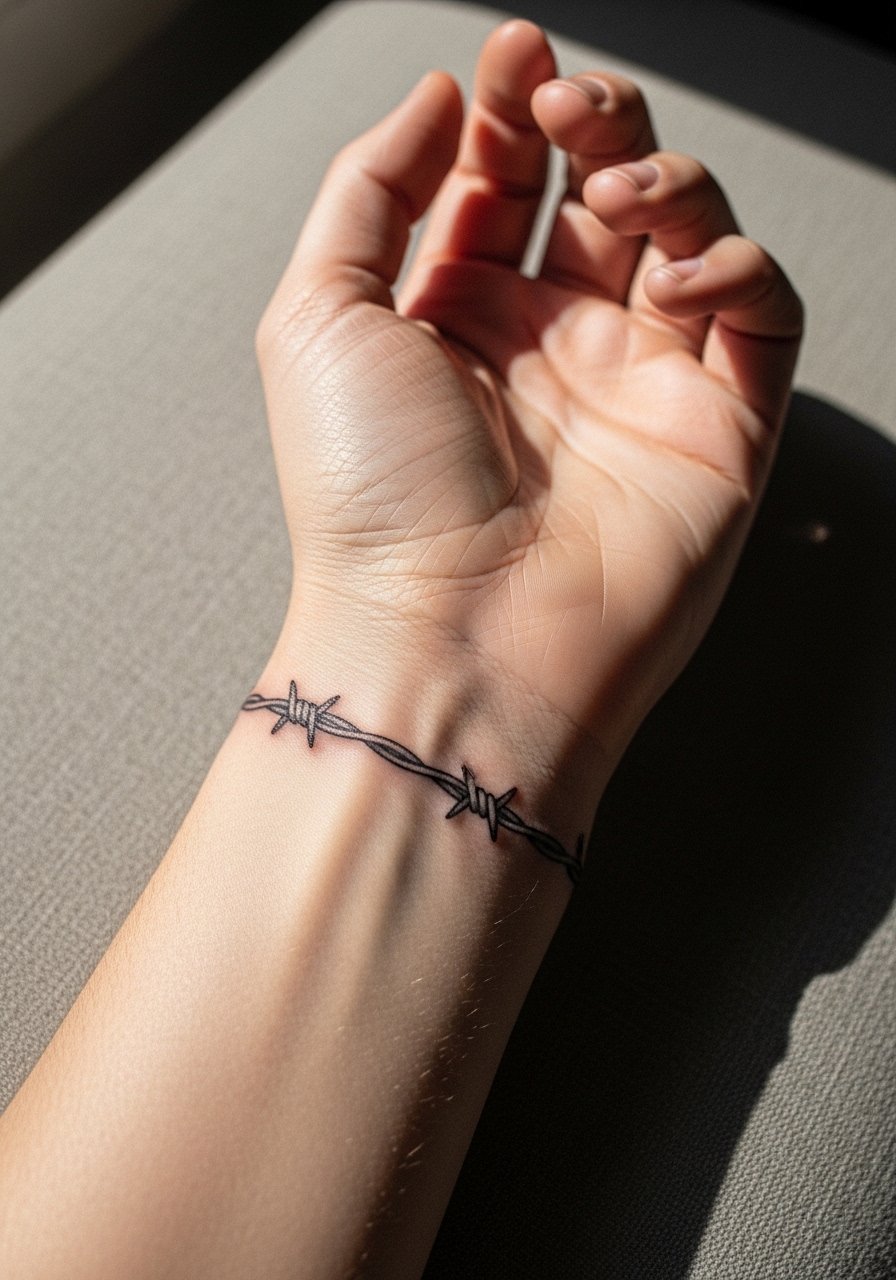
This placement reads like jewelry so detail matters more than mass. The biggest mistake is making the strand too thin for constant washing and friction. Tell your artist to use a steady lineweight and avoid super-tiny knots. Expect higher friction and faster fade on the dorsal wrist, and a small touch-up at year two is common. The session is short but sensitive because of the bone near the skin. Pair the bracelet with a minimalist watch or a thin chain bracelet to let the negative space around the wire show.
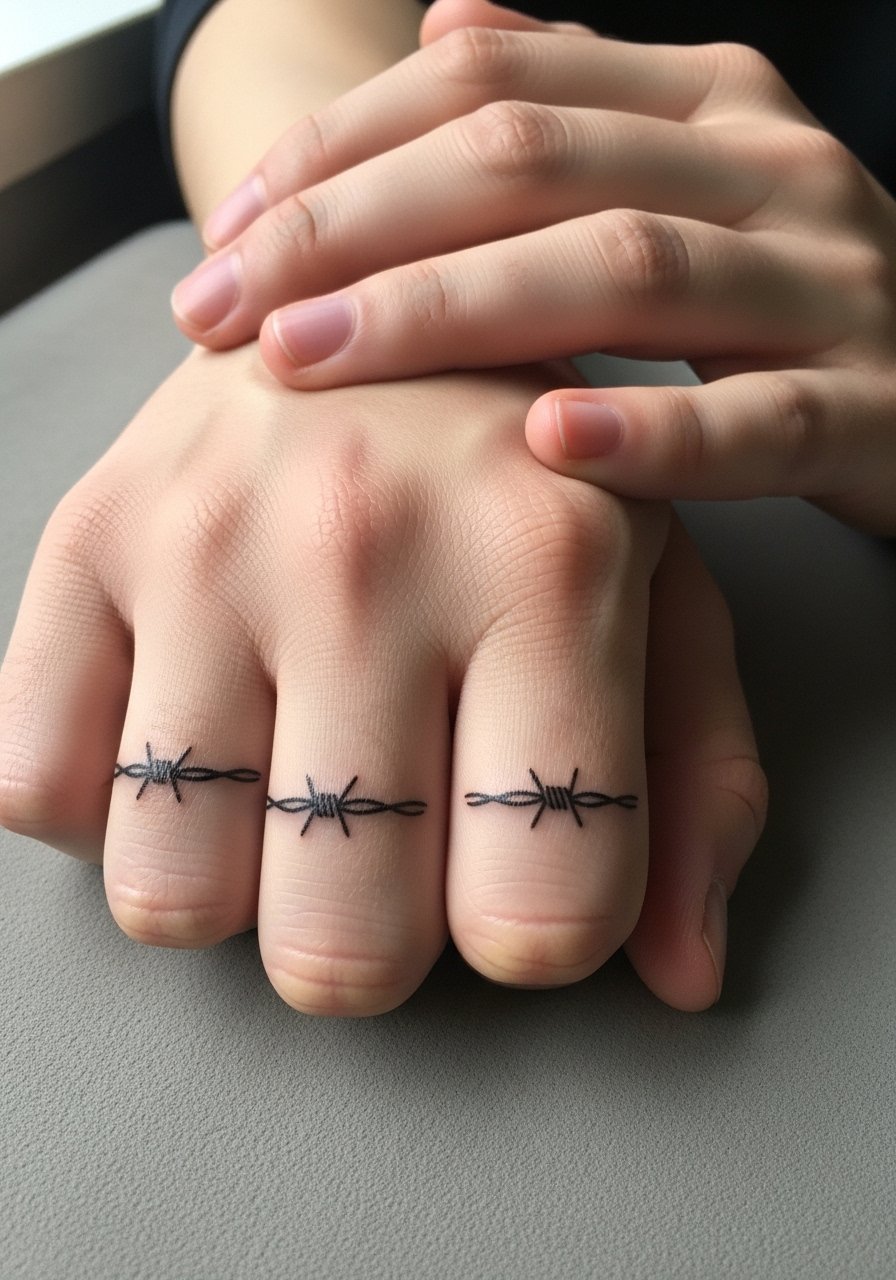
3. Finger Ring Barbed Wire (Micro)
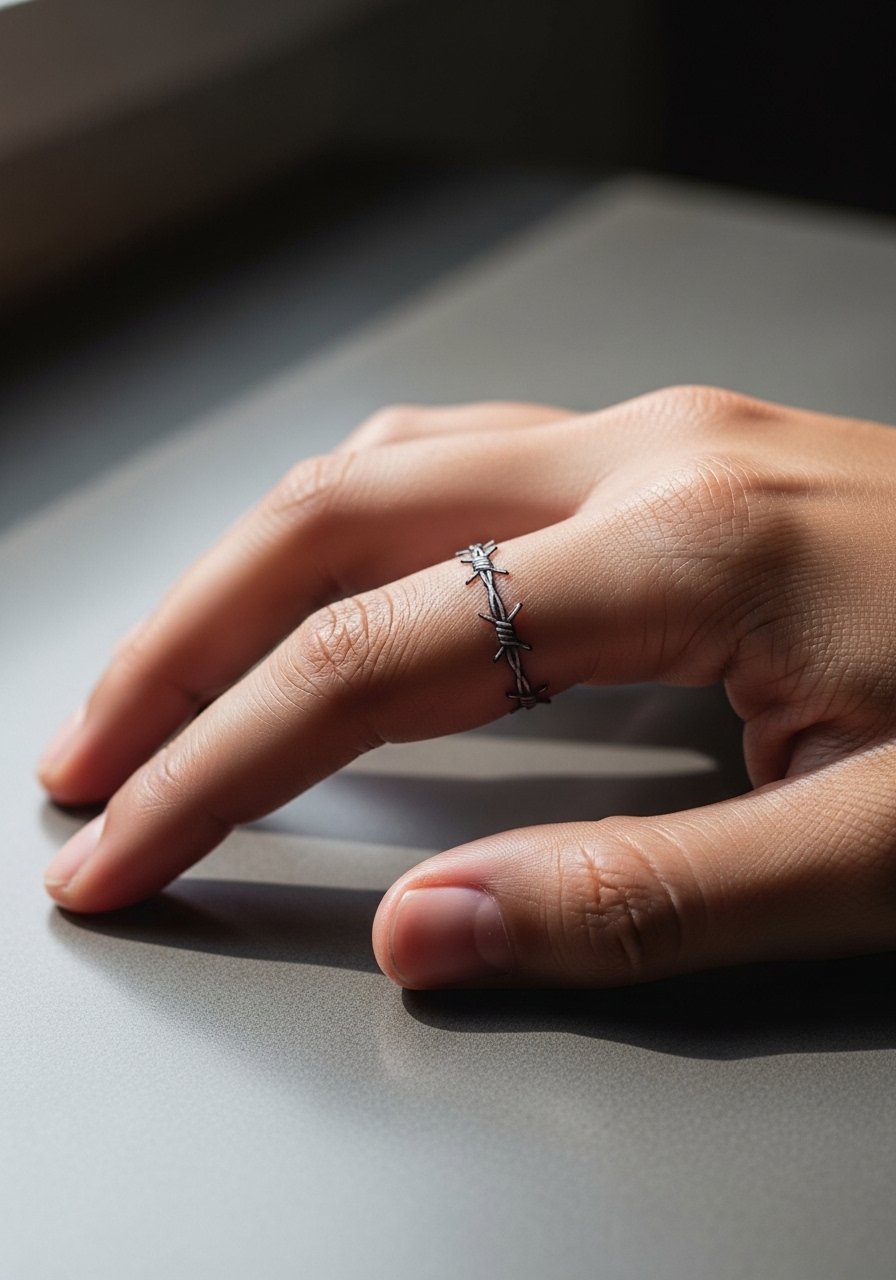
Small finger work eats ink through daily use and washing. Artists split on whether to place a wrap directly over the joint. One camp says joints blur quickly. The other camp says precise shallow placement on the outer phalanx can last with yearly touch-ups. If you want longevity, place the ring slightly above the joint and ask for thicker knots. Real-world result: crisp at six months, softened by year two without touch-up. For session comfort, slip on a thin slip-on glove to keep oils off after the wrap is applied.
4. Anklet Barbed Wire Around the Ankle
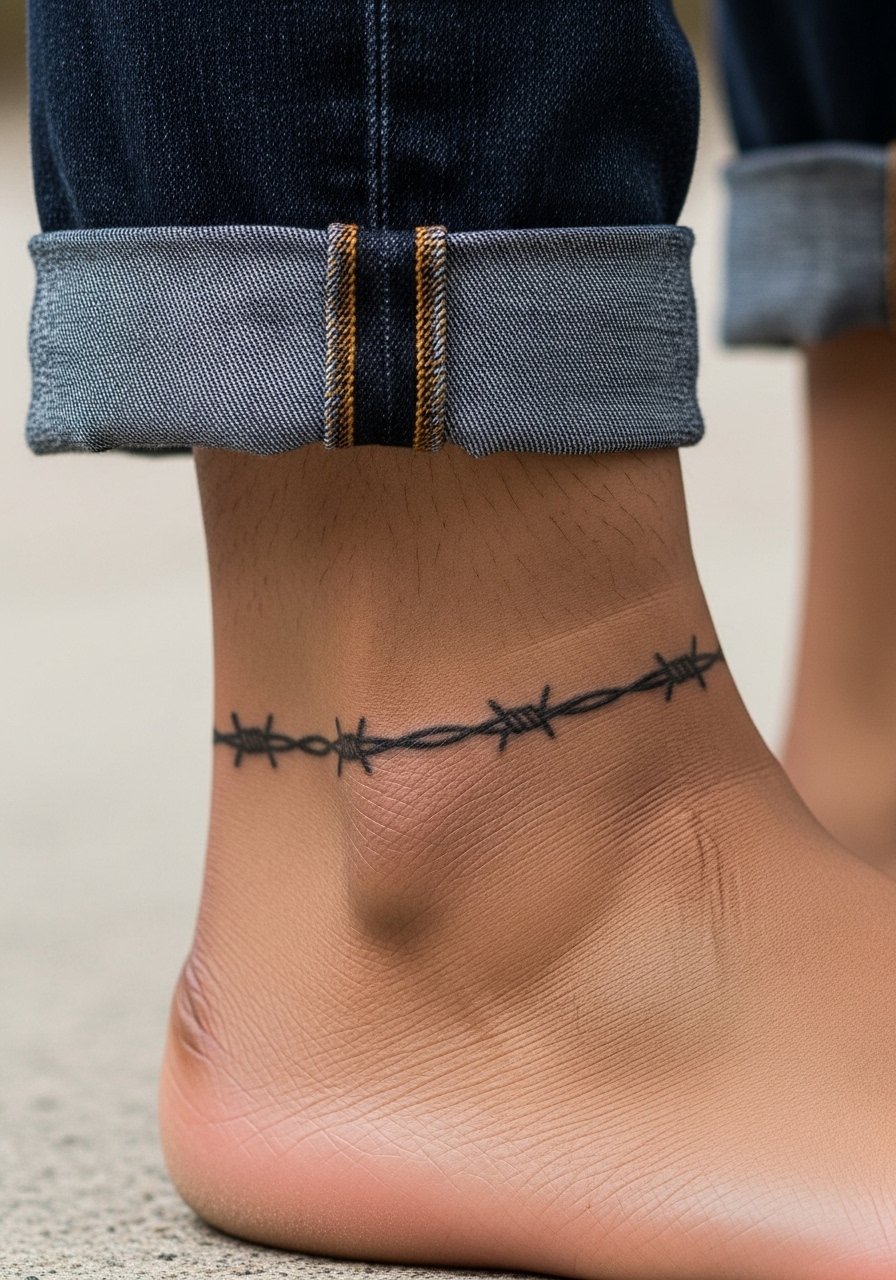
Ankle tattoos face rubbing from socks and shoes so placement slightly above the bone helps. A common error is wrapping too tight around the narrow ankle. Ask for a low-profile placement and thicker points at the barbs to preserve contrast. The session can sting where tendon lies close to skin, but it is brief. Healed at six months it still reads clean, by year three expect some softening without a touch-up. Show it off with rolled jeans or a sandal and a simple ankle chain for contrast.
5. Calf Barbed Wire with Stipple Shading
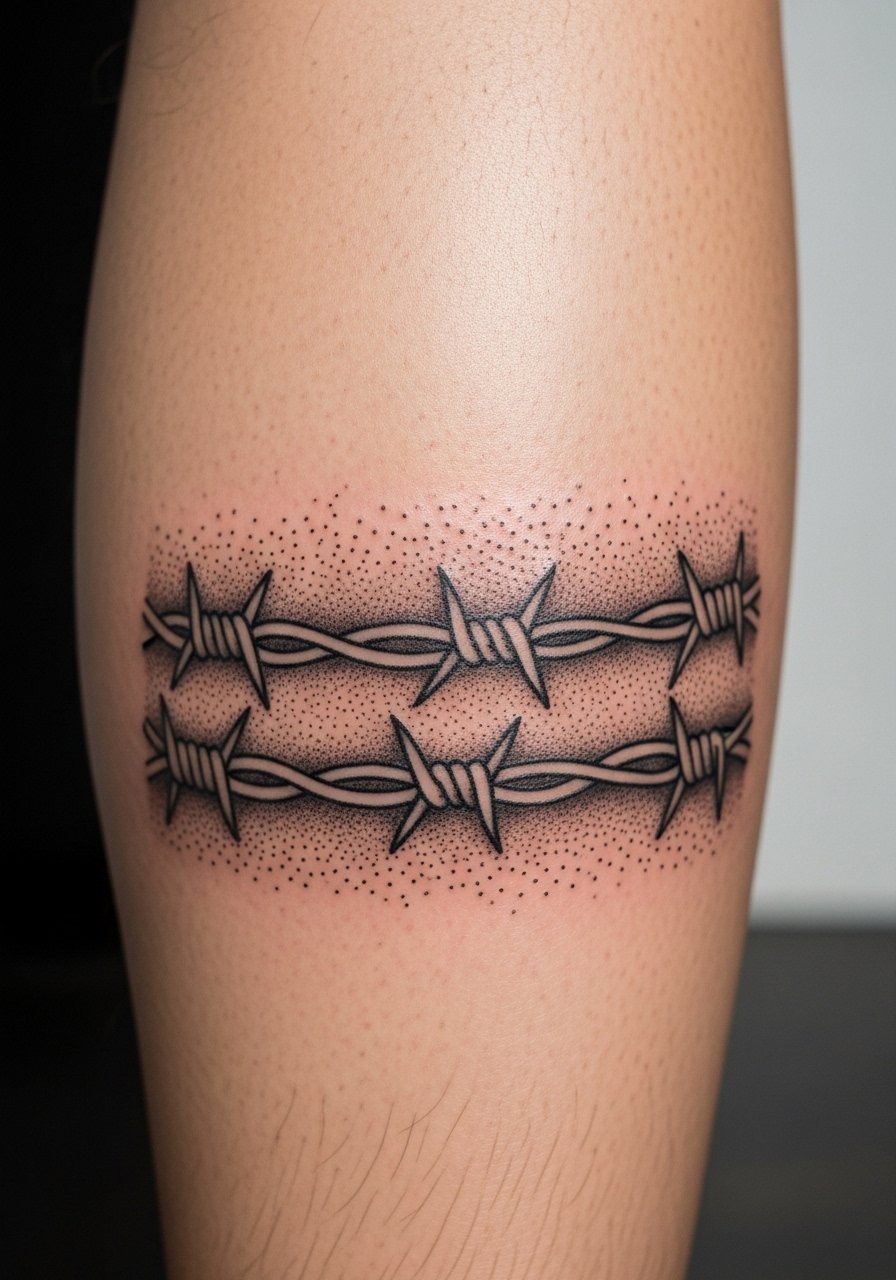
There is room on the calf for texture, so stipple shading behind the strand gives depth without heavy saturation. In consultation, bring reference for the type of stippling density you like so the artist matches your vision. The session is lower pain and can run 60 to 90 minutes for a full wrap. Calf skin accepts saturation well so this holds long with minimal touch-up, often five years or more. For evenings out, pair the wrap with a midi skirt or cropped pants that keeps the tattoo visible.
6. Thigh Barbed Wire Plate with Floral Breaks
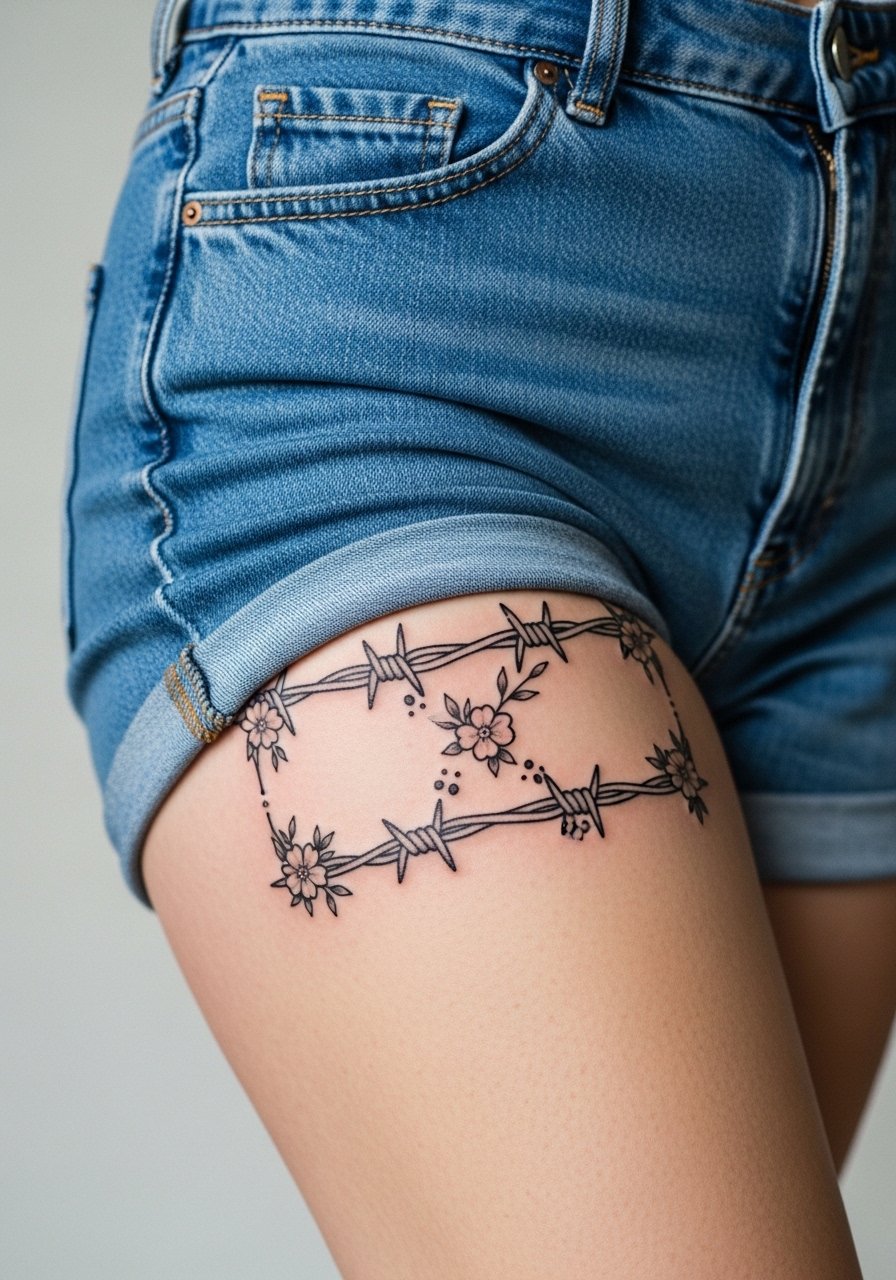
The thigh tolerates larger, more ornamental barbed wire because the skin is thick and low-motion. I recommend adding floral breaks rather than continuous metal, it reduces visual fatigue and ages more gracefully. During consultation, specify which flowers and where to leave negative space. Sessions can be longer, expect two hours for a detailed plate. The biggest mistake is going too dense with knots. For the appointment wear loose shorts or a loose drawstring linen pant so the artist can work without fabric pulling.
Studio Day Picks
The wrist, finger, and ankle pieces above all endure more washing and friction than larger leg or arm work, so a few focused items smooth the session and early healing.
-
Stencil transfer paper kit. Lets you preview placement on skin before committing, especially useful for the wrist and finger wraps above.
-
Topical numbing cream. Applied as directed about 45 minutes before helps with sensitive ankle or rib sessions without changing linework.
-
Thin protective film roll. Keeps small wrap tattoos clean through the first week of friction and showers.
-
Fragrance free gentle body wash. Cleans healing skin without irritating fine line work on hands or wrists.
-
Aquaphor healing ointment. A thin layer for the first few days locks in moisture while allowing the linework to breathe.
7. Shoulder Cap Barbed Wire in Blackwork
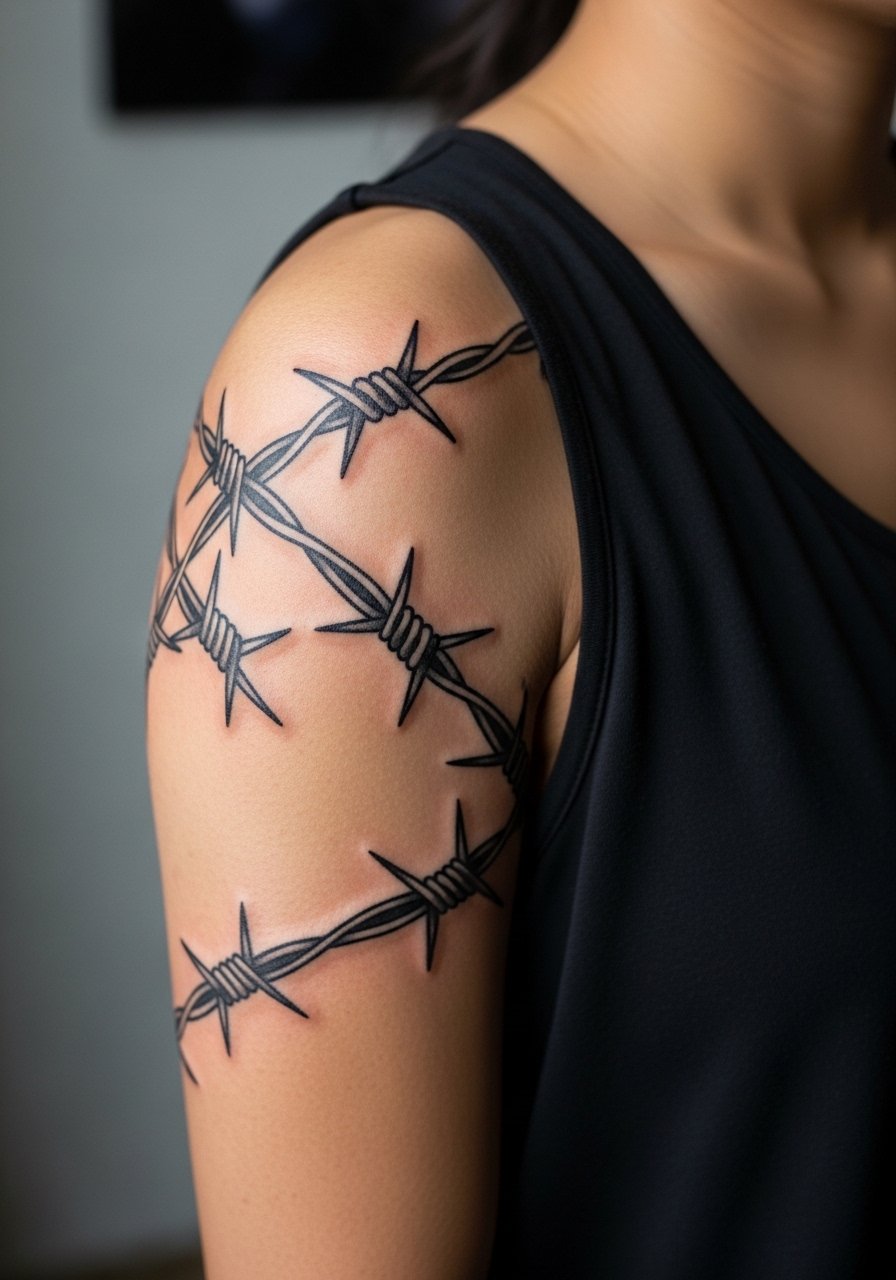
There is something about black-saturated barbed wire on the shoulder that reads architectural from a distance. The visual impact lead is obvious here. Ask for solid saturation and crisp negative space around the barbs so it does not read blobbed over time. The session is tolerable and can be split into two shorter appointments for larger pieces. Shoulders handle touch-ups well and tend to age slowly if sun protection is maintained. For showing it off, wear a loose tank top that drops just enough to reveal the cap.
8. Ribcage Single-Strand Barbed Wire
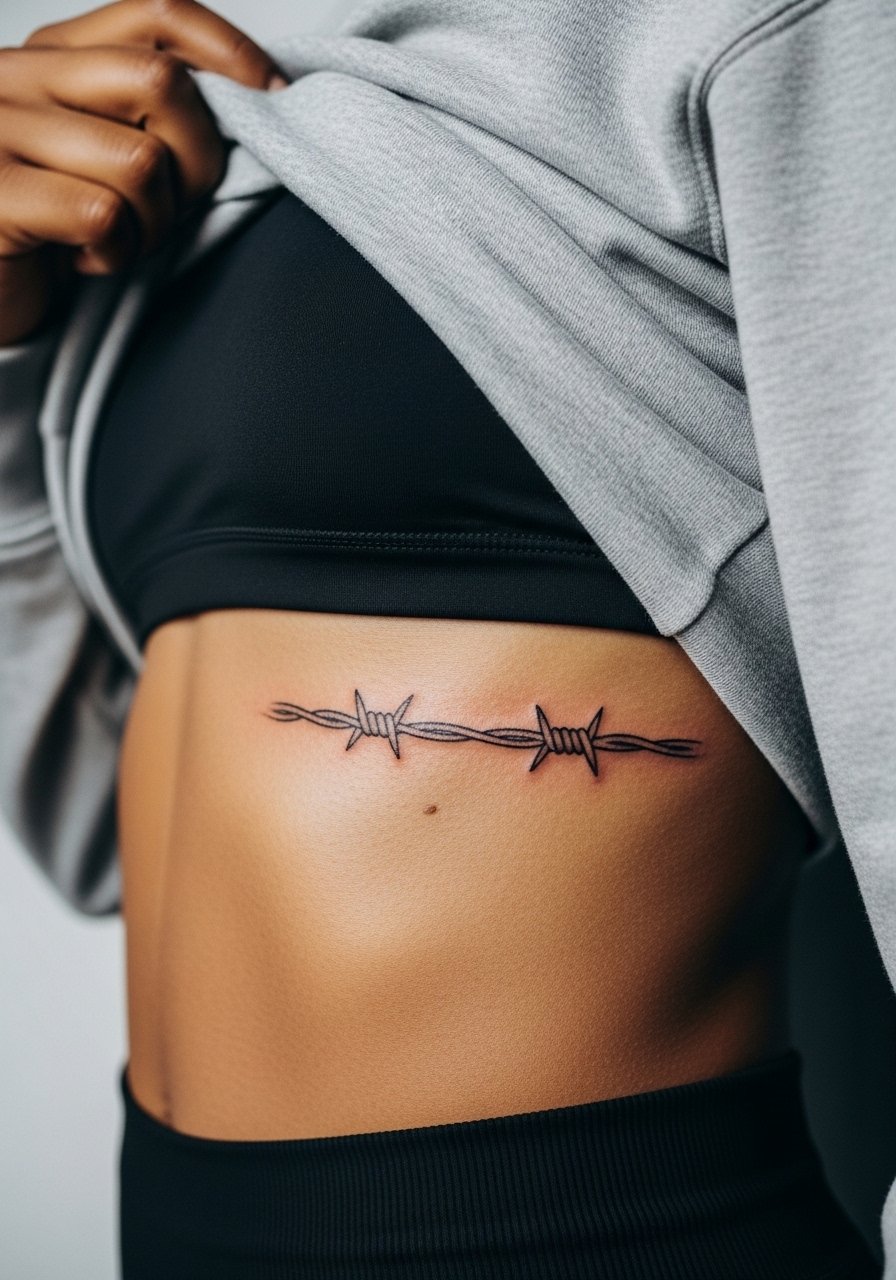
Artists split on fine line on ribs. One camp says skin stretch and frequent motion cause blurring within two years. The other camp argues that with the right needle depth and spacing, fine line can settle cleanly on ribs. I recommend larger spacing between knots and slightly bolder anchor points if you want longevity. Expect a painful session because the ribs rate high on most pain scales, and plan for a possible touch-up at year three. For the appointment wear a cropped top or a strapless sports bra so the artist can access the area cleanly.
9. Sternum Barbed Wire with Script
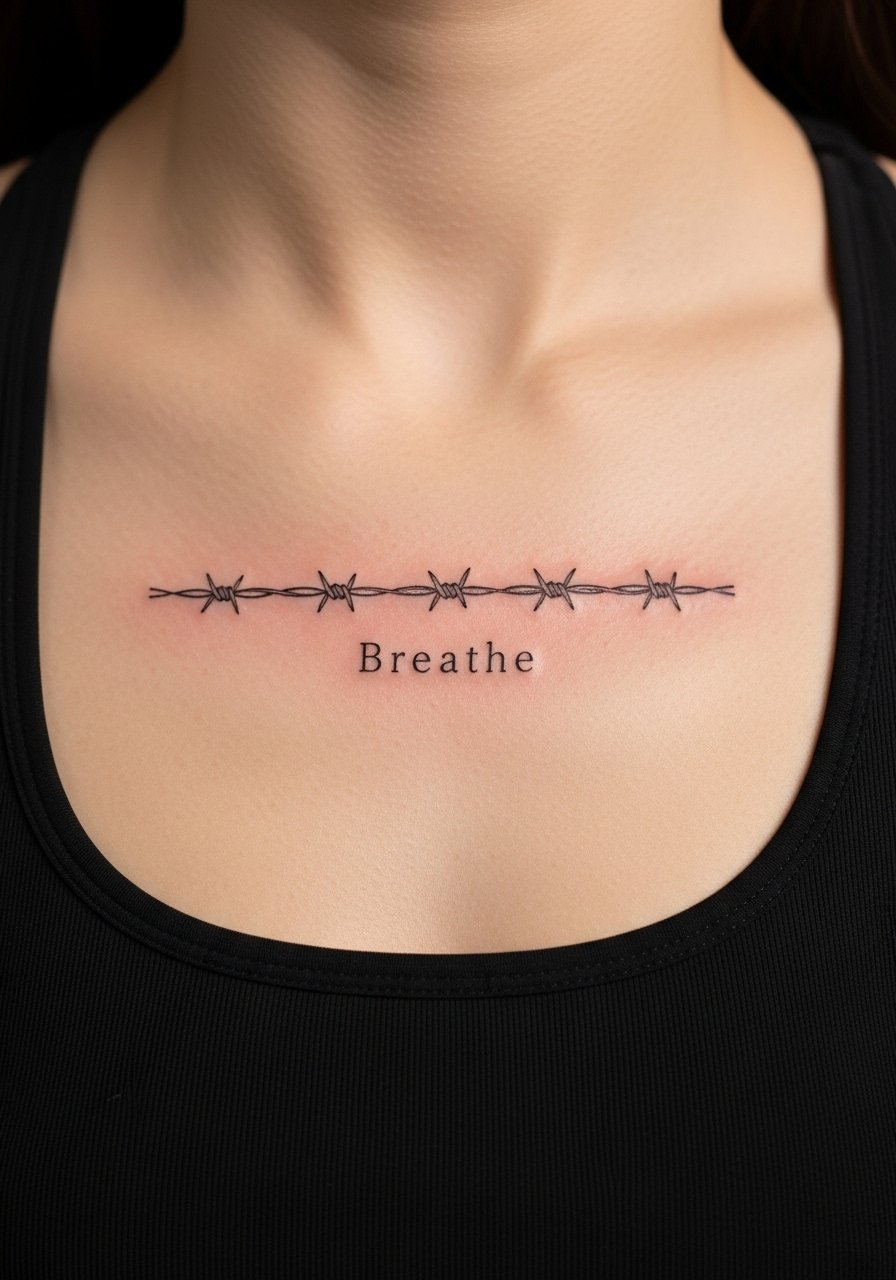
Chest and sternum work is intimate in both placement and sensation. A common mistake is cramming small script too close to the barbed wire. Tell your artist the exact real text and desired spacing, and ask for slightly larger lettering than you think you need. Sessions sting near bone and take patience. Expect texture changes as it heals and plan for a touch-up at year three if the script blurs. Sensitive area note: session wear like a fitted sports bra is best so the artist can control access without full exposure.
10. Back-of-Neck Barbed Wire Collar
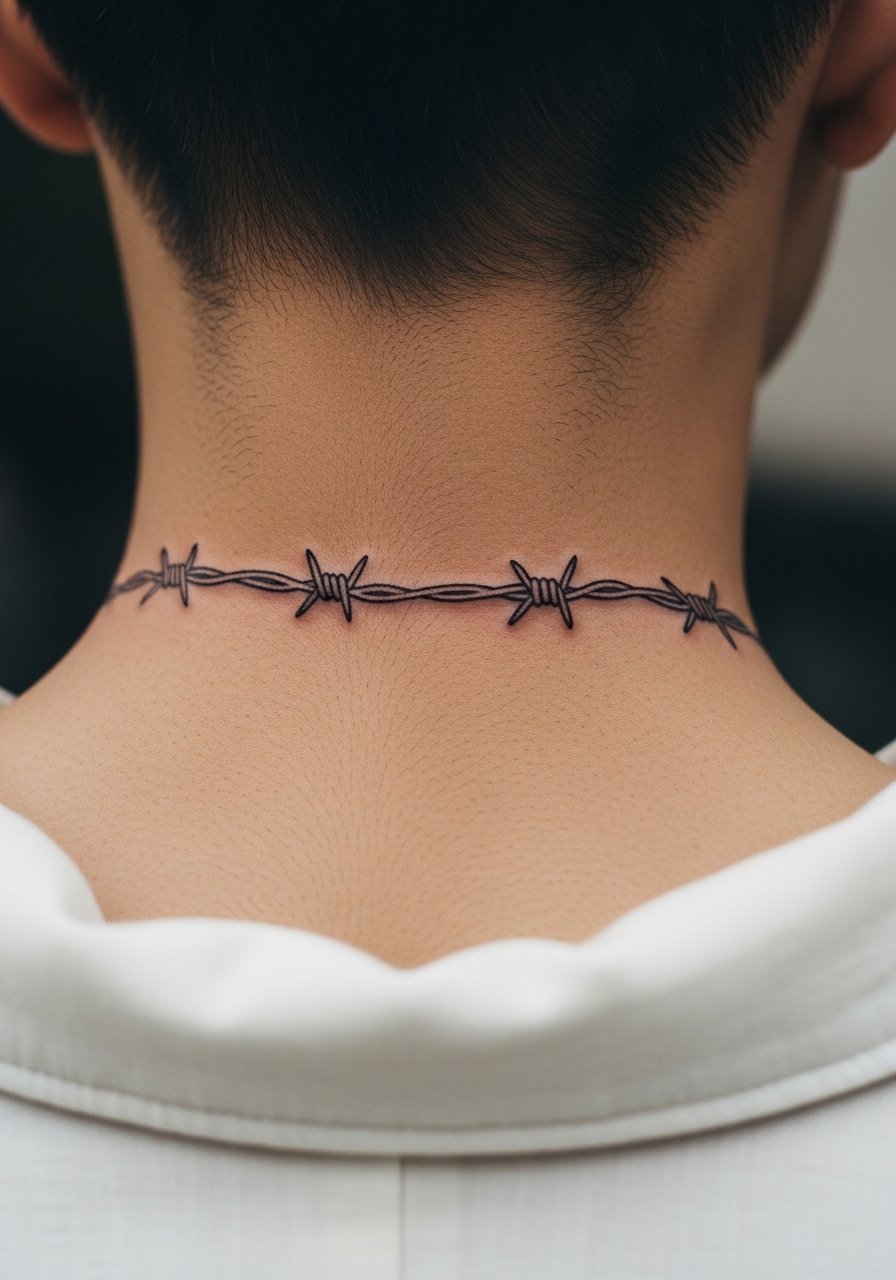
A back-of-neck wrap is discreet and frames hairlines well, but it needs clean linework because the skin there is thin. During consultation, request solid knot contrast and a plan for how hair growth will sit over it. Blowout risk is moderate if the artist works too deep. Sessions are quick but can be sensitive. For styling, a wide-neck shirt or a collared shirt pulled to one side shows it without overexposure.
11. Behind-the-Ear Mini Barbed Wire Accent
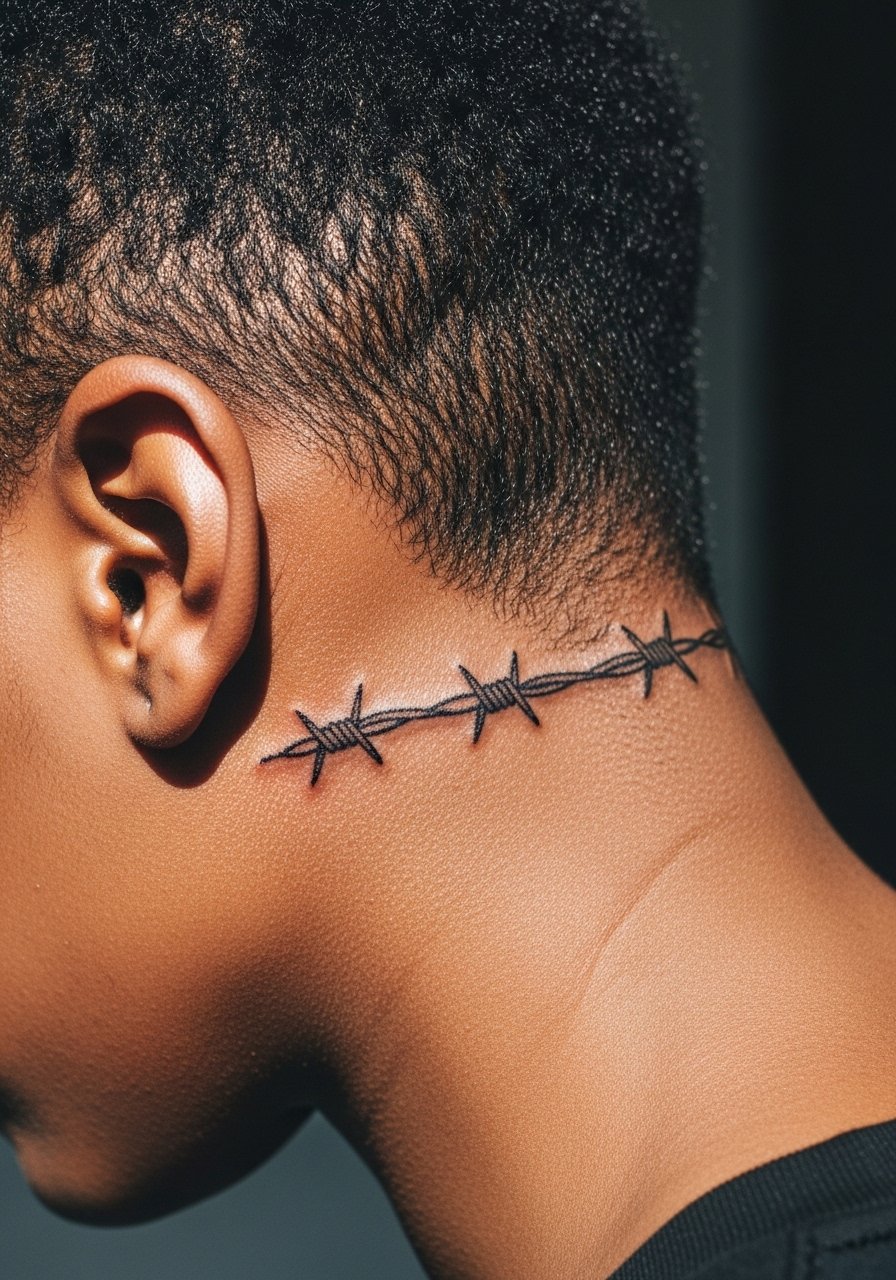
Behind-the-ear pieces must be described as on the skin below the hairline to avoid awkward framing. They are tiny and delicate so the common error is too much detail in a tiny space. Ask for a simple silhouette with clear negative space between barbs. Sessions are short and oddly sensitive because of nerve endings. For the session, tuck hair back or wear a wide headband to give the artist clean access and prevent hair from rubbing the fresh ink.
12. Lower Back Barbed Wire with Negative Space
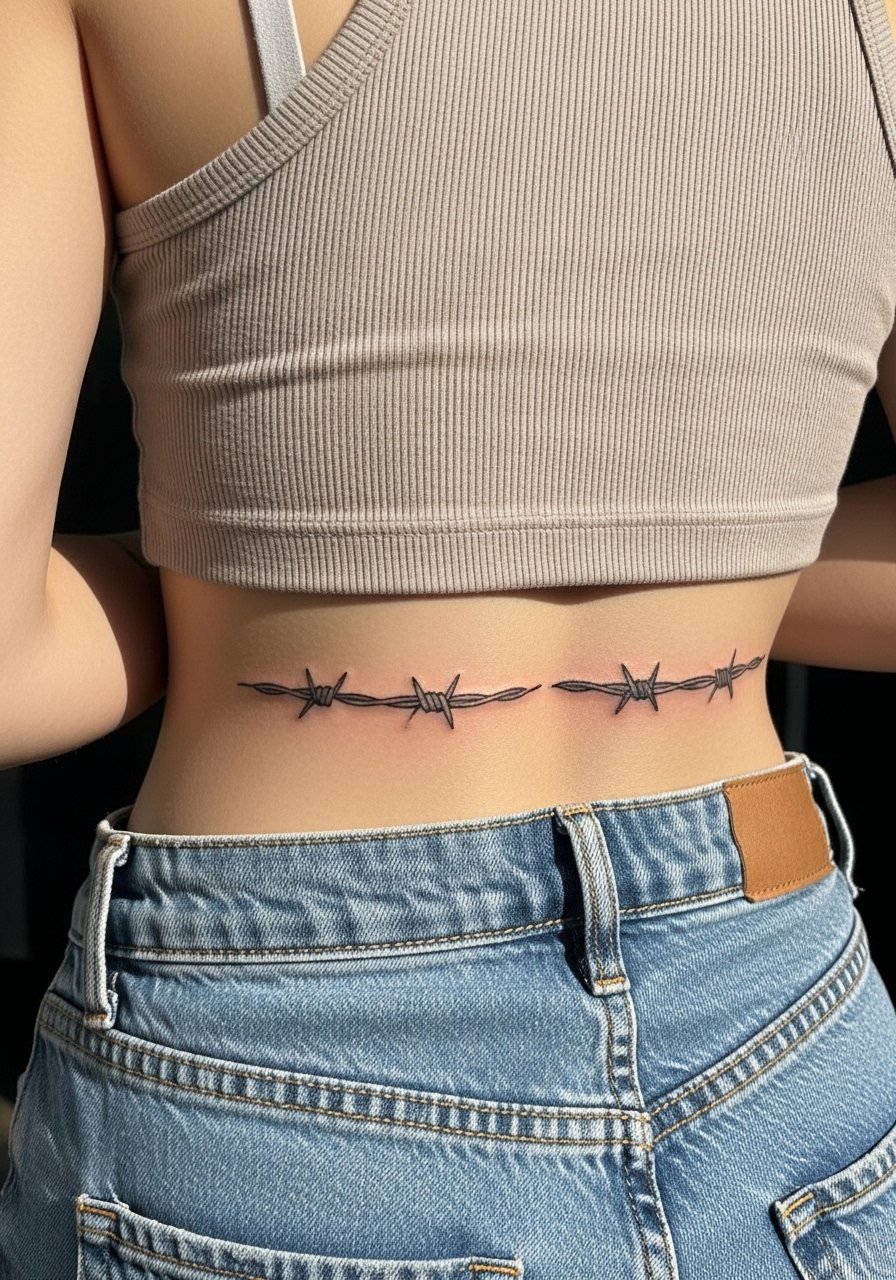
Lower back skin is forgiving for wider motifs. The aging lead matters here because a continuous heavy band can become a dark strip over time. I prefer a version with negative-space gaps so each barb reads separately as the years pass. Sessions are comfortable and often completed in one sitting. For show-off moments, a low-rise jeans and a cropped top reveal the piece and a crop tank pairs well.
13. Barbed Wire Hip Accent with Tiny Roses
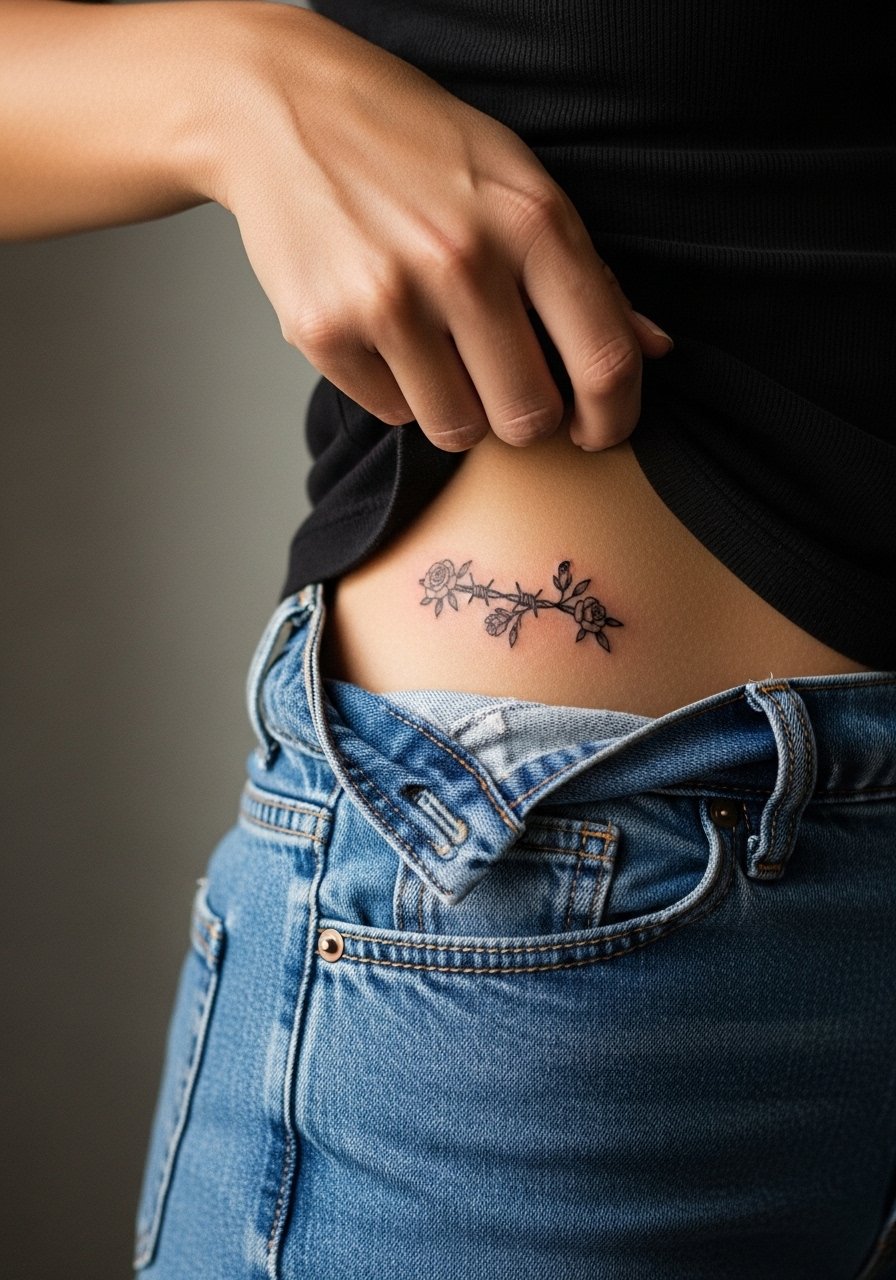
Hips curve and shift with movement so placement affects how the strand sits when you walk. One mistake is running barbs into the crease where stretch marks are common. Ask your artist to map the piece while standing so the layout reads straight when you move. Sessions are medium pain and can be broken up. For showing it off, high-waisted bottoms that sit just above the design are ideal. Try pairing with high-waisted jeans.
14. Inner Bicep Barbed Wire with Whip Shading
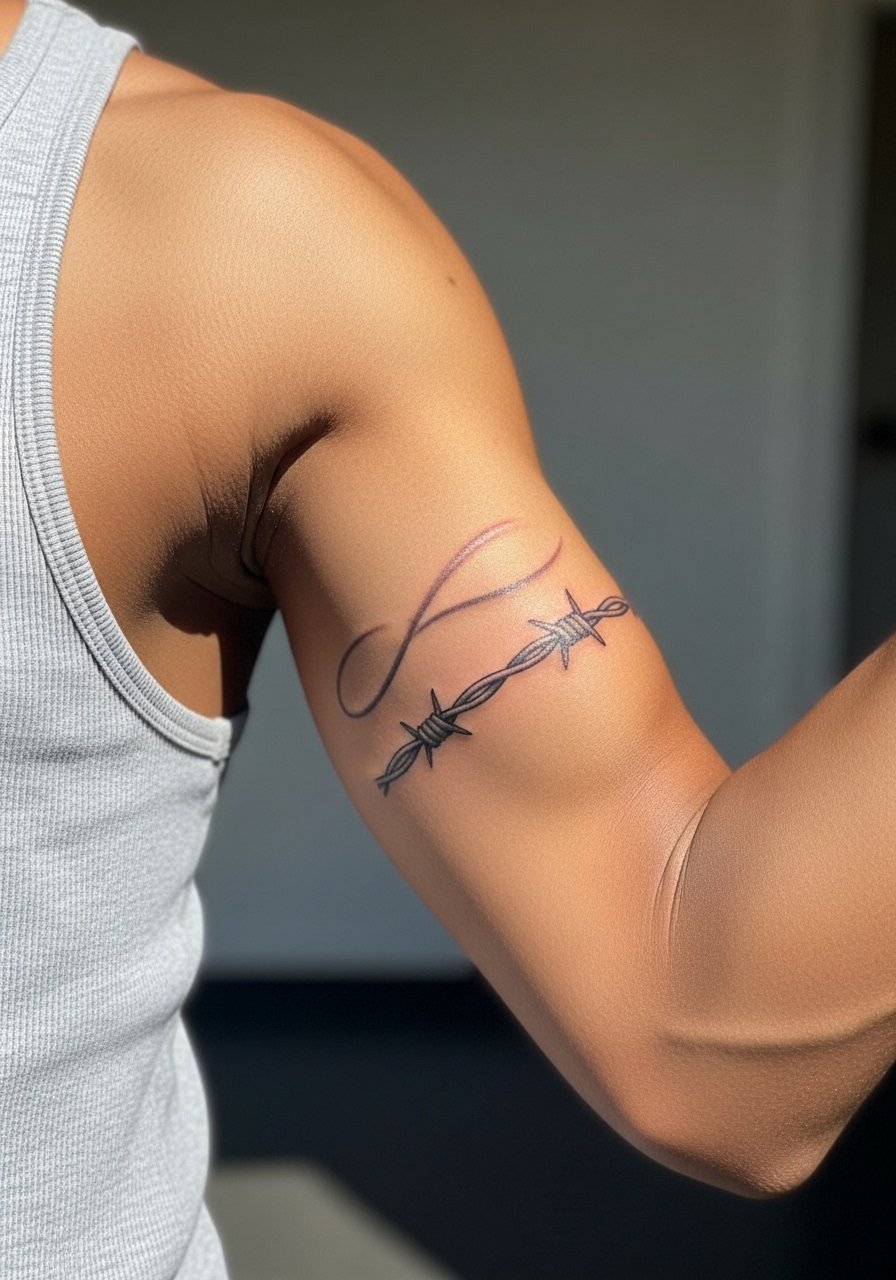
Fair warning, the inner bicep is a sensitive zone and the skin can move under the needle. The visual payoff is high because it's revealed intentionally. Request a light whip shading background rather than heavy fill so the strand stays legible. Expect a more painful session than the outer arm and plan for a touch-up at year two if you notice softening. For the appointment wear a tank top you can move around easily.
15. Spine-Running Barbed Wire with Dot Work
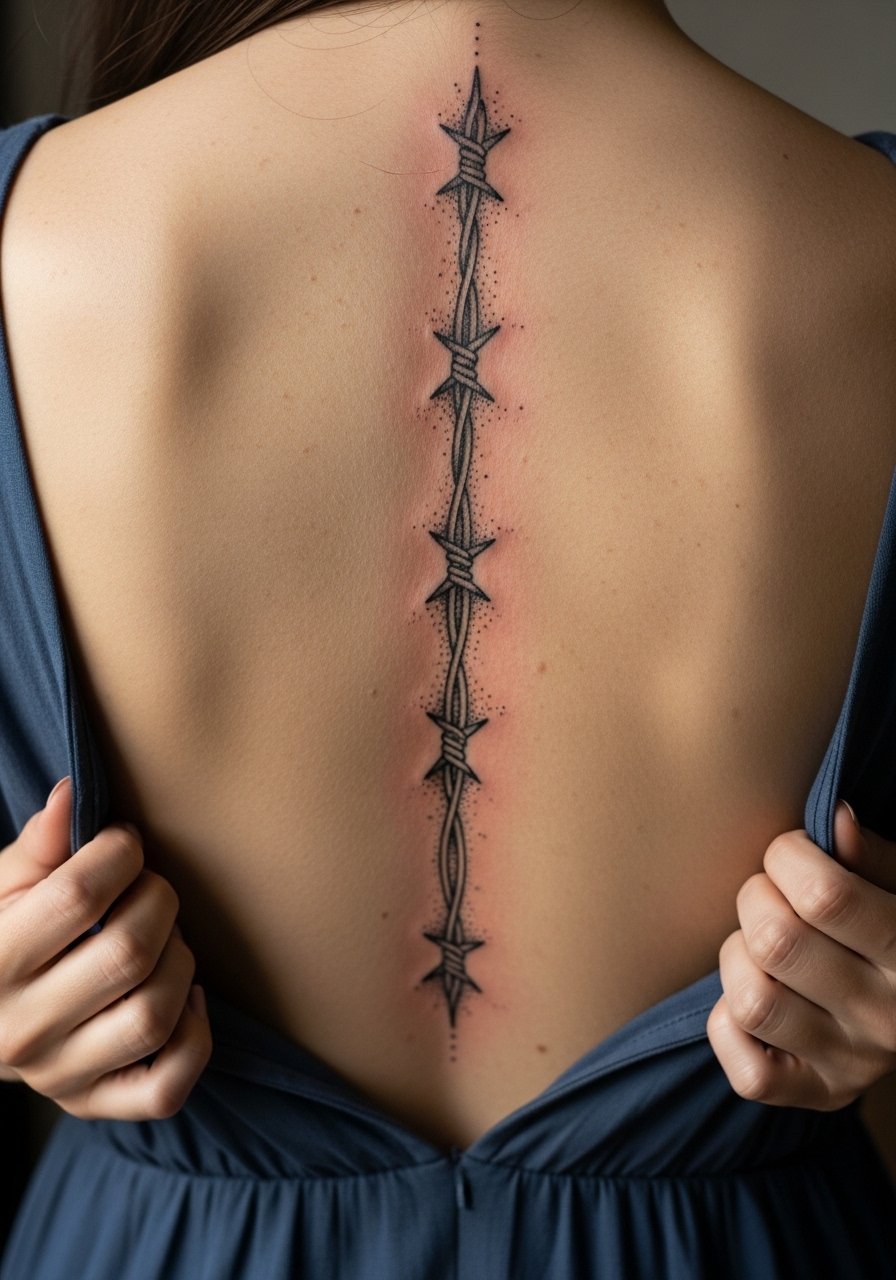
A vertical spine placement reads dramatically and benefits from dot work to suggest shadow without heavy black. During consultation, ask for dot density samples to make sure you like the level of contrast. The session is more intense near vertebrae and may require breaks. Healed at six months it looks crisp, although central vertical work can need a touch-up by year four. For showing it off, a back-baring top or an open-back dress complements the vertical line.
16. Barbed Wire Crown Around a Portrait
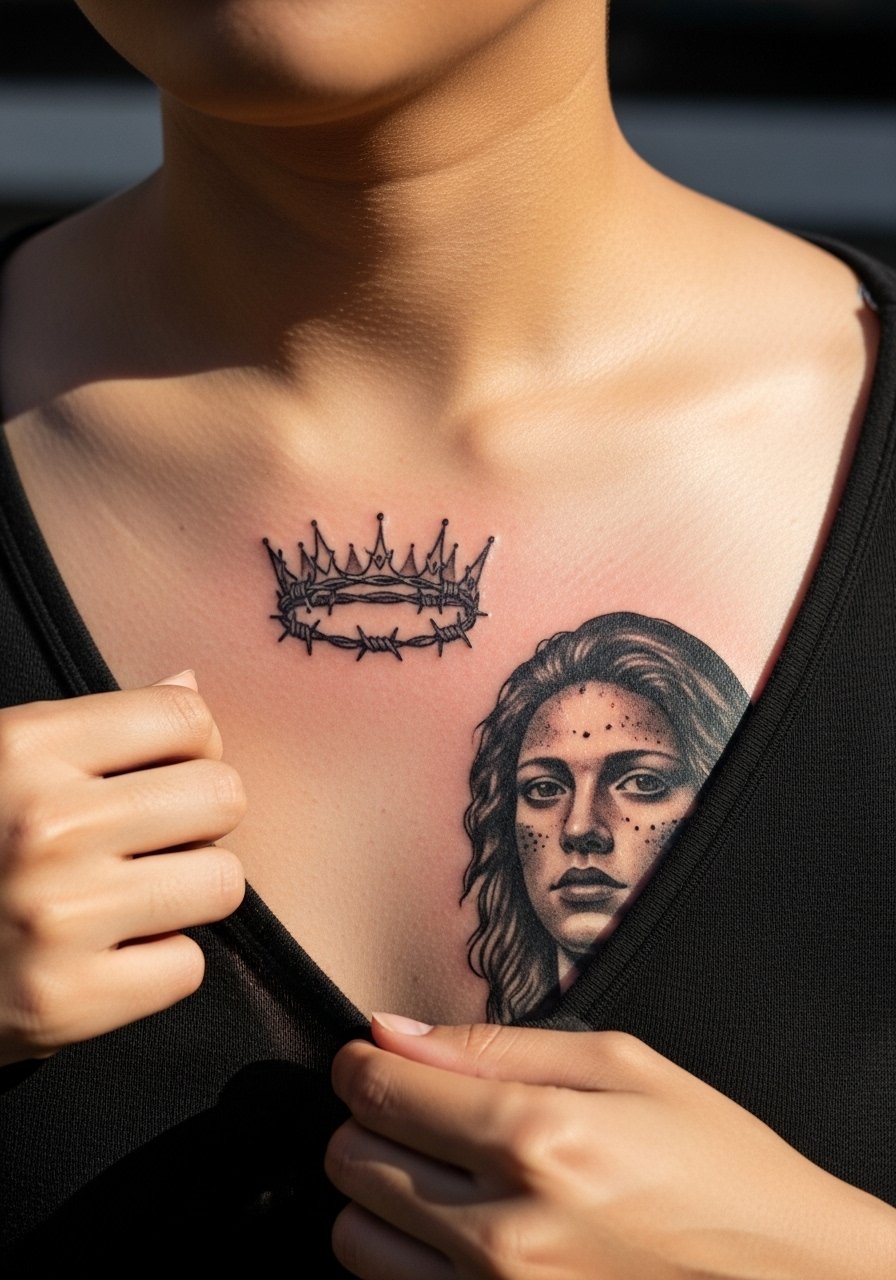
Combining barbed wire as a crown over portrait or iconography makes a bold editorial statement. A common mistake is making the crown too heavy which can compete with the portrait below. During consultation specify the balance point and exact negative space you want above the portrait. Sessions depend on portrait size and can be long. Respectful handling of portrait subjects is important, and you should confirm the cultural or personal context of iconography with the artist. For the session wear a wide-neck shirt you can easily pull aside.
17. Rustic Barbed Wire with Rust Tones (Micro-Realism)
A fresh angle is to treat the wire as weathered metal, with tiny rust hints in muted brown and orange. Tell your artist you want micro-realism color points but keep the saturation low so the rust reads natural as it heals. Visual impact is strong without full black saturation. Sessions usually require color layering and take longer than pure blackwork. For casual wear, rolled sleeves or a lightweight linen shirt lets the color pop without glare.
18. Barbed Wire Turning Into a Skyline
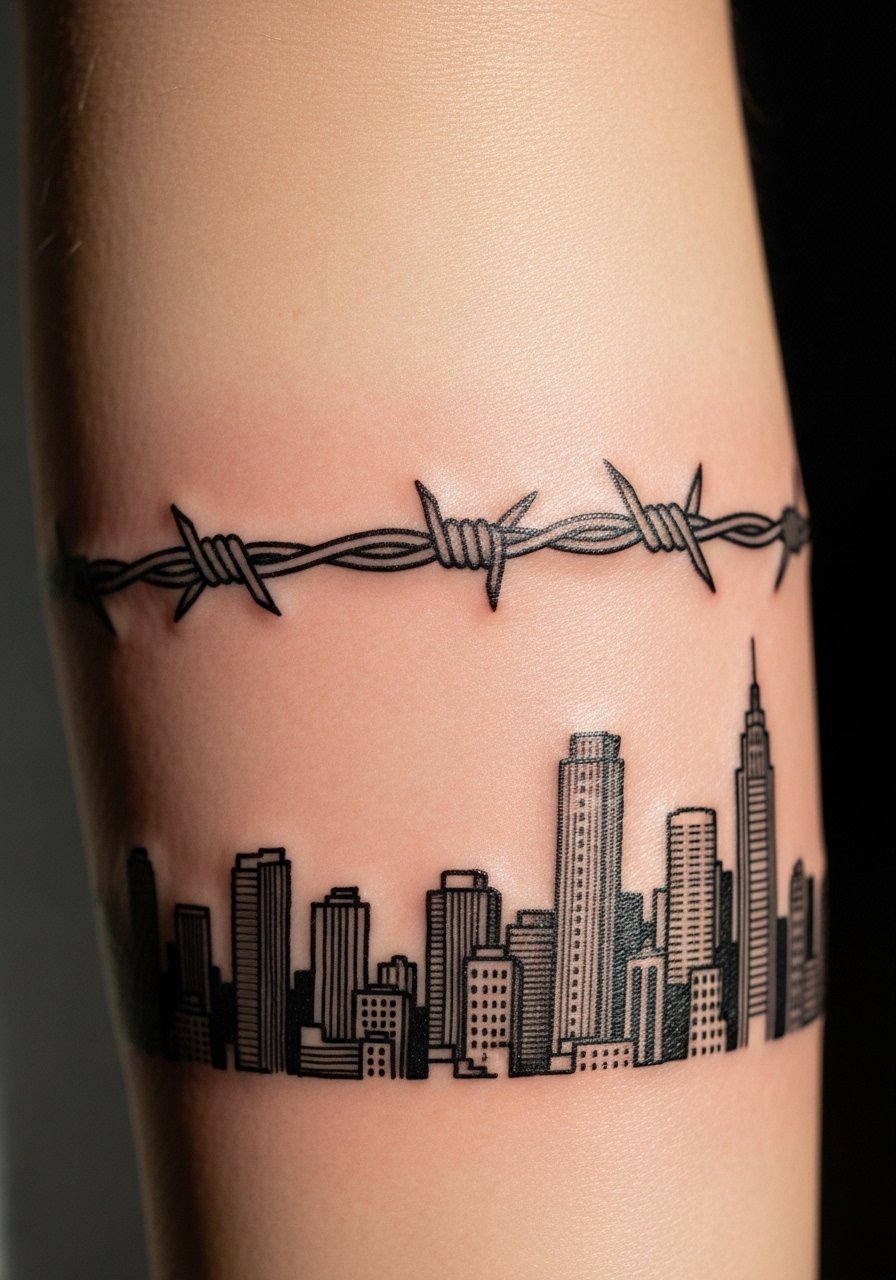
One unique approach is to have the barbed wire visually dissolve into a skyline silhouette. The consultation note is to show your city reference and discuss scale so the skyline remains legible when the wire section is reduced. The session feels like two pieces in one and may take longer. Expect the skyline to need crisper lines if it sits near high-motion areas. For show-off styling, cuffed sleeves or a rolled-up linen shirt frames the transition.
19. Barbed Wire Halo Behind a Neck Tattoo
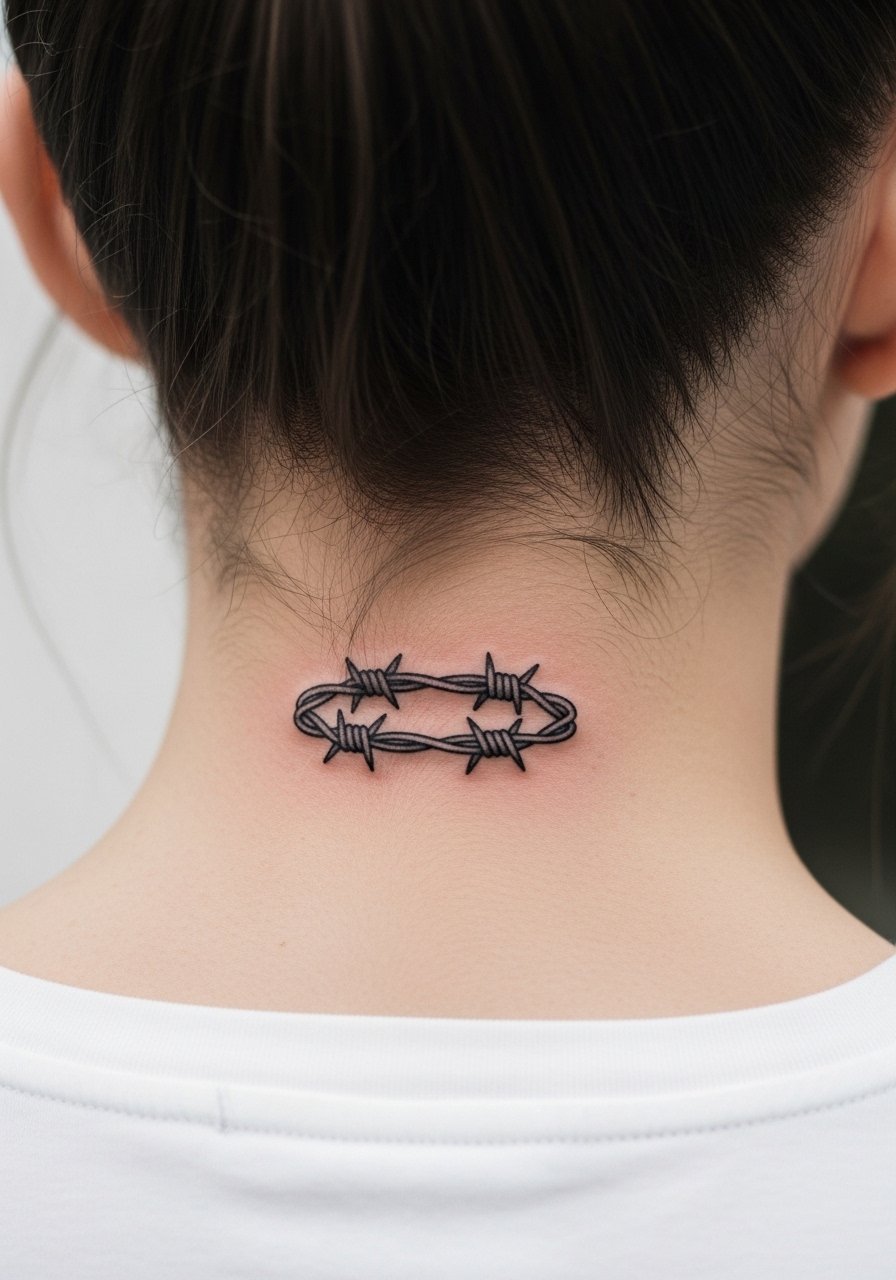
A halo of barbed wire behind the neck is discreet and symbolic, but hair will interact with healing. Plan for short-term tugging as the hair rubs the area, which can affect scabbing and pigment. The session is quick and sensitive. A common mistake is placing it too low where shirts rub. During booking ask about aftercare adjustments for hair interference. For the appointment wear your hair up or bring a soft scrunchie to keep it off the area.
20. Barbed Wire and Snake Weave on the Shoulder Blade
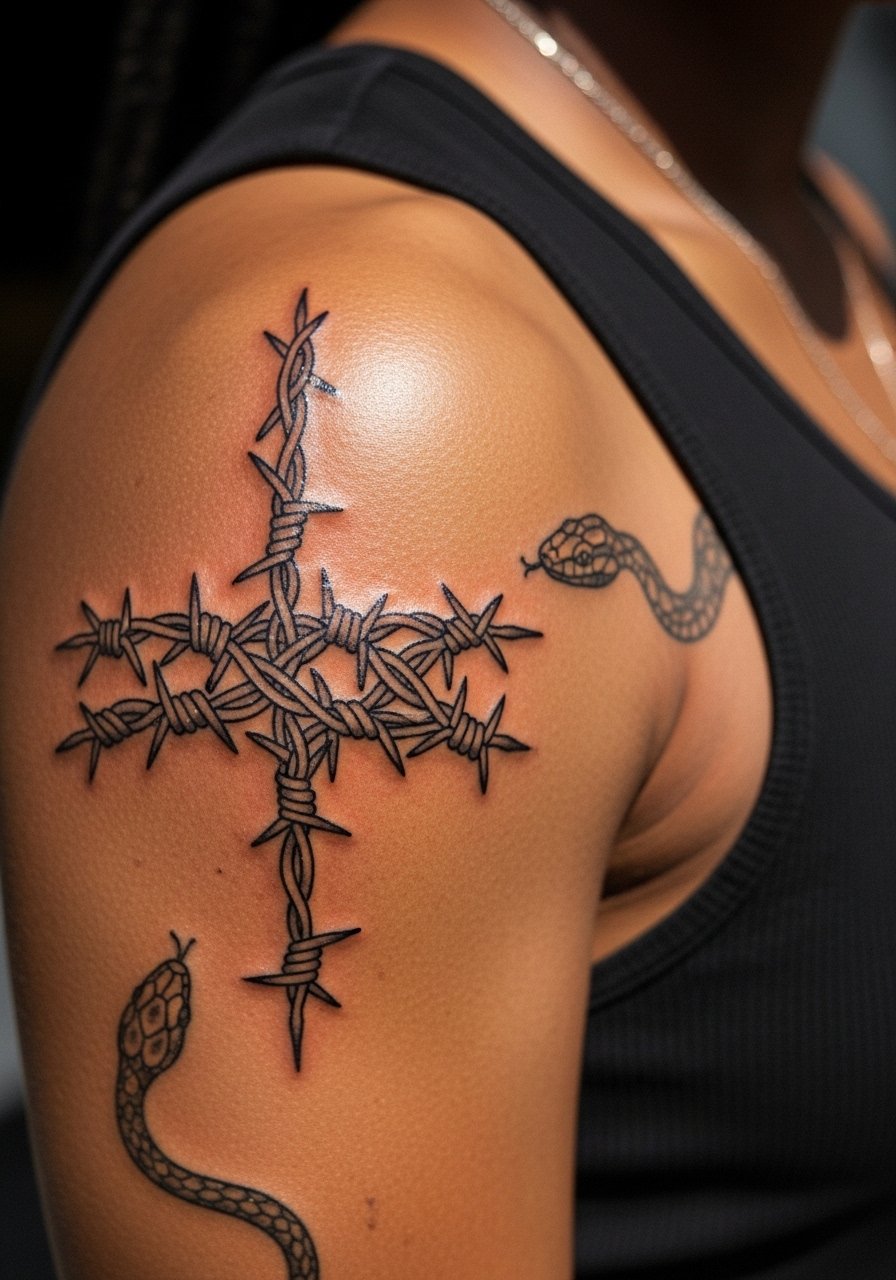
Intertwining organic imagery with metal makes the piece feel alive. Tell the artist which element should read dominant so neither the snake nor the wire overpowers the other. Sessions may require multiple passes for overlapping shading. Shoulder blade skin accepts detail well and tends to hold saturation longer than hands. For showing it off consider a sleeveless top that frames the blade.
21. Knuckle Barbed Wire Accents
Knuckle work is high-wear and often needs frequent touch-ups. The mistake is asking for tiny, highly detailed knots that vanish after months. One camp says knuckle pieces are practical for short-term statements. The other insists on bolder designs only. If you want something that persists, go slightly blockier and accept yearly touch-ups. Sessions sting because of the thin skin. Keep in mind some employers may still view hand tattoos as unprofessional in certain fields.
22. Barbed Wire Half-Sleeve with Stag Motif
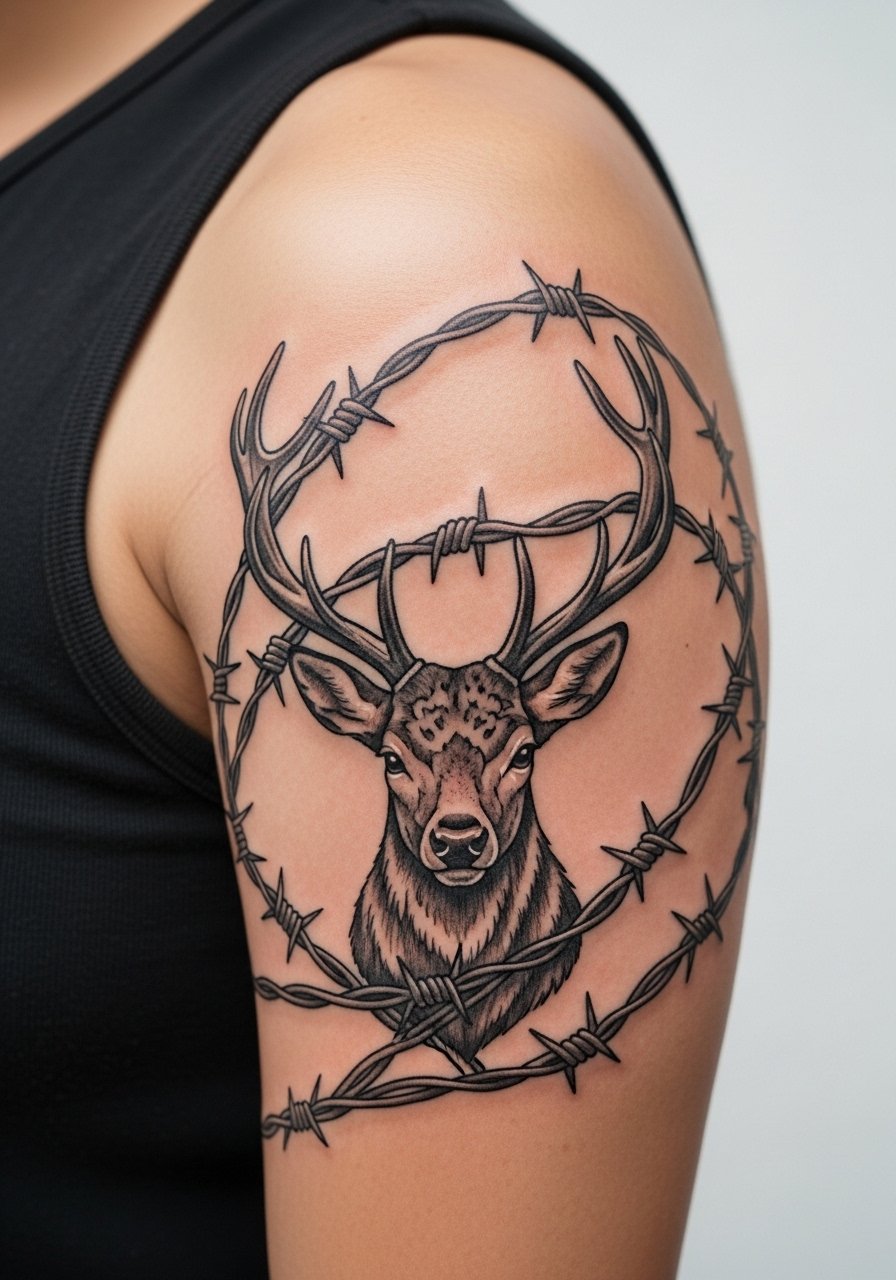
A half-sleeve allows narrative work where the barbed wire threads throughout as a visual motif. When you sit for the consultation, map how the wire wraps into other elements so it does not feel pasted on. The session is longer but the arm is forgiving and age-friendly if contrast is maintained. Expect moderate pain and plan the design in segments to preserve line clarity. For styling, short sleeves or a rolled sleeve shirt keep the sleeve visible.
23. Tiny Single Knot Barbed Wire Behind the Ear
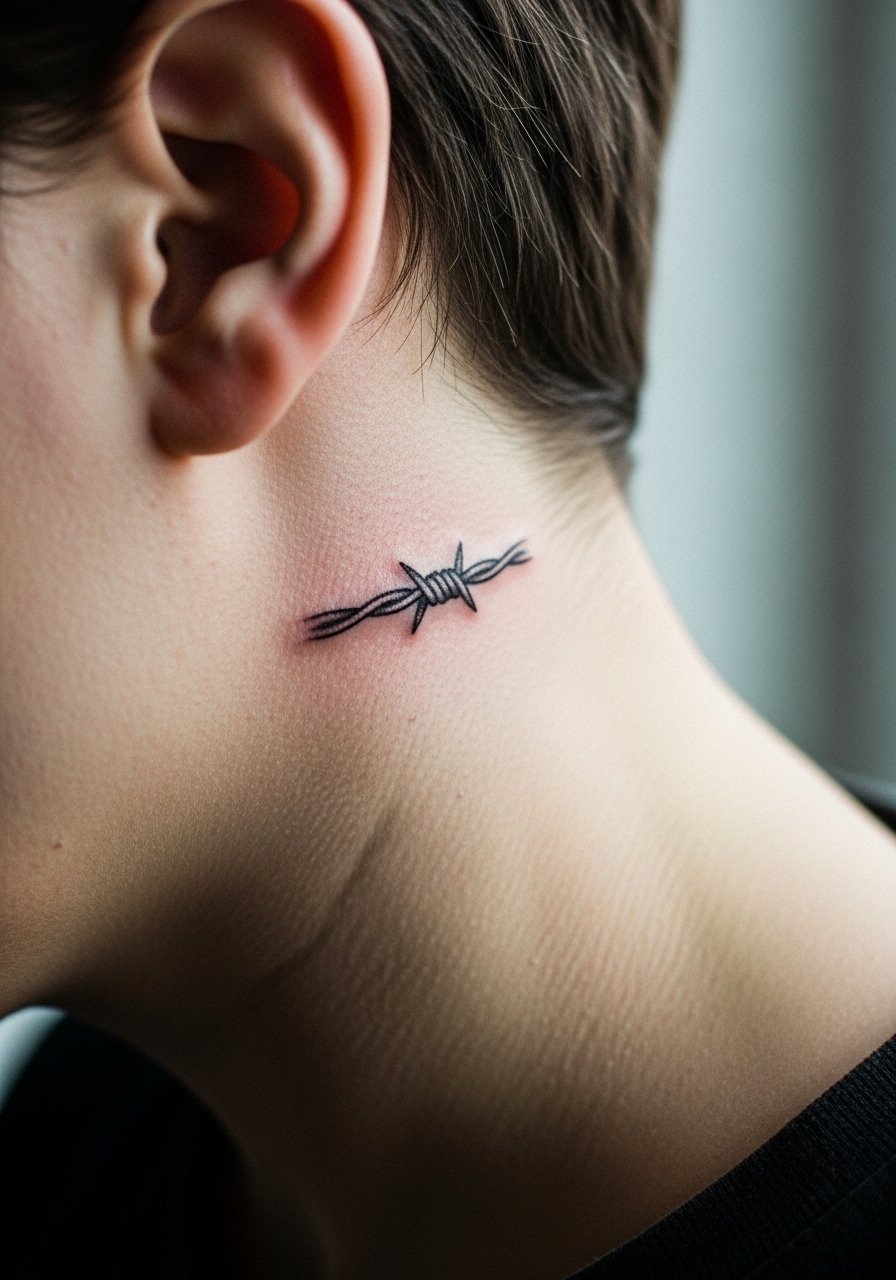
Micro-accents behind the ear are about placement precision. The usual error is over-detailing a tiny mark. Request one clear knot with minimal surrounding line. Sessions are quick and oddly sensitive. For the artist to have clean access, pin hair back or use a thin wide headband during the appointment. This placement is subtle and ages similarly to other small neck accents.
24. Barbed Wire Choker Around the Throat Line

Neck choker pieces are high-visibility and need decisive linework. Common mistake is using too fine a needle set that fades quickly. Ask for deliberate anchor points and clear spacing between barbs. Sessions are sensitive and may require breaks. Think about long-term commitment because this is rarely covered in professional settings without a collar. For showing it off, a low-collar or wide-neck shirt reveals the piece neatly.
25. Barbed Wire and Rose Cover-Up Hybrid
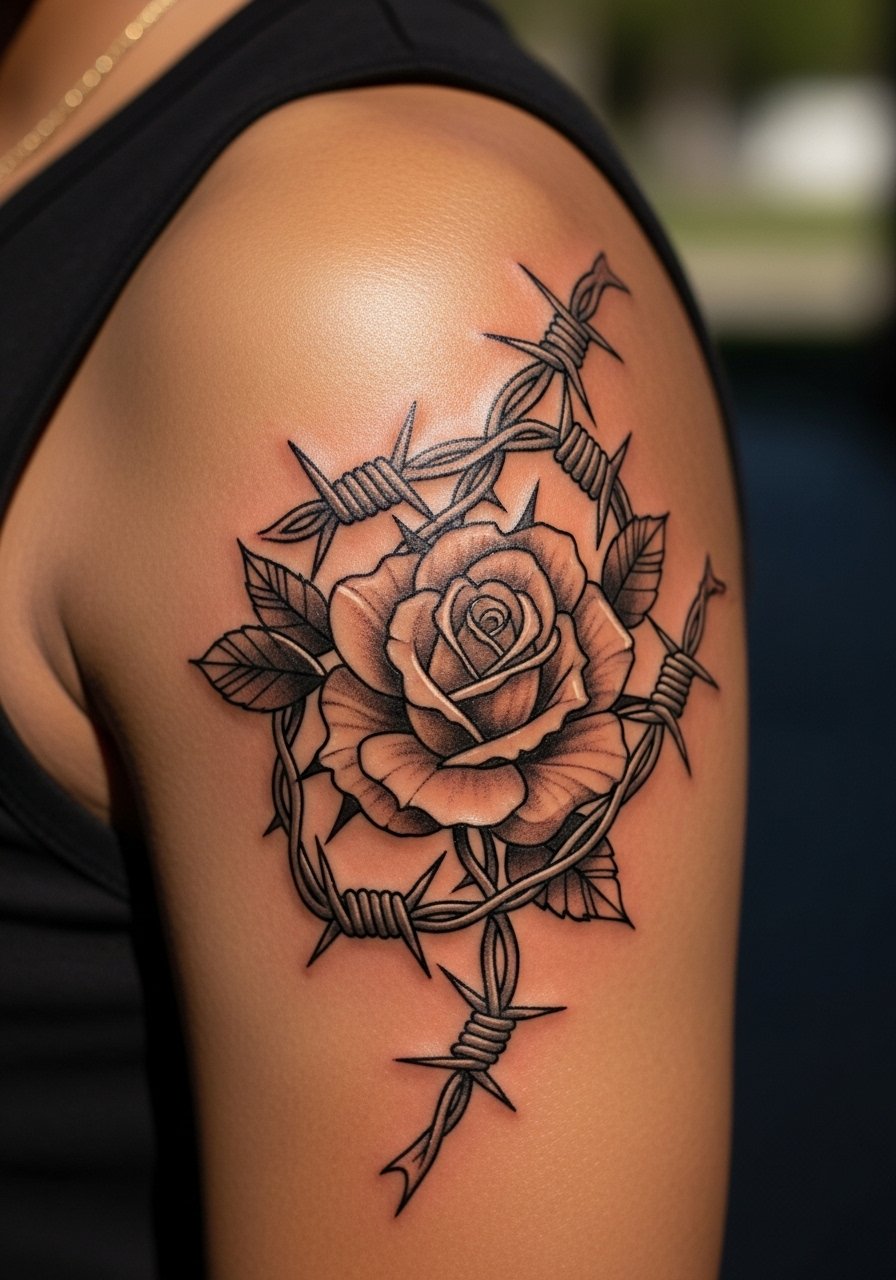
Using barbed wire elements to help disguise older lines is a smart cover-up tactic when done thoughtfully. The visual trick is to incorporate heavier barbs and shaded petals over faded spots. During consultation show the existing tattoo and ask the artist for a mapping plan that blends, not hides. Sessions are longer due to building layers. For the appointment, wear a loose button-down so the area can be accessed and checked.
26. Geometric Barbed Wire Mesh on the Forearm
There's a modern take where barbed wire repeats into a geometric lattice. The mistake is compressing the mesh too tightly which causes the lines to merge over time. Ask for intentional spacing and slightly bolder junctions at intersections. Healed appearance at six months looks crisp but expect softening at intersections by year three. For casual styling, cuffed sleeves or a rolled-up linen shirt frames the mesh without distraction.
27. Barbed Wire Anklet with Tiny Bead Details

An anklet with delicate bead accents reads playful and jewelry-like. The common mistake is spacing beads too close to knots so both fade together. Request distinct spacing and slightly thicker beads for longevity. Sessions are short and the ankle tolerates small detail if you avoid the exact bone line. For showing it off pair with sandals or slip-on shoes and a simple ankle strap sandal.
Frequently Asked Questions
Q: Will a barbed wire wrap on the wrist blur quickly because of hand washing and friction?
A: It depends on your daily routine and how tight the wrap sits near joints. Wrist wraps face constant washing and rubbing, so slightly bolder knot points and placement a touch above the joint reduce blurring. Expect a possible touch-up at year two or three if you want the original crispness.
Q: Is fine line barbed wire on the ribs a bad idea given stretch and motion?
A: Artists split into two camps on ribs. One team says skin movement and thin flesh blur fine lines fast. The other says careful depth and spacing make it work. My advice is to ask the artist which camp they fall into and adjust knot spacing or lineweight based on their comfort with ribs.
Q: How do I prepare clothing for a sternum or ribcage barbed wire session?
A: Wear items that give the artist access without exposing everything, like a fitted sports bra or a wide-neck top you can pull aside. Loose, breathable fabrics help during healing. Bring a zip-up or button shirt for the walk home to avoid pulling fabric over fresh ink.
Q: Will a finger or knuckle barbed wire affect job prospects?
A: Some industries remain conservative about visible hand tattoos. If you work in a field with strict appearance rules, consider placement slightly above the knuckles or choose designs that are easy to conceal with a ring or glove during work hours.
Q: What should I tell my artist to make sure a barbed wire design ages well?
A: Ask for clear spacing between knots, a slightly bolder point at each barb, and realistic expectations about touch-ups. Discuss where your skin creases and how often the area is exposed to sun or friction. A mapping photo taken standing up helps everyone align on final placement.
