
Fine line black panther references are all over saved boards right now, but what holds up on skin is rarely what looks best in a pixel. I keep seeing tiny, highly detailed felines lose their contour within a few years because the scale was off or the placement rubbed constant friction. Below are 27 real-world black panther tattoo ideas, with placement notes, what to ask your artist, and simple wardrobe tips to show the work without sacrificing longevity.
1. Fine Line Panther on Inner Forearm
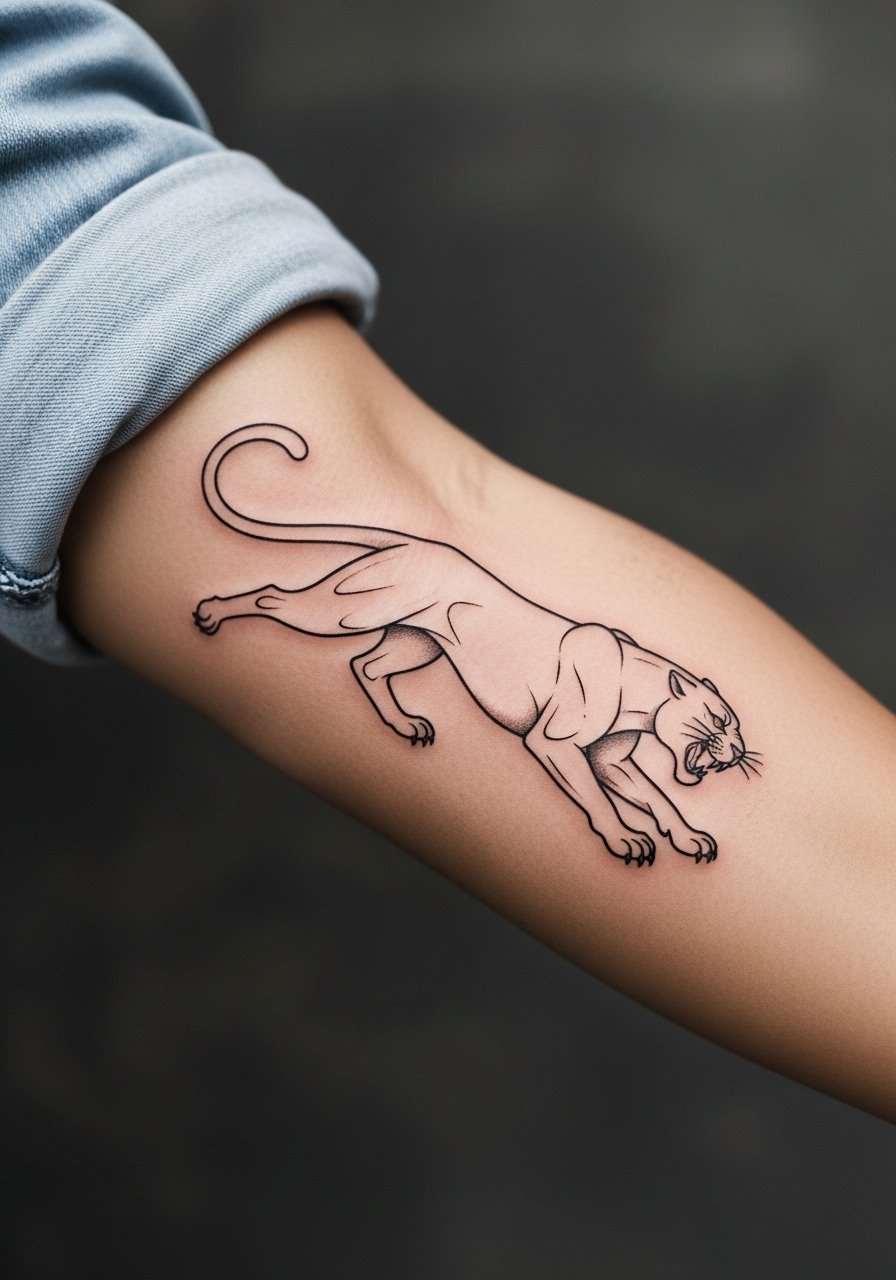
I've seen inner forearm panthers read like illustrations for years when scaled correctly. For this placement, ask for slightly heavier linework than you'd use on the wrist and request stipple shading rather than dense fill so the shape keeps definition as it heals. Pain is manageable, usually a three to four on most scales, and a single session runs about one to two hours. The common mistake is asking for micro-detail too small for the area, which blurs by year two. For showing it off, roll up sleeves and pair with a minimalist watch to frame the forearm without competing for attention.
2. Micro-Realism Panther Head on Upper Arm
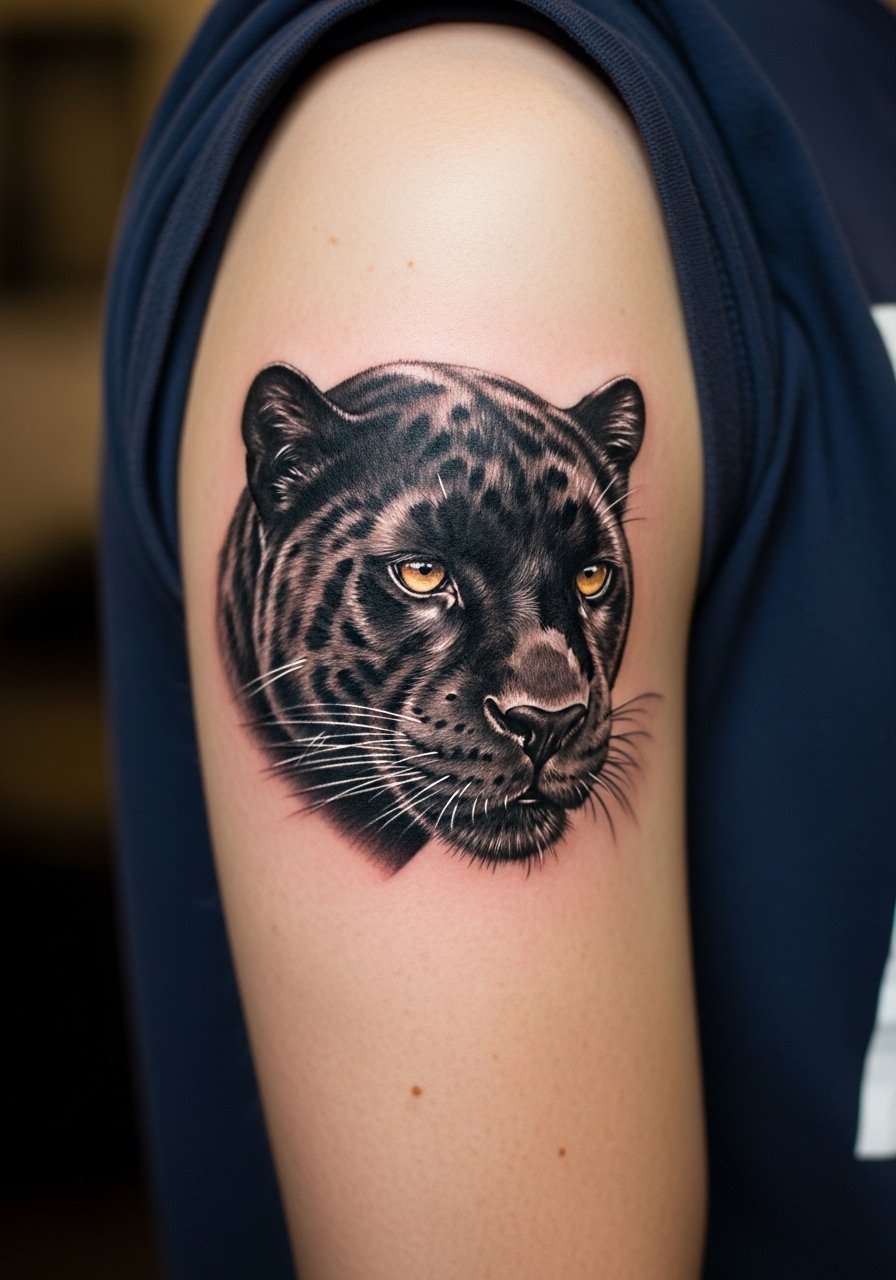
This outer upper arm spot is forgiving for micro-realism because the skin there holds saturation well. Tell your artist you want reference photos that show the exact glare and jawline you like, and ask them to mark the stencil on the live arm before needle work. Expect a moderate pain level and a two to three hour session depending on size. A frequent error is overworking the darkest areas while underplanning highlight space, which leads to muddy shadows after healing. Pair this piece with short sleeves or a rolled-sleeve linen shirt when you want the panther visible at social gatherings.
3. Minimalist Panther Silhouette Behind the Ear
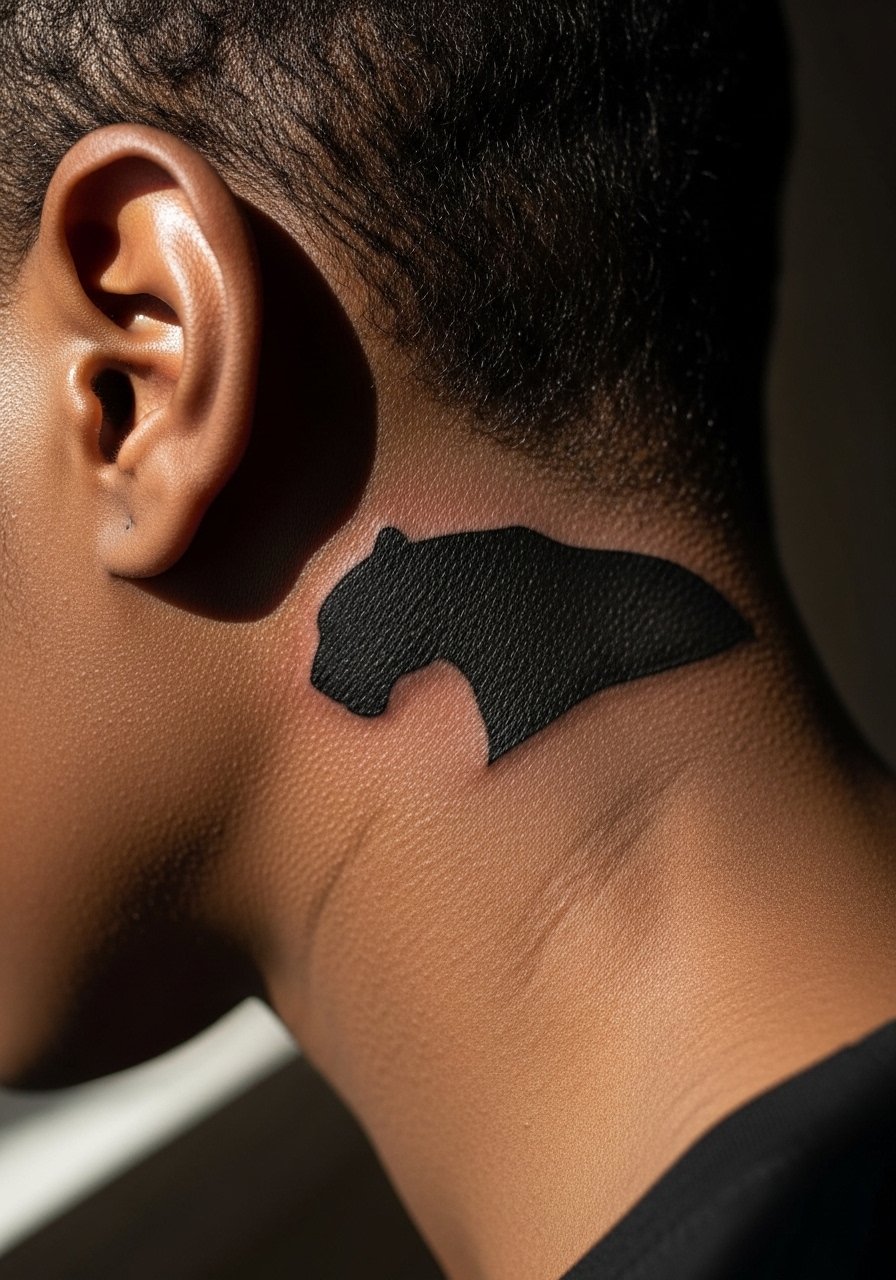
Small silhouettes behind the ear offer a secretive placement that peeks when hair is up. For safety and artist comfort, describe precisely how far below the hairline you want the piece. The area is low pain but requires an artist used to tight spaces. A common mistake is going too tiny with dense shading, which can look blotchy on darker skin tones after healing. This spot is best for people who want occasional reveal. For styling, wear hair up with a silk scrunchie during sessions to keep the area clean.
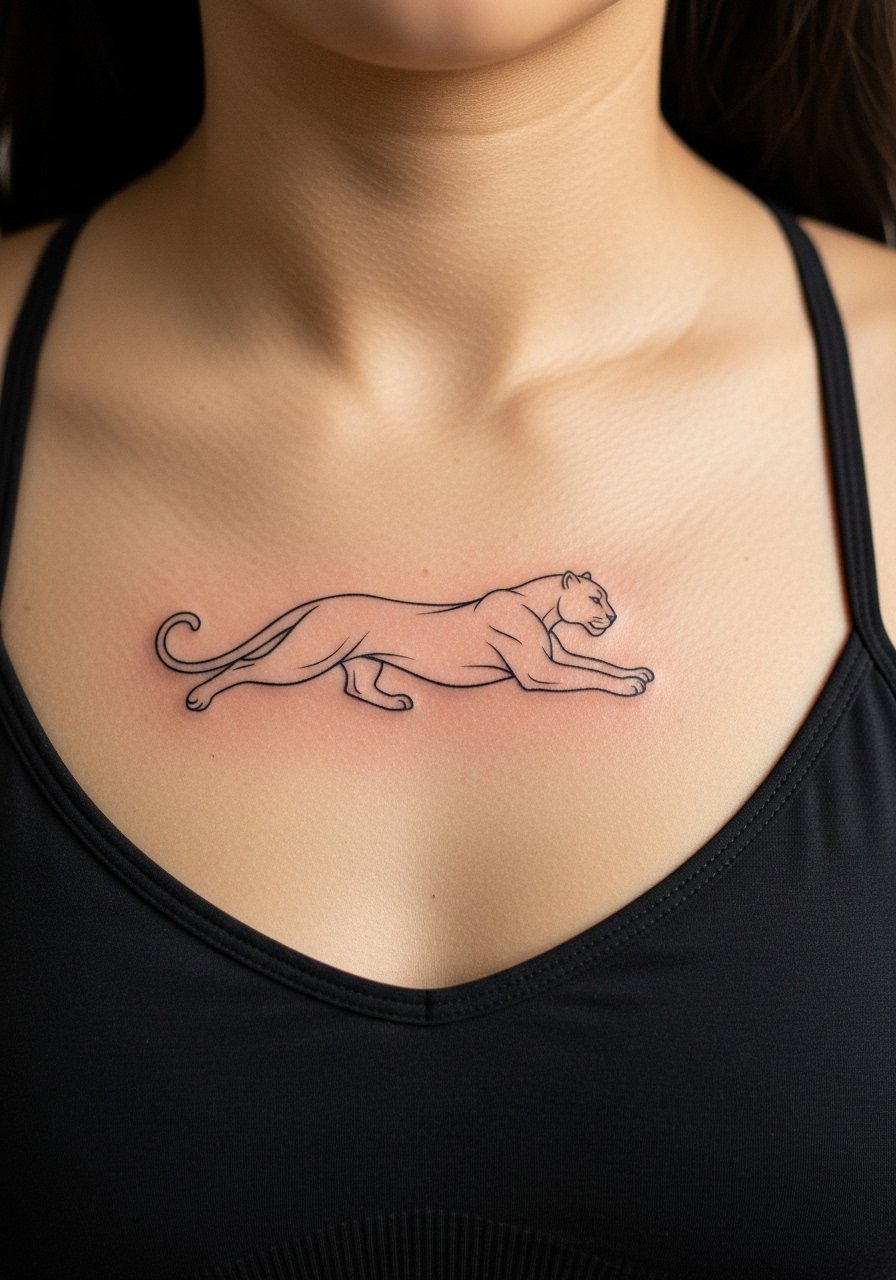
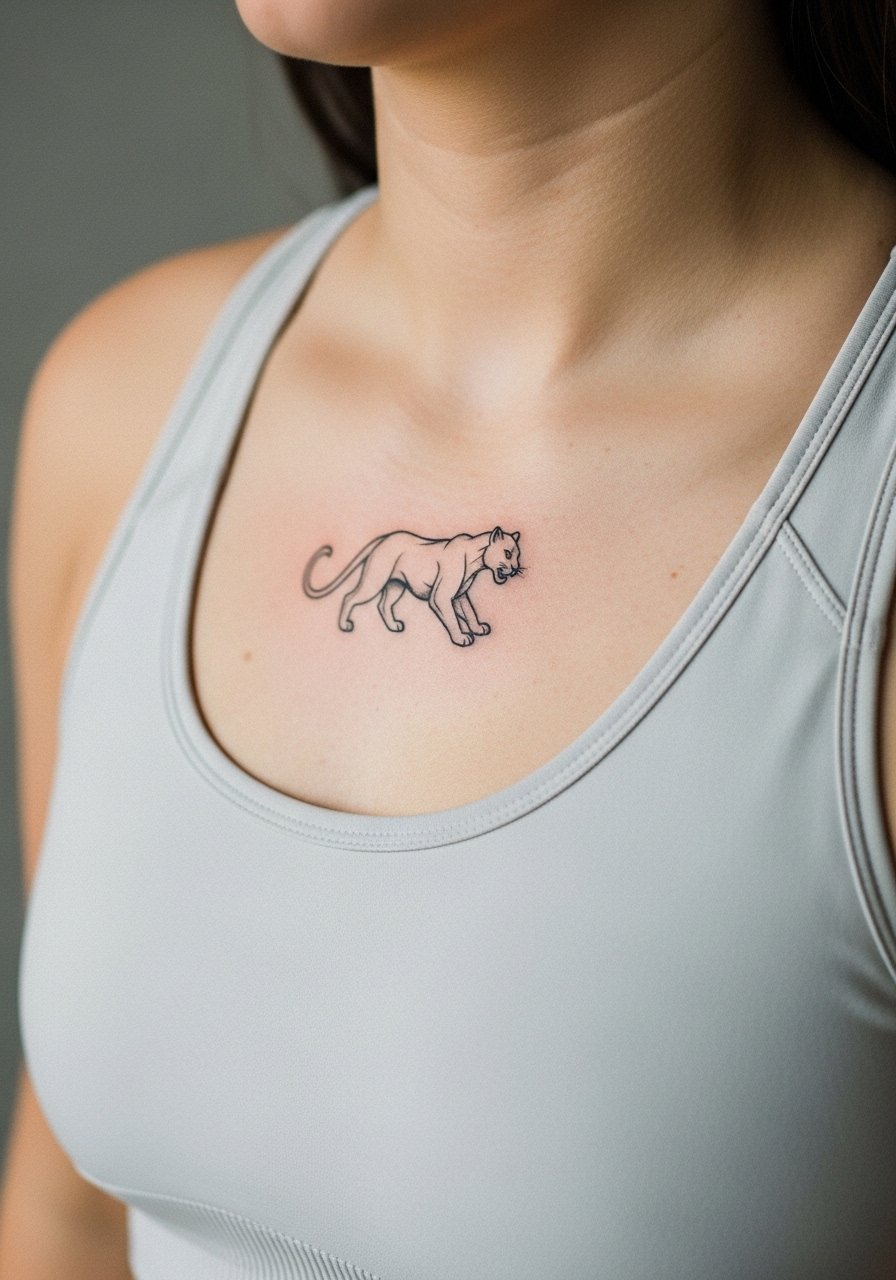
4. Blackwork Panther Across the Chest Near the Collarbone

Chest collarbone pieces read strong and age well when the linework is bold and the negative space is respected. Fair warning, this area can be tricky with movement and breathing, so expect longer breath-adjusted sittings and a session that may stretch to three hours. Artists split on how detailed a chest panther should be. One camp prefers bold blackwork that settles into a solid silhouette, and the other favors micro-detail that they say holds with careful depth control. Ask your artist where they stand and for healed photos of similar chest work. For after-session comfort, a loose wide-neck top or button-up shirt you can pull aside helps access without friction.
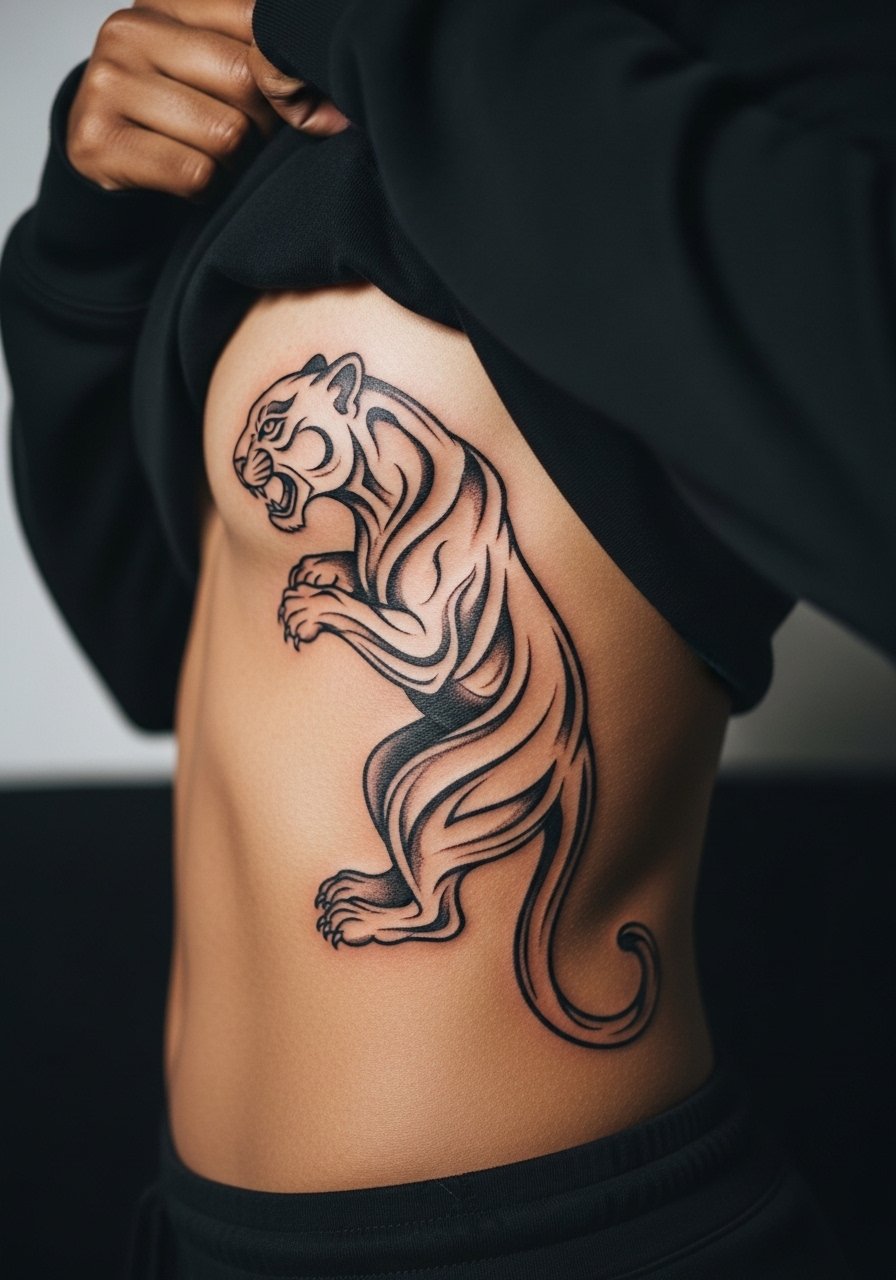
5. Ribcage Panther in Stipple Shading
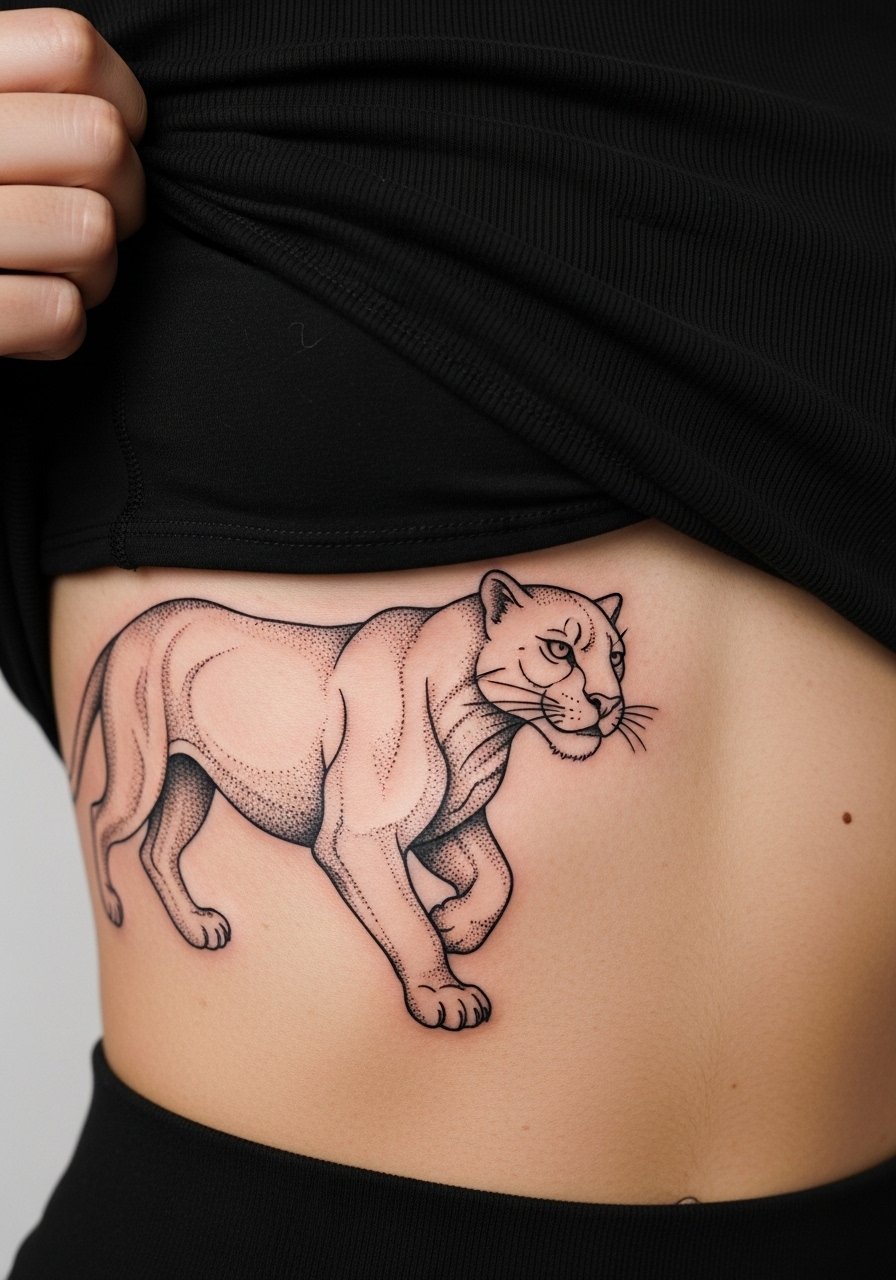
Fair warning, the ribcage is a higher pain spot, often a seven out of ten, but it yields beautiful flow with body contours. Stipple shading reduces the risk of dense patches that fade unevenly. Ask for spacing in the linework so the piece has room to breathe. Here the two camps are vocal about fine line on ribs. One group says the skin stretch blurs fine lines within two years. The other group argues that with proper depth and spacing fine line settles fine. Your best move is to see healed examples from the artist and plan touch-ups into the timeline. During the session, wear a sport bra you can unclip for access.
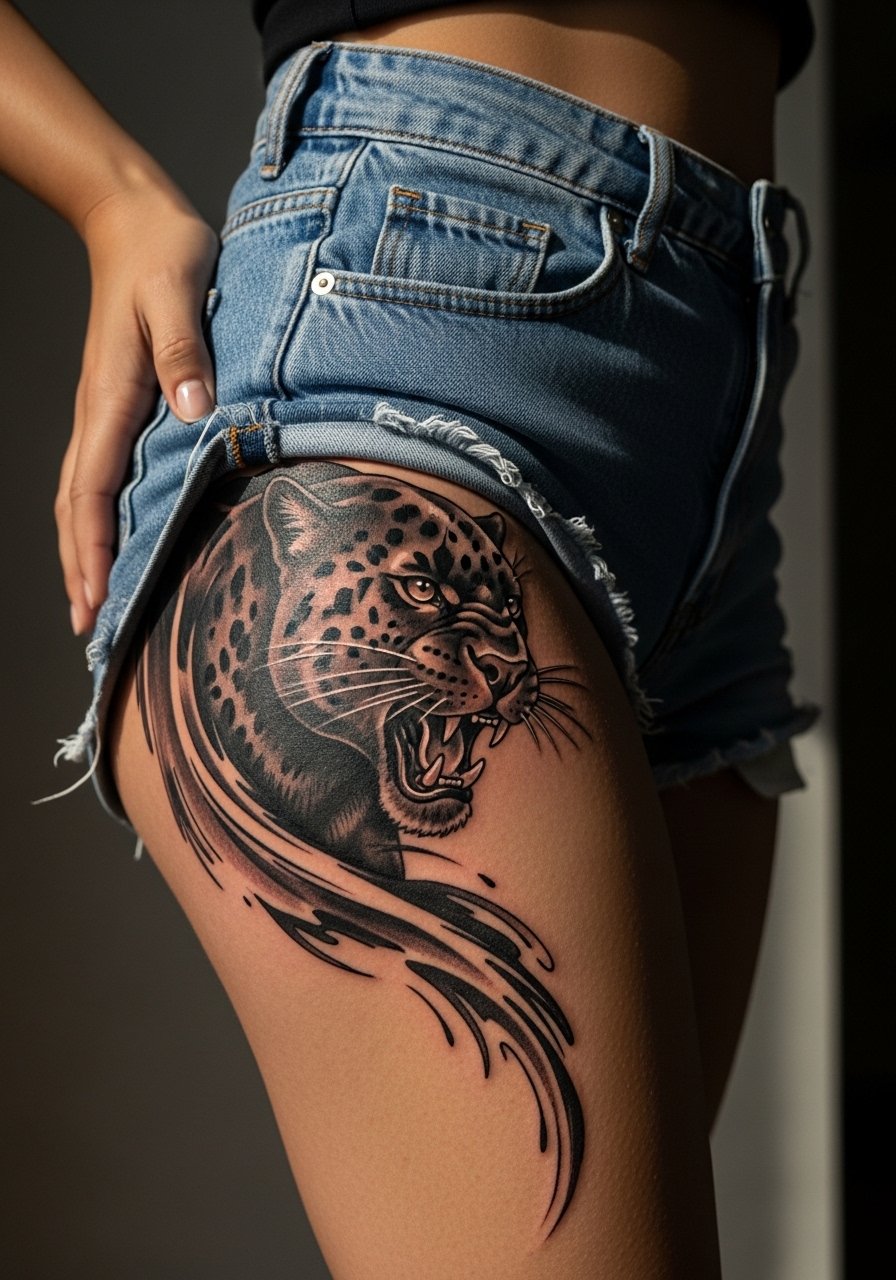
6. Thigh-Wrapped Panther in Motion
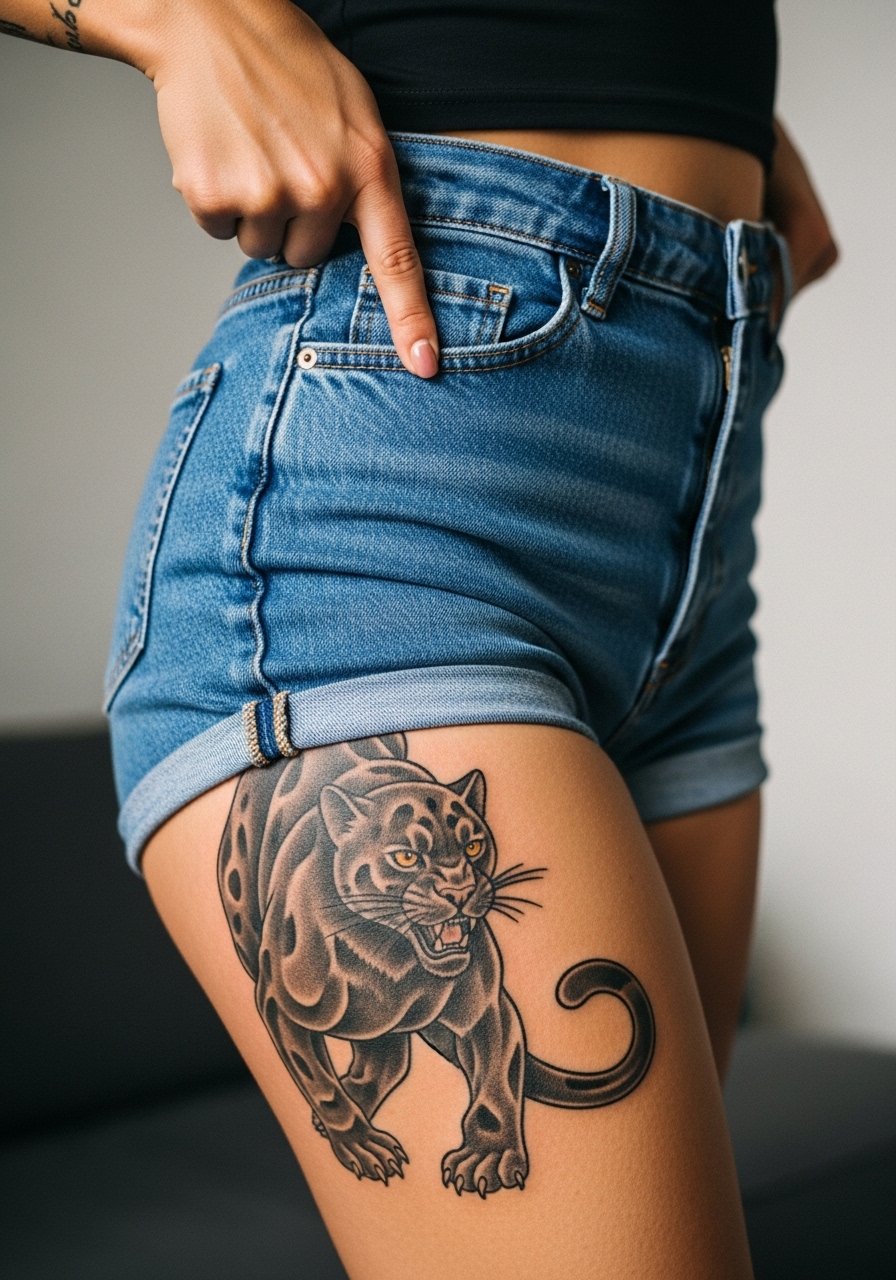
A thigh wrap uses body curves to sell motion, and the skin there tolerates larger fills and heavier saturation. Sessions can be two to four hours and are relatively low on the pain scale compared with ribs. Tell your artist you want the limbs to follow muscle lines so the panther looks alive when you move. A common mistake is placing too many tiny details where clothing friction will wear them quickly. For the appointment, wear loose drawstring shorts so the artist can access the area without tight seams digging into fresh ink.
Session Day Picks
Those first six ideas include both visible forearm pieces and intimate placements like ribs and thigh, so a few targeted items make sessions and the first week easier.
-
Stencil transfer paper kit. Lets you preview the linework on skin before the needle starts, handy for the forearm and collarbone stencils above.
-
Topical numbing cream. Applied per instructions about 45 minutes before reduces the bite on rib and thigh sessions without obscuring the artist's feel.
-
Thin protective film roll. Keeps wrist and finger work clean during the first week of frequent hand washing and typing.
-
Fragrance-free body wash. Gentle cleansing is especially useful for collarbone and chest pieces that meet water after showers.
-
Aquaphor healing ointment. Thin layers in the first days help maintain moisture for fine line areas without suffocating the skin.
7. Small Panther on the Ankle
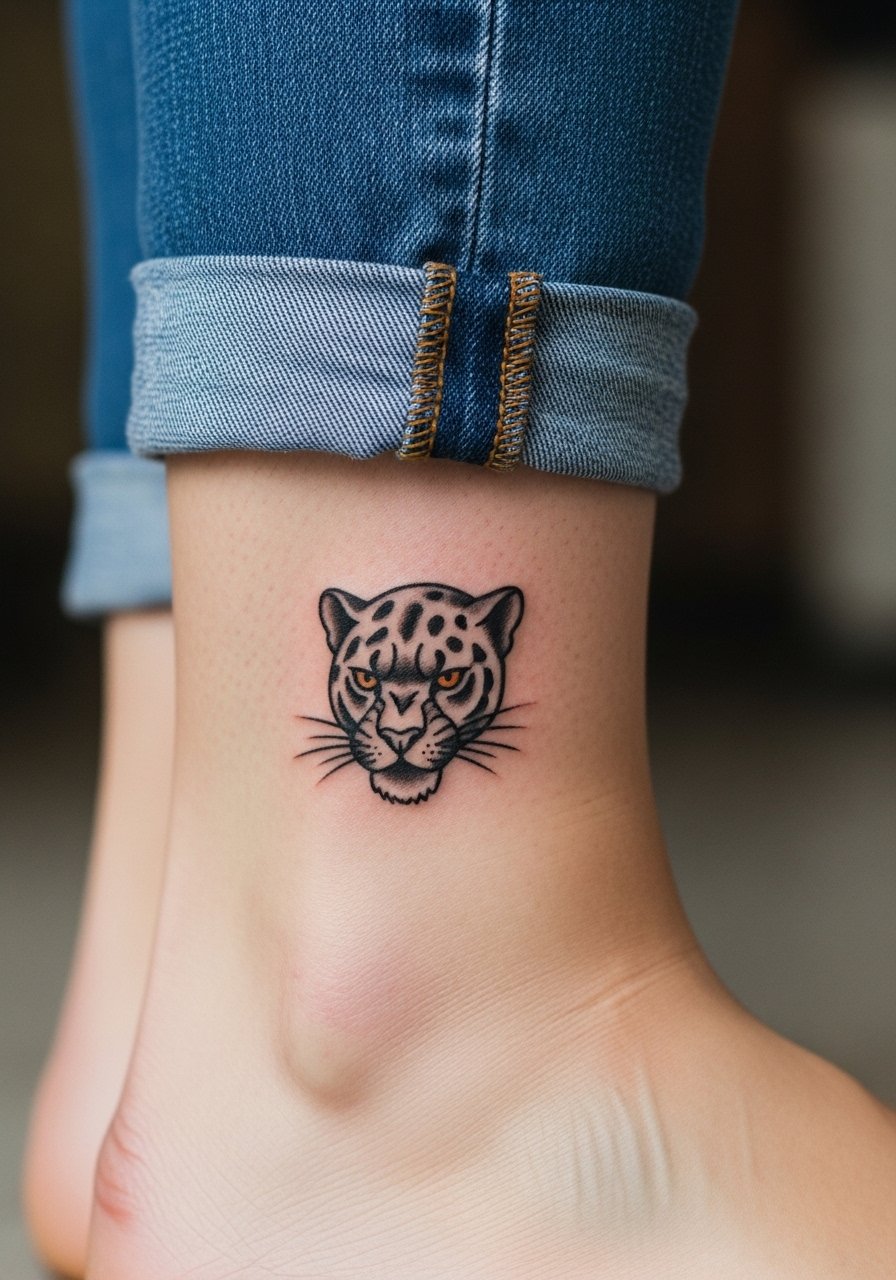
Ankle pieces are great for small panthers and they show selectively when you wear sandals or rolled pants. Expect a sharp sting at first with a short session under an hour for a small silhouette. The most common mistake is picking a silhouette with too much internal detail for such a narrow canvas. For longevity, keep the composition simple and high-contrast. If you want to highlight it, wear low-cut sandals or cropped trousers and consider an anklet that does not sit directly on the ink. A thin woven anklet can draw the eye without rubbing.
8. Collarbone Script Panther Accent
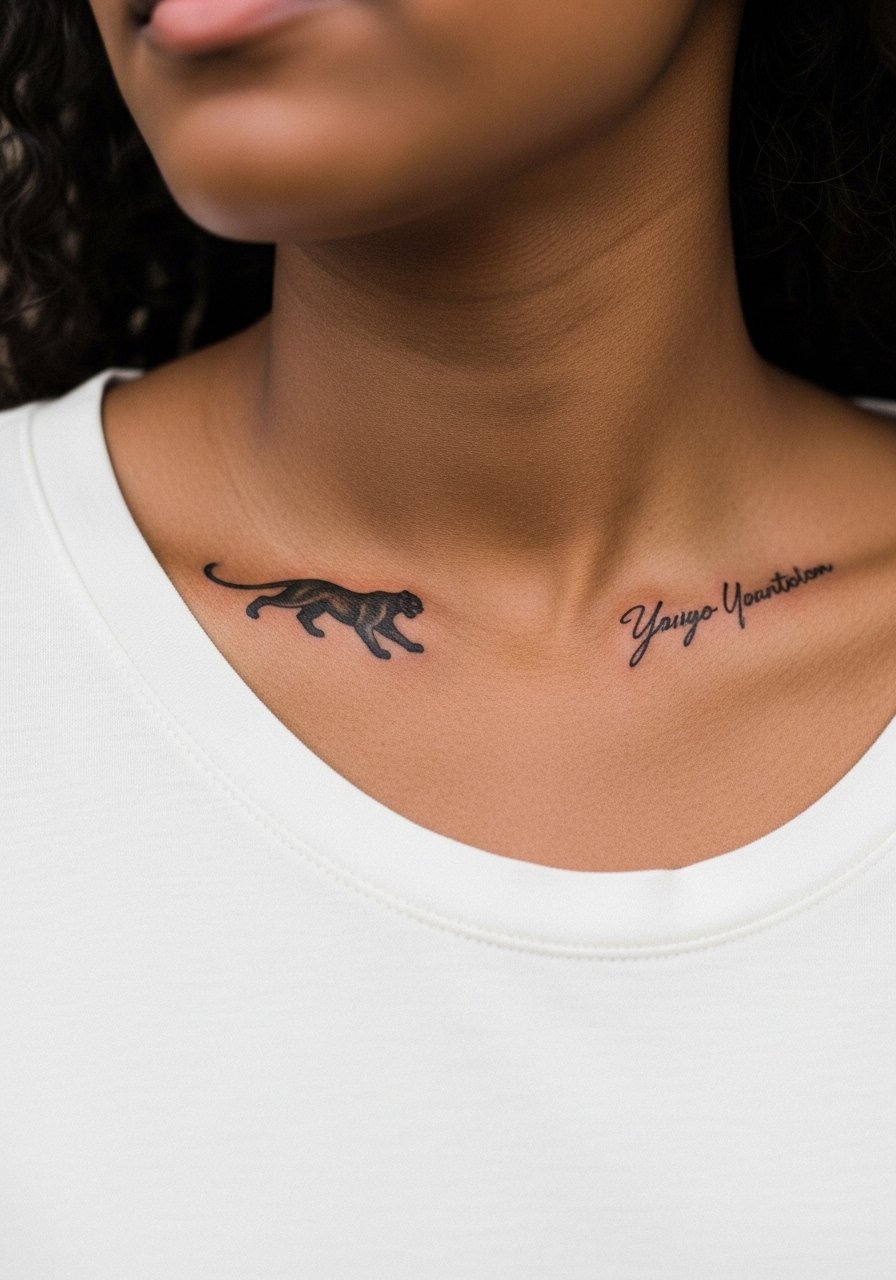
Combining a small panther with script near the collarbone is a subtle way to anchor a phrase. Plan the placement so the text sits above or below the panther rather than crossing it. Healed photos vary because collarbone motion and clothing can tug at stitches. Tell your artist the exact word spacing you want and ask for a stencil preview while standing so gravity matches your planned outfits. For showing off, open-neck dresses or tops help. Try an open-back midi dress for evenings when you want the detail visible.
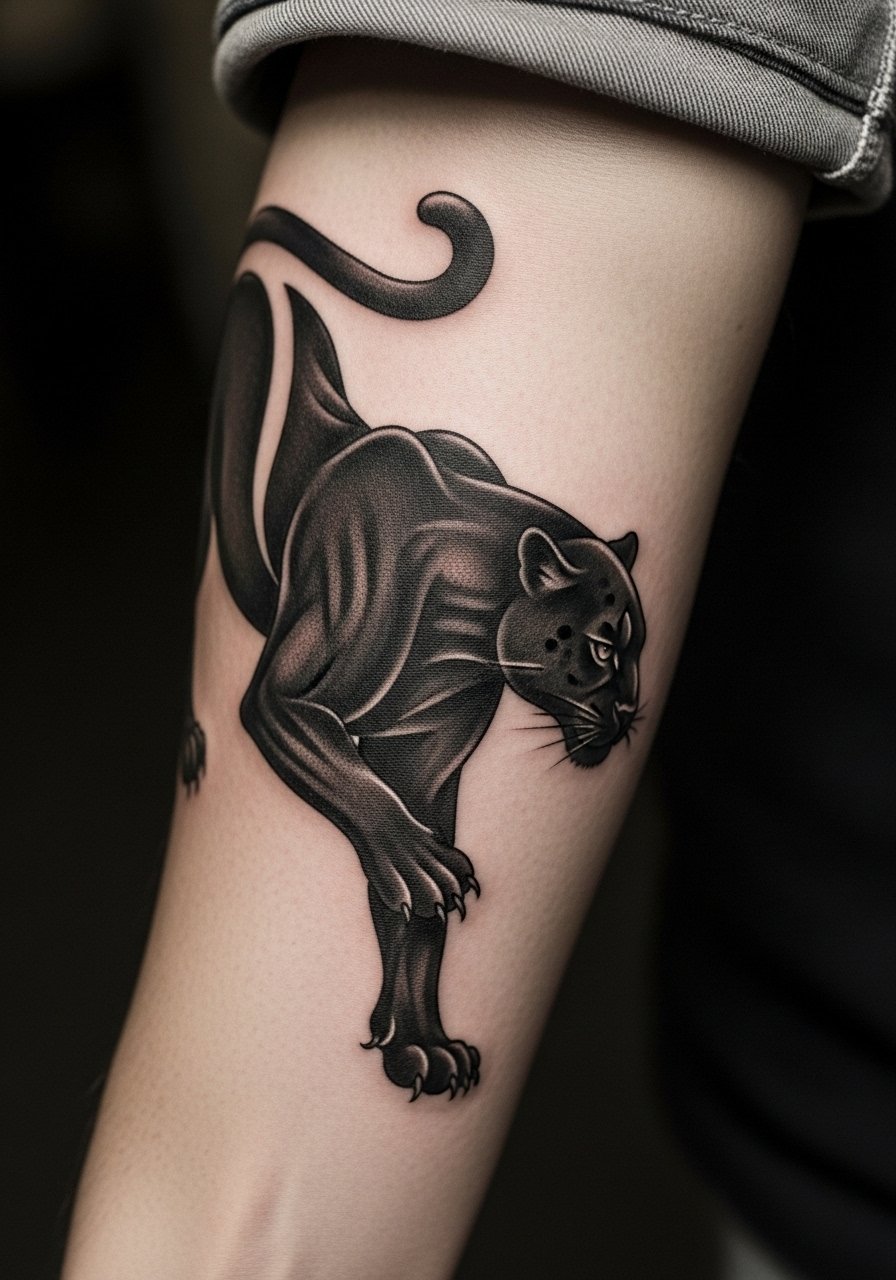
9. Sleeve Accent Panther in Blackwork Panels
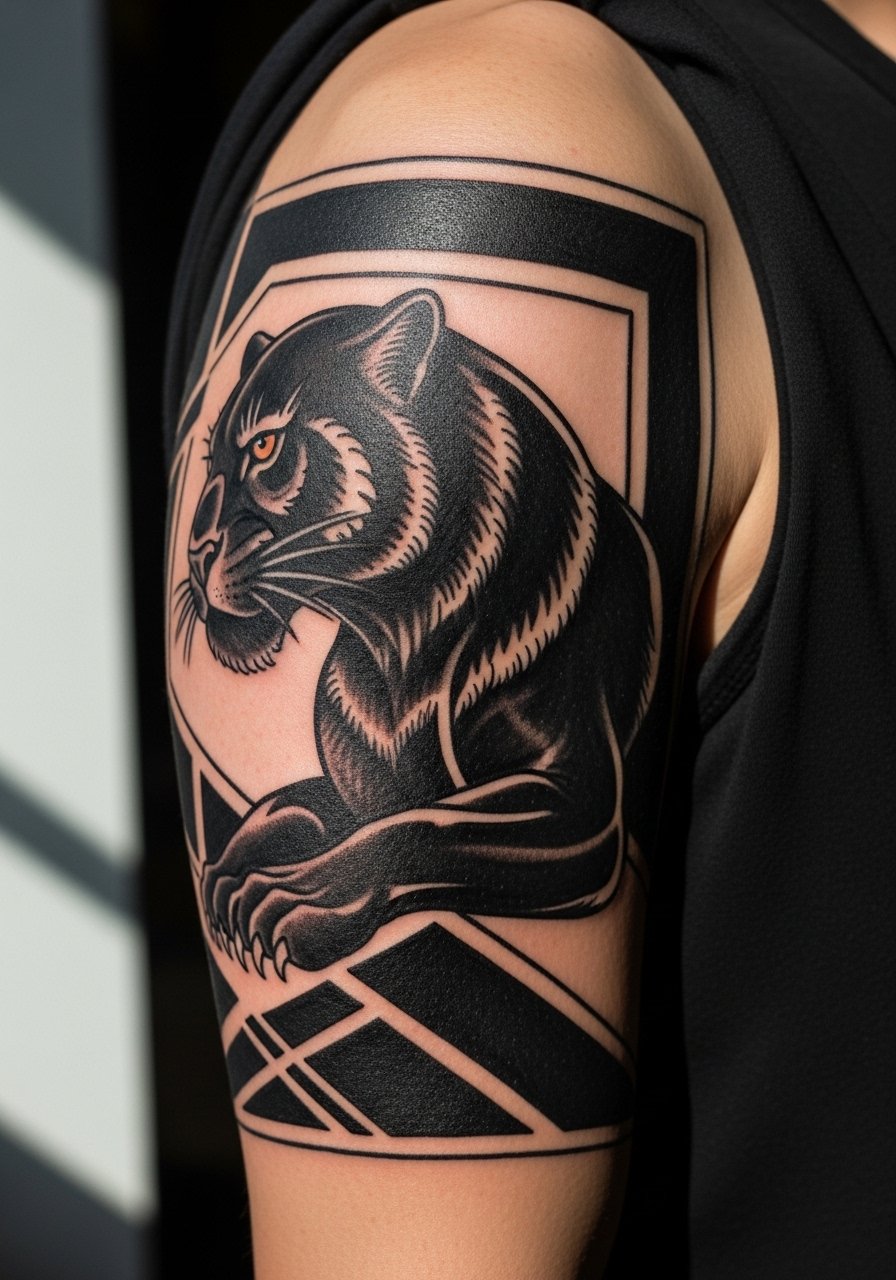
A sleeve accent panther plays with panels of blackwork and negative space. When integrated properly, it becomes a focal point without crowding the sleeve. Sessions are split across multiple days and expect heavy saturation time. Artists differ on blending a panther into dense blackwork. One path uses strong silhouette and open negative space so the panther reads years later. Another packs detail that risks softening faster. In consultation, request mock-ups of how the panther will look next to existing pieces and agree on touch-up timing. For apparel, short sleeves or rolled cuffs keep the piece visible without rubbing.
10. Wrist Chain Panther in Minimal Linework
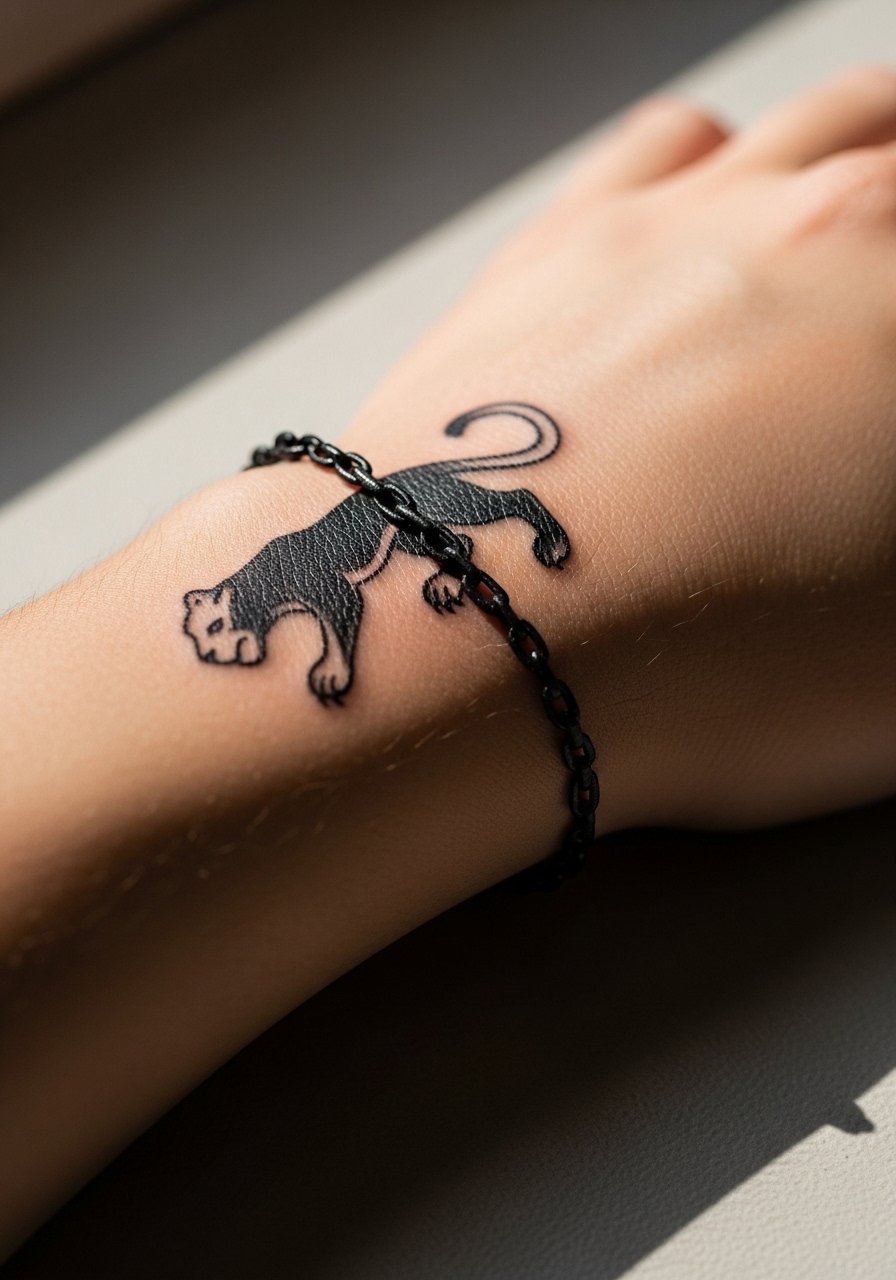
Wrist chain pieces are popular because they read like jewelry. The wrist experiences heavy rubbing, so ask for slightly bolder linework and more open negative spacing than you might choose for a more protected area. Expect a low to moderate pain session under an hour for small bands. A typical error is making the chain links too tight and thin, which encourages fade and blowout along the seam. For daytime wear, pair the piece with a thin chain bracelet rather than bulky bands that might rub the ink constantly.
11. Hand-Side Panther Claw Motif
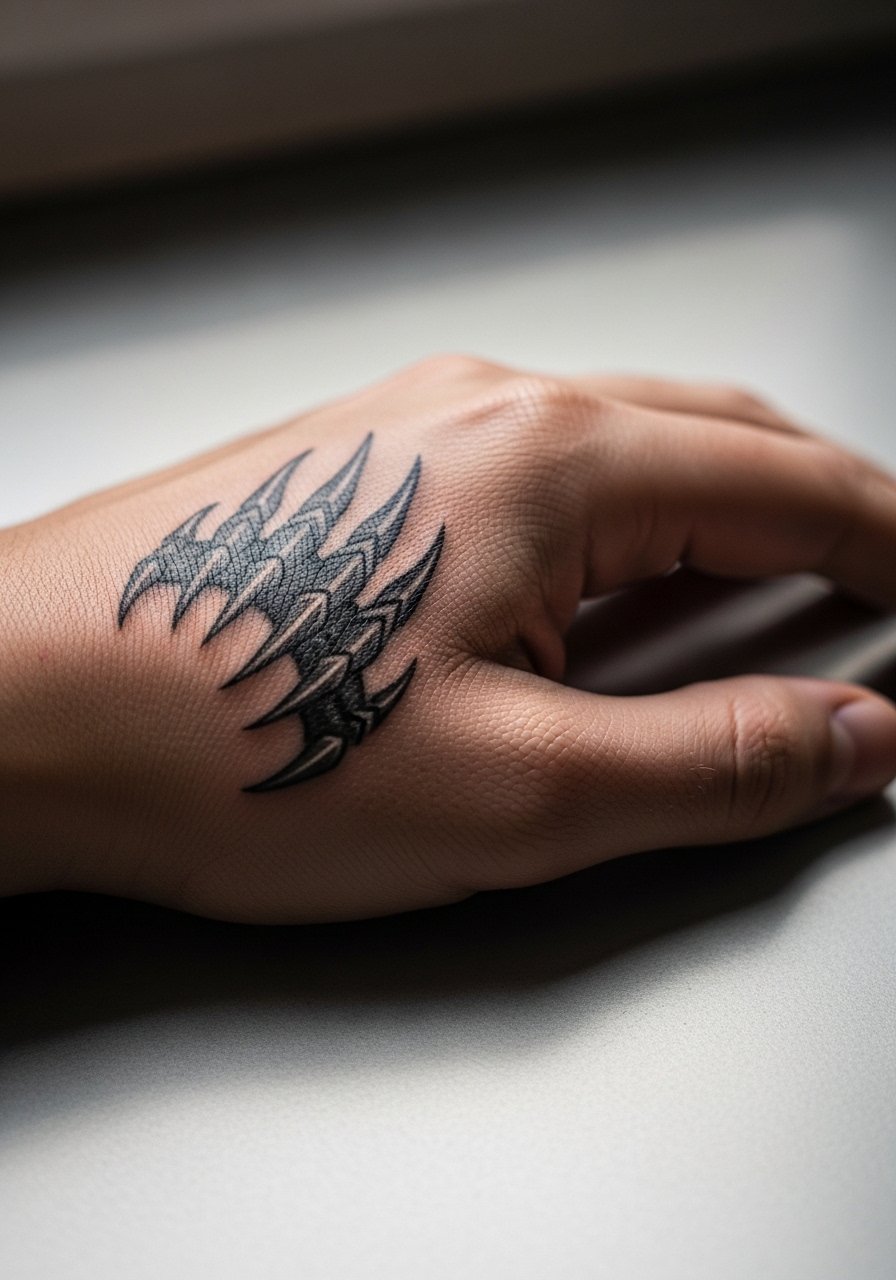
Hand tattoos are visible and age differently because of constant washing and sun exposure. The side-of-hand claw look can hold if scaled and shaded correctly, but expect multiple touch-ups over time. Pain is sharp and sessions are brief. The common mistake is asking for dense black fills in the hand without accepting the likely need for a touch-up in year one. Employers still vary in their attitudes toward hand tattoos, so think about career impact before committing. For sessions, keep your hand clean and avoid jewelry that might press into the fresh area.
12. Single-Needle Panther Portrait on the Calf
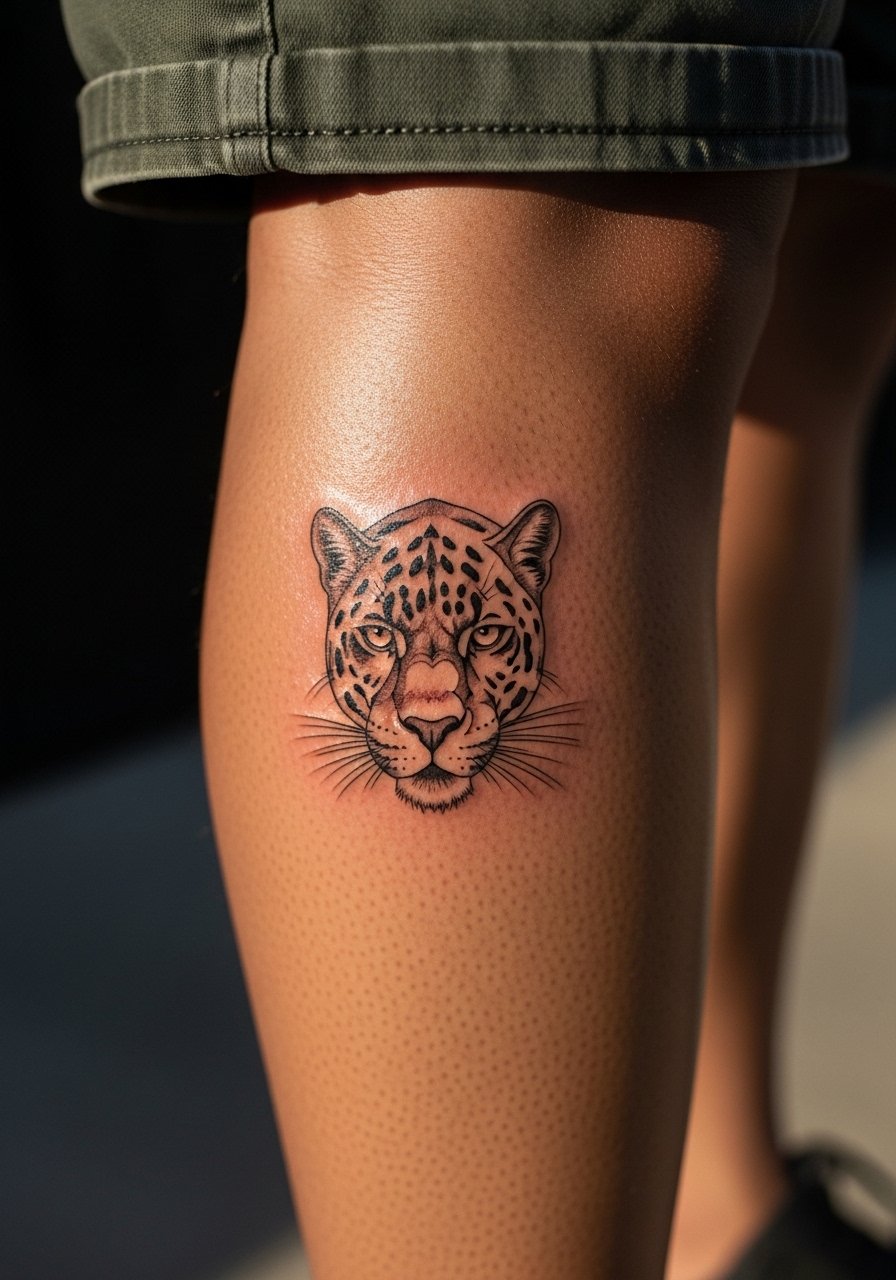
Calf placements give artists room for single-needle portrait work that holds detail longer than smaller spots. Sessions range from one to three hours. Tell your artist which angles of the panther face you prefer and ask for staged reference photos from the same pose. A mistake is cramming too many tiny textures into a small calf piece, which can soften with time. For showing off, wear cropped pants or athletic shorts that stop above the ink line so the portrait reads when you walk.
13. Small Panther on the Side of the Neck
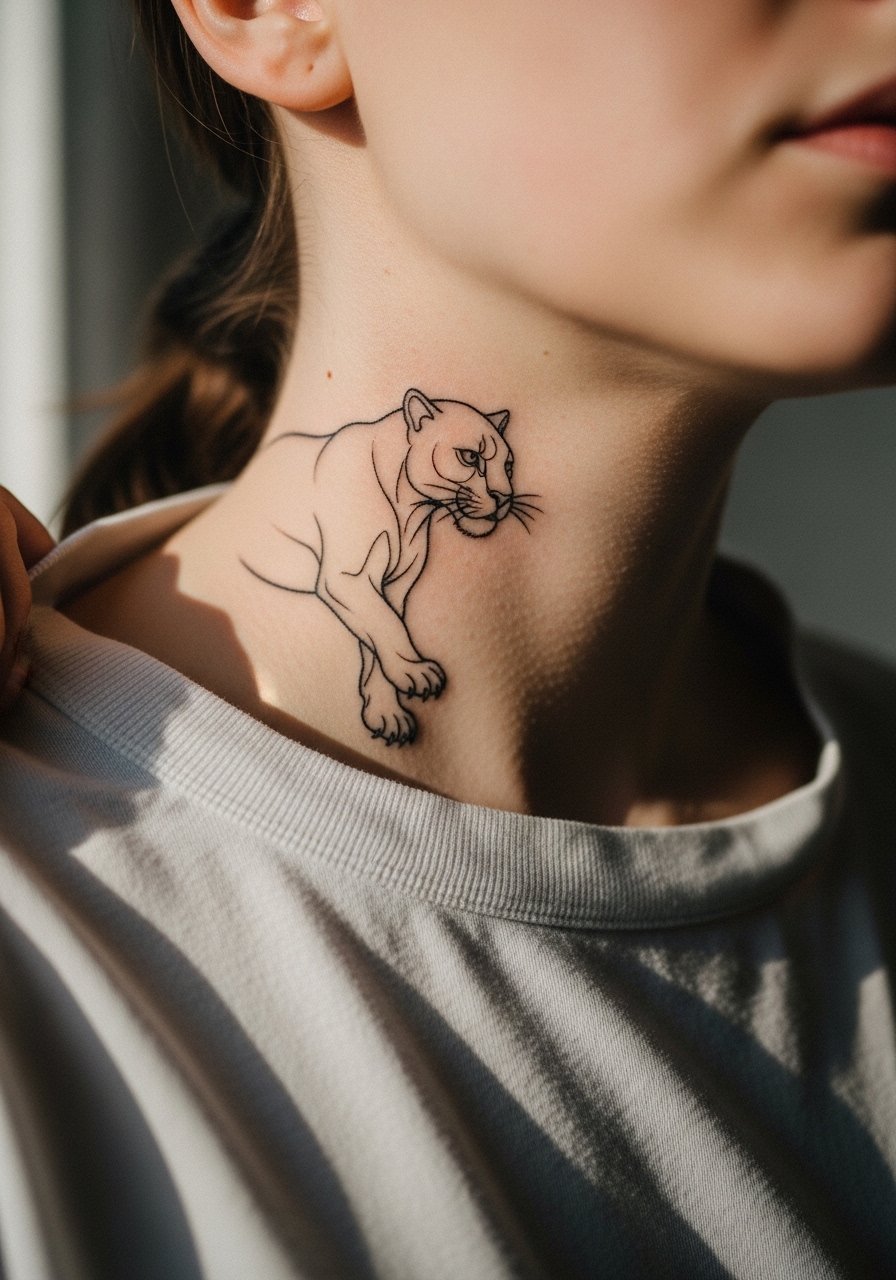
Neck pieces are highly visible and require an artist experienced with thin skin and movement. The side neck is bold and may affect job prospects in conservative industries. Sessions are often short but painful around bony areas. The typical error is underestimating how often you'll see it in mirrors and in professional settings. If you go ahead, choose a design that keeps a clean edge and plan for touch-up at two to three years. For appointment comfort, wear a shirt with a collar you can shift easily.
14. Sternum Panther Framing a Central Motif
Sternum work is intimate and dramatic. Expect a higher pain level and a session that might be split depending on size. Breath control and pacing matter for both artist and client. A frequent mistake is compressing too much detail into the sternum's narrow canvas, which leads to blur. If you want to pair with outfits, open-neck or bandeau styles let you reveal the piece selectively. For post-session comfort, a soft sports bra is recommended in the first week so bands do not press on the fresh tattoo.
15. Geometric Panther with Dot Work on the Upper Back

Upper back geometric compositions let you combine panther form with mandala-style frameworks that avoid cultural appropriation when approached with respect. Specify to your artist that geometric elements are inspired by shapes rather than sacred patterns if you want a non-religious design. Sessions are moderate in pain and can be long for large pieces. A common mistake is overcomplicating the geometry, which reads poorly at a distance. For showing the work, wear open-back tops or tanks that frame the central motif.
16. Micro Panther on a Finger Joint
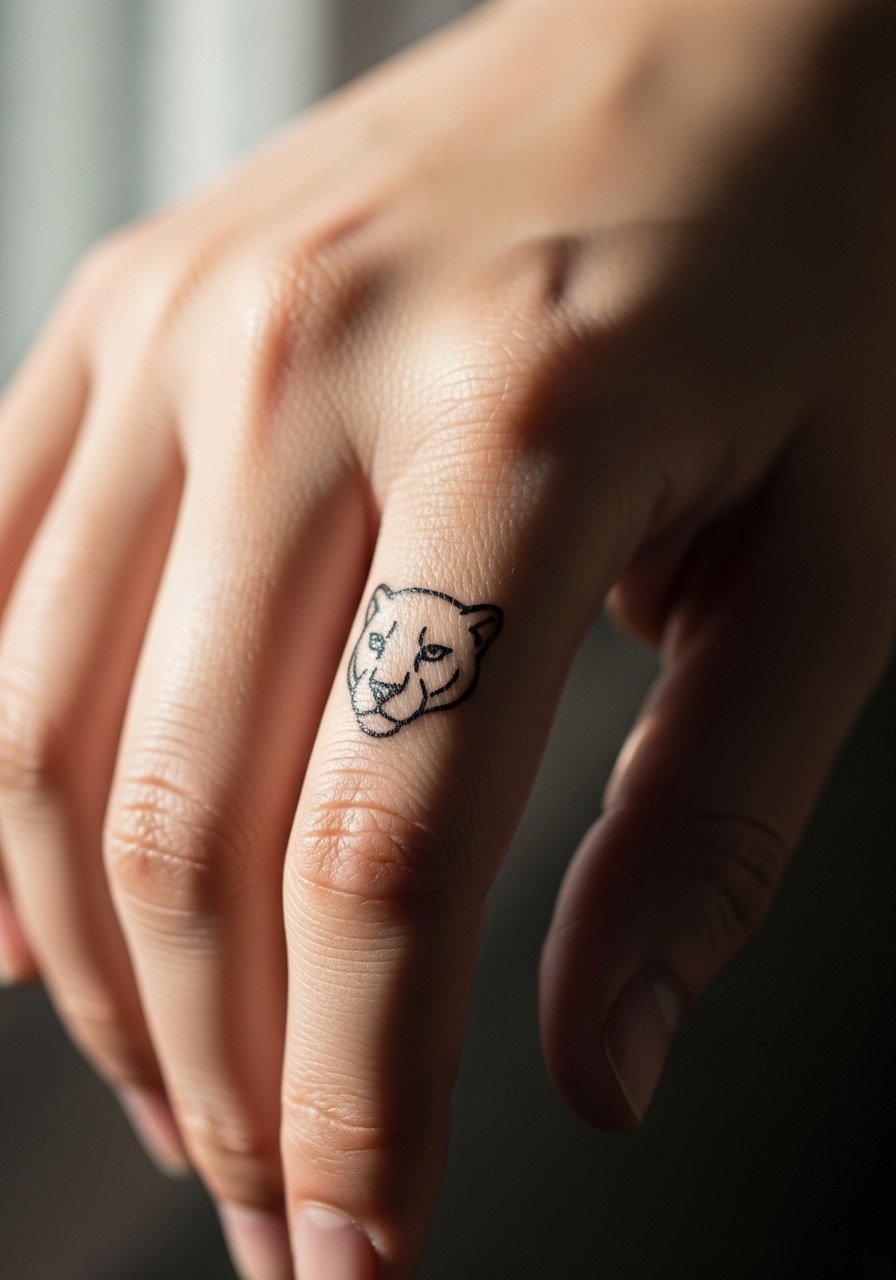
Finger joint tattoos are charming but high maintenance. The skin there sheds frequently and the result often fades within a year unless designed with bolder edges. Pain is sharp and sessions are quick. The main mistake is demanding intricate detail at a scale that cannot hold. For daily wear, consider stacking with thin rings that sit near but not on the ink. If you want a protective cover, a silicone ring during the healing window can help reduce direct metal contact without hiding the piece.
17. Full-Back Panther in Blackwork Scene
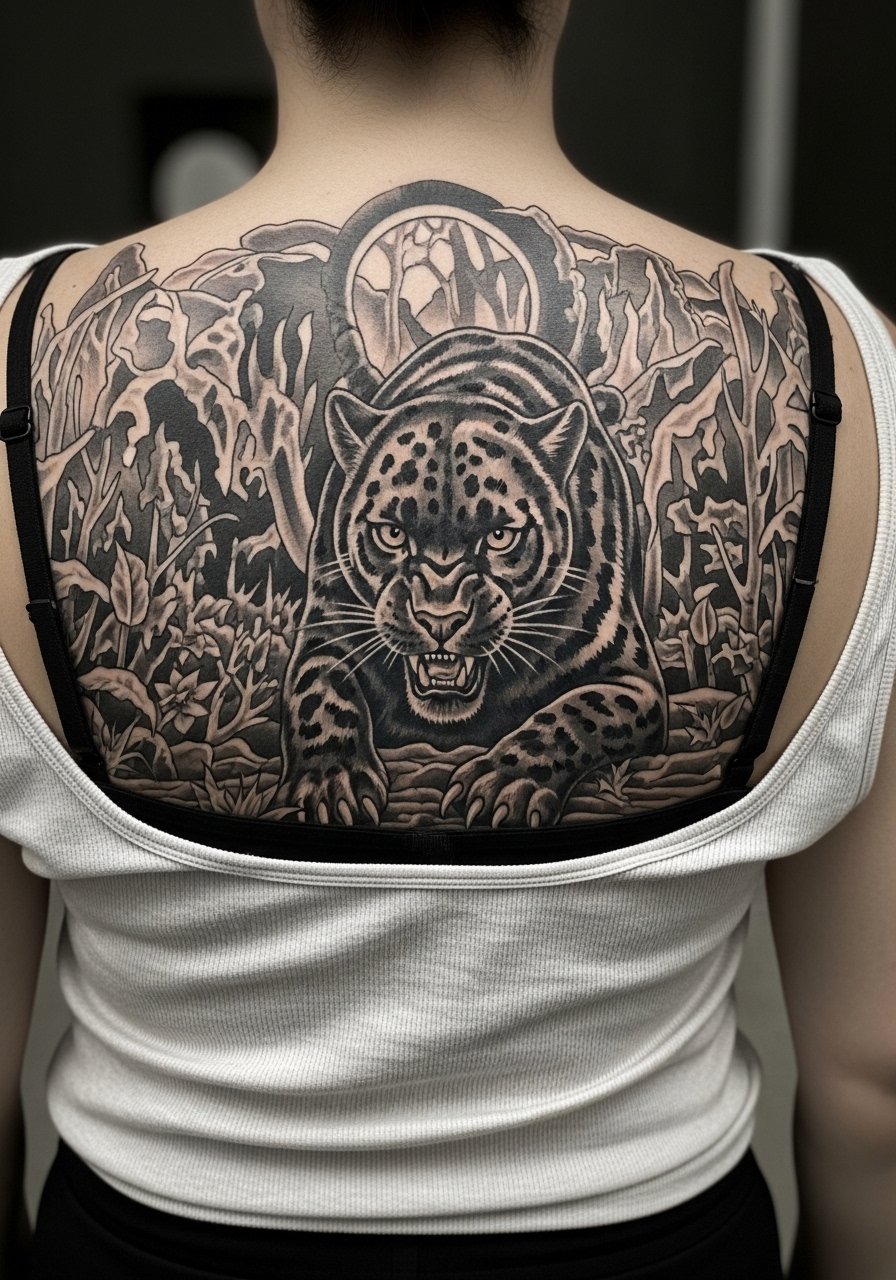
Full-back scenes are for people ready to commit to large-scale work and multiple sessions. The silhouette approach keeps the visual impact and ages predictably. Sessions are long and may be scheduled across three to six sittings. Artists sometimes debate between dense black panels or strategic negative space for breathability. The usual error is trying to force micro-detail into a composition that benefits from bold forms. For showing the tattoo, open-back garments or halter tops create a dramatic reveal.
18. Thigh Inner Linework Panther with Floral Accents

Inner thigh placements allow for intimate, finely detailed compositions that stay protected from sun and friction. The area is sensitive, so expect higher pain and plan for a slower session. A common mistake is choosing a design with many tiny black fills that can smudge when the leg rubs. Ask your artist to map the panther so the floral accents sit outside friction zones. For the session, wear loose shorts you can shift, like loose drawstring shorts that are comfortable and keep the area accessible.
19. Small Panther Behind the Knee
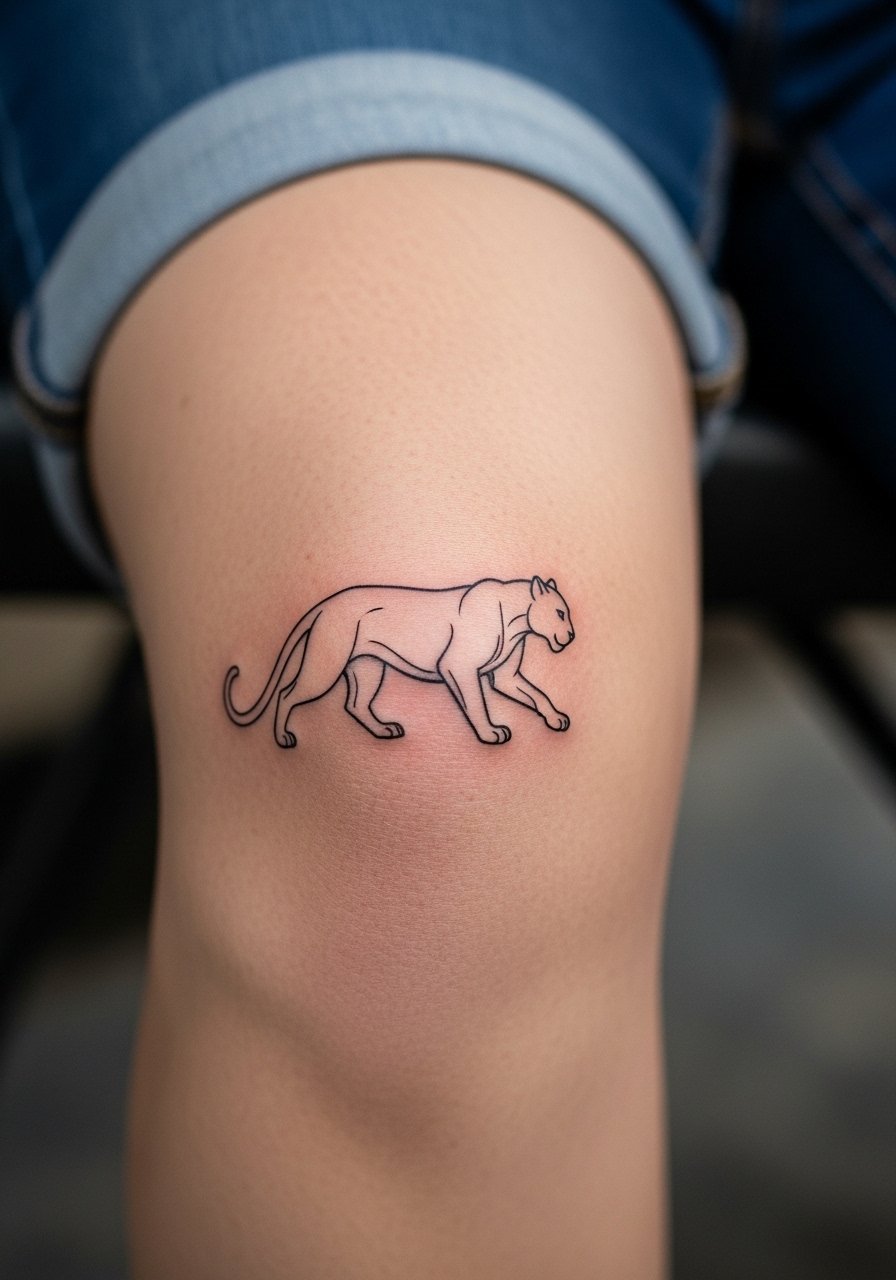
Behind-the-knee tattoos are playful and surprising when revealed. The spot moves a lot, which can blur micro-detail, so choose a simple silhouette or bold linework. Pain varies and can spike when the needle hits thin skin. A mistake people make is expecting fine detail to read when the area flexes and compresses daily. For comfort during sessions, sit with the leg supported and avoid tight bands immediately after healing.
20. Ribs Panther in Flowing Contour Lines
Rib pieces that emphasize flow and contour age better than hyper-detailed portraits in the same area. Expect a high pain level and that sessions might be separated to manage fatigue. The common error is asking for too much fine texture; prioritize clean contour and moderate contrast. One practical tip is to schedule sessions when you can rest the next day. For the appointment, wear a top that can be lifted without removal so the artist has clear access.
21. Forearm Wrap Panther with Negative Space
A forearm wrap that uses negative space can remain readable for years because it avoids overpacking the area with tiny black fills. Tell your artist you want clear separation between black panels and skin gaps to prevent merging as the skin ages. Sessions are moderate and may run two hours. The usual mistake is squeezing in too many elements which creates a busy composition that softens. For daytime wear, roll sleeves or choose short sleeves that frame the wrap without constant friction.
22. Collarbone Tiny Panther with Gemstone Accent
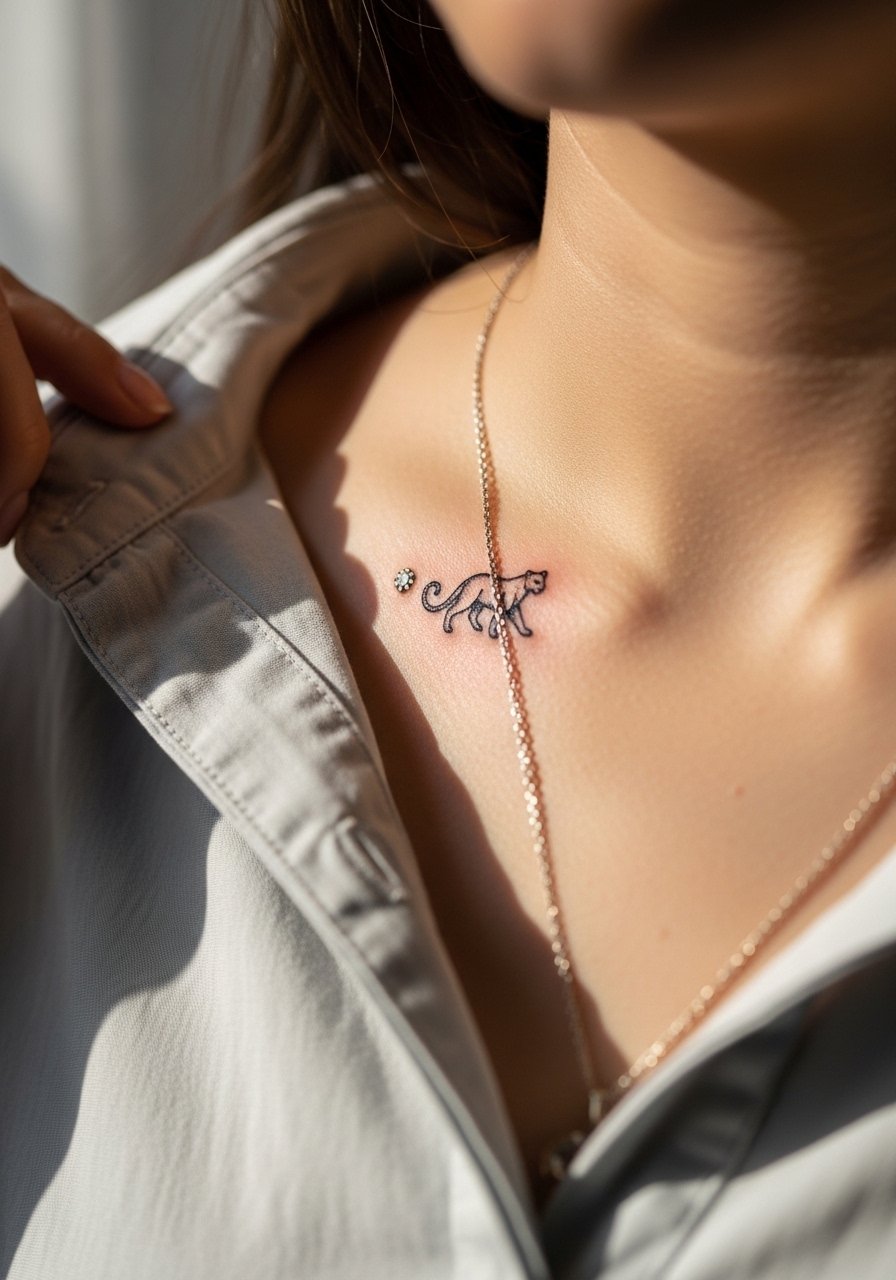
Tiny collarbone motifs have a jewelry-like quality and pair well with delicate necklaces. Ask your artist to place the gemstone dot where it aligns with pendants you already own. The collarbone moves with breath so avoid ultra-thin strokes; slightly firmer linework holds better. Sessions are short and pain ranges moderate due to bone proximity. For showing the piece, try a thin chain pendant necklace that sits just above the ink without competing.
23. Panther Paw on the Foot Arch
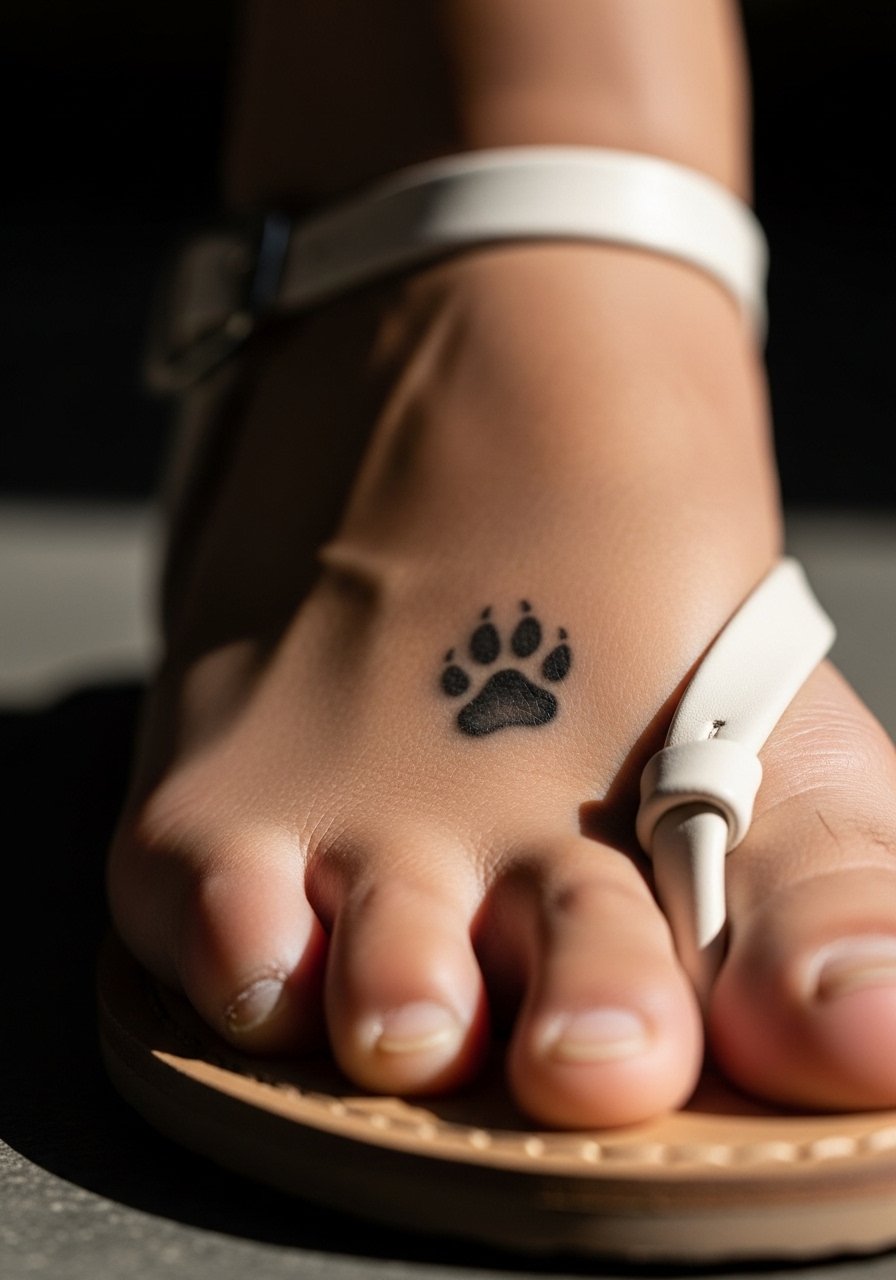
Foot tattoos live in a friction and moisture-heavy zone, which makes them fade faster than those on arms. A paw on the arch can hold if the artist places it on thicker skin and avoids excessive fine dots. Expect a short but sharp session. The typical mistake is getting a dense, shaded paw that breaks apart over time. For healing, wear open sandals and avoid tight shoes for the first week so pressure does not rub the area.
24. Upper Thigh Panther with Lace-Like Dot Work
Upper thigh pieces are durable and hide well under clothing, which helps long-term saturation. Lace-like dot work can look delicate but hold because the area sees less sun. Sessions are moderate and may be broken into two sittings for comfort. A common error is requesting overly tight dot clusters that later merge. For the session, wear high-waisted bottoms you can shift, and plan outfits that will not press seams into the fresh area.
25. Small Panther on the Sternum Edge
Edge-of-sternum placements are intimate and work well for small, centered motifs. Pain is higher and the session may be brief. The usual mistake is crowding the sternum with adjacent fine text or symbols that compete. If you plan jewelry, choose pieces that sit above the ink and avoid heavy chokers in the healing window. For wardrobe, a soft bandeau or sports bra reduces band pressure on the area.
26. Black Panther Eyebrow-Arch Accent
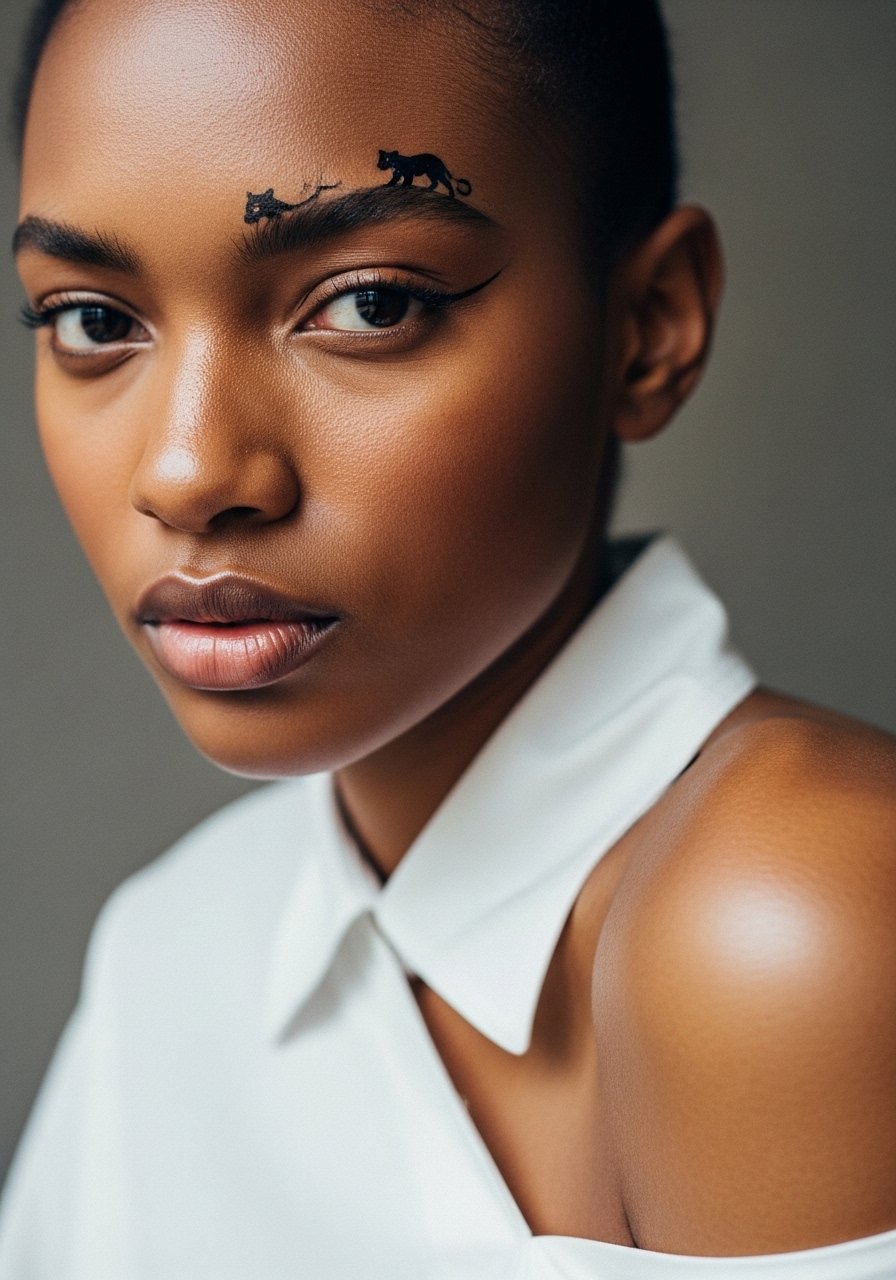
Face-adjacent work near the eyebrow arch must be approached with caution and an artist experienced in facial anatomy. Even small pieces age prominently, so consider how visible you want the tattoo to be daily. Sessions are short and sensitive. The main error is underestimating visibility and social impact. If you proceed, discuss retention expectations and ask for healed photos of similar placements. For sessions, avoid tight headbands or hats that might press the area during the first week.
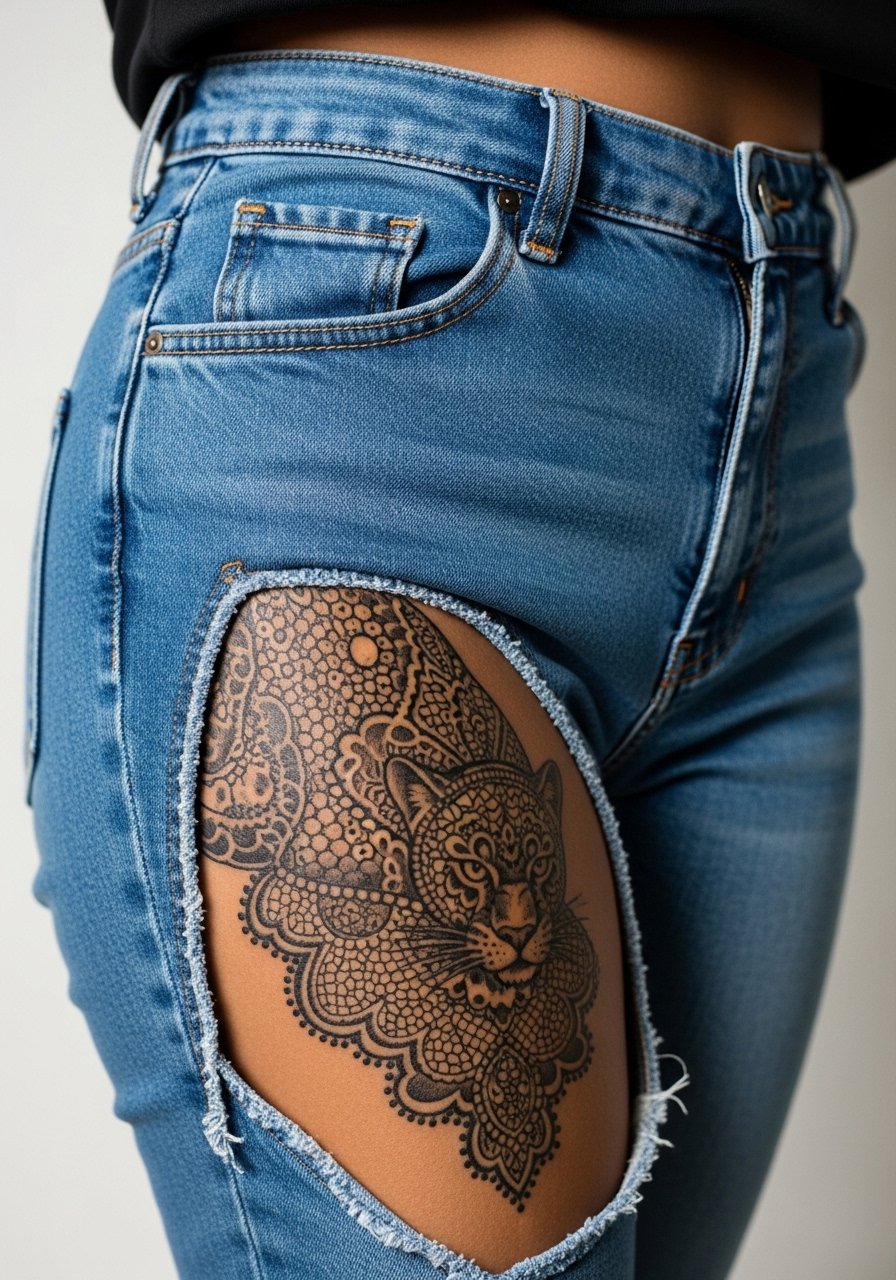
27. Large Thigh-to-Hip Panther with Open Form
This placement uses the hip curve to enhance motion and is excellent for large, open forms that avoid cramped detail. Expect multiple sessions and plan recovery time. A common mistake is trying to pack in portrait-level detail when the area benefits from more silhouette and negative space. For showing the work at events, open-side dresses or high-cut swimsuits frame the design. Pack comfortable clothes for your session and bring loose bottoms you can pull on afterward.
Frequently Asked Questions
Q: Will fine line panther tattoos blur faster than bold blackwork on the forearm?
A: In my experience fine line tends to soften sooner on high-use areas like the forearm because of friction and UV exposure. If you love fine detail ask your artist to increase the line weight slightly and plan for a touch-up around year three.
Q: Can a panther on the ribs keep crisp contour if I want lots of tiny detail?
A: Artists are split. One camp warns that the skin stretch on ribs smudges ultra-fine lines within a couple of years. The other camp says careful spacing and proper depth can keep detail intact. Ask to see healed ribcage work from the artist before booking.
Q: How should I dress for a thigh panther session to stay comfortable and give the artist access?
A: Wear loose shorts or high-waisted bottoms you can shift without removing everything. A loose drawstring short style is ideal because it keeps the area accessible and avoids tight seams.
Q: Are hand and finger panther tattoos worth it if I want minimal maintenance?
A: Hand and finger tattoos usually require more maintenance and touch-ups because of washing, sun, and skin turnover. If you want lower upkeep, choose slightly bolder silhouettes and accept the likely need for a touch-up in year one.
Q: How do I find an artist who understands blackwork panther silhouettes without naming anyone directly?
A: Look on local tattoo directories, tag-based search threads, and convention portfolios. Search for healed photos with similar placement and ask about their experience with saturation and negative space during the consultation.
