
Fine line matching hearts are everywhere on Instagram, but they do not all age the same. Small outline pairs can look clean for years with the right spacing, while tiny packed details tend to blur after sun exposure and frequent rubbing. Think about where you want the design to live on your body, what you want it to read at six months, and what you are willing to touch up later. The first idea below starts with a simple forearm pairing that holds up well.
1. Fine Line Paired Hearts on the Inner Forearm
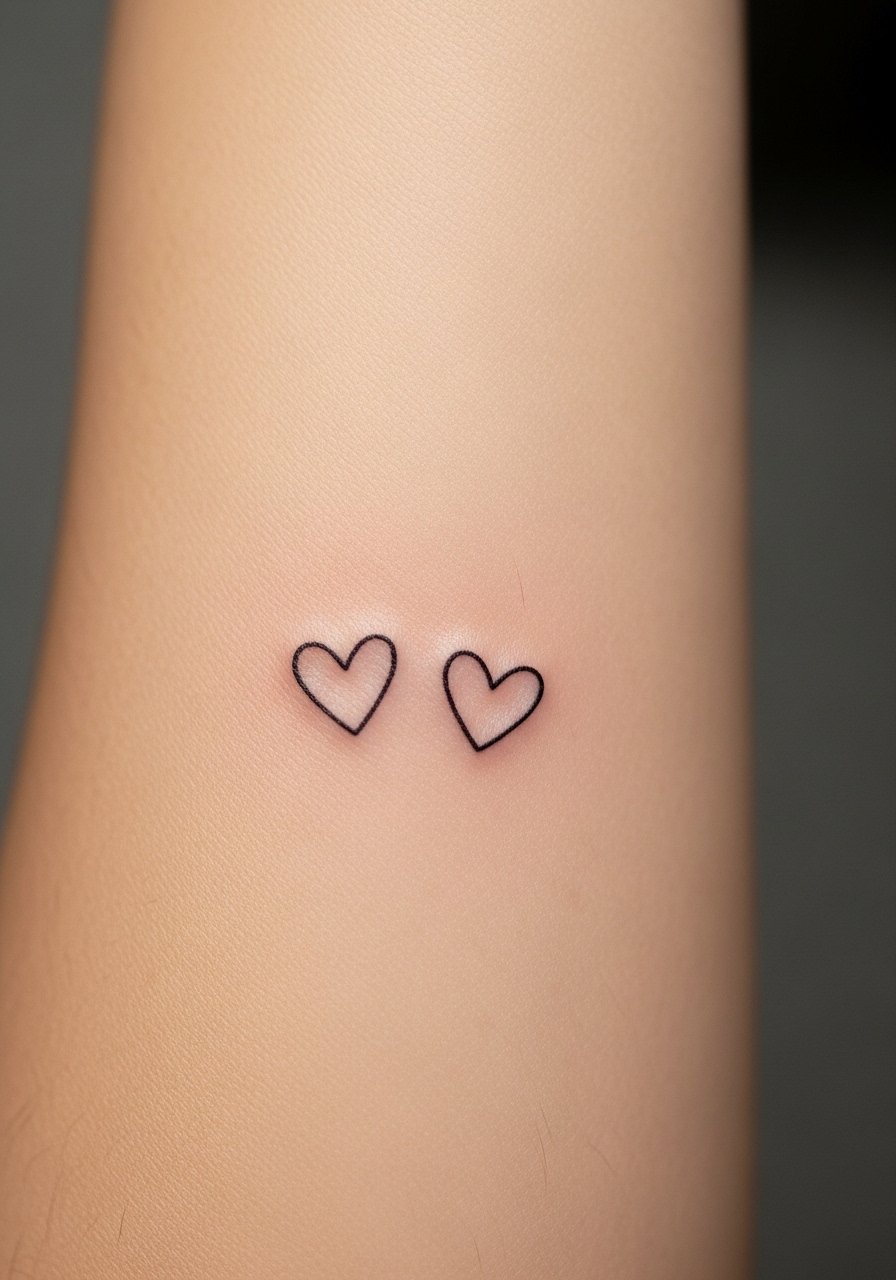
I often recommend the inner forearm for matched outline hearts. The area gives enough flat real estate for a clean stencil and less curvature to warp the linework. Tell your artist to leave a hairline of skin between the hearts so the outlines do not merge over time. Expect a one-hour session for two tiny hearts and light soreness afterward. A common mistake is going too small and too close, which invites blowout as the ink settles. For showing the piece off, roll up a linen sleeve so the forearm sits flat and the linework reads from across the room.
2. Micro Heart Behind the Ear
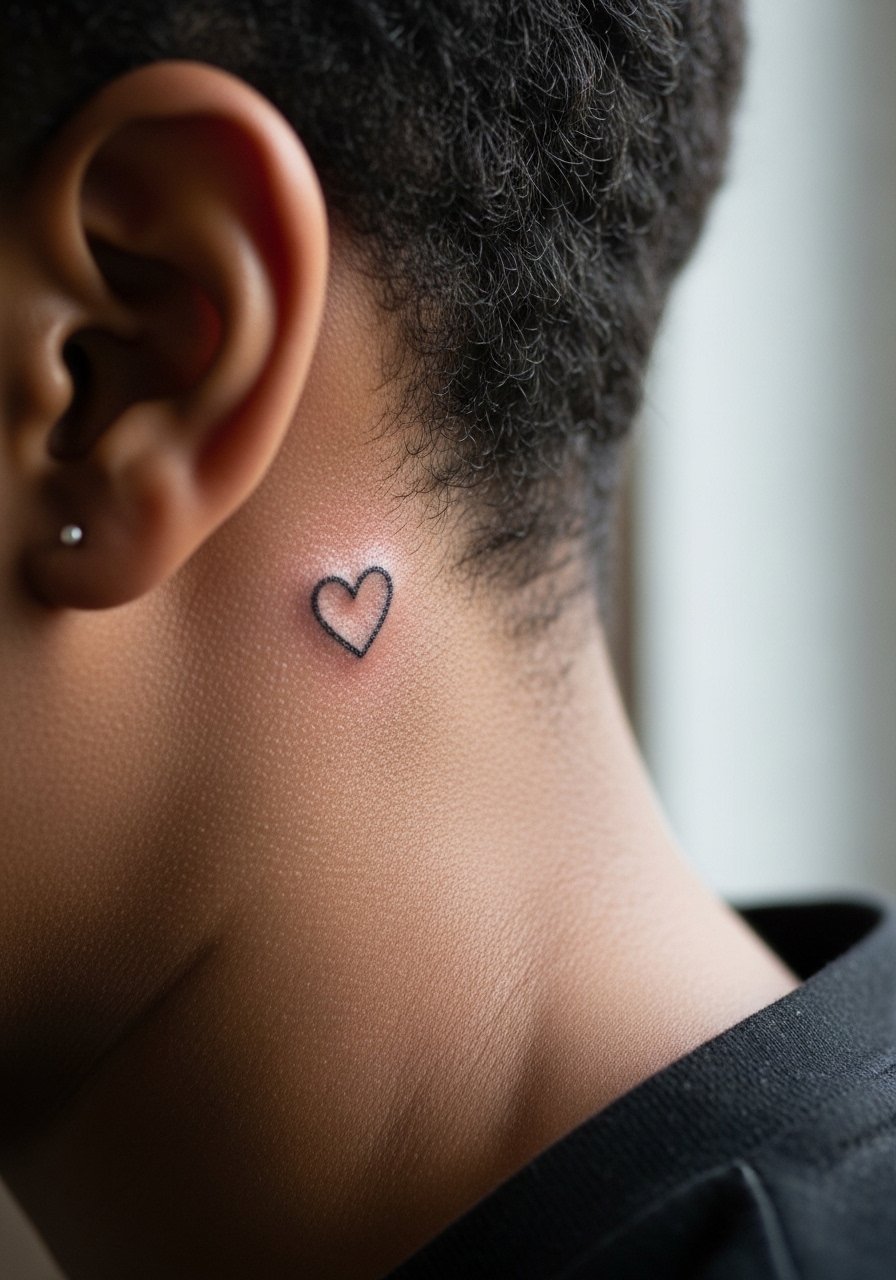
Behind-the-ear hearts are discreet and age like small wrist pieces, though they hide under hair most days. For the session wear a top with hair clipped up so the artist can access the spot without tugging. The biggest mistake is asking for hair-thin strokes with no consideration for touch-up; ask for a slightly steadier line weight to give the design longevity. Expect minimal bleeding and a quick session, but keep in mind the area sees sweat and shampoo that can dull edges early on. If work visibility matters to you, this placement is subtle enough to stay private.
3. Interlocking Hearts on Adjacent Fingers
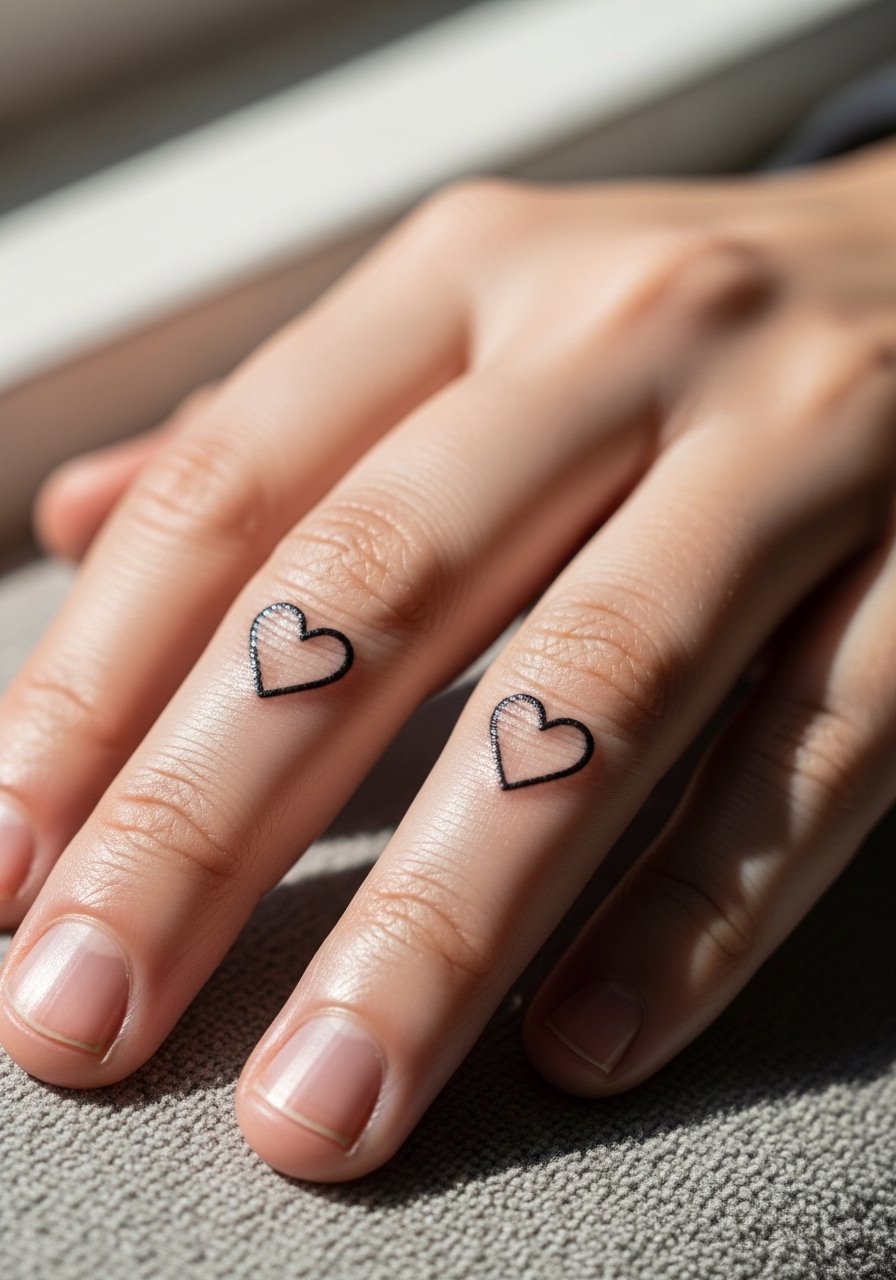
Finger tattoos are honest about trade-offs. They read instantly but face constant washing and friction, so lines thin faster than on the forearm. Ask for slightly bolder linework than the reference, and plan for a touch-up at year one or two. A common mistake is placing both hearts too close to the knuckle where movement causes early fading. For showing off matching finger hearts, stack with a thin stacking ring that sits just beside the tattoo so the metal frames the design without rubbing the ink. Expect a short session that can sting more than an outer arm piece.
4. Tiny Heart on the Ankle
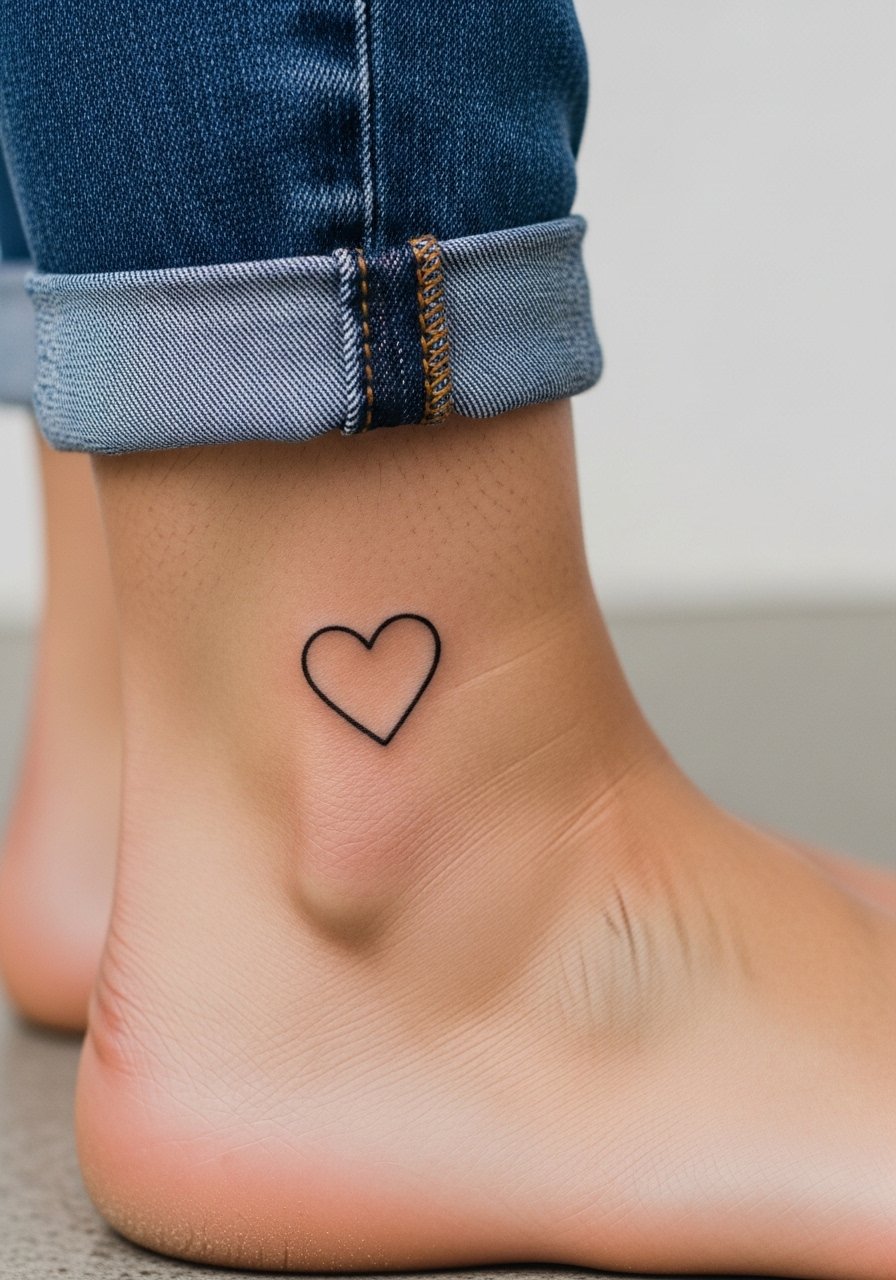
Ankle hearts are low-key and great for people who like seasonal visibility. The skin there is thin and can be bony, so tell the artist you want a shallow but consistent depth to avoid blowout. The session feels like a sharp vibration rather than deep pressure. A common error is choosing dense shading on the ankle; that calls attention to swelling and can scab unevenly. For outfits, sandals that show the ankle are the easiest way to let the tattoo breathe and be seen, try pairing with a strappy sandal for evenings out.
5. Mirrored Heart Lock at the Collarbone
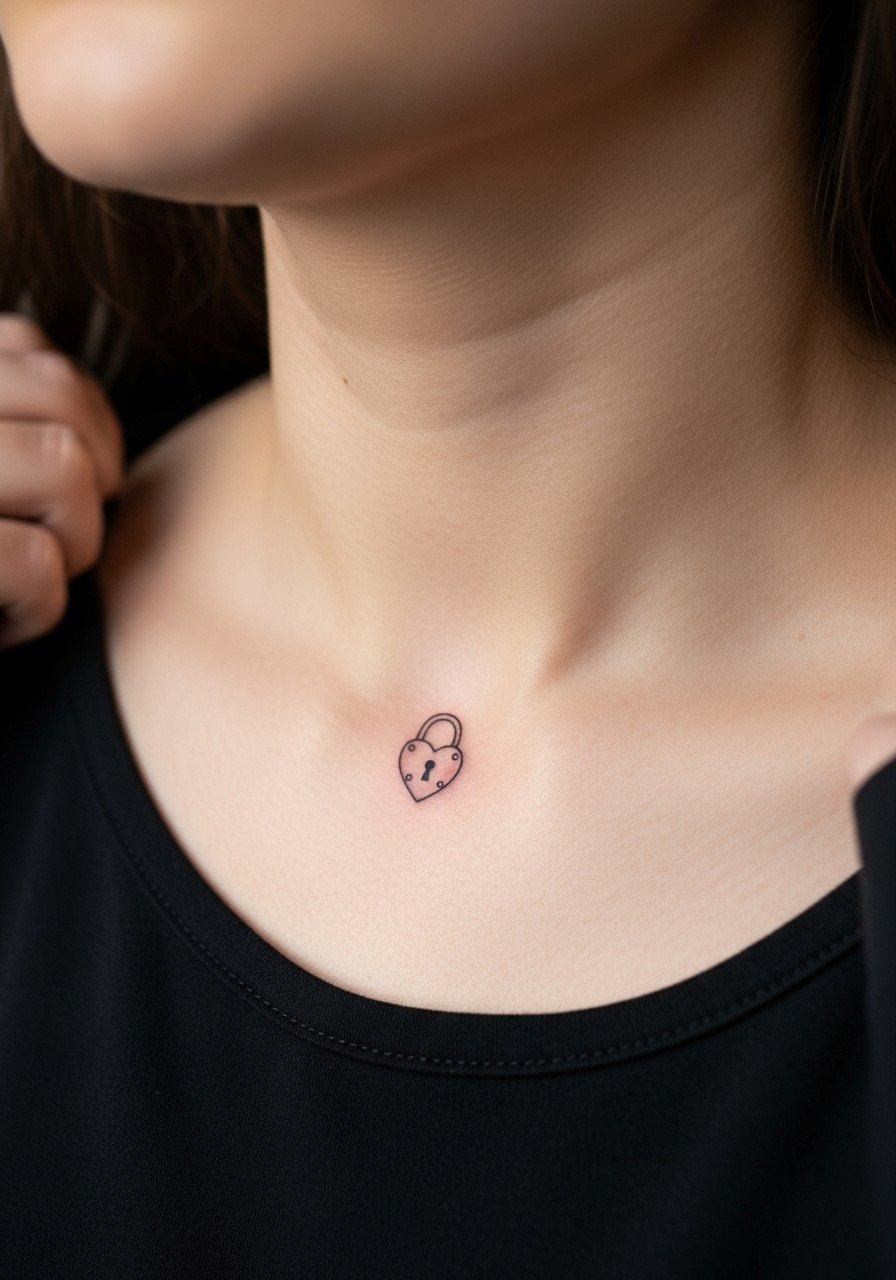
Collarbone placements demand a conversation on stencil size and angle because the bone creates natural tension on the skin. I tell clients to have the key visual centered above the collarbone and slightly rotated for the body shape. The area can scar if the artist goes too deep in one pass, so ask for a measured approach and a possible second pass if needed. Session discomfort is moderate because of the bone proximity. Pair this with an open-neck shirt when you want to show the mirrored lock hearts without stretching the skin.
6. Tiny Constellation Heart on the Shoulder Blade
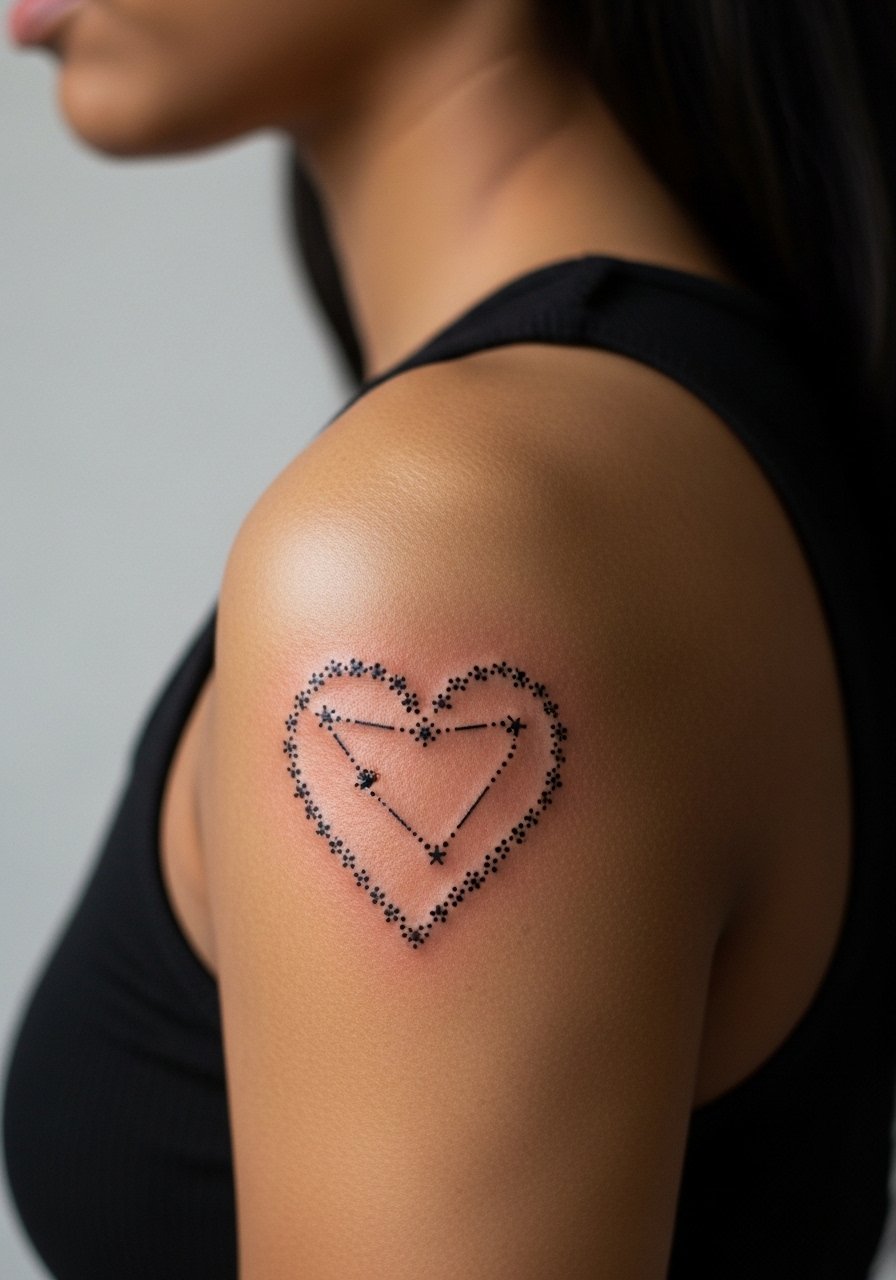
Shoulder blade hearts sit flat and photograph well. Dot work and small stippling read nicely here because the area tolerates slightly denser packing without immediate blowout. Tell your artist you prefer stipple shading over solid fill to keep the design airy. Expect a longer session than a wrist or finger piece because the artist will work thoughtfully on dot placement. For showing it off, an open-back top or halter dress is a simple pairing that frames the shoulder blade and keeps fabric from rubbing the fresh ink. The piece usually requires a touch-up later if you get heavy sun exposure.
Studio Day Picks
The collarbone, ankle, wrist, and shoulder blade pieces above need different prep. A few small items smooth the appointment and reduce early irritation.
-
Stencil transfer paper kit. Lets you preview placement and line weight on skin before the needle hits, especially helpful for the collarbone lock and interlocking finger hearts.
-
Breathable protective film roll. Useful for ankle and shoulder blade pieces during the first day of movement and light friction.
-
Friction-reducing arm sleeve. Keeps forearm and shoulder blade areas from rubbing against clothing during travel or long days.
-
Fragrance-free gentle body wash. Cleanses delicate lines at the ankle and wrist without irritating freshly healed linework.
-
Aquaphor healing ointment. Thin application in the first few days helps protect fine line pieces while they form their initial scab layer.
7. Tiny Solid Heart at the Wrist
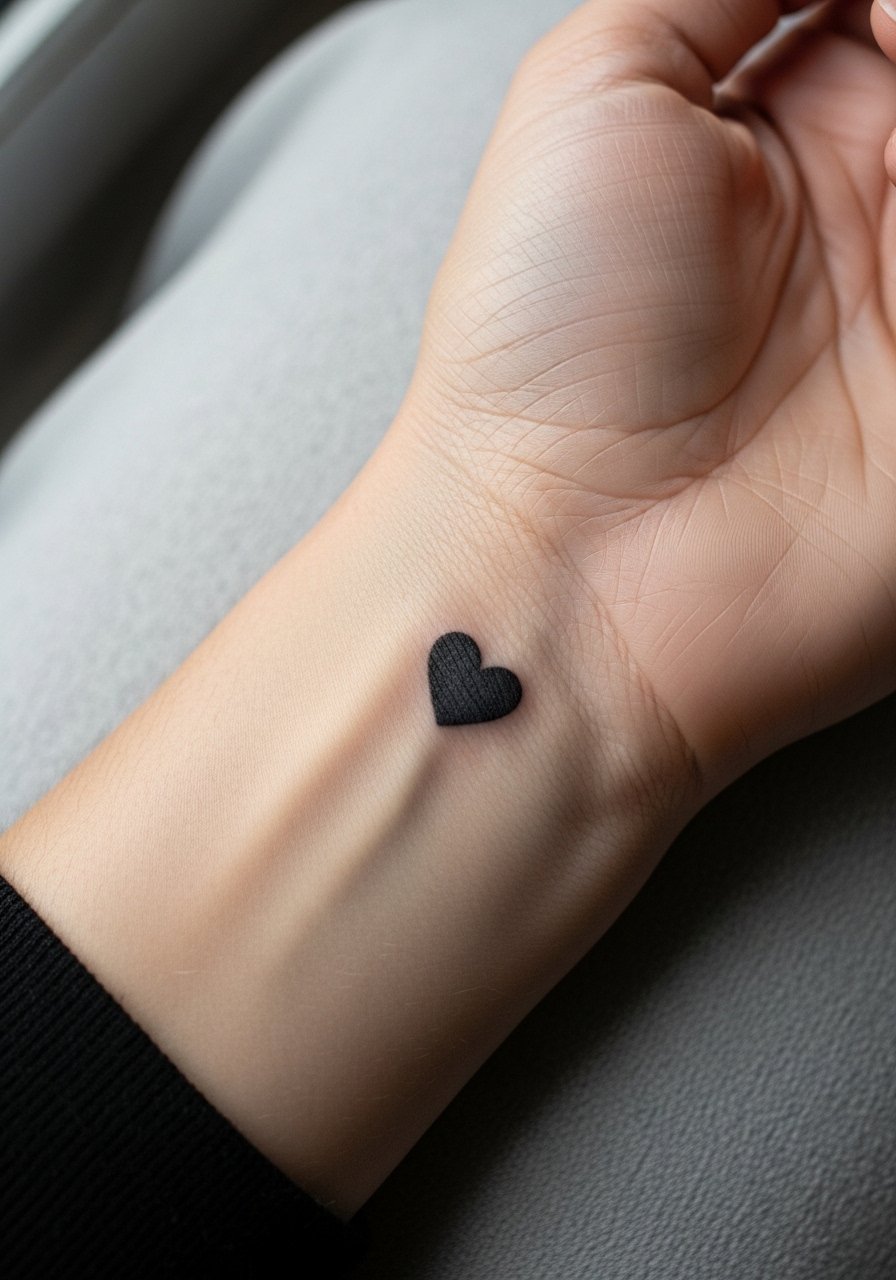
Solid black hearts on the wrist have graphic clarity and tend to age better than ultra-fine outlines. When you book, ask for a small filled shape rather than delicate hairline fill so the silhouette stays crisp. The wrist sees a lot of motion and washing, so expect some softening at year two and a likely touch-up opportunity. People often ask for a tiny heart too close to the tendon; avoid that as the lines there can spread unevenly. The session is quick and the pain is mild to moderate. It is a bold tiny statement that reads well from a distance.
8. Split Anatomical Heart Across Both Inner Biceps
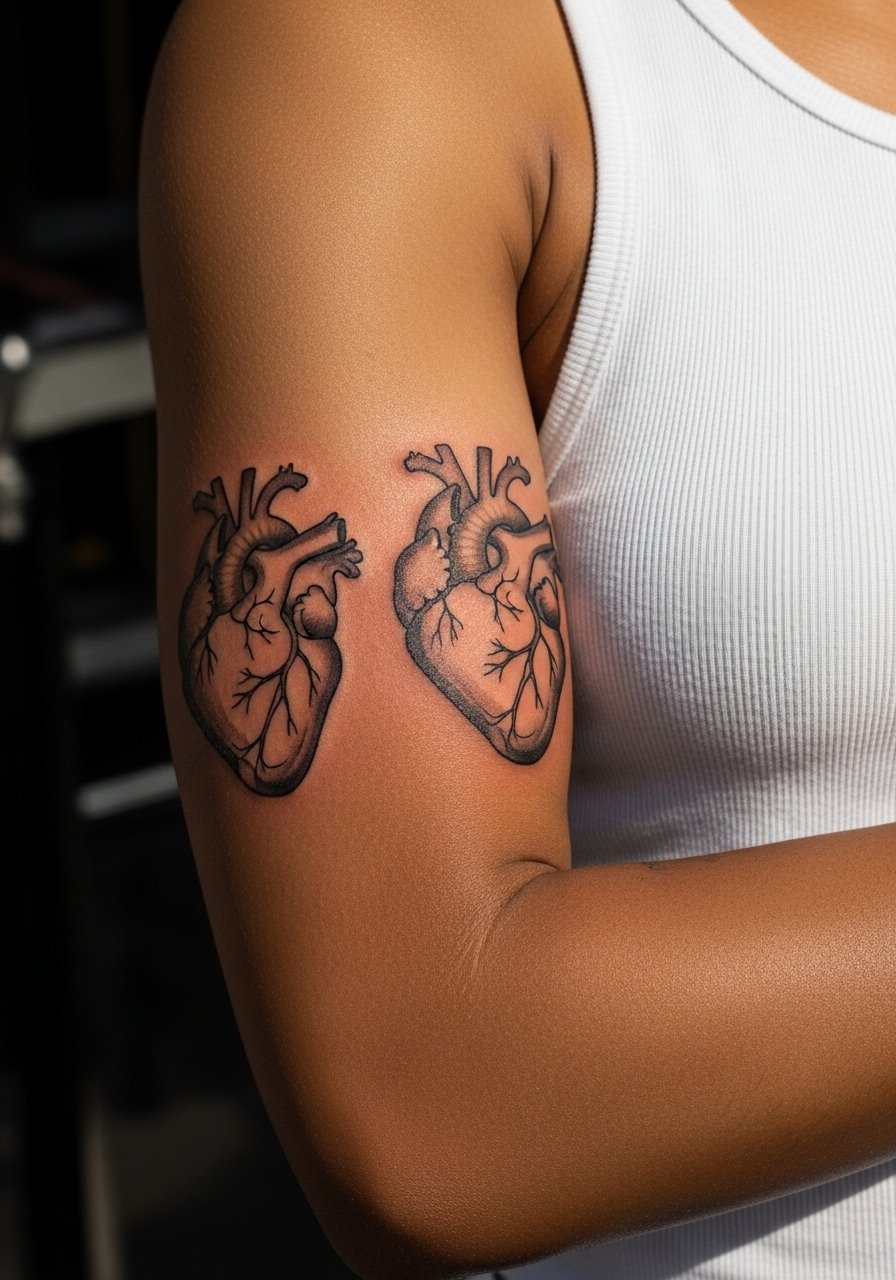
A split anatomical heart makes a clear visual across two people. Inner biceps take more time because the artist works on curved, softer skin and may need to adapt the stencil between arms. Expect moderate pain and a longer session than a tiny wrist piece. One camp in the community says detailed anatomy on soft skin blurs too quickly. The other camp says correct needle depth and spacing keep the form legible for years. Ask your artist where they fall on that split before booking. For the session, wear a racerback tank so the artist can access both inner arms without tugging.
9. Watercolor Heart Accent on the Ribcage
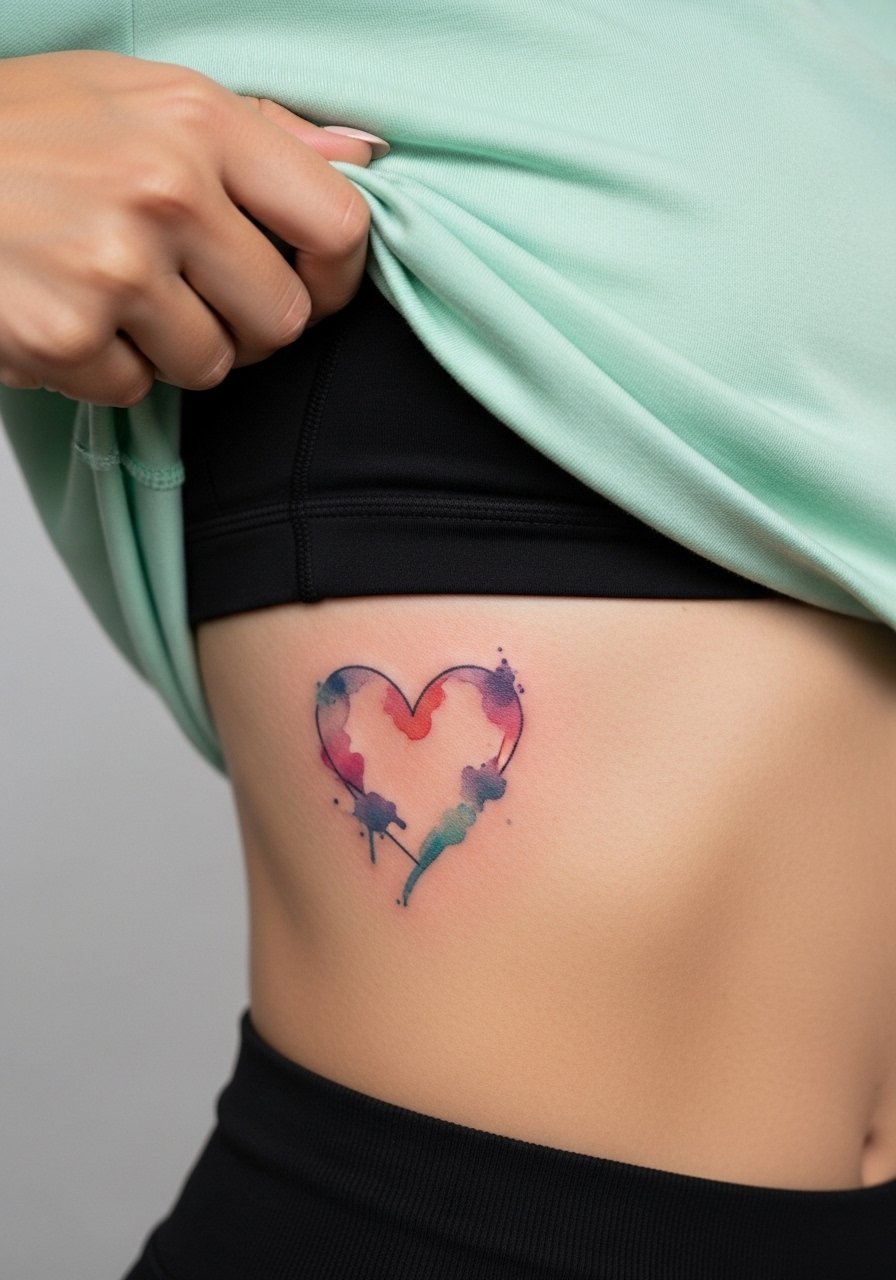
Ribcage watercolor hearts read as art and hold emotion in a dramatic way. Pain here leans high because the skin is thin and the needle taps near bone. The controversy is clear: some artists refuse fine line or delicate watercolor on ribs, saying the stretch and healing motion cause rapid fading. The opposing view is that with spaced strokes and heavier saturation in key areas, watercolor can settle well. Ask about the artist's ribcage experience and realistic touch-up expectations. Expect a longer session and plan comfortable clothing like a zip hoodie to adjust after the appointment.
10. Tiny Matchstick Heart Behind the Ear of the Neck

Neck placements are visible and can carry social implications, so think about long-term visibility. Small matchstick hearts on the side neck are quick but require a steady hand and firm stencil placement. The skin there moves with swallowing and turning, so ask for slightly bolder lines than the reference to keep the mark legible after a year. The session is brief and the pain is sharp but over quickly. Pair it with a thin chain pendant necklace that sits above the ink for a balanced look that does not rub the design.
11. Geometric Dot Work Heart Over the Sternum
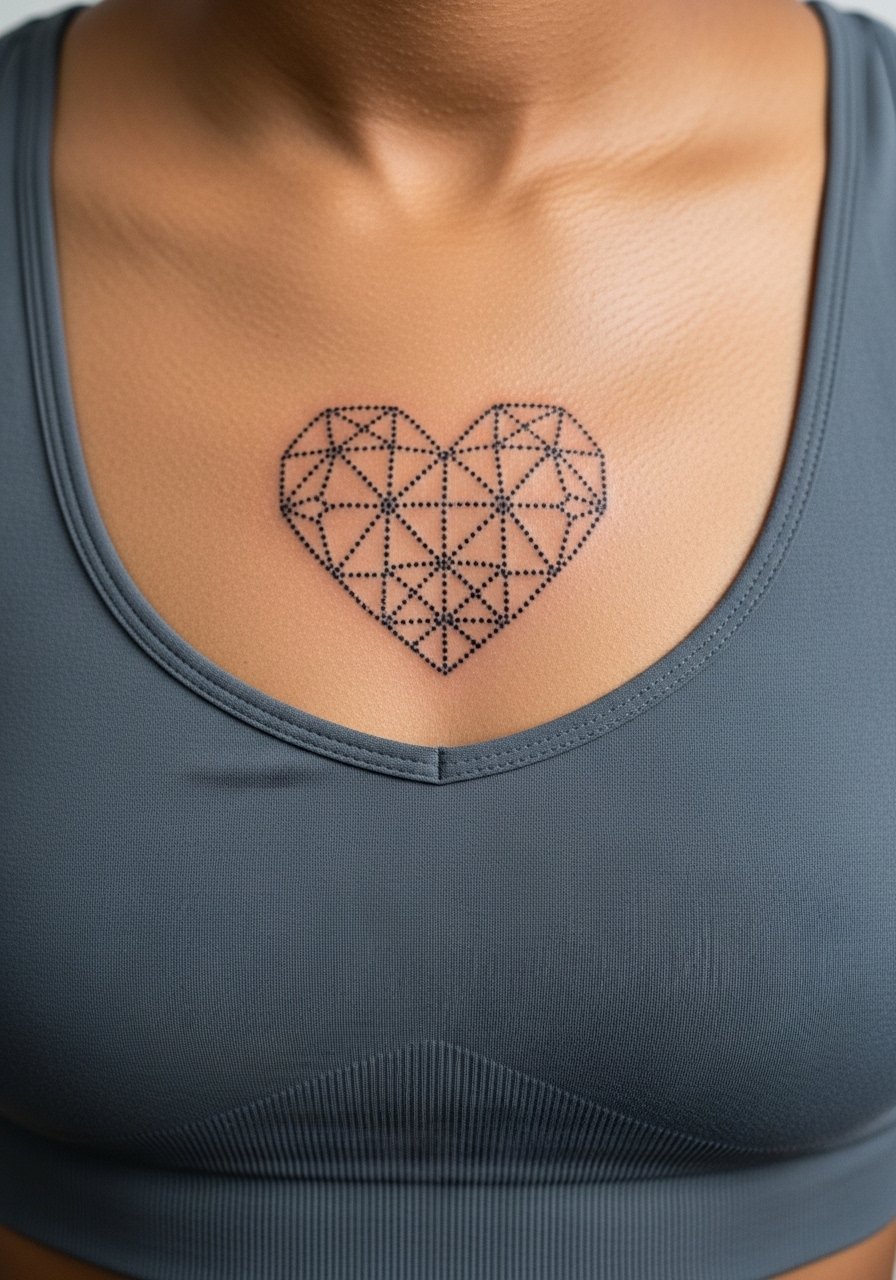
Sternum hearts feel intimate and photograph with strong symmetry. Dot work here looks delicate but needs spacing to avoid dense merging as the skin stretches. Fine line enthusiasts debate sternum placement: one camp finds it excellent for crisp symmetry with careful depth, the other warns of scabbing and merge in the central chest. Both positions have merit, so confirm the artist's sternum experience. The session can be more uncomfortable because of bone proximity and breathing movement. Keep clothing soft and nonrestrictive during healing and expect a touch-up discussion at the follow up.
12. Tiny Red Heart Tattoo on the Side of the Thumb
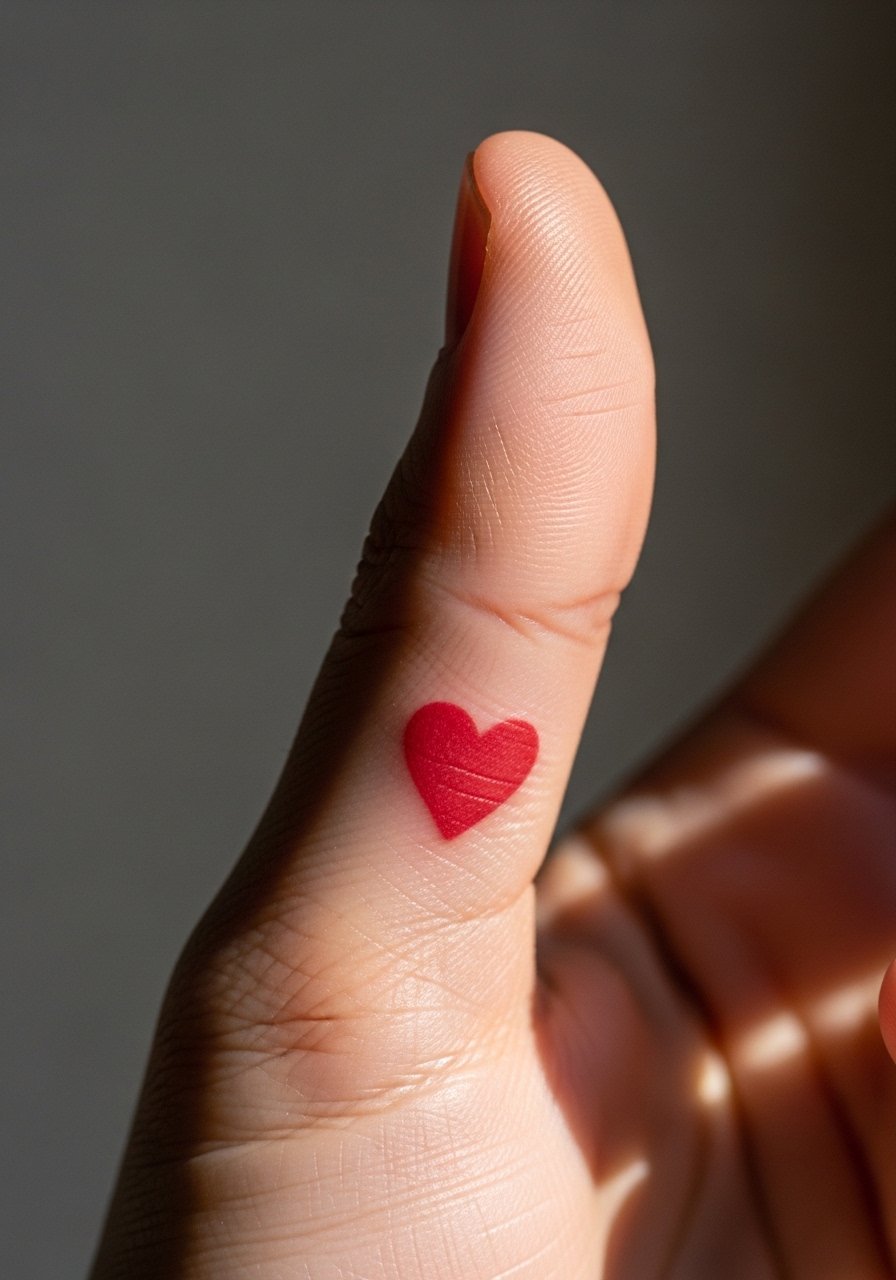
Thumb side hearts are playful but demanding. The skin is thick and moves a lot, so pick a saturated, simple shape rather than delicate line detail. Expect faster fading and plan for yearly touch-ups. Tell your artist you want a clean edge and that you understand the maintenance requirement. A common misstep is choosing a shaded or textured heart on the thumb; flat fill maintains clarity. For daily wear, a small protective ring or band can keep the area from constant metal contact during healing, and a thin leather ring pairs well without rubbing the ink.
13. Minimalist Heart Outline at the Hip
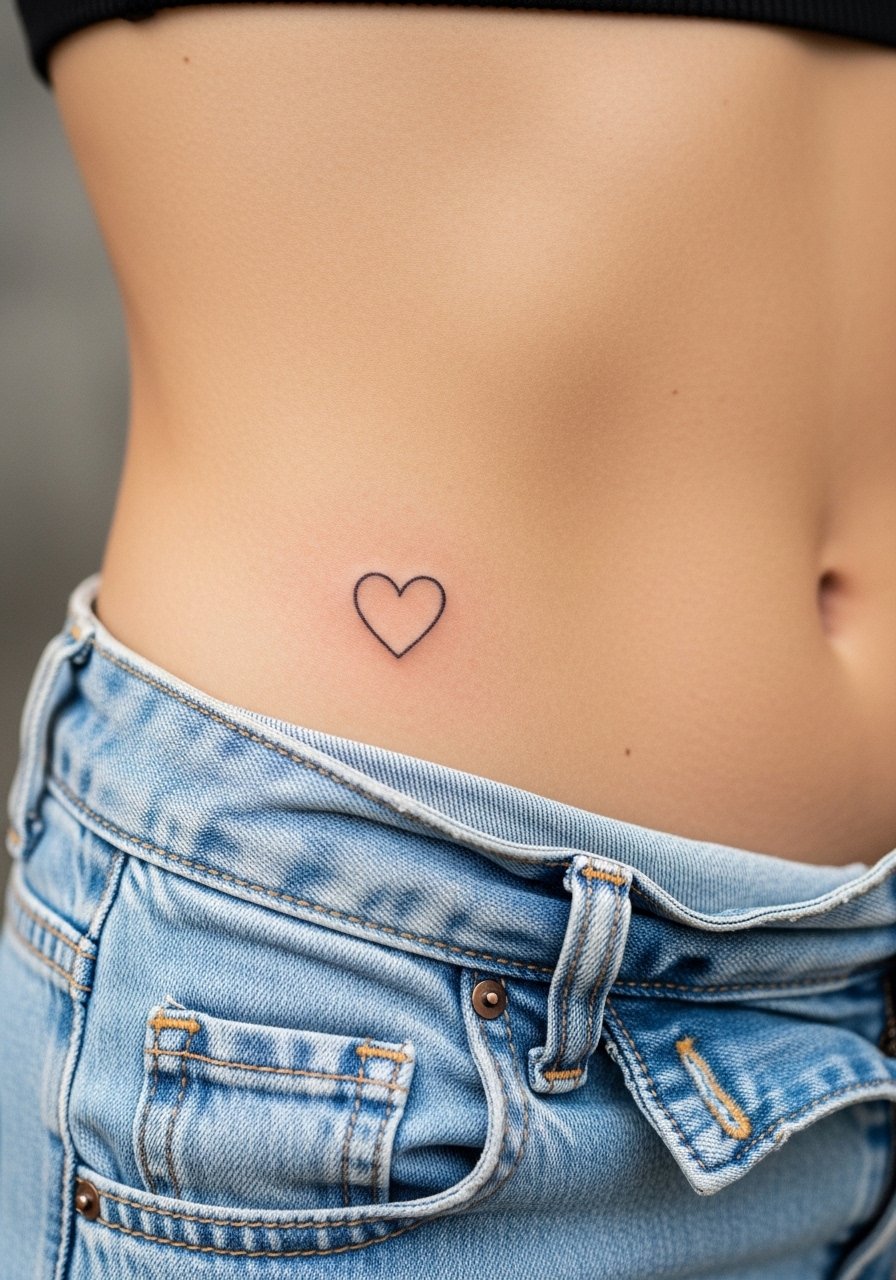
Hip hearts are intimate and easy to hide under clothing. The skin moves with sitting, so the artist will likely recommend a slightly sturdier line weight to prevent early softening. A mistake I see often is choosing too tight a curve near the pant line where friction leads to scabbing. The session is moderate and can be done in under an hour. For showing it off on warm days, high-waisted shorts or a swimsuit bottom frames the area without dragging on fresh ink. Consider the season when booking so the stretch of jeans does not press the new tattoo.
14. Negative Space Heart Band Around the Wrist

Negative space bands rely on the contrast between ink and skin, so the surrounding fill must be solid and consistent. The wrist moves constantly and that can blur very fine contours, so ask for clear spacing and a slightly larger negative heart opening than you think you need. The session feels like repeated light passes and will need a careful aftercare plan. For showing it off, stacked bracelets that avoid direct contact with the fresh ink are ideal. Try a pair of stacked dainty bracelets to frame the negative space without smudging or rubbing the tattoo.
15. Broken Heart Halves on Opposite Collarbones
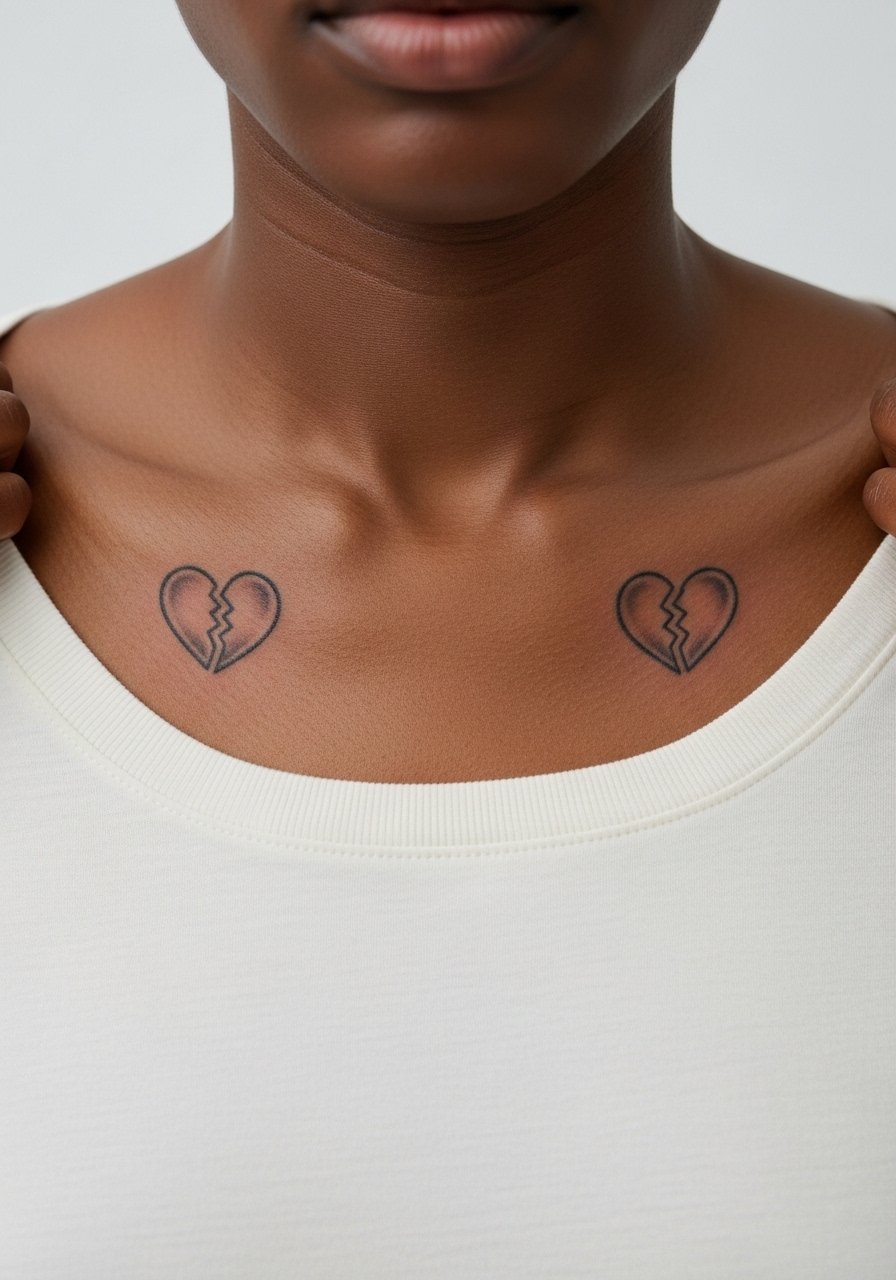
Split broken hearts across the collarbones create a powerful mirrored look. Symmetry is everything, so bring reference and ask your artist to map both sides carefully before needle work. A frequent error is uneven sizing between sides, which becomes obvious in photos. Session discomfort is moderate because of bone proximity. For minimal rubbing during healing, wear loose cotton tops or a button-down you can pull aside. This placement is dramatic and public, so think about visibility and work environments before committing.
16. Tiny Heart with Coordinates on the Lower Rib
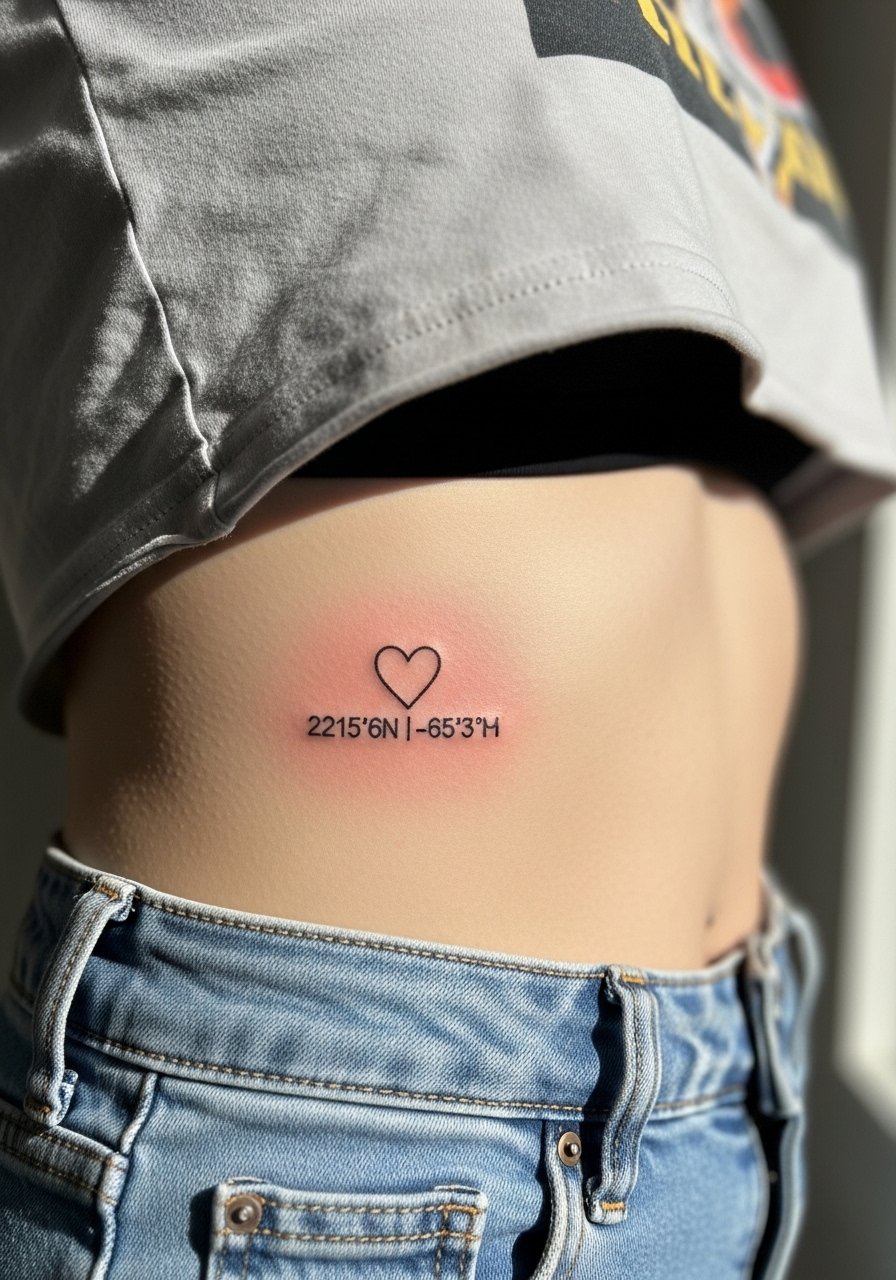
Coordinates add a personal map to a tiny heart and fit nicely on the lower rib or side torso. The rib is sensitive and the session can be painful in short bursts. Ask your artist to tattoo the coordinates in a small monospace or serif so they heal legibly, and expect a touch-up as numbers can blur faster than letters. A common mistake is cramming too many digits into a tiny area. For the session, wear high-waisted bottoms and a cropped tee so the artist can expose just the strip of skin needed without fuss. The result is private but precise.
17. Tiny EKG Line That Ends in a Heart on the Forearm
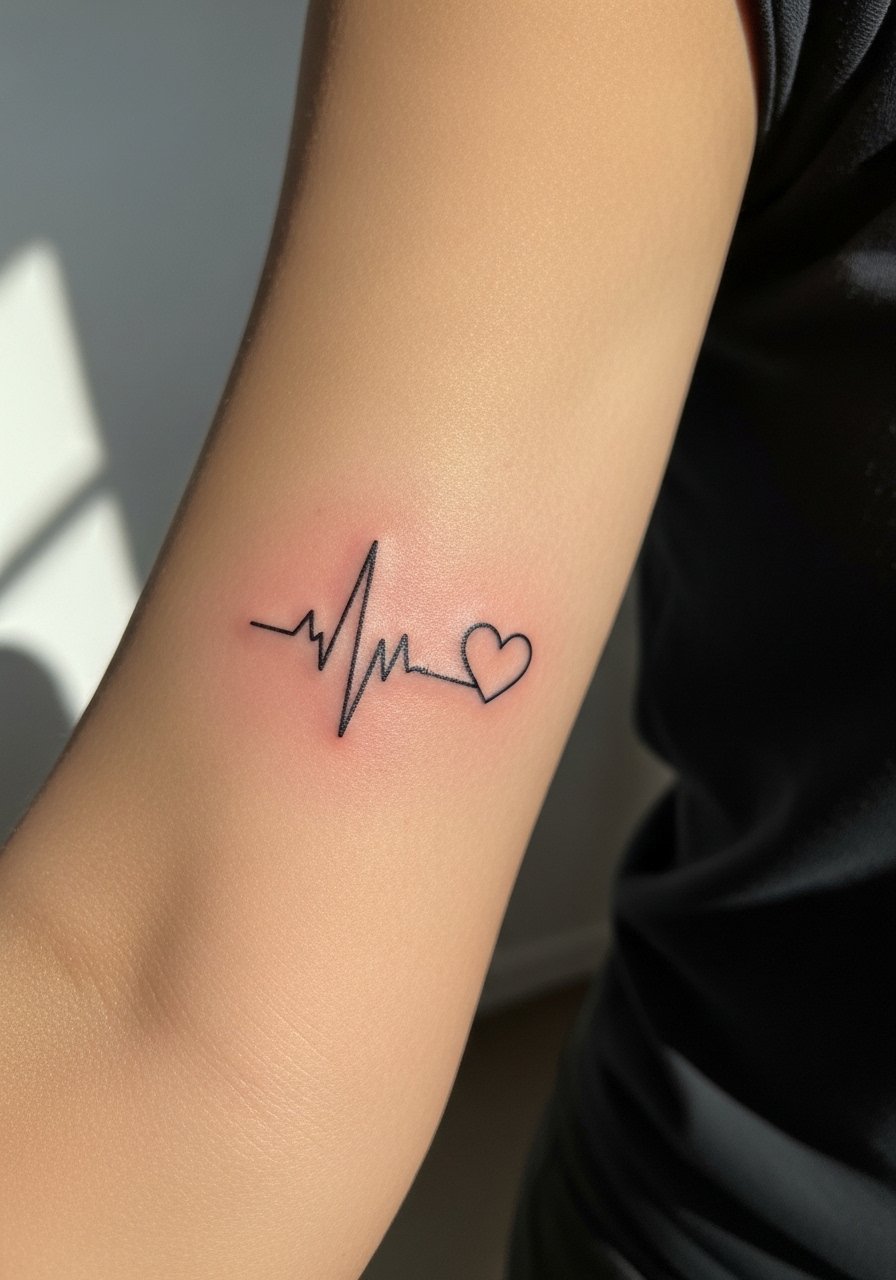
EKG line hearts are sentimental and sit well along a forearm or rib. The biggest aesthetic win is keeping the peaks evenly spaced so the pattern does not look jittery as it heals. Tell the artist you want a consistent rhythm in the linework and request a stencil that stretches across the arm to check flow before inking. Expect low to moderate pain and a short session. This design reads especially well with rolled sleeves in neutral tones, and a loose button-down shirt makes the forearm feel intentional when you show it off.
18. Tiny Floral Heart Wreath on the Upper Thigh
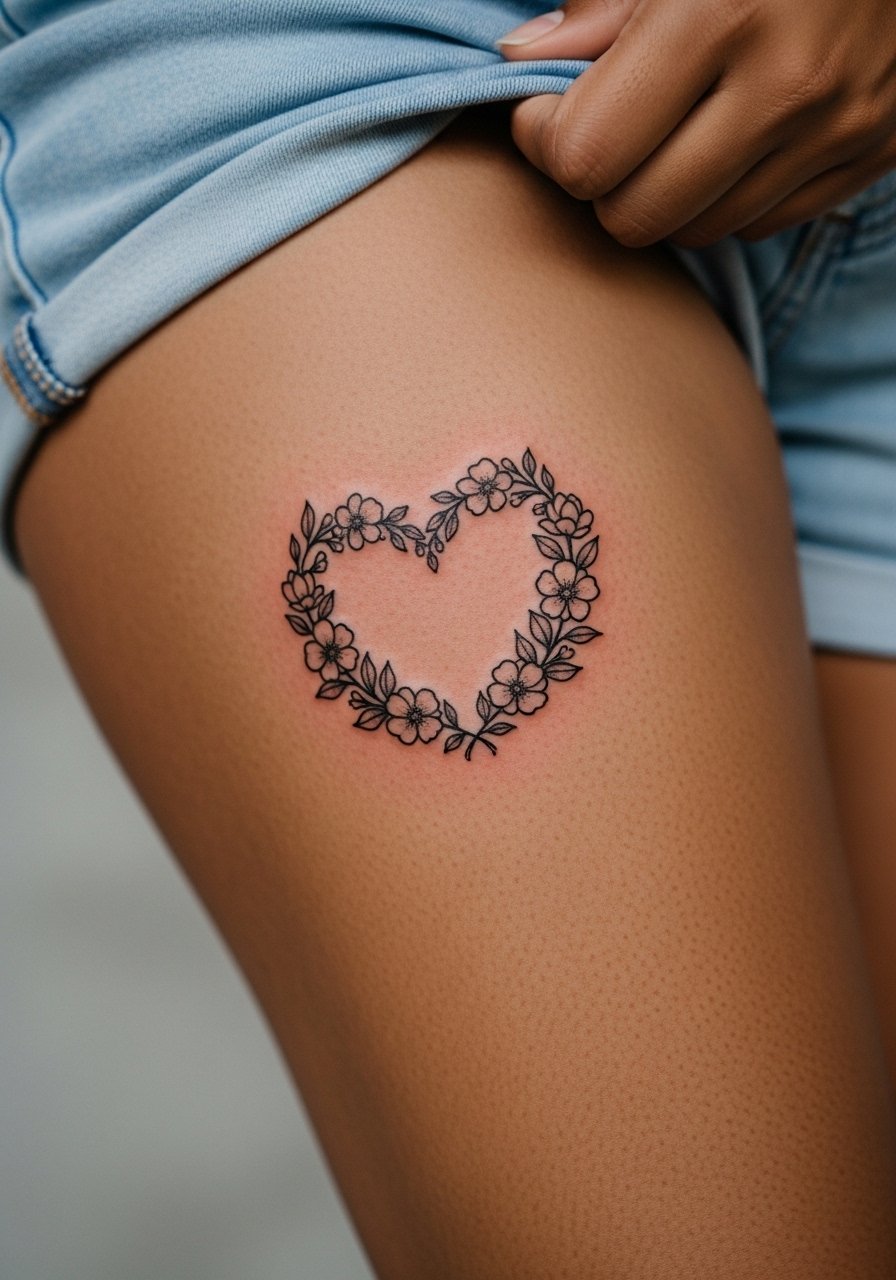
Upper thigh hearts are private and allow for slightly larger detail without public exposure. The skin is forgiving, so stipple shading and small bloom details hold well. Session comfort is moderate and typically manageable because of the padding in the area. A mistake I see is over-detailing a small wreath, which can become a muddled mass after healing. For the session, wear shorts or a skirt you can shift so the artist has clean access without stretching the skin. Thigh placements are excellent for designs that grow into larger pieces later.
19. Minimal Matching Red Hearts Behind the Ankles
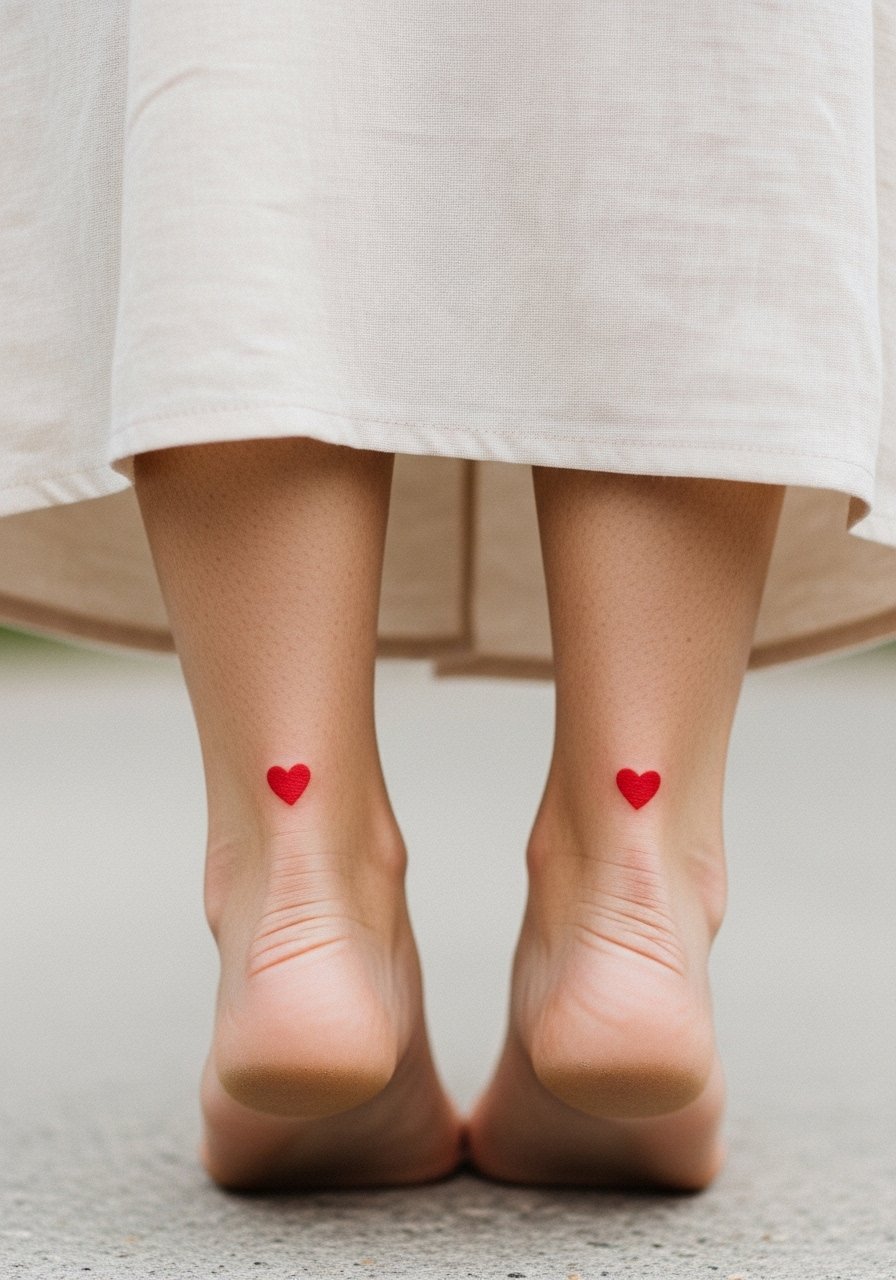
Behind the ankle is a subtle canvas with low daily friction from footwear if you choose open shoes during healing. The area can scab oddly if tight socks are used, so plan footwear and clothing for the week after. Small color punches in red often remain visible longer than faint outlines in this position. For showing it off, a pair of low sandals or a skirt works best, and a high-waisted denim skirt can frame the ankles nicely. Expect a brief session and a touch-up discussion for color retention.
20. Tiny Heart Lock with Keyhole on the Upper Arm
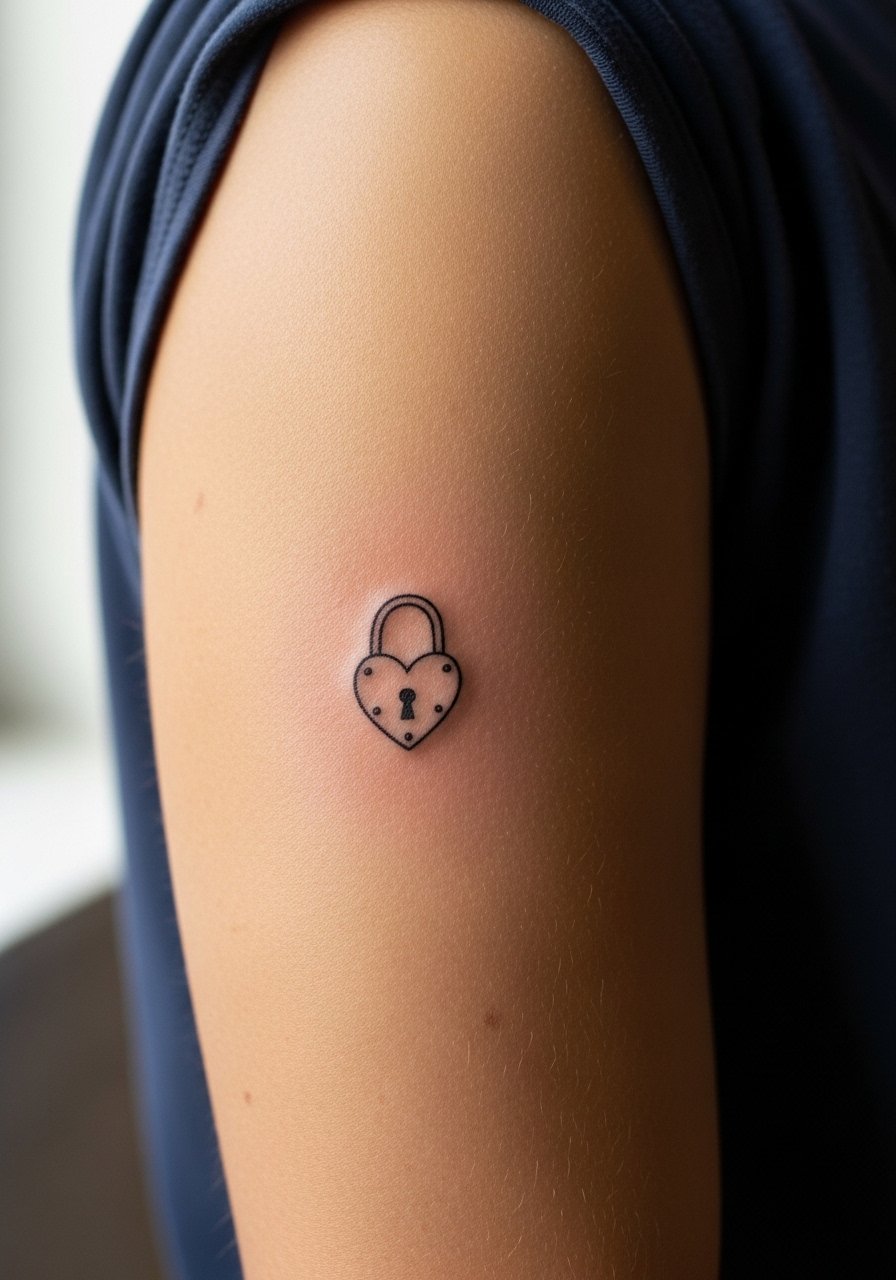
Upper arm lock hearts are classic and friendly for first matching tattoos. The muscle and skin here give a solid surface for crisp outlines and small negative space details like a keyhole. Ask for a slightly bolder keyhole than you think you need so it reads after a year. Sessions are comfortable and healing is straightforward if you avoid tight straps across the area. This placement is easy to show with rolled sleeves or short-sleeve tees and it photographs cleanly in casual shots.
21. Tiny Matching Hearts on the Back of the Neck
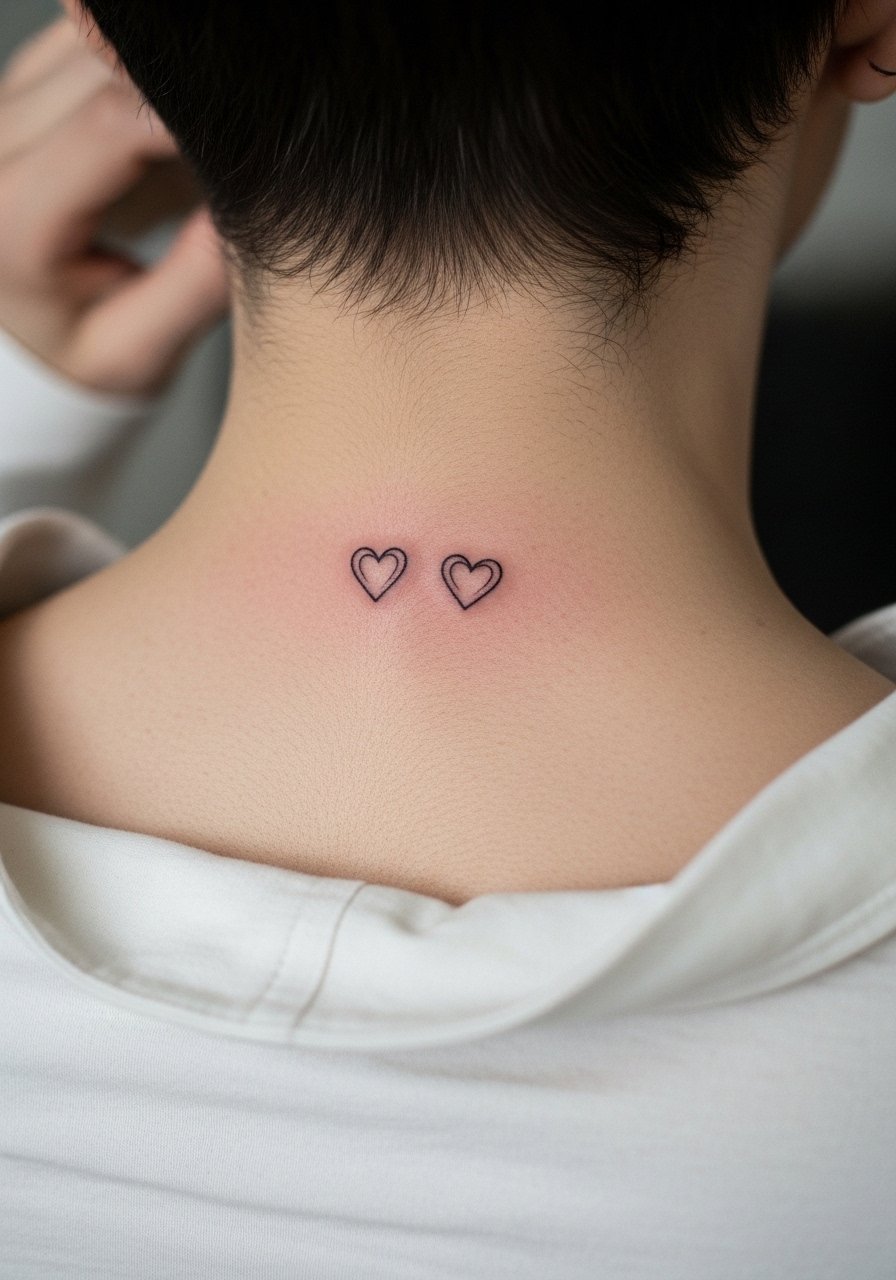
Nape hearts are a balance of private and flirty. The area sees motion and heat from hair, so keep hair away during healing and expect some early fading if you sleep on your back or use tight collars. A common mistake is placing the design too low where shirts rub it constantly. Choose a spot just below the hairline and ask the artist for conservative line weight. The session is brief and discomfort is low. For the appointment, wear a wide-neck top you can shift so the artist can work without you tugging at fabric.
Frequently Asked Questions
Q: Do tiny matching heart outlines on fingers need touch-ups more often than those on the forearm?
A: Yes, finger outlines face more friction and frequent washing, so they often need touch-ups sooner. I tell clients to expect a potential touch-up within a year or two and to plan for a slightly stronger initial line weight to help longevity.
Q: Is a watercolor heart on the ribcage a poor idea for longevity?
A: It depends on the artist's technique and your skin. Watercolor can look gorgeous at first but may fade faster on ribs because of stretch and movement. Ask your artist about their ribcage experience and realistic maintenance expectations before booking.
Q: Can matching tiny hearts be visible under certain clothing and hidden under others?
A: Absolutely. Placement like the collarbone or wrist is easy to show or hide with tops, while behind-ear or hip placements stay private unless you choose to reveal them. Think about wardrobe choices for daily life and special occasions when you pick the spot.
Q: Will a tiny red heart keep its color better than a fine line outline?
A: Solid saturated color can read longer in high-movement zones than ultra-fine outlines, but color also depends on aftercare and sun exposure. If color retention matters, discuss pigment choices and expected touch-up timelines with your artist.
Q: Are there dress suggestions for studio day for ribcage or sternum hearts?
A: Yes, wear a zip-up hoodie or a sports bra that you can shift without stretching the area so the artist can work comfortably and you do not tug clothing during the appointment.
